Panasonic DMR-EH50 Operating Instructions Manual
Dvd recorder panasonic dmr-eh50
Hide thumbs
Also See for DMR-EH50:
- Operating instructions manual (76 pages) ,
- Quick setup manual (6 pages) ,
- Operating instructions manual (73 pages)
Table of Contents
Advertisement
Quick Links
Operating Instructions
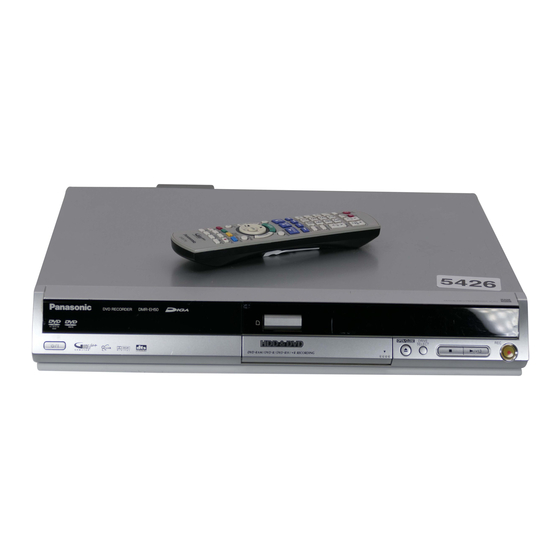
DVD Recorder
DMR-EH50
Model No.
Web Site: http://www.panasonic-europe.com
EB
HARD DISK DRIVE
Region number supported by
this unit
Region numbers are allocated to DVD players
and DVD-Video according to where they are
sold.
≥The region number of this unit is "2".
≥The unit will play DVD-Video marked with
labels containing "2" or "ALL".
Example:
2
ALL
Dear customer
Thank you for purchasing this product. For optimum
performance and safety, please read these
instructions carefully.
Before connecting, operating or adjusting this
product, please read these instructions completely.
Please keep this manual for future reference.
[Note]
"EB" on the packaging indicates the United
Kingdom.
RQT8033-3B
2
3
5
Advertisement
Table of Contents

Related Manuals for Panasonic DMR-EH50


Summary of Contents for Panasonic DMR-EH50
-
Page 1: Operating Instructions
≥The region number of this unit is “2”. ≥The unit will play DVD-Video marked with labels containing “2” or “ALL”. Web Site: http://www.panasonic-europe.com Example: Dear customer Thank you for purchasing this product. For optimum performance and safety, please read these instructions carefully. -
Page 2: Caution For Ac Mains Lead
Caution for AC Mains Lead CAUTION! (For United Kingdom) THIS PRODUCT UTILIZES A LASER. For your safety, please read the following text carefully. USE OF CONTROLS OR ADJUSTMENTS OR This appliance is supplied with a moulded three pin mains plug for PERFORMANCE OF PROCEDURES OTHER THAN THOSE your safety and convenience. -
Page 3: Table Of Contents
Table of contents Getting started Editing Caution for AC Mains Lead ..... . . 2 Editing titles/chapters ......40 Useful features . -
Page 4: Hdd (Hard Disk Drive) Handling Care
∫ Indemnity concerning recorded content Panasonic does not accept any responsibility for damages directly or indirectly due to any type of problems that result in loss of recording or edited content (data), and does not guarantee any content if recording or editing does not work properly. Likewise, the above also applies in a case where any type of repair is made to the unit (including any other non-HDD related component). -
Page 5: Disc And Card Handling
Disc and card handling ∫ How to hold a disc or card ∫ Handling precautions ≥Do not attach labels or stickers to discs. (This may cause disc Do not touch the recorded surface or the terminal surface. warping and un-balanced rotation, rendering it unusable.) ≥Write on the label side of the disc only with a soft, oil-based felt pen. -
Page 6: Inserting, Removing The Sd Card
Inserting, Removing the SD card Only insert or remove the SD card after turning the unit off. When the card indicator (“SD”) on the unit’s display is flashing, the card is being read from or written to. Do not turn off the unit or remove the card. Such action may result in malfunction or loss of the card’s contents. -
Page 7: Using Dvd-R, Dvd-Rw And +R On This Unit
Using DVD-R, DVD-RW and +R on this unit § Restrictions with DVD-R, etc. ≥16:9 aspect programmes are recorded in 4:3 aspect. ≥The main (M 1) or secondary audio (M 2) only can be recorded for bilingual broadcasts. ≥Playing the disc on other DVD players is not possible before finalizing. §... -
Page 8: Included Accessories
≥Visit our website for product information ∏ ∏ ≥E-mail: customer.care@panasonic.co.uk Direct Sales at Panasonic UK ≥Order accessory and consumable items for your product with ease and confidence by phoning our Customer Care Centre Monday– 1 Remote control 1 AC mains lead Thursday 9:00am–5:30pm, Friday 9:30am–5:30pm (Excluding... -
Page 9: Hdd, Disc And Card Information
Creating playlists ≥We recommend using Panasonic discs and cards. We also recommend using DVD-RAM discs with cartridges to protect them from scratches and dirt. ≥Discs from other manufacturers may not be recorded or played due to the condition of the recording. -
Page 10: Discs That Cannot Be Played
HDD, disc and card information Play-only discs (12 cm/8 cm) DVD-RW (DVD Video Disc type DVD-Video DVD-Audio Video CD Recording format) Logo – – Indicated in these [DVD-V] [DVD-A] [-RW‹VR›] [DVD-V] [CD] [VCD] instructions by Instructions High quality High fidelity DVD-RW recorded on Recorded CD-R and CD-... - Page 11 PC, you may not be able to use it on this unit. In these cases, format the card on this unit ( 53, 69). ≥This unit supports SD Memory Cards formatted in FAT 12 system and FAT 16 system based on SD Memory Card Specifications. ≥We recommend using a Panasonic SD card. Structure of folders displayed by this unit The following can be displayed on this unit.
-
Page 12: Control Reference Guide
Control reference guide Remote control Instructions for operations are generally described using the remote control. 1 Turn the unit on ( 19, 20) 2 Direct TV recording ( 3 Select drive (HDD, DVD or SD) ( 24, 32, 36) 4 Select channels and title numbers, etc./Enter numbers 5 Cancel Í... -
Page 13: Main Unit
Main unit DRIVE OPEN/CLOSE SELECT /k1.3 EXT LINK S VIDEO IN VIDEO IN L/MONO -AUDIO IN- < Opening the front panel Press down on the part with your finger 1 Standby/on switch (Í/I) ( 19, 20) 9 Open/close disc tray ( 24, 32) Press to switch the unit from on to standby mode or vice versa. -
Page 14: Step 1 Connection
70). Make sure to connect a fully wired 21-pin Scart lead to the television if using the Q Link functions. The following systems from other manufacturers have similar function to Q Link from Panasonic. For details, refer to your television’s operating instructions or consult your dealer. - Page 15 ≥This unit is compatible with timer recording using programme function on television (e.g., IDTVs) ( 31). ≥The AV2 or AV4 Scart terminals on Panasonic televisions are compatible with the Q Link functions. indicates included accessories. BE SURE TO READ THE CAUTION FOR THE AC MAINS indicates accessories not included.
- Page 16 STEP Connection Connecting a television with AUDIO/VIDEO terminals and VCR Connecting to the television using the 21-pin Scart leads ( BE SURE TO READ THE CAUTION FOR THE AC MAINS To the aerial indicates included accessories. LEAD ON PAGE 2 BEFORE CONNECTION. indicates accessories not included.
- Page 17 Connecting a television with RF socket only and Satellite/Digital terrestrial receiver Connect in the numbered order. If you do not have a Satellite/Digital terrestrial receiver, connect the aerial to RF IN socket of this unit and skip step 3. BE SURE TO READ THE CAUTION FOR THE AC MAINS indicates included accessories.
-
Page 18: Connecting An Amplifier Or System Component
STEP Connection Connecting an amplifier or system component ∫ To enjoy multi-channel surround sound on ∫ Connection to a stereo amplifier DVD-Video Connect an amplifier with Dolby Digital, DTS and MPEG decoders using an optical digital audio cable and change the settings in “Digital Audio Output”... -
Page 19: Step 2 Channel Reception Settings
STEP Channel reception settings When downloading has completed, the Owner ID Í/ l settings screen appears. Press [1] and press the numbered HDD DVD SD DRIVE OPEN/CLOSE buttons to enter a 4-digit PIN number. SELECT /k1.3 EXT LINK S VIDEO IN VIDEO IN L/MONO -AUDIO IN- Owner ID X CH W... - Page 20 Refer to the control reference on page 19. STEP Channel reception settings Auto-Setup (Setup without Q Link functions) ∫ If the clock setting menu appears ≥When connecting to a television with the VIDEO OUT, Set the clock manually ( 61). S VIDEO OUT or COMPONENT VIDEO OUT terminal 16).
- Page 21 VIDEO Plus+ system for Satellite/ Digital terrestrial stations This unit doesn’t recognise PlusCode numbers for Satellite stations or Digital terrestrial stations. Removing Interference The following operation also allows you to use PlusCode numbers ≥When connecting to a television with RF socket only ( to make timer recordings for satellite and digital terrestrial stations.
-
Page 22: Step 3 Set Up To Match Your Television And Remote Control
STEP Set up to match your television and remote control Press [3, 4] to select the TV aspect and press [ENTER]. Í TV operation Í VOLUME VOLUME buttons DIRECT TV REC DIRECT TV REC TV Aspect SETUP 16:9 WIDE TV 16:9 Tuning 4:3 TV... -
Page 23: Television Operation
Change the remote control code on the main unit and the remote television channel and change the television volume. control (the two must match) if you place other Panasonic products close together. Point the remote control at the television Use “DVD 1”, the factory set code, under normal circumstances. -
Page 24: Recording Television Programmes
Recording television programmes Press [W X CH] to select the channel. DC BS DUB EXT Link MPEG4 D.MIX D.MIX AVCD RWRAM HDD DVD SD DRIVE OPEN/CLOSE SELECT SDPC /k1.3 EXT LINK S VIDEO IN VIDEO IN L/MONO -AUDIO IN- To select with the numbered buttons: ∫... - Page 25 Recording modes and approximate recording times After recording ≥[-R] [-RW‹V›] [+R] In order to play a disc recorded using this unit on Depending on the content being recorded, the recording times may become shorter than indicated. another playback equipment, the disc must first be finalized ( 54).
-
Page 26: Rec For High Speed Dubbing
Recording television programmes Flexible Recording DVD SD (Recording that fits the remaining disc space) DRIVE OPEN/CLOSE SELECT /k1.3 [HDD] [RAM] [-R] [-RW‹V›] [+R] The unit sets the best possible picture quality that fits the recording within ∫ HDD, DVD indicator the remaining disc space. -
Page 27: Playing While You Are Recording
To stop play Playing while you are recording Press [∫]. [HDD] [RAM] To stop recording 2 seconds after play stops Press [∫]. Playing from the beginning of the title you are To stop timer recording recording—Chasing playback Press [F TIMER]. Press [1] (PLAY) during recording. -
Page 28: Timer Recording
Timer recording Using VIDEO Plus+ system to make HDD DVD SD timer recordings DRIVE OPEN/CLOSE SELECT /k1.3 Entering PlusCode numbers is an easy way of timer recording. You can find these numbers in TV listings in newspapers and magazines. ∫ ≥Using PlusCode numbers for Satellite stations or Digital terrestrial stations Set this unit to recognise PlusCode numbers for Satellite stations or... -
Page 29: To Release The Unit From Recording Standby
∫ To release the unit from recording standby Press [F TIMER]. “F” goes out. ≥Be sure to press [F TIMER] before the programme start time to put the unit in recording standby. Timer recording will work only if “F” is displayed. ∫... -
Page 30: Manually Programming Timer Recordings
Timer recording Refer to the control reference on page 28. ∫ To release the unit from recording standby Press [F TIMER]. Manually programming timer “F” goes out. ≥Be sure to press [F TIMER] before the programme start time to recordings put the unit on recording standby. -
Page 31: To Record Programmes From Satellite Receiver By Rgb Signals
To record programmes from satellite Making timer recordings on the receiver by RGB signals television (e.g., of digital broadcasts) [HDD] [RAM] [-R] [-RW‹V›] [+R] Preparation [HDD] [RAM] [-R] [-RW‹V›] [+R] ≥Make sure you connect the AV2 input terminal of this unit to “VCR Scart terminal” To make a timer recording with your television, connect to a of a SKY Digital STB/digital terrestrial receiver with a 21-pin scart lead ( 15). -
Page 32: Playing Recorded Video Contents/Playing Play-Only Discs
Playing recorded video contents/Playing play-only discs ∫ Selecting recorded programmes (titles) to play— Direct Navigator [HDD] [RAM] [-R] [-RW‹V›] [+R] [-RW‹VR›] 1 Press [DIRECT NAVIGATOR]. DVD SD DRIVE OPEN/CLOSE ≥Thumbnail Display ≥Table Display SELECT /k1.3 EXT LINK S VIDEO IN VIDEO IN DIRECT NAVIGATOR TITLE VIEW DIRECT NAVIGATOR... -
Page 33: Operations During Play
∫ When a menu screen appears on the television [DVD-V] [DVD-A] Press [3, 4, 2, 1] to select the item and press [ENTER]. Some items can also be selected using the numbered buttons. [VCD] Press the numbered buttons to select the item. e.g., ≥To return to the menu screen [DVD-V] Press [TOP MENU] or [SUB MENU]. -
Page 34: Simple Editing Operations During Play
Playing recorded video contents/Playing play-only discs Refer to the control reference on page 32. Operations during play (continued) Displaying the television Press [TIME SLIP]. Play images PLAY The unit displays the television image as a image as a picture-in- 0 min picture-in-picture. -
Page 35: Using Menus To Play Mp3
Using menus to play MP3 [CD] Preparation Í Í Press [DVD] to select the DVD drive. VOLUME VOLUME DIRECT TV REC DIRECT TV REC This unit plays MP3 files recorded on CD-R/RW designed for audio recording that are finalized ( 69) on a computer. -
Page 36: Playing Still Pictures (Jpeg/Tiff)
Playing still pictures (JPEG/TIFF) Press [3, 4, 2, 1] to select the still HDD, DVD, SD indicator ∫ picture and press [ENTER]. You can also select still pictures with the numbered buttons. DRIVE OPEN/CLOSE SELECT /k1.3 e.g., 115: [0] DRIVE SELECT 1115: [1] ≥Press [2, 1] to display the previous or next still picture. -
Page 37: Useful Functions During Still Picture Play
Useful functions during still picture Regarding still pictures (JPEG, TIFF) play [HDD] [RAM] [SD] ≥Compatible formats: DCF § compliant (Content recorded on a Start Slide You can display still pictures one by one digital camera, etc.) with constant interval. Show §... -
Page 38: Using On-Screen Menus/Functions Window And Status
Using on-screen menus/FUNCTIONS window and Status message Disc menu—Setting the disc content Í Í § Soundtrack VOLUME VOLUME DIRECT TV REC DIRECT TV REC [HDD] [RAM] [-R] [-RW‹V›] [+R] [-RW‹VR›] The disc’s audio attributes appear. [DVD-V] [DVD-A] Select the audio and language ( below, Audio attribute, Language). -
Page 39: Functions Window
Picture menu—Change the picture quality FUNCTIONS window By using the FUNCTIONS window you may access the main Playback NR functions quickly and easily. Reduces noise and picture degradation. While stopped Press [FUNCTIONS]. § Progressive Functions displayed depend on the selected drive or type of Select “On”... -
Page 40: Editing Titles/Chapters
Editing titles/chapters VOLUME VOLUME DIRECT TV REC DIRECT TV REC During play or while stopped HDD, DVD Press [DIRECT NAVIGATOR]. [HDD] [RAM] VIDEO Plus+ VIDEO Plus+ Press [A] to select “VIDEO”. CANCEL CANCEL INPUT SELECT INPUT SELECT MANUAL SKIP MANUAL SKIP Press [3, 4, 2, 1] to select the title. -
Page 41: Title Operations
Title operations After performing steps 1–5 ( Press [2, 1] to select “Erase” and press [ENTER]. § Erase ≥Once erased, the recorded contents are lost and cannot be restored. Make certain before proceeding. [HDD] [RAM] [-R] [-RW‹V›] [+R] ≥The available recording space on DVD-R or +R does not increase when you erase titles. ≥Available recording space on DVD-RW (DVD-Video format) increases only when the last recorded title is erased. -
Page 42: Creating, Editing And Playing Playlists
Creating, editing and playing playlists Press [3, 4] to select “PLAYLISTS” and press [ENTER]. Í Í VOLUME VOLUME Press [3, 4, 2, 1] to select “Create” DIRECT TV REC DIRECT TV REC and press [ENTER]. HDD, DVD PLAYLISTS PLAYLIST VIEW - - - - - - - - -... -
Page 43: Editing And Playing Playlists/Chapters
Editing and playing playlists/chapters Playlist operations [HDD] [RAM] After performing steps 1–5 ( left) [-RW‹VR›] (Play only) § Press [2, 1] to select “Erase” and press Erase [ENTER]. While stopped [HDD] [RAM] Once erased, the playlists are lost and Press [FUNCTIONS]. cannot be restored. -
Page 44: Editing Still Pictures
Editing still pictures Press [3, 4, 2, 1] to select the still picture. Í Í VOLUME VOLUME To show other pages DIRECT TV REC DIRECT TV REC Press [3, 4, 2, 1] to select “Previous” or “Next” and press [ENTER]. HDD, DVD, ≥You can also press [:, 9] to show other pages. -
Page 45: Transferring (Dubbing)
Transferring (dubbing) titles or playlists [HDD] [RAM] [-R] [-RW‹V›] [+R] You can select from a variety of methods to transfer (dub) on this unit. You cannot transfer (dub) titles which have been treated to prevent copying. ∫ Transferring (dubbing) direction You can transfer (dub) your favorite titles and playlists to discs. -
Page 46: Transferring (Dubbing) Using The Transferring (Dubbing) List
Transferring (dubbing) titles or playlists Set the recording mode. ≥If you are not going to change the recording mode, press [4] Í Í step 5). VOLUME VOLUME DIRECT TV REC DIRECT TV REC 1 Press [3, 4] to select “Dubbing Mode” and press [1]. 2 Press [3, 4] to select “Format”... - Page 47 ∫ To edit the transferring (dubbing) list ∫ To stop transferring (dubbing) Erase All Select the item in step 5–4 ( 46, right column) Press and hold [RETURN] for 3 seconds. 1 Press [SUB MENU]. ≥If stopped partway, transferring (dubbing) will be up to that 2 Press [3, 4] to select the operation and press Erase point.
-
Page 48: Transferring (Dubbing) A Finalized Dvd-R, Dvd-Rw (Dvd-Video Format) And +R
Transferring (dubbing) titles or playlists Refer to the control reference on page 46. When the top menu is displayed Press [3, 4, 2, 1] to select the title Transferring (dubbing) a finalized you want to start transferring DVD-R, DVD-RW (DVD-Video format) (dubbing), and press [ENTER]. -
Page 49: Recording From A Video Cassette Recorder
Recording from a video cassette recorder Preparation ≥Press [HDD] or [DVD] to select the recording drive. ≥When recording bilingual programmes Í Í [HDD] [RAM] VOLUME VOLUME DIRECT TV REC DIRECT TV REC When both M 1 and M 2 is selected on the connected equipment, you can select the audio type in playback. -
Page 50: Transferring (Dubbing) Still Pictures
Transferring (dubbing) still pictures Register still pictures for transfer (dubbing). Í Í ≥If you are going to transfer (dub) a registered list without VOLUME VOLUME DIRECT TV REC DIRECT TV REC making any changes to it ( step 6). You can register still pictures or still picture folders. ≥Still pictures and folders cannot be registered on the same Numbered list. -
Page 51: Transferring (Dubbing) All The Still Pictures On A Card-Copy All Pictures
To show other pages Transferring (dubbing) all the still Press [3, 4, 2, 1] to select “Previous” or “Next” and press pictures on a card—COPY ALL [ENTER]. ≥You can also press [:, 9] to show other pages. PICTURES Multiple editing [SD] >... -
Page 52: Hdd, Disc And Card Management
HDD, disc and card management Setting the protection [RAM] Í Í VOLUME VOLUME DIRECT TV REC DIRECT TV REC Preparation ≥Press [DVD] to select the DVD drive. HDD, DVD, After performing steps 1–3 ( left) Press [3, 4] to select “Disc VIDEO Plus+ VIDEO Plus+ CANCEL... -
Page 53: Erasing All Titles And Playlists-Erase All Titles
Erasing all titles and playlists—Erase Erasing all the contents of a disc or all titles card—Format [HDD] [RAM] [HDD] [RAM] [-RW‹V›] [-RW‹VR›] [SD] Preparation Preparation ≥Press [HDD] or [DVD] to select the drive. ≥Press [HDD], [DVD] or [SD] to select the drive. ≥Release protection ( ≥Release protection ( 52). -
Page 54: Enabling Discs To Be Played On Other Equipment
TOP MENU LIST ≥You cannot finalize discs recorded on other manufacturer’s equipment. Display after finalizing ≥If you finalize discs recorded on Panasonic equipment other than Thumbnail this unit, the background selected as “Top Menu” may not be (Still picture) displayed. -
Page 55: Entering Text
Entering text VOLUME DIRECT TV REC Press [3, 4, 2, 1] to select a Numbered character and press [ENTER]. buttons VIDEO Plus+ VIDEO Plus+ Repeat this step to enter other characters. CANCEL CANCEL INPUT SELECT INPUT SELECT MANUAL SKIP MANUAL SKIP ¢... -
Page 56: Child Lock
Child Lock VIDEO Plus+ VIDEO Plus+ The Child Lock deactivates all buttons on the unit and remote control. Use it to prevent other people from operating the unit. CANCEL CANCEL INPUT SELECT INPUT SELECT MANUAL SKIP MANUAL SKIP SKIP SKIP SLOW/SEARCH SLOW/SEARCH Press and hold [ENTER]... -
Page 57: Summary Of Settings
Changing the unit’s settings Summary of settings The settings remain intact even if you switch the unit to standby. Tabs Menus Options (Underlined items are the factory presets.) Tuning Manual ( Auto-Setup Restart ( Download from TV ( Disc Settings for playback ≥Press [ENTER] to show the following settings. - Page 58 Changing the unit’s settings Tabs Menus Options (Underlined items are the factory presets.) Dynamic Range Compression [DVD-V] (Dolby Digital only) ≥On Sound ≥Off Change the dynamic range for late night viewing. ≥M 1 Bilingual Audio Selection ≥M 2 Select whether to record the main or secondary audio type when: You cannot select the audio on this unit when recording from an –Recording or transferring (dubbing) to a DVD-R, DVD-RW...
- Page 59 Tabs Menus Options (Underlined items are the factory presets.) ≥16:9 ≥4:3 ≥Letterbox Connection TV Aspect ( Set to match the type of television connected. ≥On ≥Off Progressive ( This setting cannot be made when the “AV1 Output” is set to “RGB (without component)”...
-
Page 60: Tuning
Changing the unit’s settings Refer to the control reference at the bottom of page 56. Tuning Press [3, 4] to select an item and press [1]. While stopped To change the programme position in which Press [FUNCTIONS]. the TV stations are assigned Press [3, 4] or numbered buttons to select the Press [3, 4] to select “To Others”... -
Page 61: Clock Settings
Clock settings Usually, the unit’s Preset Download or Auto-Setup function ( 19, 20) automatically adjusts the clock to correct time. Under some reception conditions, however, the unit cannot set the clock automatically. In this case, follow the operation steps below to manually set the clock. ≥In the case of a power failure, the clock setting remains in memory for approximately 60 minutes. -
Page 62: Tv System
Changing the unit’s settings Refer to the control reference at the bottom of page 56. TV System Change the setting to match the equipment you are connecting with, or to match the title when there are both PAL and NTSC titles on the HDD. While stopped Press [FUNCTIONS]. -
Page 63: Messages
Messages On the television Page ≥The programme was copy-protected. Cannot finish recording — ≥The HDD or disc may be full. completely. — ≥The maximum number of times you can record the program is exceeded. — ≥You tried to play a title recorded using a different encoding system from that of the TV Cannot playback. -
Page 64: Frequently Asked Questions
If you have a CRT television or a multi system television using PAL mode that is compatible with progressive scan, we cannot recommend progressive output as some flickering can occur. ≥All Panasonic televisions that have 625 (576)/50i · 50p, 525 (480)/60i · 60p input terminals Is my television progressive output —... -
Page 65: Troubleshooting Guide
≥Regular disc rotating sounds. ≥Operations do not work due to a poor-quality disc. (Try again using ≥Poor reception due to atmospheric conditions. a Panasonic disc.) ≥Image disturbance during search. ≥The unit freezes due to one of its safety devices being activated. - Page 66 Troubleshooting guide Sound Page ≥Check the connections and the “Digital Audio Output” settings. Check the input mode on the No sound. 15–18, Low volume. amplifier if you have connected one. ≥Press [AUDIO] to select the audio. Distorted sound. ≥Turn off V.S.S. in the following cases. Cannot hear the desired audio type.
- Page 67 ≥You may be able to transfer (dub) a “One time only recording” title that was recorded to DVD- — RAM using a different Panasonic DVD Recorder to this unit’s HDD, but play is not possible due to copyright protection. ≥When recording to DVD-RAM using “EP (8 Hours)” mode, play may not be possible on DVD players that are compatible with DVD-RAM.
- Page 68 Troubleshooting guide Play (Continued) Page ≥The languages are not recorded on the disc. Alternative soundtrack and — ≥You may not be able to use the on-screen menus to change the soundtrack and subtitles on subtitles cannot be selected. some discs. Use the disc’s menus to make changes. ≥Subtitles are not recorded on the disc.
-
Page 69: Glossary
Your television must be compatible to enjoy progressive video. possible on equipment that can play such media. You can finalize Panasonic televisions with 625 (576)/50i · 50p, 525 (480)/60i · 60p DVD-R, DVD-RW (DVD-Video format) and +R on this unit. -
Page 70: Safety Precautions
Glossary ≥On-Screen Messages § Q Link This function works only if the unit is connected via a fully wired 21- When you are watching a TV programme, the following messages pin Scart lead to a TV featuring the Q Link or similar function. appear on the TV screen to inform you of the unit’s condition: Q Link offers the following functions: Message... -
Page 71: Specifications
Specifications Recording system DVD Video Recording format (DVD-RAM), Television system DVD-Video format (DVD-R), Tuner system: PAL-I DVD-Video format (DVD-RW) Channel Coverage: UHF: CH 21–68 RF converter output: UHF: CH 21–68, 71d3 dBg, 75 ≠ termination Recordable discs DVD-RAM: Ver.2.0 Video Ver. -
Page 72: Index
≥SD logo is a trademark. Gemstar Development Corporation. ≥Portions of this product are protected under copyright law and are provided under license by ARIS/SOLANA/4C. Environment friendly printed on chlorine free bleached paper. Matsushita Electric Industrial Co., Ltd. Web Site: http://www.panasonic.co.jp/global/ RQT8033-3B F0205VG3065...