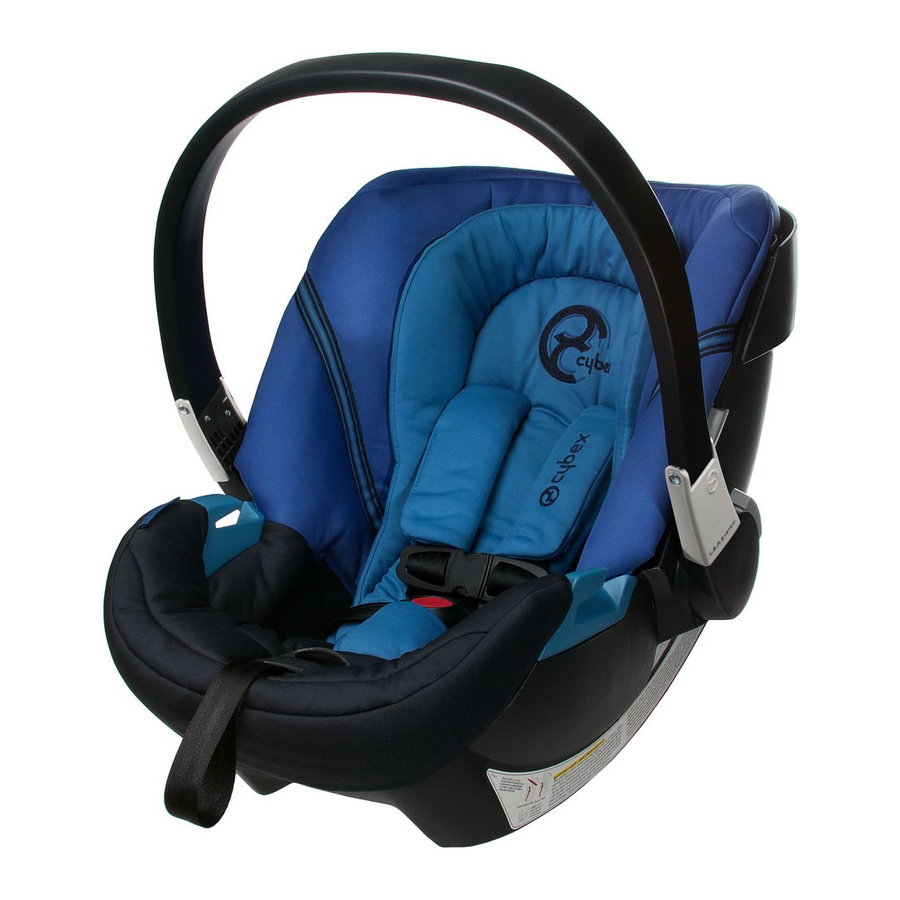
CYBEX ATON Owner's Manual
Rear facing infant car seat/base
Hide thumbs
Also See for ATON:
- User manual (180 pages) ,
- Owner's manual (99 pages) ,
- Instruction manual (60 pages)
Table of Contents
Advertisement
Available languages
Available languages
READ this Owner's
Manual carefully before
rst use, and keep it for
future reference.
LEA este Manual
del Propietario
minuciosamente antes
de usarlo y guarde para
su futura referencia.
4—32 lb
1,8—14,5 kg
+
Maximum 30"
Máximo 76 cm
Rear Facing Infant Car Seat / Base
Manual del Propietario
+
One inch or more
Una pulgada o más
ATON
Owner's Manual
Advertisement
Chapters
Table of Contents

Related Manuals for CYBEX ATON


Summary of Contents for CYBEX ATON
- Page 1 READ this Owner’s ATON Manual carefully before rst use, and keep it for future reference. Rear Facing Infant Car Seat / Base Owner’s Manual LEA este Manual Manual del Propietario del Propietario minuciosamente antes de usarlo y guarde para su futura referencia.
- Page 2 3. Proper use of LATCH or the vehicle seat belts to install this child restraint. 4. Proper recline angle of the child restraint. Before the rst use of the Aton infant car seat, please make sure you have followed all the steps in the Safety Checklist and CYBEX Safe Practices found on page 40.
-
Page 3: Table Of Contents
Table of Contents Registration and Recall Information ....................2 Certi cation ..........................2 Warnings and Important Safety Information ..................3 Overview of the Aton Base .......................6 Features of the Aton Base ........................7 Super Easy And Tight™ Installation ....................7 Recline Angle Adjustment ......................7 Level Indicator.......................... -
Page 4: Registration And Recall Information
The card is already addressed and we’ve paid the postage. CYBEX Registration Tear off and mail this part 1100 Cobb Place Blvd. NW CONSUMER: JUST FILL IN YOUR NAME, ADDRESS AND E-MAIL Kennesaw, GA 30144 USA ADDRESS. -
Page 5: Warnings And Important Safety Information
Important Safety Information WARNING DEATH or SERIOUS INJURY can occur • READ this Owner’s Manual carefully before rst use, and keep it for future reference. • NEVER install or use this child restraint until you have read and understand the instructions in this manual AND in your vehicle Owner’s Manual . - Page 6 • NEVER USE this child restraint if any of the Harness or LATCH straps are cut, frayed or damaged in any way. • NEVER USE accessories or parts with this child restraint, other than those approved by CYBEX. Use of accessories or parts from other manufacturers could alter the performance of the child...
- Page 7 WARNING DEATH or SERIOUS INJURY can occur When Used Outside a Vehicle • NEVER LEAVE child unattended even for a short time. Your child can tip or move the Infant Carrier by their movements, kicking or grabbing on to their surroundings. • SUFFOCATION HAZARD: NEVER place Infant Carrier on beds, sofas or other soft surfaces.
-
Page 8: Overview Of The Aton Base
Overview of the Aton Base Infant Carrier Attachment Lock Level Indicator Locking Lever Belt Guide Infant Carrier Attachment Catch Leveling Foot LATCH Strap Tensioning Loop Belt Tensioning Plate Green Button Level Adjustment Handle Steel Chassis Infant Carrier Release LATCH Guides... -
Page 9: Features Of The Aton Base
Features of the Aton Base Super Easy And Tight™ Installation The Aton Belt Tensioner uses CYBEX's Super Easy And Tight (SEAT) Technology to achieve a quick and secure installation every time, whether you choose to use LATCH or vehicle belts. -
Page 10: Overview Of The Infant Carrier
Overview of the Infant Carrier Top View Designer Canopy (Stored) Infant Insert Shoulder Pads Travel System Release Button Carry Handle Adjustment Button Chest Clip Belt Guide Buckle Pad Harness Straps Harness Adjustment Button Harness Buckle Adjuster Strap Cover Harness Adjustment Strap... - Page 11 Overview of the Infant Carrier Bottom View Shoulder Belt Guide Harness Slots Base Attachment Rod Harness Splitter Plate Clear Plastic Cover Owner's Manual Storage Base Attachment Rod Harness Adjustment Strap...
-
Page 12: Features Of The Infant Carrier
Features of the Infant Carrier Harness Buckle To release Buckle Tongues, rmly press the button on the Harness Buckle. To fasten, insert each Tongue into Buckle, listening for an audible CLICK. Pull on each to verify a secure connection. Check that the Buckle functions properly and is kept free of dirt and debris. -
Page 13: Carry Handle
Designer Canopy™ Simply pull forward to extend the Aton Canopy. The Canopy has two positions. To retract the Canopy, gently push it back into its original... -
Page 14: Using The Infant Carrier
Use the CYBEX Aton until your child reaches the maximum weight or height limits. Because not all children have the same shapes and sizes, DO NOT USE the Aton when the top of the child's head is less than 1 inch (2,5 cm) from the top of the Infant Carrier. This allows for proper protection during a crash. -
Page 15: Adjusting The Harness Height
Using the Infant Carrier Adjusting the Harness Height For proper use of the Infant Carrier, the Harness shoulder straps MUST be at the correct height for your child. 1. Place child in Infant Carrier making sure their bottom is in the seat, and their back is fully supported. 2. -
Page 16: Securing Child In Infant Carrier
Using the Infant Carrier Securing Child in Infant Carrier 1. Loosen Harness by rmly pressing down the Harness Adjustment Button (a) while pulling forward on both straps (b). 2. Press button on Harness Buckle to release Tongues. 3. Separate Chest Clip and spread straps apart. - Page 17 Using the Infant Carrier 7. Pull up on Harness Straps to snug around the child's hips while holding the Harness Buckle in place. 8. Slowly pull the adjuster strap to tighten the Shoulder Straps. A snug strap should not allow any slack. It lies in a relatively straight line without sagging.
-
Page 18: Newborn Inlay
Infant Insert To ensure a better t for infants, we recommend using the Aton Infant Insert. The Insert will give more stability to the head and upper torso, as well as provide a better Harness t for smaller babies. We recommend using the Infant Insert until 22 lb (10 kg) or until child needs more room. -
Page 19: More Support Options
Carrier with their bottom in the seat, and their back fully supported. Make sure legs are straddling the crotch strap. NEVER place extra padding UNDER or BEHIND the child. The Infant Insert is the only approved padding to be used with the Aton. -
Page 20: Vehicle Seat Location Requirements
Vehicle Seat Location Requirements WARNING DEATH or SERIOUS INJURY can occur NEVER place this child restraint on a front seat with an active airbag. DEATH or SERIOUS INJURY may occur. The REAR seat is the safest place for children 12 and under. Based on crash statistics, the National Highway Traf c Safety Administration (NHTSA) recommends that parents select the REAR SEAT as the safest location for a properly installed child restraint rather than a... -
Page 21: Vehicle Seat Belts
Vehicle Seat Location Requirements Vehicle Seat Belts The design and operation of vehicle seat belt systems vary from vehicle to vehicle and from seating location to seating location in the same vehicle. Refer to your vehicle Owner’s Manual for proper use, placement, and adjustment of the vehicle’s lap and shoulder belts. -
Page 22: Lower Anchors And Tethers For Children (Latch)
These anchor the top of forward facing child restraints and are NOT USED for the Aton Infant Carrier or the Base. LATCH typically offers an easier and more consistent installation. -
Page 23: Latch Guides
LATCH Guides to the lower LATCH anchors for easier installation of the Aton Base. 3. To install, connect the two LATCH Guides to the two lower LATCH anchors by sliding the LATCH Guides... -
Page 24: Installing The Base
Installing the Base Using LATCH 1. Position Base on a forward facing vehicle seat with the Leveling Foot toward the vehicle seat back. 2. Fully extend the Leveling Foot to access the LATCH connectors. Remove each connector by pushing the button while pulling out. - Page 25 Installing the Base 7. Push Base against vehicle seat back. Tension the LATCH strap by pulling on the LATCH Strap Tensioning Loop. Tuck the loose end of the strap under the base so it WILL NOT INTERFERE with the closing of the Belt Tensioning Plate or the connection of the Infant Carrier to the Base (a).
-
Page 26: Using Vehicle Lap And Shoulder Belt
Installing the Base Using Vehicle Lap and Shoulder Belt 1. Position Base on a forward facing vehicle seat with the Leveling Foot toward vehicle seat back. 2. Adjust the Leveling Foot to the correct angle for your child's size as shown on the Level Indicator. - Page 27 Installing the Base 7. Press the Belt Tensioning Plate down with both hands where indicated, until it locks into place. The orange Locking Lever will rotate to the PRESS CLOSE position when the Plate is locked. If Belt Tensioning Plate does not lock, try loosening the vehicle belt slightly.
-
Page 28: Using Vehicle Lap Belt Only
Installing the Base Using Vehicle Lap Belt Only 1. Position Base on a forward facing vehicle seat with the Leveling Foot toward vehicle seat back. 2. Adjust the Leveling Foot to the correct angle for your child as shown on the Level Indicator. - Page 29 Installing the Base 7. Press the Belt Tensioning Plate down with both hands, where indicated, until it locks into place. ORANGE Locking Lever will rotate to the CLOSE position when the Plate is locked. If the Belt Tensioning Plate does not lock, try loosening the vehicle belt slightly.
-
Page 30: Using Infant Carrier With The Base
Using Infant Carrier with the Base Attaching Infant Carrier to Base 1. Make sure handle is LOCKED in the CARRY POSITION. 2. Lift Infant Carrier by the Handle and slide the Attachment Rod under the Attachment Catch on the Base. 3. -
Page 31: Storing The Latch Connectors
Storing the LATCH Connectors When using a vehicle belt to secure the Base, the LATCH Connectors MUST BE STORED in the Base. Loose Connectors could seriously injure vehicle occupants in the event of a crash. 1. Fully extend the Leveling Foot to access the LATCH Connector Storage compartments. -
Page 32: Installing The Infant Carrier Without The Base
Installing the Infant Carrier without the Base Using Vehicle Lap and Shoulder Belt 1. Position Infant Carrier on a forward facing vehicle seat so child is facing the rear of vehicle. 2. Route only the vehicle lap belt under both Belt Guides. Buckle the belt. 3. - Page 33 Installing the Infant Carrier without the Base 7. Check the recline angle. Adjust the seat angle until the line on the Infant Carrier is level with the ground. A tightly rolled towel or pool noodle may be placed under the Infant Carrier near the vehicle seat back to adjust the angle.
-
Page 34: Using Vehicle Lap And Shoulder Belt (Alternate Method)
Installing the Infant Carrier without the Base Using Vehicle Lap and Shoulder Belt (Alternate Method) 1. Position Infant Carrier on a forward facing vehicle seat so child is facing the rear of vehicle. 2. Route only the vehicle lap belt under both Belt Guides. - Page 35 Installing the Infant Carrier without the Base 6. Check the recline angle. Adjust the seat angle until Level Line on the Infant Carrier is level with the ground. A tightly rolled towel or pool noodle may be placed under the Infant Carrier,near the vehicle seat back to adjust the angle.
-
Page 36: Using Vehicle Lap Belt Only
Installing the Infant Carrier without the Base Using Vehicle Lap Belt Only 1. Position Infant Carrier on a forward facing vehicle seat so child is facing the rear of vehicle. 2. Route vehicle lap belt under both Belt Guides. Buckle the belt. 3. -
Page 37: Installing The Infant Carrier In Aircraft
Installing the Infant Carrier in Aircraft The FAA recommends that children up to 40 pounds (18 kg) use a certi ed, Harnessed child seat while travelling on an aircraft. Install your Infant Carrier in a window seat to avoid blocking the aisle. If the aircraft lap belt is too short, ask the ight attendant for a belt extender. -
Page 38: Adjusting The Recline Angle
Adjusting the Recline Angle It's very important for your child's safety that this child restraint be installed at the correct angle. DO NOT use this or any other child restraint with a premature, low birth weight, or medically fragile infant, until after you have consulted with your doctor. Some infants may have dif culty breathing or have other medical problems when placed in a seated position. -
Page 39: When Using Infant Carrier Without Base
Adjusting the Recline Angle When using Infant Carrier without Base Adjust the seat angle until the Level Line on the Infant Carrier is level with the ground. If you are having trouble achieving the proper recline angle: Line MUST be level with ground when 1. -
Page 40: Care And Cleaning
Care and Cleaning Removing the Seat Cover The seat cover is designed to be very taut and to t exactly inside the Infant Carrier. Please pay close attention before and during the removal of the cover, to help remember how to put it back on. 1. -
Page 41: Washing Instructions
Care and Cleaning Spot Cleaning Spot clean Seat Covers, Shoulder Pads, Buckle Pad, and the Infant Insert as needed with a clean cloth using mild detergent and water. Washing Instructions Seat Cover, Shoulder Pads, Buckle Pad, and the Infant Insert may be washed as follows: Machine wash cold, gentle cycle, mild detergent Do not bleach Do not tumble dry... -
Page 42: Safety Checklist
Safety Checklist Did you read and understand this Owner’s Manual and all labels found on this child restraint? Are the Harness slots that you are using at or below top of child’s shoulders? Is the Harness secured properly with the Chest Clip positioned at the armpits? Is the Harness snug and not twisted? Is the child restraint rear facing in an approved vehicle seat location? Is the Infant Carrier securely attached to the Base? Is the... -
Page 43: Resources
This information can be found on page 2 of this Owner’s Manual, or on the underside of your Infant Carrier and Base. Please contact the U.S. CYBEX Distributor, Regal Lager, Inc.: • Toll free: 1–800–593–5522 • E-mail: info@regallager.com... -
Page 44: Warranty
Warranty IMPORTANT: Immediately register your Aton so we can contact you in the unlikely event of a safety recall. Register online at www.regallager.com/register/cybexcarseats or mail in the separate registration card provided. LIMITED WARRANTY CYBEX warrants to the original consumer purchaser that this product will be free from defects in material and workmanship for two (2) years from the date of original purchase (the “Warranty... - Page 45 El Aton ha sido sometido a pruebas extensivas y cumple o supera todas las normas federales aplicables de seguridad de automotores en Norte América.
- Page 46 Certi cación ..........................2 Advertencias e importante Información sobre la Seguridad ...............3 Vista General Base del Aton ......................6 Características de la Base del Aton ....................7 Instalación Super Easy And Tight™ ....................7 Ajuste del Ángulo de Reclinación ....................7 Indicador de Nivel ......................... 7 Chasis de Acero ..........................
-
Page 47: Registro E Información De Retiro Del Producto
The card is already addressed and we’ve paid the postage. fecha de fabricación del sistema de sujeción a: Tear off and mail this part CONSUMER: JUST FILL IN YOUR NAME, ADDRESS AND E-MAIL CYBEX Registration ADDRESS. PLEASE PRINT CLEARLY. Your Name 1100 Cobb Place Blvd. NW... -
Page 48: Advertencias E Importante Información Sobre La Seguridad
Información sobre la Seguridad ADVERTENCIA MUERTE o GRAVES LESIONES podrían ocurrir • LEA este Manual del Propietario minuciosamente antes del primer uso y guárdelo para su futura referencia. • NO INSTALE O UTILICE este sistema de sujeción infantil hasta que haya leído y comprendido las instrucciones de este manual Y del Manual del Propietario de su vehículo . - Page 49 LATCH está de alguna manera cortada, rasgada o dañada. • NO UTILICE accesorios o piezas con este sistema de sujeción infantil distintos a los autorizados por CYBEX. La utilización de accesorios o piezas de otros fabricantes podría modi car el funcionamiento del sistema de sujeción infantil.
- Page 50 ADVERTENCIA MUERTE o GRAVES LESIONES podrían ocurrir Cuando se utiliza fuera del vehículo • JAMÁS DEJE al niño desatendido, aunque sea por períodos breves de tiempo. Los movimientos, patadas o manotazos al aire del niño podrían ladear o mover el Porta Bebé. • RIESGO DE ASFIXIA: JAMÁS coloque el Porta Bebé...
-
Page 51: Vista General Base Del Aton
Vista General de la Base del Aton Tope de Sujeción del Porta Bebé Palanca de Bloqueo Indicador de Nivel Guía del cinturón Pestillo de Sujeción del Porta Bebé Pata Niveladora Prensilla Tensora Placa Tensora de Cinturones de la correa del sistema LATCH Botón de Seguridad... -
Page 52: Características De La Base Del Aton
Características de la Base del Aton Instalación Super Easy And Tight™ El Tensor de Cinturón Aton utiliza la tecnología Super Easy And Tight (SEAT) de CYBEX para lograr siempre una instalación rápida y segura ya sea que usted opte por utilizar el sistema LATCH o los cinturones de seguridad del vehículo. -
Page 53: Vista General Del Porta Bebé
Vista General del Porta Bebé Vista desde lo Alto Capucha Designer Canopy™ (almacenada) Inserto para Bebés Pequeños Almohadillas de Hombros Botón del Sistema de Viaje Botón de Ajuste del Asa de Acarreo Clip de Pecho Guía del Cinturón Almohadilla de la Hebilla Botón de Ajuste Botón de Ajuste Correas del... - Page 54 Vista General del Porta Bebé Vista desde Abajo Guía del Cinturón de Hombro Ranuras del Arnés Varilla de Sujeción de la Base Arnés Placa Divisora Cubierta de Plástico Bolsa para Transparente Guardar el Manual del Propietario Varilla de Sujeción de la Base Correa de Ajuste del Arnés...
-
Page 55: Características Del Porta Bebé
Características del Porta Bebé Hebilla del Arnés Para liberar las lengüetas de la hebilla, presione rmemente el botón ROJO de la Hebilla del Arnés. Para abrochar, inserte cada una de las lengüetas en la hebilla hasta escuchar un CLIC sonoro. Tire de las lengüetas para veri car que estén bien abrochadas. -
Page 56: Asa De Acarreo
éstos podrían lesionar gravemente al niño en caso de frenado súbito o choque. Capucha Designer Canopy™ Simplemente tire hacia adelante para extender la Capucha Aton, la cual tiene dos posiciones. Para extender la capucha,empuje suavemente de vuelta a su posición original. -
Page 57: Uso Del Porta Bebé
Utilice el asiento CYBEX Aton hasta que el niño alcance los límites máximos de peso o altura. Debido a que no todos los niños tienen las mismas formas y tamaños, no utilice el asiento Aton cuando la parte superior de la cabeza del niño esté a menos de 1 pulgada (2,5 cm) de la parte superior del Porta Bebé. -
Page 58: Para Ajustar La Altura Del Arnés
Uso del Porta Bebé Para ajustar la altura del arnés Para el uso correcto del Porta Bebé, las correas del arnés de hombros TIENEN que estar a la altura correcta para el niño. 1. Coloque al niño en el porta bebé, asegurándose que su trasero descanse en el asiento y su espalda esté... -
Page 59: Colocación Segura Del Niño En El Porta Bebé
Uso del Porta Bebé Colocación segura del niño en el Porta Bebé 1. A oje el arnés oprimiendo rmemente el Botón Ajustador mientras tira de ambas correas hacia adelante. 2. Oprima el botón ROJO de la Hebilla del Arnés para liberar las lengüetas. 3. - Page 60 Uso del Porta Bebé 7. Tire hacia arriba de las Correas del Arnés para ceñirlas alrededor de las caderas del niño mientras sostiene en su lugar la Hebilla del Arnés. 8. Lentamente tire de la correa ajustadora para apretar las Correas de Hombros. Una correa bien ajustada no debe quedar oja y debe estar colocada en una línea relativamente recta sin estar suelta.
-
Page 61: Adaptador Para Recién Nacidos
Funda del Asiento. Este adaptador ayuda a colocar correctamente a los bebés más pequeños en el asiento Aton durante sus primeros meses de vida. Recomendamos utilizar el Adaptador para Recién Nacidos hasta que su bebé alcance 11 lb (5 kg), o tenga 3 meses de edad. -
Page 62: Más Opciones De Soporte
Asegúrese que las piernas se encuentren a horcajadas en la correa de entrepierna. JAMÁS coloque relleno adicional debajo o detrás del niño. El Inserto para Bebés Pequeños es el único relleno autorizado para utilizarse en el asiento Aton. -
Page 63: Requisitos De Ubicación En El Asiento Del Vehículo
Requisitos de ubicación en el asiento del vehículo ADVERTENCIA MUERTE o GRAVES LESIONES podrían ocurrir JAMAS coloque este sistema de sujeción infantil en un asiento del frente que tenga bolsa de aire activa. La MUERTE o LESIONES GRAVES podrían ocurrir. El asiento trasero es el lugar más seguro para los niños menores de 12 años. -
Page 64: Cinturones De Seguridad Del Vehículo
Requisitos de ubicación en el asiento del vehículo Cinturones de Seguridad del Vehículo El diseño y funcionamiento de los sistemas de cinturones de seguridad varían de un vehículo a otro y de una ubicación de asientos a otra en el mismo vehículo. Consulte el Manual del Propietario del vehículo para conocer el uso, ubicación y ajuste correctos de los cinturones de regazo y de hombro del vehículo. -
Page 65: Sistema De Anclajes Inferiores Y Correas De Anclaje Para Niños (Sistema Latch)
Éstos sirven para anclar la parte superior de los sistemas de sujeción infantil orientados hacia el frente y no se utilizan para el Porta Bebé Aton o la Base. De manera característica, el sistema LATCH ofrece una instalación más sencilla y homogénea. Sin embargo, este sistema de sujeción infantil puede instalarse de manera segura utilizando ya sea el... -
Page 66: Las Guías Latch
Guías del Sistema LATCH que vienen con el producto en los anclajes inferiores para una instalación más sencilla de la Base Aton. 3. Para instalar, una las dos Guías del Sistema LATCH a los dos anclajes inferiores del sistema deslizándolas en el pliegue y debajo... -
Page 67: Instalación De La Base
Instalación de la Base Utilizando el sistema LATCH 1. Coloque la Base en un asiento de vehículo orientado hacia el frente con el extremo de la Pata Niveladora hacia el respaldo del vehículo. 2. Extienda totalmente la Pata Niveladora para tener acceso a los conectores del sistema LATCH. - Page 68 Instalación de la Base 7. Empuje la Base contra el respaldo del asiento del vehículo. Tense la correa del sistema LATCH tirando de la presilla. Meta el extremo suelto de la correa del Sistema LATCH debajo de la base para que NO INTERFIERA con el cierre de la Placa Tensora de Cinturones o la conexión entre el Porta Bebé...
-
Page 69: Utilización Del Cinturón De Seguridad De Regazo Y Hombro
Instalación de la Base Utilización del Cinturón de Seguridad de Regazo y hombro 1. Coloque la Base en un asiento de vehículo orientado hacia el frente con el extremo de la Pata Niveladora hacia el respaldo del asiento del vehículo. 2. - Page 70 Instalación de la Base 7. Presione la Placa Tensora de Cinturones hacia abajo con ambas manos, donde aparece indicado, hasta que quede bloqueada en su lugar. La Palanca de PRESIONE Bloqueo ANARANJADA girará hasta la posición de CLOSE cuando la Placa quede bloqueada. Si la Placa Tensora de Cinturones no se bloquea, intente a ojar ligeramente el cinturón del vehículo.
-
Page 71: Para Utilizar El Cinturón De Regazo Únicamente
Instalación de la Base Para utilizar el Cinturón de Regazo única- mente 1. Coloque la Base en un asiento de vehículo orientado hacia el frente con el extremo de la Pata Niveladora hacia el respaldo del asiento del vehículo. 2. Ajuste la Pata Niveladora hasta lograr el ángulo correcto según el tamaño del niño como lo muestra el Indicador de Nivel. - Page 72 Instalación de la Base 7. Presione la Placa Tensora de Cinturones hacia abajo con ambas manos, donde aparece indicado, hasta que quede bloqueada en su lugar. La Palanca de Bloqueo ANARANJADA girará hasta la posición de CLOSE cuando la Placa quede bloqueada. Si la Placa Tensora de Cinturones no se bloquea, intente a ojar ligeramente el cinturón del vehículo.
-
Page 73: Uso Del Porta Bebé Con La Base
Uso del Porta Bebé con la Base Para jar el Porta Bebé a la Base 1. Asegúrese que el asa esté BLOQUEADA en la POSICIÓN DE ACARREO. 2. Levante el Porta Bebé por el Asa y deslice la Varilla de Sujeción debajo del Pestillo de Sujeción en la Base. -
Page 74: Almacenamiento De Conectores Del Sistema Latch
Almacenamiento de Conectores del Sistema LATCH Al utilizar el cinturón de seguridad del vehículo para sujetar la Base, ES NECESARIO que los Conectores LATCH queden ALMACENADOS en la Base. Los Conectores sueltos podrían lesionar gravemente a los ocupantes del vehículo en caso de choque. 1. -
Page 75: Para Instalar El Porta Bebé Sin La Base
Para instalar el Porta Bebé sin la Base Utilizando el Cinturón de Seguridad de Regazo y Hombro 1. Coloque el Porta Bebé en un asiento de vehículo orientado hacia el frente para que el niño mire hacia la parte trasera del vehículo. 2. - Page 76 Para instalar el Porta Bebé sin la Base 6. Asegúrese que el cierre del cinturón del vehículo y partes duras no inter eran con el Porta Bebé. 7. Veri que el ángulo de reclinación. Ajuste el ángulo del asiento hasta que la línea roja del Porta Bebé...
-
Page 77: Utilizando El Cinturón De Seguridad De Regazo Y Hombro (Método Alterno)
Para instalar el Porta Bebé sin la Base Utilizando el Cinturón de Seguridad de Regazo y Hombro (método alterno) 1. Coloque el Porta Bebé en un asiento de vehículo orientado hacia el frente para que el niño mire hacia la parte trasera del vehículo. 2. - Page 78 Para instalar el Porta Bebé sin la Base 6. Veri que el ángulo de reclinación. Ajuste el ángulo del asiento hasta que la línea ROJA Porta Bebé esté nivelada con el piso. Se puede colocar una toalla bien enrollada o un pedazo de otador de piscina de polietileno debajo del Porta Bebé...
-
Page 79: Utilizando El Cinturón De Seguridad De Regazo Únicamente
Para instalar el Porta Bebé sin la Base Utilizando el Cinturón de Seguridad de Regazo únicamente 1. Coloque el Porta Bebé en un asiento de vehículo orientado hacia el frente para que el niño mire hacia la parte trasera del vehículo. 2. -
Page 80: Para Instalar El Porta Bebé En Una Aeronave
Para instalar el Porta Bebé en una aeronave La Administración Federal de Aviación (FAA, por sus siglas en inglés) de los Estados Unidos recomienda que los niños de hasta 40 libras (18 Kg.) de peso utilicen un asiento infantil certi cado provisto de arnés al viajar en una aeronave. -
Page 81: Ajuste Del Ángulo De Reclinación
Ajuste del Ángulo de Reclinación Es muy importante para la seguridad del niño que el Sistema de Sujeción Infantil quede instalado en el ángulo correcto. NO UTILICE éste o ningún otro Sistema de Sujeción Infantil con un bebé prematuro sino hasta que haya consultado a su médico. -
Page 82: Si Utiliza El Sistema De Sujeción Infantil Sin La Base
Ajuste del Ángulo de Reclinación Si utiliza el Sistema de Sujeción Infantil sin la Base Ajuste el ángulo del asiento hasta que la Línea de Nivel ROJA del Porta Bebé esté nivelada con el piso. Line MUST be level Si está teniendo di cultades en lograr el ángulo de with ground when reclinación correcto: installed without... -
Page 83: Cuidados Y Limpieza
Cuidados y Limpieza Retirar la Funda del asiento La Funda está diseñada para ser muy estrecha y adaptarse exactamente dentro del Porta Bebé. Por favor, preste atención antes y durante que retire la Funda para recordar como ponerla de nuevo. 1. -
Page 84: Para Sacar Manchas
Cuidados y Limpieza Para Sacar Manchas Utilice un paño limpio usando detergente y agua para sacarle manchas a las Fundas del Asiento, Almohadillas de Hombros, Almohadilla de la Hebilla y al Inserto para Bebés Pequeños Instrucciones para el Lavado La Funda del Asiento, Almohadillas de Hombros, Almohadilla de la Hebilla y el Inserto para Bebés Pequeños se pueden lavar de la siguiente manera: Lavar en máquina con agua fría, ciclo delicado, detergente suave No usar blanqueador... -
Page 85: Lista De Puntos De Veri Cación De Seguridad
Lista de puntos de veri cación de seguridad Leyó y entendió completamente este Manual del Propietario y todas las etiquetas colocadas en este sistema de sujeción juvenil? ¿Las Ranuras del Arnés que está utilizando, están a la altura o debajo de los hombros del niño? ¿Está... -
Page 86: Recursos
Recursos Si necesita ayuda Favor de ponerse en contacto con nuestro Departamento de Servicio al Cliente, donde nuestro personal cuenta con muchos Especialistas en Seguridad de Pasajeros Infantiles (CPS), con las preguntas que pudiera tener sobre utilización, componentes, mantenimiento o información sobre el producto. -
Page 87: Garantía
Garantía IMPORTANTE: Registre de inmediato su asiento Aton para que podamos ponernos en contacto con usted en el caso poco probable de una orden de retirar el producto por cuestiones de seguridad. Ingrese a: http://www.regallager.com/register/cybexcarseats o envíe por correo la tarjeta de registro proporcionada. - Page 88 1100 Cobb Place Blvd. Kennesaw, Georgia 30144 USA Toll free: 1-800-593-5522 / e-mail: info@regallager.com / www.regallager.com © 2011 CYBEX Industrial, Ltd. All rights reserved. Printed in China. This product and its components are subject to change without notice. C100_US013_01C Rev. 03/2012...