
Related Manuals for Volvo Penta MS2


Summary of Contents for Volvo Penta MS2
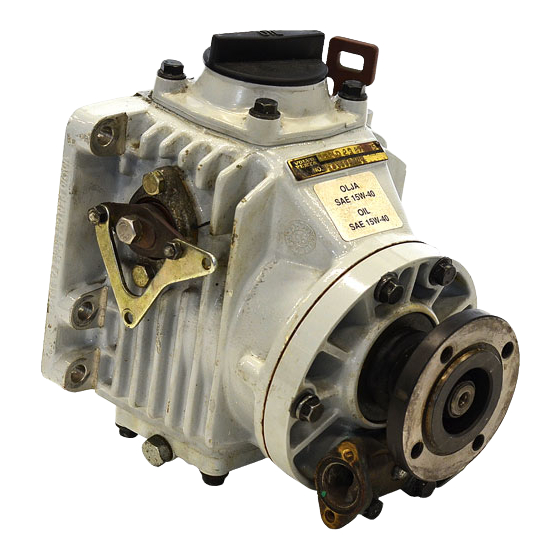
- Page 1 Workshop manual 2(0) MS2, MS2B-A, MS2B-L, MS2A-D MS2A-E, MS2L-D, MS2L-E, MS2V 120S, 120S-B, 120S-C, 120S-D, 120S-E...
-
Page 3: Table Of Contents
History ............... 16 Disassembly - upper and lower gear housings 120S, 120S-B, -C, -D, -E ..........18 Repair of MS2 reverse gear, upper gear housing 120S, 120S-B, -C, -D, -E ..........20 Repair of MS2V reverse gear ........51 Repair - lower gear housing 120S, 120S-B, -C, -D, -E ..........61... -
Page 4: Safety Information
(exhaust pipes, turbos, charge uct versions noted in the table of contents, supplied air pipes, starting heaters etc.) and hot fluids in by Volvo Penta. Make sure you use the correct work- pipes and hoses on an engine which is running shop literature. - Page 5 General instructions Always use goggles when doing any work where Make sure that oil and fuel soaked rags, and there is any risk of splinters, grinding sparks, used fuel and oil filters are stored in a safe acid splash or other chemicals. Your eyes are place.
- Page 6 All chains or cables should be parallel to tion system (on petrol (gasoline) engines) and each other and should be as square as possible fuel systems on Volvo Penta products have to the top of the engine. been designed to minimize the risks of explo- If other equipment connected to the engine has sion and fire.
-
Page 7: General Information
(upper gear) are essentially the same. Where No damage whatever, occasioned by use of non-origi- they differ, this is noted. nal Volvo Penta spares for the product, will be com- In all correspondence, the product designation and se- pensated by the warranty offered by Volvo Penta. -
Page 8: Repair Instructions
In the workshop manual, all tasks for which there are mends the use of biodegradable degreasers whenever Volvo Penta special tools, are done using these tools. engine components are de-greased, unless otherwise Special tools are specially prepared to permit the saf- specified in the workshop manual. -
Page 9: Tightening Torque
General instructions Tightening torque Lock nuts The tightening torques for vital fasteners, which Disassembled locknuts shall not be re-used, they should be tightened with a torque wrench, are listed in shall be replaced by new ones, since the locking prop- “Specifications: Tightening torque”... -
Page 10: Sealants
RTV compound must be re- moved before the joint is sealed again. The following RTV preparations are mentioned in the workshop manual: Volvo Penta part no. 840879-1, ® Loctite 574; Volvo Penta part no. 1161099-5, Perma- ®... - Page 11 General instructions Safety rules for fluorocarbon • Always use chloroprene rubber gloves (gloves for chemicals handling) and goggles. rubber • Handle the removed seal in the same way as cor- rosive acid. All residues, including ash, can be Fluorocarbon rubbers are commonly used materials in strongly corrosive.
-
Page 12: Special Tools
Special tools 884078 884143 884161 884264 884611 884637 884679 884720 884721 884723 884724 884725 884726 884728 884729 884730 884732 884731 884078-7 Extractor. Disassembly of output shaft 884724-6 Hook wrench. Removal, assembly of nuts. 884143-9 Shaft for expander 884750. 884725-3 Drift Removal, assembly of retention ring 884161-1 Slide hammer. - Page 13 Special tools 884733 884738 884735 884736 884739 884743 884746 884744 884747 884745 884748 884750 884752 884753 884754 884755 884756 884757 884761 884733-7 Drift. Installation of bearings, removal of 884752-7 Drift. Installation of seal rings in rear gear wheels. bearing housing. 884735-2 Tool.
- Page 14 Special tools 884766 884830 884833 884834 884835 884836 884855 884856 884857 884859 884860 3858852 9991801 884766-7 Press. For pressing down the vertical 884857-4 Plate. Removal of bearing race from cov- shaft. Used together with 884753 er, MS2V 884830-1 Sleeve for vertical shaft. Can be replaced 884859-0 Shaft, MS2V by 884264...
-
Page 15: Other Special Equipment
3810152 9985472-1 Depth micrometer Chemicals 9985494-5 Spring balance RTV preparations: 9999683 -7 Dial gauge ® Volvo Penta part no. 840879-1, Loctite 574; ® 9999701-7 Micrometer Volvo Penta part no. 1161099-5, Permatex No. 3. Anaerobic preparations: 3810152-3 Equipment for pressure testing drives ®... -
Page 16: Design And Function
Design and function Reverse gear MS2 Forward position Reverse position... - Page 17 Design and function Sailboat drive 120S Forward position Reverse position...
-
Page 18: History
Design and function History, sail boat drives Model 120S Model 120S-B 1. Adapter, loose 1. Adapter, integrated into gear housing 2. Rubber sleeve 2. Adapter plate 3. Gasket Model 120S-C Model 120S-D 1. Dipstick, new version New material in slid- ing sleeve Production rationalization changes... - Page 19 Design and function Model 120S-E 1. Rubber mounting, new version Shot blasted gear wheels Fully synthetic oil...
- Page 20 Disassembly - upper and lower gear housings, sailboat drive 1. Clean the outside of the reverse gear and drive. 3. Split the drive and save the spacer ring (1), shims, (2) and gasket (3). Remove the drain plug and drain the oil. Remove the screws in the adapter section.
- Page 21 Disassembly - upper and lower gear housings, sailboat drive 5. Models 120S-B, -C, -D, -E 6. Remove the slipping clutch (1). Remove the adapter plate and remove the rubber Check that the clutch is not damaged. sleeve. Prize carefully. Use a tool with no sharp edges. Remove and scrap the O-ring on the sleeve of the adapter plate.
- Page 22 Repair - MS2 reverse gear and upper gear housing, sailboat drive Gear shift mechanism, disassembly 1. Disassemble the gear shift mechanism, 2 screws. 3. Drive in the spring pin so far that the pin (1) is re- leased. 2. Remove the dog (1) and spring (2).
- Page 23 Repair - MS2 reverse gear and upper gear housing, sailboat drive Gear shift mechanism, assembly 884679 5. Pull the eccentric piston out. 8. Oil all components before assembly starts. Install the seal ring. Align the side with the spring inwards.
- Page 24 Repair - MS2 reverse gear and upper gear housing, sailboat drive 12. NOTE! During assembly, the dog must be aligned as shown in the illustration. The gear shift mechanism will not work if the dog is turned the other way round.
- Page 25 Repair - MS2 reverse gear and upper gear housing, sailboat drive Reverse gear/upper gear housing, disassembly 16. Drive, 120S, 120S-B, -C, -D, -E Remove the cooling water valve. Remove the gear shift cable holder and the rear cover with rubber mounting.
- Page 26 Repair - MS2 reverse gear and upper gear housing, sailboat drive 884725 20. Turn the reverse gear/upper bearing housing over 18. Reverse gear MS2. and put it in a press. Put tool no. 884725 over the ver- Turn the reverse gear upside down and remove the tical shaft, so that it rests on the large washer.
- Page 27 Repair - MS2 reverse gear and upper gear housing, sailboat drive 22. Pull up the sliding sleeve with a turning motion. 25. Remove the lock washer (1), the large domed washer (2), the three smaller domed washers (3), any spacer washers (4) and the needle roller bearing (5).
- Page 28 Repair - MS2 reverse gear and upper gear housing, sailboat drive Input bearing seal housing, disassembly 27. Remove the circlip, using circlip pliers. 29. Fix the bearing housing in a vise. Press a screw- 9991801 driver into the seal ring. Then place a thick piece of rubber or leather between the screwdriver and the bearing housing casting.
- Page 29 Repair - MS2 reverse gear and upper gear housing, sailboat drive 9991801 884728 33. Drive out the small outer bearing race, using tool 884728 and shaft 9991801. NOTE! Be careful to offer up the tool against the bear- 31. Drive or press the input shaft out of the bearing ing race.
- Page 30 Repair - MS2 reverse gear and upper gear housing, sailboat drive Input bearing housing, installation. 884732 37. Put the metal sheet (1) on the drive shaft. 35. Press the small outer bearing race into the bearing housing. Use tool no. 884732.
- Page 31 Repair - MS2 reverse gear and upper gear housing, sailboat drive 884729 9985494 2.25-4.05 lbf 39. Place the drive shaft in the bearing housing and 41. Test the pre-load with a spring balance. Fix the press the small roller bearing on, using tool no.
- Page 32 Repair - MS2 reverse gear and upper gear housing, sailboat drive Upper bearing housing, disassembly 9991801 884728 9991801 884733 884723 884723 43. Put the bearing housing in tool no. 884723 and 45. Put the bearing housing in tool no. 884723 and press the gear wheel out.
- Page 33 Repair - MS2 reverse gear and upper gear housing, sailboat drive Upper bearing housing, assembly 884731 9991801 884731 46. Press the upper roller bearing into the bearing 48. Put shims on the gear wheels for the upper bear- housing. Use tool no. 884731 and shaft 9991801.
- Page 34 Repair - MS2 reverse gear and upper gear housing, sailboat drive Reverse gear MS2 Output gear housing, 9991801 disassembly 884728 884739 50. Press the gear wheel into the upper bearing hous- ing. Use tool no. 884728, shaft 9991801 and 884739 as a support for the inner race.
- Page 35 Repair - MS2 reverse gear and upper gear housing, sailboat drive 884730 54. Press the output shaft out of the bearing housing. 56. Remove the O-ring (1) and ball bearing (2) from Use tool no. 884730. the bearing housing. 55. Remove the seal ring. Use a screwdriver or similar 57.
- Page 36 Repair - MS2 reverse gear and upper gear housing, sailboat drive 58. Press the shaft out from the roller bearing. Use a 60. Check that the cooling water pipe is in good condi- knife puller. tion. Change as necessary. Remove the screw and lift the manifold off.
- Page 37 Repair - MS2 reverse gear and upper gear housing, sailboat drive Reverse gear MS2 Output gear housing, assembly 9991801 884731 64. Install the cooling water pipe and install the two larger O-rings (1). Press the small O-ring (2) onto the screw.
- Page 38 Repair - MS2 reverse gear and upper gear housing, sailboat drive 884729 884729 68. Place the drive shaft in the bearing housing and 66. Press a roller bearing onto the output shaft. Use press the other roller bearing on, using tool no.
- Page 39 Repair - MS2 reverse gear and upper gear housing, sailboat drive Reverse gear MS2 Lower bearing cover, disassembly 70. Put on O-ring (1) and thread seal ring (2) on. Install the propeller shaft flange and install a new nut. Tighten the nut.
- Page 40 Repair - MS2 reverse gear and upper gear housing, sailboat drive Reverse gear MS2 Reverse gear MS2. Slipping Slipping clutch, clutch/lower bearing cover, disassembly assembly 884733 75. Press the small ball bearing onto the slipping 73. When the bearings need to be changed. Press the clutch.
- Page 41 Repair - MS2 reverse gear and upper gear housing, sailboat drive 77. Assume that the marking on the gear wheel = 65.00 mm. Only 00 is stamped on the gear wheel. Put the outer bearing race on and measure the depth of the gear wheel and the small roller bearing, as 79.
- Page 42 Repair - MS2 reverse gear and upper gear housing, sailboat drive 83. Measure the cover on the inside (B) down to the shim seat. Then measure the cover on the outside (C). 81. Put the slipping clutch into the housing and place Example: the outer bearing race loose on top of the bearing.
- Page 43 Repair - MS2 reverse gear and upper gear housing, sailboat drive Reverse gear MS2 Flank clearance 84. Put in shims of the calculated thickness, plus a further 0.5 mm in the cover and install the bearing race. Put a plate on the bearing race and press.
- Page 44 Repair - MS2 reverse gear and upper gear housing, sailboat drive Reverse gear MS2 Marking pattern 884735 90. If the marking pattern is similar to B, the output shaft must be moved inwards by removing shims from the bearing housing.
- Page 45 Repair - MS2 reverse gear and upper gear housing, sailboat drive Reverse gear MS2 Preload 884720 884736 3.37-6.74 lbf 9985494 884735 92. When the correct flank clearance and marking pat- tern have been obtained, disassemble the output bear- ing housing, lower bearing cover and slipping clutch.
-
Page 46: Gear Housing
Repair - MS2 reverse gear and upper gear housing, sailboat drive Gear housing Checking the marking pattern and gear flank clearance 96. Install the lower roller bearing in the housing. NOTE! Align the narrow ring by the arrow upwards. 98. Try installing an 0.40 mm shim in the input bearing The ring has a sharp edge which would cut into the housing. - Page 47 Repair - MS2 reverse gear and upper gear housing, sailboat drive 9999683 884738 100. Measure the gear flank clearance on both gear 102. Apply marking dye to the gear wheel. Turn the in- wheels, using a dial gauge 9999683. Press the gear put shaft round in the direction of engine rotation.
-
Page 48: Final Assembly
Repair - MS2 reverse gear and upper gear housing, sailboat drive Final assembly 104. If the marking pattern resembles B, the shim thickness in the input bearing housing should be re- duced. If the gear flank clearance becomes too small, the gear wheels must be disassembled. - Page 49 Repair - MS2 reverse gear and upper gear housing, sailboat drive 884725 108. Put the shaft in a press. 110. Align the “TOP” marking upwards, and install Use tool no. 884725 and press the lock washer down sliding sleeve (1) and needle roller bearing (2).
- Page 50 Repair - MS2 reverse gear and upper gear housing, sailboat drive 884725 114. Press down the large washer so far that the re- 112. Measure the distance between the gear wheel taining ring halves can be put in the groove.
- Page 51 Repair - MS2 reverse gear and upper gear housing, sailboat drive 116. Reverse gear MS2 Put a new O-ring on the cover. 118. Drive, 120S, 120S-B, -C, -D, -E Make sure that the oil drain is correctly aligned. Screw Put on a new O-ring and install the rear cover and the cover down onto the housing.
- Page 52 Repair - MS2 reverse gear and upper gear housing, sailboat drive 120. Install the gear change mechanism in the reverse gear housing. Please refer to items 10-13. 121. Reverse gear MS2 Install the dipstick. Fill up with oil. Please refer to Technical Data for oil volume, grade and viscosity.
-
Page 53: Repair Of Ms2V Reverse Gear
Repair of MS2V reverse gear, angle gear This section only refers to repair of the angle gear and Tubular shaft, its sub-components. Please refer to the MS2 informa- disassembly tion for general information about the reverse gear. 1. Clean the outside of the reverse gear. Remove the drain plug (1) and drain the oil. - Page 54 Repair of MS2V reverse gear, angle gear 5. Remove the seal ring. 7. Screw two screws into the tubular shaft and fix it by putting the two screw heads in a vise. Undo the tubu- NOTE! The seal ring must always be replaced by a lar nut with a hook wrench.
- Page 55 Repair of MS2V reverse gear, angle gear 884859 884857 884637 9. Put the tubular shaft in sleeve 884637 and press 11. Remove the bearing race from the cover. Use tool out the tubular shaft, which also removes the crown no. 884857 and shaft 884859. wheel and the inner roller bearing.
- Page 56 Repair of MS2V reverse gear, angle gear Pinion, disassembly 14. Remove the roller bearing from the pinion, using a knife extractor and press. 12. Fix the pinion in a vise and undo the two nuts with a hook wrench. 884720 884723 15.
- Page 57 2.25-3.93 lbf 884836 18. Install the inner roller bearing on the pinion, use 20. Apply thread locking fluid, Volvo Penta part no. the two sleeves 884732 and 884836 . 1161053-2 on the threads of the nut and install it with the chamfered side upwards.
- Page 58 1161053-2, on the threads and install the nut. Tightening torque: 140 Nm (103.26 lbf ft) 22. Apply sealant, Volvo Penta part no. 1161099-5 to the gearbox housing and install a new seal ring. Use tool no. 884834 and shaft 884859.
- Page 59 884834 26. Put the cover in the tubular shaft and press the 24. Apply sealant, Volvo Penta part no. 1161099-5 to roller bearing on with sleeve no. 884833. Press the the cover and install a new seal ring. Use tool no.
- Page 60 Repair of MS2V reverse gear, angle gear 884860 9985494 2.25-3.60 lbf 28. Screw two screws into the tubular shaft and fix it in a vise. Align the tubular nut with the un-threaded section towards the crown wheel and install it with tool no.
- Page 61 Repair of MS2V reverse gear, angle gear Flank clearance, checking 9999701 33. Remove the pinion and check whether the marking pattern on the pinion corresponds with illustration A, which is correct. The pattern should be located at the centre of the tooth, in height, but displaced towards the narrower end.
- Page 62 Repair of MS2V reverse gear, angle gear Angle drive, final assembly 36. Install the pinion in the gearbox housing together with a new O-ring. Tightening torque: 9 Nm (6.64 lbf ft) 37. Install the tubular shaft in the gearbox housing to- gether with a new O-ring.
- Page 63 Repair - lower gear housing, sailboat drive Repair - lower gear housing, sailboat drive Disassembly of the drive 1. Clean the outside of the drive. Remove the propel- 3. Separate the upper and lower gear housings. Re- ler and remove the fishing line cutter. Unscrew the move and scrap the gasket at the division line.
- Page 64 Repair - lower gear housing, sailboat drive 3858852 5. Remove the zinc ring. 8. Lock the pinion nut with tool no. 3858852. Press the shaft down and make sure that the pinion nut en- gages in the tool. Fix the tool to the rear bearing hous- ing, using socket cap screws.
- Page 65 Repair - lower gear housing, sailboat drive 884761 884721 884761 12. Disassemble the outer bearing race from the upper 10. Disassemble the bearing race with tool no. part of the gear housing, using tool no. 884761 in 884761. combination with tool no. 884721. NOTE! Note the number of shims between the bearing race and the gear.
- Page 66 Repair - lower gear housing, sailboat drive Vertical shaft, Vertical shaft, disassembly assembly NOTE! Oil all components before or during assembly. 17. Put a new ferrule (1) on the vertical shaft. 14. Remove the roller bearings with a knife extractor as counterhold.
- Page 67 Repair - lower gear housing, sailboat drive Propeller shaft, disassembly of bearings and drive 884753 22. Remove the gear wheel with tool no. 884753. Use a socket to protect the end of the shaft. NOTE! The gear wheel and pinion are classed togeth- er and can only be changed as a complete unit.
- Page 68 Repair - lower gear housing, sailboat drive Propeller shaft, assembly of Propeller shaft, shimming bearings and drive 26. For when only new bearings have been installed. Use the previously installed shims in the first in- stance. In other cases, the shim thickness can be calculated as in items 27–29.
- Page 69 Repair - lower gear housing, sailboat drive 884756 31. Install the outer bearing race in the gear housing 29. The illustration shows the K dimension (– 5) en- with mandrel 884756. Use the rear bearing housing as graved on the gear wheel. The other engraved figure a guide.
- Page 70 Repair - lower gear housing, sailboat drive Rear bearing housing, shimming For when only new bearings have been installed. Use the previously installed shims in the first instance. When the gear housing or rear bearing housing is changed, the shim thickness should be calculated as below.
- Page 71 (towards the bow). When the seal rings have been in- stalled, the spring in the rings should face away from each other. 38. Apply some grease to the seal rings, Volvo Penta part no. 828250-1. 41. Install the propeller shaft in the gear housing.
- Page 72 Repair - lower gear housing, sailboat drive Pre-load 884747 9985494 884748 42. Check that there is no slack in the propeller shaft Check the preload in the shaft. Method 1. Wind a piece of string round the shaft and 44. Install a new needle roller bearing. Use tool no. pull with spring scale 9985494.
- Page 73 NOTE! First tighten the nut by hand, so that the tool Apply sealant, Volvo Penta part no. 1161231-4, to the lies flush against the division plane. mating face between the bearing housing and the drive.
- Page 74 Repair - lower gear housing, sailboat drive Flank clearance Install dial gauge 9999683 on the propeller shaft splines. Tap the vertical shaft from above, so that it comes as far down as possible. Turn the propeller shaft forwards and backwards. Flank clearance: 0.04-0.10 mm (0.002-0.004") If the clearance is too small, the nut must be tight- ened a further turn.
- Page 75 Repair - lower gear housing, sailboat drive Marking pattern 884264 884766 884830 884753 54. Disassemble the propeller shaft and check that the marking pattern on the gear teeth corresponds with the marking pattern in the illustration above or the figures in items 55 and 56. 52.
- Page 76 Repair - lower gear housing, sailboat drive Model 120S Installation, lower gear housing–adapter housing Preferably use the shims which were installed previ- ously, if only new bearings have been installed. Shim thickness can also be measured as in the points be- low.
- Page 77 61. Measure the height of flange (C) on the adapter the lower gearing housing. Apply MoS based grease, housing. Volvo Penta part no. 1161029-2 to the socket cap screws. Put washers on the six socket cap screws Example: and use a torque wrench to tighten them.
- Page 78 Repair - lower gear housing, sailboat drive Models 120S-B, -C, -D, -E Installation, lower gear housing–adapter plate. Preferably use the shims which were installed previ- ously, if only new bearings have been installed. Shim thickness can also be measured as in the points be- low.
- Page 79 Repair - lower gear housing, sailboat drive 9999701 70. Install the calculated thickness of shims and gas- ket on the division plane of the lower gear housing. NOTE! The text on the gasket must face upwards. 68. Measure the thickness of gasket (B) with mi- The hole pattern in the gasket only fits one way round.
- Page 80 73. Install the adapter plate on the upper gear hous- Reverse installed drive (180°) ing. Apply MoS2 based grease, Volvo Penta part no. 1161029-2 to the three socket cap screws. Put wash- ers on the socket cap screws and use a torque wrench to tighten them.
- Page 81 Repair - lower gear housing, sailboat drive Other components, installation 75. Secure four of the screws, the ones with holes in 76. Install a new zinc ring. their heads, with locking wire, two screws on each Tightening torque: 12 Nm (8.85 lbf ft) side as in the illustration.
-
Page 82: Pressure Testing
Pump the pressure up to a level not exceeding 78 kPa (11.31 psi). Paint with Volvo Penta original primer plus a top coat. Give the paints time to harden. Check that the pressure remains constant for 1 minute. -
Page 83: Technical Data
With 4” extension, total ........3.3 l (0.87 US gallon) Oil volume, reverse gear......... 0.8 l (0.21 US gallon) Oil volume, MS2V reverse gear ......1.8 l (0.48 US gallon) *) Or Volvo Penta oil for diesel engines, please refer to the handbook. - Page 84 Technical data Tightening torque Reverse gear MS2, MS2B-A, MS2B-L, MS2A-D, MS2A-E, MS2L-D, MS2L-E Lower cover ................23 Nm (16.96 lbf ft) Reverse gear MS2V Nut on pinion ................140 Nm (103.26 lbf ft) Nut on tubular shaft ..............140 Nm (103.26 lbf ft) Cover for tubular shaft ...............
-
Page 85: References To Service Bulletins
References to Service Bulletins Group Date Refers to ...................................................................................................................................................................................................................................................................................................................................................................................................................................................................................................................................................................................................................................................................................................................................................................................................................................................................................................................................................................................................................................................................................................................................................................................................................................................................... - Page 86 Notes ..........................................................................................................................................................................................................................................................................................................................................................................................................................................................................................................................................................................................................................................................................................................................................................................................................................................................................................................................................................................................................................................................................................................................................................................................................................................................................................................
- Page 87 We would prefer you to write in English or Swedish. From: ....................................................................Refers to publication: ............................. Publication no: ............Date of issue: ..............Suggestion/Motivation:................................................................................................................................................................................................................................................................................................................... Date: ............Name: ............AB Volvo Penta Teknisk Information 405 08 Göteborg...