
Related Manuals for Cap Strength FM-CSH1006


Summary of Contents for Cap Strength FM-CSH1006
-
Page 1: Assembly Manual
Deluxe Home Gym FM-CSH1006 Assembly Manual CAP Barbell, Inc. 10820 Westpark Houston, TX 77042 Ph(877)-227-0955 - 1 -... -
Page 2: Table Of Contents
TABLE OF CONTENTS ………………………………………………….. WARNING DECAL PLACEMENT …………………………………………..PRODUCT OVERVIEW & DIMENSIONS …………………………………………….. BEFORE YOU BEGIN/PRECAUTIONS ……………………………………………………………………... PARTS LIST ……………………………………………………………………..ASSEMBLY 9-16 …………………………………………………………. EXERCISE GUIDELINES 17-18 …………………………………………………. MANUFACTURERS WARRANTY Note: A PART IDENTIFICATION CHART and a PART LIST/EXPLODED DRAWING are attached in the center of this manual. -
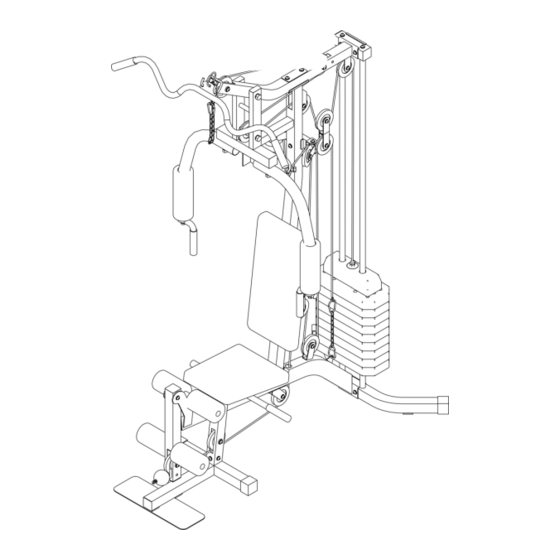
Page 3: Product Overview & Dimensions
877-227-0955. T o help Thank you for selecting your CAP Strength Gym. assist you, please note the product model This gym will help you build and tone major muscle groups. number before calling. The model number is... -
Page 4: Before You Begin/Precautions
IMPORTANT PRECAUTIONS WARNING: To reduce the risk of serious injury, read the following important precautions before using the gym. 1.Read all instructions in this manual and all 9. The Home Gym is designed to support a warnings on the gym before using the gym. maximum user weight of 250 lbs pounds. -
Page 5: Parts List
Part No. Description Qty. Pre.-assembled Part No. Description Qty. Pre.-assembled PFMH1005-01 Main Frame Support PFMH1005-31 M10 x 90mm Bolt PFMH1005-02 Top Frame PFMH1005-32 M8 x 65mm Bolts PFMH1005-03 Horizontal Beam PFMH1005-33 M8 x 20mm Bolts PFMH1005-04 Arm Curl Platform PFMH1005-34 M8 x 40mm Carriage Bolts PFMH1005-05 Press Arm Junction... - Page 6 PFMH1005-20 Foam Rollers PFM2007-08 Plastic Handle Covers PFM2004-09 50mm Round Inner Caps PFMH1005-21 Foam Arm Rests Cushion PFMH1005-22 Seat Rest PFMH1005-40 PFM4004-18 Round Plastic Bushings #38*#25 PFMH1005-23 Back Cushion PFMH1005-24 Enforcements PFMS80-13 Plastic Bushings PFM4004-22 Pop Pin PFMH1001-15 Pulley Bracket A PFMH1001-16 Pulley Brackets B PFMH1001-45...
- Page 7 DRAWING Q`TY DRAWING Q`TY Selector Shaft Round End Caps Foam Rollers Plastic Bushings Foam Arm Rests Pop Pin Enforcements Plastic Cap Pulley Bracket Top Plate Pin Pulley Brackets Selector Key Pulley Brackets Rubber Rings Seat Enforcements 4" Pulleys Pulley Bracket Bottom Cable Square Plastic Caps 50*50 Top Cable...
-
Page 9: Assembly Instruction
ASSEMBLY INSTRUCTION: IIIustration 1 Assembly of the base unit frame: Step 1: Connect the base frame (7) to the horizontal beam (3) by using bolts (35), washers (51), enforcement (25) and locknuts (45). Step 2:Connect the other end of the base frame (7) to the Arm Curl Platform (4) by using bolts (36) and washers (51) Step 3:Insert inner washers (55) into the leg extension (8). - Page 10 IIIustration 2 Mounting the base unit frame: Step 1:Vertically place the main frame support (1) onto the base frame (7). Secure them with bolts (34), pulley bracket-D (30), washers (51) and nuts (45) Step 2:Connect the Guide Rod Support (6) to the top frame (2) by using bolts (35), washers (51), enforcements (25) and nuts (45).
- Page 11 IIIustration 3 Mounting the butterfly and the chest press: Step 1:Assemble four inner washers (54) into the press arm junction (5). Once done, insert two inner washer (54) into the top frame (2) then slide the press arm junction onto the top frame (2) and attach by using bolt (31) washers (50) and nut (44).
- Page 12 IIIustration 4 Mounting the Leg Curl and the Pec Deck/Butterfly Station: Step 1:Place the Handle Rod (16) through the Base Frame (7), then attach the Plastic Handle Covers (60) on either end. Once inserted, use bolt (42) to secure its placement, as shown. Step 2:Attach the seat enforcements (29) onto the seat support (9) by using the bolts (43), washers (52) and nuts (46).
- Page 13 IIIustration 5 Step 1:Stick bolt (38) through the bent part of the left arm (12) then place washer (51), nut (47), Pec Deck cable (73) around the bolt (38) and tighten with nut (45). (PEC DEC CABLE has a metal ring on each end) Step 2:Place the Pec Deck cable (73) within the grooves of the 4”...
- Page 14 Step 5:Attach the top cable (72) with the 4” pulley (70). Then attach pulley to the Top frame (2) use bolt (25), washers (51), plastic bushings (64) and nut (45). Attach carabiners (76) to either end of the chain (74). Then open carabiners to fit lat bar attachment and attach the other end to the ball end of the top cable (72), as shown.
- Page 15 Step 9 : Align the bottom cable (71) underneath the 4” pulley (70) and insert both through the hole in the leg extension (8) and secure, as shown. Pull the bottom cable (71) through the base frame (7) and align it underneath the 4” pulley (70) and secure it as shown.
-
Page 17: Exercise Guidelines
EXERCISE GUIDELINES THE FOUR BASIC TYPES OF WORKOUTS Cross Training Cross training is an efficient way to get a Muscle Building complete and well-balanced fitness program. An example of a balanced To increase the size and strength of your program is: muscles, push them close to their •... - Page 18 WORKING OUT Rest for a short period of time after each set. The ideal resting periods are: Each workout should include 6 to 10 different • Rest for three minutes after each set for a exercises. Select exercises for every major muscle muscle-building workout.
-
Page 19: Manufacturers Warranty
This warranty is not valid in cases where this product is used commercially. CAP Strength will provide a replacement part at no charge for any part found defective in materials or workmanship during the specified warranty period. Under no circumstances will the manufacturer be responsible for damages or failures that occur as a result of improper assembly or failure to operate the product correctly.