
Related Manuals for Vivax ACP-07CIFM21GEI


Summary of Contents for Vivax ACP-07CIFM21GEI
- Page 1 Service manual ACP-07CIFM21GEI ACP-09CIFM25GEI ACP-12CIFM35GEI ACP-18CIFM50GEI RoHS...
-
Page 3: Specifications And Technical Parameters
Specifications and Technical Parameters Model ACP-07CIFM21GEI ACP-09CIFM25GEI ACP-12CIFM35GEI ACP-18CIFM50GEI Rated Voltage 1PH—220~240V 1PH—220~240V 1PH—220~240V 1PH—220~240V Frequency(Hz) Cooling Capacity(W) 2100 2600 3500 5300 Heating Capacity(W) 2600 2800 3800 5800 Cooling Air Flow Volume 450/390/320/280 450/390/320/280 510/430/380/330 800/680/600/550 (m3/h) (SH/H/M/L) Heating Air Flow Volume... -
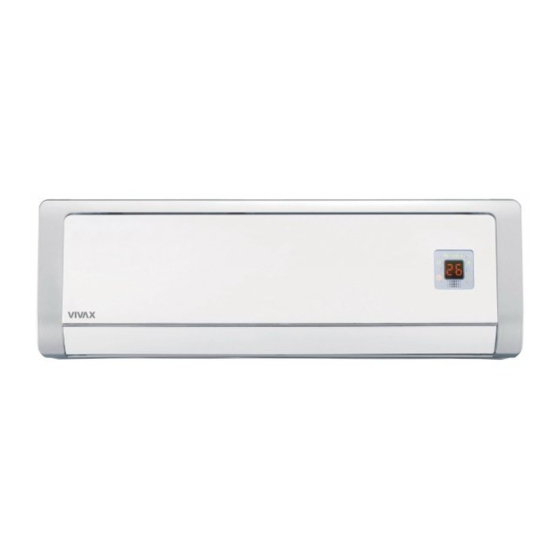
Page 4: Part Name
Artful Series Part name Indoor unit Air intake LCD display Front panel Wrapping Tape Wall pipe Guide louver board Air outlet Filter Wireless remote control Setting temp. Displayer Cool Heat Power/Run Window receiver... -
Page 5: Outline And Installation Dimension
Outline and installation dimension Outline and dimension Left tube exit Right tube exit Unit: mm Dimension Applicable models Ceiling Wall-Mounting Plate... -
Page 6: Wiring Diagram
Artful Series Wiring diagram ACP-07CIFM21GEI ACP-09CIFM25GEI ACP-12CIFM35GEI ACP-18CIFM50GEI MOTOR PIPE-MID PIPE-IN PIPE-OUT ROOM TEM.SENSOR TEM.SENSOR TEM.SENSOR TEM.SENSOR TUBE-I TUBE TUBE-O ROOM N(1) COMU AC-L JUMP YEGN YEGN DISP1 DISP2 SWING-UD TR-OUT TR-IN EARTHING PANEL YEGN ELECTRIC BOX EVAPORATOR II I... -
Page 7: Basic Functions
Manual of functions of remote controller and operation method Manual of functions of remote controller The following function manual, the temperature unit is centigrade, if there is Fahrenheit, there will be TF=TC X1.8+32. Temperature parameter Room ambient temperature (Tamb) Evaporator inlet tube temp (Tinlet) Indoor unit copper tube surface temp. -
Page 8: Timer Function
Artful Series When unit is running in cooling and dehumidifying mode, after sleep set up 1hr later, Tset will be increased 1 ; 2hrs later, Tset will be increased 2 , the Tset will not be exceeded 30 ; In heating mode, after sleep procedure set up 1hr later, Tset declined 1 , 2hrs later, Tset will be declined 2 ;... - Page 9 (!) After powered on, the displaying fure will fully displayed then only power indicator light on. (2) Remote control to turn on the unit, the running indicator and cooling indicator will light on; Heat mode: the running indicator and heating indicator will light on; In Heat mode, running indicator and dehumidifying indicator light on; Fan mode, running indicator light on;...
-
Page 10: Disassembly Procedures
Artful Series 7 7 7 7 7 Disassembly Procedures Disassembly Procedures of Indoor Unit Operating Procedures / Photos Disassemble Front Panel Front panel To push the raised parts of front panel left and right sides, open the front panel, scrwe off the screws which fix on the LCD cover board, take off the joint, to lift up the panel, to make the front panel get clear of the clasps, can take down the front panel. - Page 11 Operating Procedures / Photos Disassemble Front Case Unscrew the seven screws, pull open the clasp at the front case, and remove the front case. Screw Disassemble Water Tray Earth screw Electric box cover Firstly to screw off earth screw of electric box cover, loosen clasp, disassemble the electric box cover, then take off the wire terminal of air guide motor, to screw off 2pcs screw from water tray to disassemble...
- Page 12 Artful Series Operating Procedures / Photos Disassemble Evaporator Unscrew the screw to remove the rear pipe clamp. Rear pipe clamp Screw Remove the left two screws at the evaporator, Screw Remove the left two screws at the evaporator, turn the evaporator with certain angle, then move the ecaporator Screw...
- Page 13 Operating Procedures / Photos Disassemble Motor and cross flow fan Unscrew the three screws fixing the motor clamp, loosen the screws holding on the motoe and cross flow fan,then you can remove motor and cross flow fan. Screw Screw...
- Page 14 Artful Series Explosive view and parts list for indoor unit Explosive view for indoor unit...
- Page 15 Spare parts list for indoor unit Part Code Description ACP-07CIFM21GEI ACP-09CIFM25GEI Wall-Mounting Frame 01252006 01252006 Rear Case 22200092 22200092 Evaporator Assy 01002548 01002548 Evaporator Support 24212075 24212075 Cross Flow Fan 10352422 10352422 Ring of Bearing 76512203 76512203 Drainage Pipe 0523001401...
- Page 16 Artful Series Explosive view of parts for indoor unit...
- Page 17 Parts list of indoor unit Part Code Description ACP-12CIFM35GEI - l l Evaporator Assy 01002549 t l i r r i The above data are subject to be changed without notice.
- Page 18 Artful Series Explosive view of parts for indoor unit...
- Page 19 Parts list of indoor unit Part Code Description ACP-18CIFM50GEI - l l Rear Case 22204002 Evaporator Assy 01002914 Evaporator Support 24214080 Cross Flow Fan 10352016 Ring of Bearing 76512203 Drainage Pipe 0523001401 Water Tray 20184074 Swing Louver 10512099 Swing Linkage 10584085 Swing Louver 10512097...