
Related Manuals for Kenwood KDC-7024


Summary of Contents for Kenwood KDC-7024
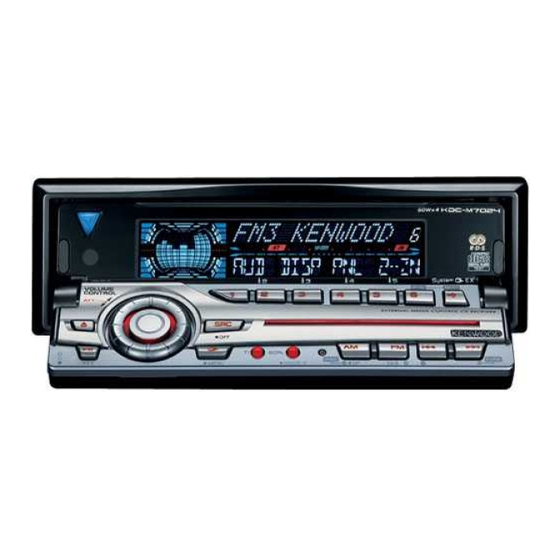
- Page 1 KDC-M7024 KDC-7024 CD-RECEIVER INSTRUCTION MANUAL COMPACT DIGITAL AUDIO © B64-2468-00/01 (EV/E2V)
-
Page 2: Table Of Contents
Contents Safety precautions...3 About GSM Hands Free Unit ...5 Notes on playing MP3 ...6 Notes on Multi-function Key System...8 About CDs...9 General features ...10 Power Selecting the Source Volume Attenuator System Q Audio Control Speaker Setting Display Mode Switching Text Display Switching External Display Switching Auxiliary Input Display Setting Non-fading Output... -
Page 3: Safety Precautions
KENWOOD disc changers/ CD players released in 1998 or later can be connected to this unit. Refer to the catalog or consult your Kenwood dealer for connectable models of disc changers/ CD players. Note that any KENWOOD disc changers/ CD... - Page 4 Reset button is pressed. If the unit still fails to operate properly after the Reset button has been pressed, contact your local KENWOOD dealer for assistance. • Press the reset button if the Disc auto changer fails to operate correctly. Normal operation should be restored.
-
Page 5: About Gsm Hands Free Unit
The marking of products using lasers (Except for some areas) CLASS 1 LASER PRODUCT The label is attached to the chassis/case and says that the component uses laser beams that have been classified as Class 1. It means that the unit is utilizing laser beams that are of a weaker class. -
Page 6: Notes On Playing Mp3
Notes on playing MP3 (KDC-M7024) This unit can play MP3(MPEG1, 2, 2.5 Audio Layer 3). Note, however, that the MP3 recording media and formats acceptable are limited. When writing MP3, pay attention to the following restrictions. Acceptable media The MP3 recording media acceptable to this unit are CD-ROM, CD-R, and CD-RW. - Page 7 MP3 playing order When selected for play, Folder Search, File Search, or for Folder Select, files and folders are accessed in the order in which they were written by the CD writer. Because of this, the order in which they are expected to be played may not match the order in which they are actually played.
-
Page 8: Notes On Multi-Function Key System
Notes on Multi-function Key System Multi-function Key System serves to control various functions with the [2] — [5] buttons. The basic operation of the Multi-function Key System is described below. What's the Multi-function Key System? This unit is equipped with the Multi-function Key System that enables the operation of multiple functions with one button. -
Page 9: About Cds
About CDs Handling CDs • Don’t touch the recording surface of the CD. • CD-R and CD-RW are easier to damage than a normal music CD. Use a CD-R or a CD-RW after reading the caution items on the package etc. •... -
Page 10: General Features
General features VOLUME #2-5 CONTOROL NAME.S NAME.S ATT indicator Function display Power Turning ON the Power NEXT Turn the vehicle ignition ON. The panel appears. NEXT Turing OFF the Power Turn the vehicle ignition OFF. The panel hides. Do not apply force to the panel during operation. It can cause damage. -
Page 11: Volume
Volume Increasing Volume Turn the [VOLUME CONTROL] knob clockwise. Decreasing Volume Turn the [VOLUME CONTROL] knob counterclockwise. Attenuator Turning the volume down quickly. Press the [ATT] button. Each time the button is pressed the Attenuator turns ON or OFF. When it’s ON, the "ATT" indicator blinks. System Q You can recall the best sound setting preset for different types of music. -
Page 12: Audio Control
General features Audio Control Select the source for adjustment Press the [SRC] button. Select the key function section Press the [NEXT] button. Repeatedly press the button until "AUD" is displayed above the [2] button. Refer to <Notes on Multi-function Key System> (page 8). Enter Audio Control mode Press the [2] ("AUD") button. -
Page 13: Dual Zone System
[3] button Adjustment Item Display Range Middle Center "MID F" 0.5/1.0/1.5/2.0 kHz Frequency Middle level "Middle" –8 — +8 Middle Q Factor "Middle Q" 1.0/2.0 [4] button Adjustment Item Display Range Treble Center "TRE F" 10.0/12.5/15.0/17.5 kHz Frequency Treble level "Treble"... -
Page 14: System Q
General features Speaker Setting Fine-tuning so that the System Q value is optimal when setting the speaker type. Enter Standby Press the [SRC] button. Select the "ALL OFF" display. Enter Speaker Setting mode Press the [Q] button. Select the Speaker type Press the [2] —... - Page 15 In Tuner source Information Program Service name or Frequency Radio text, Program Service name or Frequency Frequency Clock In CD & External disc source Information Disc title Track title Track number & Play time Disc name Clock In MP3 source Information Song title &...
-
Page 16: External Display Switching
General features External Display Switching Switching the display in the External Display connected. Select the key function section Press the [NEXT] button. Repeatedly press the button until "DISP" is displayed above the [3] button. Refer to <Notes on Multi-function Key System> (page 8). Enter display control mode Press the [3] ("DISP") button. -
Page 17: Panel Position Setting
Enter Panel Position Setting mode Press the [4] ("PNL") button. Select the item for adjustment Press the desired [2] — [5] button. Each time the button is pressed the items that can be adjusted switch as shown below. Adjustment Item Button The panel tilts upwards The panel tilts downwards... -
Page 18: Hiding The Control Panel
General features Hiding the Control Panel Prevents tampering with the unit while your car is being serviced etc. Hiding the control panel Press the [SRC] button for at least 1 second. When the time set in <OFF Wait Time Setting> (page 38) lapses, the panel is hidden and the power turns OFF. -
Page 19: Audio Control
Dual Zone System Rear: The sound of the source selected with step 1 is outputted from rear, and the sound of the source selected with step 6 is outputted from front. Dual Zone System Front: The sound of the source selected with step 1 is outputted from front, and the sound of the source selected with step 6 is outputted from rear. -
Page 20: Tuner Features
Tuner features NAME.S MENU Band display ST indicator Tuning Selecting the station. NEXT Select tuner source Press the [SRC] button. NEXT Select the "TUNER" display. Select the band Press the [FM] or [AM] button. Each time the [FM] button is pressed it switches between the FM1, FM2, and FM3 bands. -
Page 21: Auto Memory Entry
The preset number display blinks 1 time. On each band, 1 station can be put in the memory on each [1] — [6] button. Auto Memory Entry Putting a station with good reception in the memory automatically. Select the band for Auto Memory Entry Press the [FM] or [AM] button. -
Page 22: Rds Features
RDS features #1-6 NAME.S SCRL Radio text TI indicator Traffic Information Switching to traffic information automatically when a traffic NEXT bulletin starts even when you aren't listening to the radio. Press the [TI] button. NEXT Each time the button is pressed the Traffic Information function turns ON or OFF. -
Page 23: Pty (Program Type)
PTY (Program Type) Selecting the Program Type and searching for a station. Enter PTY mode Press the [PTY] button. During PTY mode the "PTY" indicator is ON. This function can't be used during a traffic bulletin or AM reception. Select the Program Type Press the [FM] or [AM] button. - Page 24 RDS features Program Type preset Putting the Program Type in the Preset button memory and calling it up quickly. Presetting the Program Type Select the Program Type to preset Refer to <PTY (Program Type)> (page 23). Preset the Program Type Press the desired [1] —...
-
Page 25: Cd/Mp3/External Disc Control Features
CD/MP3/External disc control features NEXT NEXT NAME.S 4 ¢ SCRL/ NAME.S DISC- DISC+ Track time Track number Disc number IN indicator — 25 —... -
Page 26: Playing External Disc
Hold down on the [¢] button. Release your finger to play the disc at that point. Reversing Hold down on the [4] button. Release your finger to play the disc at that point. — 26 — Disc player CD player CD changer/MD changer... -
Page 27: Track/File Search
Track/File Search Searching for a song on the disc or in the MP3 folder. Press the [4] or [¢] button. If the remote with number buttons is used as optional accessories, a song you'd like to listen to can directly be selected with the operation below. -
Page 28: Scan Play
CD/MP3/External disc control features Scan Play Playing the first part of each song on the disc or MP3 folder you are listening to and searching for the song you want to listen to. Select the key function section Press the [NEXT] button. Repeat to press the button until "SCAN"... -
Page 29: Folder Select
• When operation stops for 10 seconds the name at that time is registered, and Name Set mode closes. • Media that you can attach names to - Internal CD player: 30 discs. - External CD changer/ player: Varies according to the CD changer/ player. Refer to the CD changer/ player manual. -
Page 30: Text/Title Scroll
CD/MP3/External disc control features Text/Title Scroll Scrolling the displayed CD text, MP3 text, or MD title. Press the [SCRL] button. — 30 —... -
Page 31: Gsm Hands Free Unit Control Features
GSM Hands Free Unit control features NAME.S TI SCRL Telephone Number Receiving a call Received calls can be answered when a GSM Hands Free Unit NEXT (optional accessory) is connected to this unit. When a Call is Received NEXT "HF CALL" will be displayed. Accept a call Press the [1], [3] —... -
Page 32: Phone Book Search
GSM Hands Free Unit control features Phone Book Search Selecting a telephone number from the phone book. Select the key function section Press the [NEXT] button. Repeatedly press the button until "H-F" is displayed above the [2] button. Refer to <Notes on Multi-function Key System> (page 8). Enter Hands Free mode Press the [2] ("H-F") button. -
Page 33: Sms (Short Message Service) Mode
SMS (Short Message Service) Mode Select the key function section Press the [NEXT] button. Repeatedly press the button until "H-F" is displayed above the [2] button. Refer to <Notes on Multi-function Key System> (page 8). Enter Hands Free mode Press the [2] ("H-F") button. Select the SMS Mode Press the [5] ("SMS") button. -
Page 34: Menu System
Menu system NAME.S MENU Menu display RDS indicator Menu System Setting during operation beep sound etc. functions. The Menu system basic operation method is explained here. The reference for the Menu items and their setting content is after this operation explanation. NEXT Enter Menu mode Press the [MENU] button for at least 1 second. -
Page 35: Security Code
removed from the vehicle, personalizing this unit is by using the Security Code is a help in preventing theft. When the Security Code function is activated it can't be released. Note, your Security Code is the 4 digit number entered in your "Car Audio Passport"... -
Page 36: Microphone Sensitivity Adjust
Menu system Microphone sensitivity adjust <When hands free unit connecting> Adjusting the volume of the Microphone. Display and Setting "HF MIC 0" "HF MIC 15"(Original setting) "HF MIC 31" Auto Response time Adjust <When hands free unit connecting> Setting the time from an incoming call to the automatic response. -
Page 37: Contrast Adjustment
Synchronize Clock Synchronizing the RDS station time data and this unit's clock. Display Setting "SYNC ON" Synchronizes the time. "SYNC OFF" Adjust the time manually. It takes 3 to 4 minutes to synchronize the clock. DSI (Disabled System Indicator) A red indicator will blink on the unit after the faceplate is removed, warning potential thieves. -
Page 38: Off Wait Time Setting
Menu system OFF Wait Time Setting Setting the time until the faceplate hide operation starts after the power is turned OFF. The faceplate can be removed only during the set time period. Display and Setting "Off Wait 0s" "Off Wait 3s" (Original setting) "Off Wait 25s"... -
Page 39: Bass Management System)
B.M.S. (Bass Management System) Adjust the bass boost level of the external amplifier using the main unit. Display Setting "AMP BASS FLT" Bass boost level is flat. "AMP BASS +6" Bass boost level is low (+6dB). "AMP BASS +12" Bass boost level is mid (+12dB). "AMP BASS +18"... -
Page 40: Auto Memory Entry
Menu system Tuning Mode Sets the tuning mode. Tuning mode Display Operation Auto seek "Auto 1" Automatic search for a station. Preset station seek "Auto 2" Search in order of the stations in the Preset memory. Manual "Manual" Normal manual tuning control. Auto Memory Entry For the operation method refer to <Auto Memory Entry>... -
Page 41: Power Off Timer
Display Setting "MONO OFF" The monaural reception is OFF. "MONO ON" The monaural reception is ON. Text Scroll Setting the displayed text scroll. Display Setting "Scroll MANU" Doesn't scroll. "Scroll Auto" Scrolls when the display changes. The text scrolled is shown below. •... -
Page 42: Accessories
10.Press the reset button. 2CAUTION ... Number of items • If your car is not prepared for this special connection-system, consult your KENWOOD dealer. • Only use antenna conversion adapters (ISO-JASO) when the antenna cord has an ISO plug..1 •... -
Page 43: Connecting Wires To Terminals
Non-fading right output (Red) Rear left output/ Non-fading left output (White) Front right output (Red) Front left output (White) To KENWOOD disc changer/ GSM hands free unit/ External optional accessory To connect these leads, refer to the relevant instruction manuals. -
Page 44: Installtion
Connecting Wires to Terminals 2WARNING Connecting the ISO Connector The pin arrangement for the ISO connectors depends on the type of vehicle you drive. Make sure to make the proper connections to prevent damage to the unit. The default connection for the wiring harness is described in 1 below. -
Page 45: Removing The Unit
• To attach this unit, make sure the front of the control panel faces you and fit it into the mounting sleeve by pressing the four corners of the hard rubber frame at the same time. Do not apply strong pressure to other sections than the corners; otherwise troubles such as the impossibility of opening or closing the panel may result. -
Page 46: Locking The Backpanel To The Unit
Removing the Unit ■ Removing the Unit Refer to the section <Removing the hard rubber frame> and then remove the hard rubber frame. Remove the screw (M4 × 8) on the back side. Insert the two removal tools deeply into the slots on each side, as shown. -
Page 47: Troubleshooting Guide
Troubleshooting Guide What might seem to be a malfunction in your unit may just be the result of slight misoperation or miswiring. Before calling service, first check the following table for possible problems. General The power does not turn ON.01 ✔... - Page 48 Troubleshooting Guide The Touch Sensor Tone doesn’t sound.34 ✔ The preout jack is being used. ☞ The Touch Sensor Tone can’t be output from the preout jack. Even though Synchronize Clock is ON, the clock can’t be ✔ The received RDS station isn’t sending time data. ☞...
- Page 49 MP3 source Cannot play an MP3.67 ✔ The media is scratched or dirty.69 ☞ Clean the media, referring to the CD cleaning of the section on <About CDs> (page 9). The sound skips when an MP3 is being played.73-1 ✔ The media is scratched or dirty. ☞...
- Page 50 After setting it in the Disc Changer, DNPP was done without having it been played at least 1 IN (Blink): The CD player section is not operating ➪ Reinsert the CD. If the CD cannot be ejected or the display MD.E10 title.E11...
-
Page 51: Specifications
Digital filter (D/A) ...8 Times Over Sampling D/A Converter ...1 Bit Spindle speed (KDC-M7024)...1000 – 400 rpm (CLV 2times) (KDC-7024)...500 – 200 rpm (CLV) Wow & Flutter...Below Measurable Limit Frequency response (±1 dB) ...10 Hz – 20 kHz Total harmonic distortion (1 kHz) ...0.01 % Signal to Noise ratio (1 kHz) ...105 dB...