
Related Manuals for Shark 612C


Summary of Contents for Shark 612C
-
Page 1: Instruction Manual
Instruction Manual Instruccion Manual Manuel D’instruction 612C Model / Modelo / Modèle EURO-PRO Operating LLC 4400 Bois Franc, St. Laurent, Quebec, H4S 1A7 , Tel.: 1 (800) 361-4639 www.euro-pro.com... -
Page 3: Important Safety Instructions
IMPORTANT SAFETY INSTRUCTIONS When using an electrical appliance, basic safety should always be followed, including the following: Read all instructions before using this sewing machine. DANGER : To reduce the risk of electric shock: An appliance should never be left unattended when plugged in. Always unplug this appliance from the electrical outlet immediately after using and before cleaning. -
Page 4: Instrucciones Importantes De Seguridad
INSTRUCCIONES IMPORTANTES DE SEGURIDAD Al usar una máquina de coser siempre se deben tomar precauciones básicas de seguridad, incluyendo las siguientes: Lea todas las instrucciones antes de usar la máquina de coser. PELIGRO - Para reducir el riesgo de choque eléctrico: Los artefactos nunca deben dejarse desatendidos cuando estén enchufados. - Page 5 CONSIGNES DE SECURITE IMPORTANTES Lors de l'usage de tout appareil électrique, des consignes de sécurité fondamentales doivent être observées,y compris les suivantes : Veuillez lire toutes les directives avant d'utiliser la machine à coudre. DANGER - Pour réduire le risque de choc électrique: Un appareil électrique ne doit jamais être laissé...
-
Page 6: Table Of Contents
Table of Contents SECTION 1. NAMES OF PARTS Name of Parts ..............................Standard Accessories............................SECTION 2. GETTING READY TO SEW Connecting the Machine to the Power Supply ................. Foot Control ............................Presser Foot Lifter ..........................Changing the Presser Foot ......................... Extension Table ........................... - Page 7 Indice SECCION 1. NOMBRE DE LAS PARTES Nombre de las partes ............................Accessorios Estándares............................. SECCION 2. PREPARACIÓN PARA COSER Conectando la máquina a la alimentación ..................Pedal de Control ..........................Elevandor de la Prensora ........................Cambiando la Pata Prensora ......................Extensión .............................
- Page 8 Table des Matières SECTION 1. IDENTIFICATION DES PIÈCES DE LA MACHINE Noms des pièces .............................. Accessoires standard ............................SECTION 2. PREPAREZ-VOUS Á COUDRE Connectez votre machine à l’alimentation électrique ..............Commande de pied ........................... Relève-presseur ..........................Changer le pied-presseur ......................... Tablette extensible ..........................
-
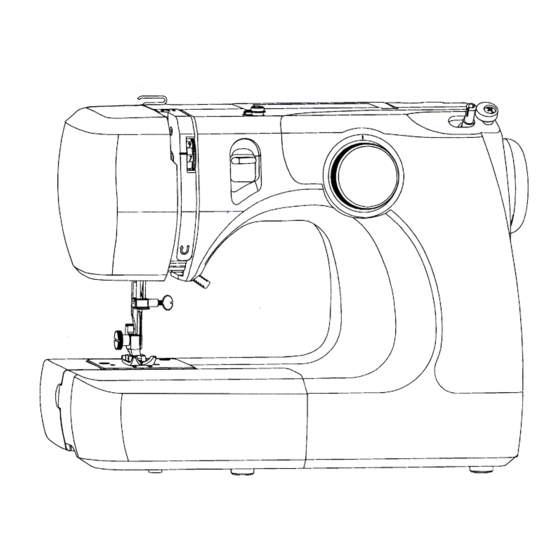
Page 9: Section 1. Names Of Parts
SECTION 1. NAMES OF PARTS 1. Stitch Selector 2. Bobbin Winder Stopper 3. Bobbin Winder Spindle 4. Reverse Stitch Control 5. Bobbin Winding Tension Disk 6. Thread Take-Up Lever 7. Upper Thread Guide 8. Thread Tension Dial 9. Needle 10. Presser Foot 11. -
Page 10: Seccion 1. Nombre De Las Partes
SECCIÓN 1. NOMBRE DE LAS PARTES SECTION 1. NOMS DES PIÈCES 1. Selector de puntada 1. Sélecteur de points 2. Freno de devanado de la bobina 2. Bouchon de la bobineuse 3. Eje de devanado de la bobina 3. Tige de la bobineuse 4. -
Page 11: Section 2. Getting Ready To Sew
SECTION 2. GETTING READY TO SEW Connecting Machine to Power Supply a. Power supply plug b. Power switch c. Outlet d. Machine socket e. Machine plug CAUTION: Always make sure that the machine is unplugged from the power source and the power switch is on “O”... -
Page 12: Seccion 2. Preparación Para Coser
SECCIÓN 2. PREPARACION PARA COSER SECTION 2. PRÉPAREZ-VOUS À COUDRE Connectez votre machine à l’alimentation Conectando la máquina a la alimentación électrique a. Enchufe de la fuente de alimentación a. Prise électrique b. Llave de encendido b. Interrupteur c. Tomacorriente c. -
Page 13: Presser Foot Lifter
Presser Foot Lifter a. Presser foot lifter b. Normal up position c. Highest position The presser foot lifter raises and lowers the presser foot. You can raise it about 1/4” (0.6 cm) higher than the normal up position for easy removal of the presser foot or to allow you to place heavy fabric under the presser foot. -
Page 14: Elevandor De La Prensora
Elevador de la pata prensora Relève-presseur a. Elevador de la pata prensora a. Relève-presseur b. Posición normal superior b. Position haute normale c. Posición más alta c. Position supérieure El elevador de la pata prensora levanta y baja la pata Le relève-presseur s'élève et se rabaisse. -
Page 15: Changing The Needle
Changing the Needle Important: Turn the power switch to the “O” (Off) position before inserting or removing the needle. The needle should be replaced at the first sign of thread breakage or skipped stitches. Always select the correct type of needle and size for the fabric being sewn. 1. -
Page 16: Reemplazo De La Aguja
Reemplazo de la aguja Changez l'aiguille Importante: Apague la llave de encendido antes de IMPORTANT: Avant de mettre ou d'enlever une aiguille, colocar o quitar la aguja. mettre en position « O » (Off). Il faut changer d'aiguille aux premiers signes de ruptures ou Reemplace la aguja ni bien comience a cortar el hilo o a saltear puntadas. -
Page 17: Bobbin Winding
Bobbin Winding Fig. 1 To Remove the Bobbin Case: 1. Remove the extension table from the sewing machine by pulling it to the left. 2. Open the shuttle cover (a) by pulling down the tab that is on the left side of the cover. (Fig. 1) 3. -
Page 18: Devando De La Bobina
Devanado de la bobina Enroulage de la bobine Para sacar el soporte del carrete: Pour retirer le boîtier de la bobine: 1. Saque la extensión de la máquina de coser jalándola 1. Retirez la tablette extensible de la machine à coudre en hacia la izquierda. -
Page 19: Threading The Machine
Threading the Machine Threading the Upper Thread (Fig. 1): Fig. 1 Caution: Before threading, make sure that the machine is turned “Off”. 1. Place a spool of thread on the spool pin with the thread coming off in a clockwise direction (a). 2. -
Page 20: Enhebrado De La Máquina
Enhebrado de la Máquina Enfilage de la machine Enhebrando el hilo superior (Fig. 1): Enfilage du fil du haut (Fig. 1): Advertencia: Verifique que la máquina esté apagada Mise en garde: Assurez-vous que la machine à coudre est antes de enhebrarla. sur «... -
Page 21: Adjusting The Needle Thread Tension
Adjusting the Needle Thread Tension Thread Tension: Note: The bobbin thread tension has been adjusted at the factory and readjustment is not usually required. Lower thread tension: To test the bobbin thread tension, remove the bobbin case with the bobbin from the sewing machine and hold the bobbin case suspended by the thread. -
Page 22: Ajustando La Tensión Del Hilo De La Aguja
Ajustando la tensión del hilo de la aguja Ajustez la tension du fil d’aiguille Tensión del hilo: Tension du fil: Nota: La tensión del hilo de la bobina ha sido ajustada en AVERTISSEMENT: La tension du fil de la bobine a été la fábrica y normalmente no hace falta ajustarla otra vez. -
Page 23: Section 3. Basic Sewing
SECTION 3. BASIC SEWING Choosing Your Stitch Pattern: Fig. 1 1. Raise the needle above the fabric. 2. Turn the stitch selector dial to the desired stitch pattern. (Fig. 1) Note: To avoid damaging the needle or your fabric, make sure that the needle is up and out of the fabric before selecting a stitch. -
Page 24: Straight Stitch Sewing
Straight Stitch Sewing: The straight stitch is one of the most commonly used and versatile type of stitches. a. Stitch selector A ~ C b. Needle thread tension 2 ~ 6 c. Presser foot All purpose foot 1. Select the straight stitch (A ~ C). (Fig. 1) Select Straight Stitch 2. -
Page 25: Costura Con Puntada Recta
Costura con puntada recta: Couture point droit: La puntada recta es una de las puntadas más usadas y Le point droit est le plus polyvalent et le plus utilisé. versátiles. a. Sélecteur de point A ~ C a. Selector de puntada A ~ C b. -
Page 26: Basic Zigzag
Basic Zigzag: The zigzag stitch is another stitch that is very versatile. It Fig. 1 can be a utility stitch for sewing a button, making a buttonhole, hemming, overcasting, mending and darning. It Set Needle Thread Tension can also be used to decorate with trims, appliques and cut Ajuste la tensión del hilo de la aguja work, or as a decorative stitch. -
Page 27: Costura Basica En Zigzag
Costura básica en zigzag: Zigzag de base: La puntada en zigzag es otra puntada muy versátil. Puede Le point zigzag est aussi très utilisé. C’est un point utile ser una puntada utilitaria para coser un botón, hacer un pour coudre un bouton, faire une boutonnière, un point de ojal, dobladillos, hilvanados, remiendos y zurcidos. -
Page 28: Blind Hem Stitch
Blind Hem Stitch: The blind hem stitch is used to sew hems on all your sewing Fig. 1 projects. a. Stitch selector H ~ I Set Needle Thread Tension b. Needle thread tension 1 ~ 4 Ajuste la tensión del hilo c. -
Page 29: Using The Hemmer Foot
Using the Hemmer Foot: Use the Hemmer foot for hems in fine or sheer fabrics. Fig. 1 a. Stitch selector A ~ C b. Needle thread tension 3 ~ 5 c. Presser foot Hemmer foot Select Stitch 1. Select the desired stitch (A ~ C). (Fig. 1) Seleccione la puntada 2. -
Page 30: Using The Zipper Foot
Using the Zipper Foot : a. Stitch selector A ~ C Fig. 1 b. Needle thread tension 3 ~ 5 c. Presser foot Zipper foot 1. Select the desired stitch (A ~ C). (Fig. 1) Select Stitch 2. Set the needle thread tension between 3 ~ 5. (Fig. 1) Seleccione la puntada Sélectionnez un point 3. -
Page 31: Using The Buttonhole Foot
Using the Buttonhole Foot: Fig. 1 a. Stitch selector b. Needle thread tension 1 ~ 5 Select Stitch c. Presser foot Buttonhole foot Seleccione la puntada Sélectionnez un point Starting to Sew: Set Needle Thread Tension 1. Remove the All Purpose foot and replace with the Ajuste la tensión del hilo Buttonhole foot. -
Page 32: Usando La Pata Prensora Para Ojales
Usando la pata prensora para ojales: Utilisation du pied pour boutonnière: a. Selector de puntada a. Sélectionnez un point b. Tensión del hilo de la aguja 1 ~ 5 b. Tension du fil d’aiguille 1 ~ 5 c. Pata prensora Pata para ojales c. -
Page 33: Section 4. Care Of Your Machine
SECTION 4. CARE OF YOUR MACHINE Fig. 1 Note: Turn off the power switch and unplug the machine before cleaning or doing any type of maintenance. Do not dismantle your machine other than as explained in this section. Cleaning the Feed Dog: 1. -
Page 34: Sección 4. Cuidado De Su Máquina
SECCIÓN 4. CUIDADO DE SU MÁQUINA SECTION 4. ENTRETIEN DE VOTRE MA- Nota: Apague la llave de encendido y desenchufe la CHINE máquina antes de limpiarla o de realizar cualquier tipo Avertissement: Avant d'effectuer l'entretien ou de de mantenimiento. No desarme la máquina de ninguna nettoyer votre machine assurez-vous qu'elle est otra forma que no esté... -
Page 35: Replacing The Light Bulb
Replacing the Light Bulb: Caution: Always make sure that the machine is unplugged Fig. 1 from the power source and the power switch is turned off. Let the light bulb cool a little before changing as it could be HOT. 1. -
Page 36: Troubleshooting Guide
Trouble shooting guide Problem Cause Correction Rethread the machine. The machine is not threaded correctly. Reduce the thread tension (lower The thread tension is too tight. number). The thread is too thick for the needle. Select a larger needle. Upper thread breaks The needle is not inserted correctly. -
Page 37: Guía Para La Localización De Problemas
Guía para la localización de problemas Problema Causa Solución 1. La máquina no está enhebrada 1. Enhebre nuevamente la máquina. correctamente. 2. El hilo está muy tensionado. 2. Reduzca la tensión del hilo (número menor). 3. Seleccione una aguja más grande. 3. -
Page 38: Guide De Dépannage
Guide de dépannage Problème Cause Correction 1. Renfilez la machine. 1. La machine n’est pas enfilée correctement. 2. Diminuez la tension du fil (chiffre plus faible). 2. La tension du fil est trop grande. 3. Choisissez une aiguille plus grosse. 3. - Page 39 25 YEAR LIMITED WARRANTY EURO-PRO Operating LLC warrants the sewing machine head and any of its parts other than those covered by the 2- year warranty below or those subject to normal wear and tear for a period of 25 years from date of the original purchase, to be free of defective parts due to imperfections in the workmanship and materials, subject to the following conditions, exclusions and exceptions.
- Page 40 GARANTÍA LIMITADA DE 25 AÑOS EURO-PRO Operating LLC garantiza el cabezal de la máquina de coser y cualquiera de sus partes que no estén cubiertas por la siguiente garantía de 2 años, o aquellas sujetas al desgaste normal, por un período de 25 años desde la fecha de compra original, contra cualquier falla de materiales o fabricación, sujeto a las siguientes condiciones, exclusiones y excepciones.
- Page 41 GARANTIE LIMITÉE DE 25 ANS EURO-PRO Operating LLC garantit cette tête machine à coudre ainsi que toutes ses pièces, autres que celles couvertes par la garantie de 2 ans ci-dessous et autres que celles assujetties à l’usure normale, contre toute défectuosité matérielle ou de main d’œuvre pour une période de 25 ans à...