
Related Manuals for Shark Euro-Pro 384


Summary of Contents for Shark Euro-Pro 384
-
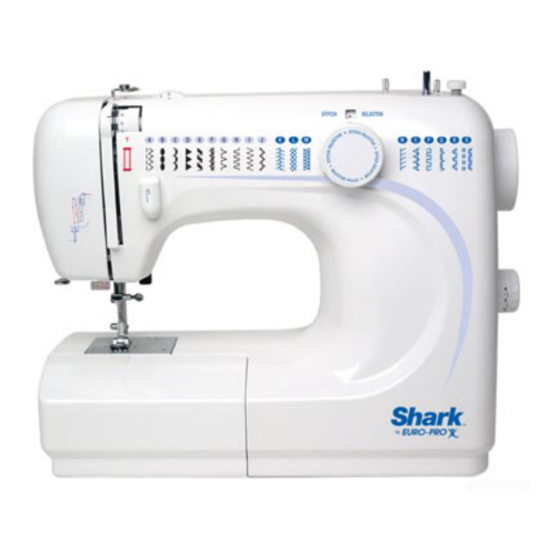
Page 1: Instruction Manual
Instruction Manual Instruccion Manual Manuel D’instruction Model / Modelo / Modéle EURO-PRO Operating LLC Boston, MA, 02465 4400 Bois Franc, St. Laurent, Quebec, H4S 1A7 Tel.: 1 (800) 798-7398, www.euro-pro.com... -
Page 3: Important Safety Instructions
IMPORTANT SAFETY INSTRUCTIONS When using an electrical appliance, basic safety precautions should always be followed, including the following: Read all instructions before using (this sewing machine) DANGER To reduce the risk of electric shock: An appliance should never be left unattended when plugged in. Always unplug this appliance from the electric outlet immediately after using and before cleaning. -
Page 4: Instrucciones Importantes De Seguridad
INSTRUCCIONES IMPORTANTES DE SEGURIDAD Siempre deberá seguir las precauciones de seguridad básicas al usar este aparato eléctrico, incluyendo las siguientes precauciones: Lea todas las instrucciones antes de usar esta máquina de coser PELIGRO Para reducir el riesgo de choques eléctricos: Se requiere supervisión constante de este aparato cuando esté... - Page 5 - 3 -...
-
Page 6: Table Of Contents
CONTENTS Name of parts ................................7-8 Accessories ..................................9 Before sewing (Power supply and sewing lamp) ......................10 Removing extension table .............................. 11 Free-arm sewing................................11 Winding the bobbin ................................. 12 Removing bobbin case and bobbin..........................13 Inserting bobbin into bobbin case ........................... 13 Inserting bobbin case into shuttle race ........................... - Page 7 CONTENIDO Piezas principales.................................7-8 Accesorios..................................9 Antes de coser ................................1 0 Uso de la mesa ajustable para coser tejidos de gran superficie..................11 Coser a brazo libre (Freearm) ............................11 Bobinar ................................... 12 Retirar el casquillo de la bobina y la bobina ........................13 Colocar la bobina en el casquillo de la bobina .......................
- Page 8 CONTENU Pieces principales ................................7-8 Accessoires..................................9 Avant de coudre ................................1 0 Utilisation de la table pour pousser pour pouvoir coudre des grandes surfaces de toile..........11 Coudre à bras libre................................. 11 Remplir la canette ................................12 Sortir la capsule de la canette et la canette ........................13 Mettre la canette dans la capsule...........................
-
Page 9: Name Of Parts
Name Of Parts (Front View) / Piezas Principales (Parte Delantera) Pieces Principales (Face Avant) 1. Spool pin 1. Tiges porte-bobines 2. Bobbin winder stopper 2. Arrêt bobineur 3. Pattern selector window 3. Affichage du point 4. Pattern selector dial 4. Sélecteur de point 5. - Page 10 Rear View / Vista Posteriore / Face Arrière 1. Axe bobineur 1. Bobbin winder spindle 2. Guide-fil supérieur 2. Upper thread guide 3. Levier du pied presseur 3. Presser foot lever 4. Vis de serrage 4. Thumb screw 5. Pied de couture 5.
-
Page 11: Accessories
Accessories Accesorios Accessoires Accessorios standard (1) Accessoires standard (1) Standard accessories (1) a. Pie universal a. Pied universel a. All purpose foot b. Pie para ojales b. Pied boutonnière b. Buttonhole foot c. Pie para puntada invisible c. Pied pour ourlet invisible c. -
Page 12: Before Sewing (Power Supply And Sewing Lamp)
Before sewing / Antes de coser / Avant de coudre Fit plug into the machine. Insert plug into the mains socket. Sewing speed can be varied by the foot control. Note: Use only FDM model KD-1902 foot controller with sewing machine. CAUTION : Always disconnect the machine from the power source when the machine is not being used, when cleaning the machine or when changing the lamp. -
Page 13: Removing Extension Table
Removing Extension Table Uso De La Mesa Ajustable Para Coser Tejidos De Gran Superficie Utilisation De La Table Hold the snap-in sewing table horizontal, and push it in the direction of the arrow. The inside of the snap-in sewing table can be utilzed as an accessory box. -
Page 14: Winding The Bobbin
Winding The Bobbin / Bobinar / Remplir La Canette 1. Disengage the sewing function by pulling the hand wheel out. 2. Thread as shown. (Fig. 1) 3. When bobbin is filled, re-engage the clutch. (Fig. 2) Push bobbin winder spindle in direction of the arrow. (Fig. 3) When bobbin winding is completed, return spindle to its original position. -
Page 15: Removing Bobbin Case And Bobbin
Removing Bobbin Case And Bobbin / Retirar El Casquillo De La Bobina Y La Bobina Sortir Le Boîtier De La Canette Et La Canette Fig. 2 Fig. 3 Fig. 1 Hinged latch Palanca Levier basculable 1. Raise the needle to its highest position and open shuttle race cover. (Fig. 1) 2. -
Page 16: Inserting Bobbin Case Into Shuttle Race
Inserting Bobbin Case Into Shuttle Race Colocar El Casquillo De La Bobina En La Guia Del Agarrador Mise En Place De La Canette 1. Raise the needle to its highest position. Pull the thread to the front, open the latch of the bobbin case and hold it. 2. -
Page 17: Threading Upper Thread & Twin Needle Threading
Threading Upper Thread / Enhebrar el Hilo Superior / Enfilage du Fil Supérieur Caution: Before threading, turn power switch to "O". Raise the needle bar to its highest position. Follow exactly the numbered threading sequence illustrated. If you skip a step or fail to properly engage the thread in any of the thread guides, the machine will not sew properly. -
Page 18: Auto Threader
Auto Threader / Enhebrado Automatico De La Aguja Enfileur Automatique Needle must be in its highest position and presser foot down while using the needle threader. NOTA: Cuando use el enhebrador automático, la aguja deberá estar en su punto más alto y el pie prensatelas en su posición de apoyo. Pour l’emploi de l’enfileur automatique l’aiguille doit se trouver dans la position la plus haute et le pied de biche doit être descendu. -
Page 19: Drawing Up The Bobbin Thread
Drawing Up The Bobbin Thread / Subir El Hilo De Rosca Inferior / Remonter Le Fil Inférieur 1. Hold the upper thread with left hand, turn the hand wheel slowly towards you until the needle goes down and comes up. Then stop the hand wheel when the take up lever is at its highest position. -
Page 20: Levelling Machine
Levelling The Machine / Estabilidad De La Máquina Stabilisation De La Machine If the sewing machine is not Down level, remove the sewing table Hacia abajo and adjust the levelling by turning En bas the foot as illustrated. Si la máquina de coser no está estable, retire la mesa plana corrediza Hacia arriba y ajuste el nivel haciendo rotar el pie... -
Page 21: Adjusting Thread Tension
Adjusting The Thread Tension / Ajustar Las Tensiones Del Hilo De Rosca Réglage De La Tension Du Fil Upper thread tension Upper thread tension may be adjusted by turning the thread tension dial. Normal upper thread tension: 4 - 6 A. -
Page 22: Regulating The Presser Foot Pressure
Regulating The Presser Foot Pressure / Regular La Presión Del Pie Prensatela / Réglage De La Pression Du Pied De Biche 1. Turn the knob to the desired pressure; for light fabrics set the lever at 3, set at 2 for medium fabrics and at 1 for hea vy fabrics. 2. -
Page 23: Changing Needle
Changing the Needle / Reemplazo De La Aguja / Changement De L´aiguille Needle clamp screw Tornillo de abrazadera de la aguja Vis pincant l´aiguille Tighten Apretar Pincer Loosen Aflojar Défaire Flat face side away from you Lado plano hacia la parte posterior Côté... -
Page 24: Fabric-Thread-Needle-Table
Fabric-Thread-Needle-Table / Tabla De Tejidos-Hilo-Aguja Survue Des Tissus Des Fils Et Des Aiguilles Please pay attention to the following list as a guide for sewing different types of fabric. Tenga en cuenta el tipo de tejido que va a usar. Faites attention aux indications pour les différents tissus . -
Page 25: Sewing (Pattern Selector) And Operation Table
Sewing (Pattern Selector) And Operation Table Tabla De Costura, Selector De Diseño Coudre (Choix Du Motif De Couture) & Equipement De Couture Drop feed Stitch width Stitch length Presser foot Stitch patterns Avance Anchura de puntada Largo de puntada Costura, diseño Griffes Largeur de couture Longueur de piqûre... - Page 26 Honeycomb stitch Nido de abeja Point nid d'abeille Double overlock stitch Puntada doble de sobrehilar Point double overlock Slant over edge Sobrehílo inclinado Piqûre inclinée Pullover stitch Puntada jersey Point pour pullovers Automatic embroidery Puntada decorativa Points d’ornement Elastic blind hem Puntada elástica invisible Points d’ornement Elastic embroidery stitch...
-
Page 27: To Start Sewing
To Start Sewing / Comienzo De La Costura / Nous Commencons À Coudre Important hints: 1. Raise the take-up lever to its highest position before starting and after stopping sewing. 2. Hold both threads about 10 cms to the rear of the machine for the first two or three stitches. 3. -
Page 28: How To Finish Stitches
How To Finish Stitches / Remate De La Costura / Fin D´une Couture 1. Sew to the edge of seam. 2. Push the reverse button and sew in reverse for about 3-4 cms. 3. Raise the needle to its highest position. 4. -
Page 29: Straight Stitch
Straight Stitching & Needle Position / Costura Recta y Posición de la Aguja / Couture au Point Droit et Position d’Aiguille Stitch Selector Zig-Zag Foot Turn the pattern selector dial (4) so that the stitch display (3) shows the straight stitch position. Place the stitch width dial to “0”. -
Page 30: Zigzag Sewing
Zigzag Sewing - Zigzag - Couture au Point Zigzag Stitch Selector Zigzag Foot Turn the pattern selector to “A” or “S”. Function of the Stitch Width Dial The maximum zigzag stitch width for zigzag stitching is “5”; however, the width can be reduced on any pattern. The width increases as you move the zigzag dial from “0”... -
Page 31: Stretch Stitch Adjustment
Stretch Stitch Adjustment / Ajuste de la Puntada Elastica / Réglage-Point Extensible Back of the machine Adjustment Screw Detrás de la máquina Tornillo de Ajuste Arrière de la machine Vis d’Adjustement Direction of the screw Incorrect stitch shown Correct stitch shown Direccion del destornillador Muestra de puntada incorrecta Muestra de la puntada correcta... -
Page 32: Overlock Stitches
Overlock Stitches / Puntos overlock / Point Overlock Stitch Length Overcasting Foot Stitch Width The overcasting foot is an optional accessory that is not supplied with your machine. Seams, neatening, visible hems. The stitch width can be adjusted to suit the fabric. Turn the stitch length dial to “4”... -
Page 33: Straight And Zigzag Stretch Stitches
Straight And Zigzag Stretch Stitches / Costura Recta Elástica / Couture Elastique Stitch Length All Purpose Foot Stitch Width Use only for Stretch Zigzag Use this stitch with knitted, tricot or other stretchy fabrics. The stitch enables your seam to stretch with out breaking the thread. For Stretch Straight Stitch: Set the stitch selector to position "S"... -
Page 34: Blind Stitch
Blind Stitch / Costura Invisible / Ourlet au Point Invisible Blind Stitch Foot Stitch Length Stitch Width Use the Blind Stitch foot for hems, curtains, trousers, skirts, etc. Set the Stitch Selector to position “F” for blind hem on stretch fabrics. Set the Stitch Width from “3 - 5”. -
Page 35: Button Sewing
Button Sewing / Cosido de Botones / Coudre des Boutons Stitch Length Stitch Width Button Foot Move the drop feed control down to lower the feed dogs. (1) (See page 21) Change the regular foot to the button sewing foot. Position the work under the foot. -
Page 36: Patchwork
Patchwork / Costura de Remiendo / Patchwork All Purpose Foot Stitch Width Stitch Length These stitches are used to join two pieces of fabric while leaving a space between their edges. 1. Fold over the edges over the two pieces of fabric for the hem and baste the edges to a thin piece of paper leaving a small space between them. -
Page 37: Zipper Sewing
Zippers and Piping / Colocación de Cremalleras / Pose d’Une Fermeture à Glissière Stitch Width Stitch Length Zipper Foot Set the pattern selector to “A”. Set the stitch length between “1” - “4”, depending to the thickness of the fabric. The zipper foot can be inserted right or left, depending on which side of the foot you are going to sew. -
Page 38: One-Step Buttonhole Sewing
One-step Buttonhole Sewing / Costura De Ojales De Un Paso Coudre Une Boutonnière En Une Étape 0.25~1 Buttonhole Foot Stitch Length Stitch Width Stitch width adjusting dial set between 4 & 5 Pattern selection dial select “ T ” Punto con disco de ajuste de anchura entre 4 & 5 Disco selector de estilo en “... -
Page 39: Costura De Ojales De Un Paso
One-step Buttonhole Sewing / Costura De Ojales De Un Paso Coudre Une Boutonnière En Une Étape Buttonhole sewing is a simple process that provides reliable results. However, it is strongly suggested to always make a practice buttonhole on a sample of your fabric and interfacing. Making a Buttonhole Using a tailor’s chalk, mark the position of the buttonhole on the fabric. -
Page 40: Hemming
Hemming (Optional) / Ruedos, Orlar (OpcIonal) / Faire Des Ourlets (Option) Hemmer Foot Stitch Width Stitch Length The hemmer foot is an optional accessory that is not supplied with your machine. 1. Raise the foot and the needle to its highest position. Replace the foot with the hemmer foot. -
Page 41: Twin Needle
Twin Needle (Optional) / Aguja Doble (OpcIonal) / Aiguille Jumellé (Option) 0~2.5 All Purpose Foot Stitch Length Stitch Width The twin needle is an optional accessory that is not supplied with your machine. Turn the stitch length dial to the desired stitch length. Set the stitch selector to "A". -
Page 42: Embroidery
Embroidery / Bordados / Broder Stitch Width Stitch Length Set the machine as illustrated. Remove the presser foot and the presser foot holder. Move the drop feed control down to lower the feed dogs. Fig. 1 (Fig. 1) Lower the presser foot lever before starting to sew. (Fig. 2) Adjust the stitch width according to the size of lettering or design. -
Page 43: Quilter
Quilting Foot (Optional) / Pie Para Acolchar (Opcional) / Pied de Ouatinage (Optionnel) Stitch Width Stitch Length Quilting Foot Quilting Guide Note: The quilting foot is an optional accessory and is not included with this machine. Set the pattern selector as illustrated to “A”. Insert the quilting guide into the presser foot holder and set the space as you desire. -
Page 44: Free Motion Darning
FREE MOTION DARNING (Optional) / ZURCIDA DE BRAZO LIBRE (Opcional) / REPRISE (Option) Move the drop feed control down to lower the feed dogs. (1) Remove the presser foot clamp. (2) Attach the darning/embroidery foot to the presser foot bar. The lever (A) should be behind the needle clamp screw (B). -
Page 45: Gathering Foot
Gathering foot (Optional) / Pie para fruncir (Opcional) / Pied de fronceur (Option) Set the pattern selector as illustrated. Attach the gathering foot. Sew a single row or multiple rows of straight stitches. If more gathering is required, loosen the upper thread tension to below 2 so that the lower thread lies on the under side of the material. -
Page 46: Appliqué
Applique (Optional) / Aplicación (Opcional) / Appliqué (Option) Turn the stitch length dial to the desired length. Turn pattern selector dial to zigzag. Select a narrow zigzag width. 0.5~1 Cut out the applique design and baste it to the fabric. Sew slowly around the edge of the design. -
Page 47: Walking Foot
Walking foot (Optional) / Pie regular (Opcional) / Pied de transport supérieur (Option) Note: The walkong foot accessory is optional. it is not included with this machine. Always try to sew first without the walking foot accessory which should be used only when necessary. -
Page 48: Maintenance (Cleaning And Oiling)
Maintenance / Manutención de la Máquine / Entretien de la Machine Caution: Always make sure that the machine is unplugged from the power source and the main switch is on “O” before inserting or removing any parts and before cleaning. Remove the stitch plate: Turn the handwheel until the needle is fully raised. -
Page 49: Checking Performance Problems - Troubleshooting
Troubleshooting Guide Guía Diagnóstico de Problemas Problem Probable cause What to do Disturbio Probable causa Solución - Feed dog down - Raise feed dog - Stitch length dial on “0“ - Set dial between 1 and 4 Fabric does not move - Light presser foot pressure - Increase pressure La tela no se mueve... -
Page 50: Comment Remédier Soi-Même Aux Petits Problèmes
Guide De Dépannage Dérangement Cause probable Réparation - La machine ne coud pas, seulement la roue - Veuillez tirer sur le bouton d´embrayage Le tissu n´est pas fonctionne transporté - La roue de la largeur des piqûres est en position “0“ - Mettez-la sur 1-4 - La pression du tissu est trop faible - Augmentez la pression du tissu... - Page 51 25 YEAR LIMITED WARRANTY EURO-PRO Operating LLC warrants the sewing machine head and any of its parts other than those covered by the 2- year warranty below or those subject to normal wear and tear for a period of 25 years from date of the original purchase, to be free of defective parts due to imperfections in the workmanship and materials, subject to the following conditions, exclusions and exceptions.
- Page 52 GARANTÍA LIMITADA DE 25 AÑOS EURO-PRO Operating LLC garantiza el cabezal de la máquina de coser y cualquiera de sus partes que no estén cubiertas por la siguiente garantía de 2 años, o aquellas sujetas al desgaste normal, por un período de 25 años desde la fecha de compra original, contra cualquier falla de materiales o fabricación, sujeto a las siguientes condiciones, exclusiones y excepciones.
- Page 53 GARANTIE LIMITÉE DE 25 ANS EURO-PRO Operating LLC garantit cette tête machine à coudre ainsi que toutes ses pièces, autres que celles couvertes par la garantie de 2 ans ci-dessous et autres que celles assujetties à l’usure normale, contre toute défectuosité matérielle ou de main d’œuvre pour une période de 25 ans à...