
Related Manuals for EverFocus EHN3160 Plus


Summary of Contents for EverFocus EHN3160 Plus
- Page 1 EHN Plus Series Outdoor Vandal Proof IP Dome Camera Quick Installation Guide Copyright © EverFocus Electronics Corp, Release Date: October, 2012...
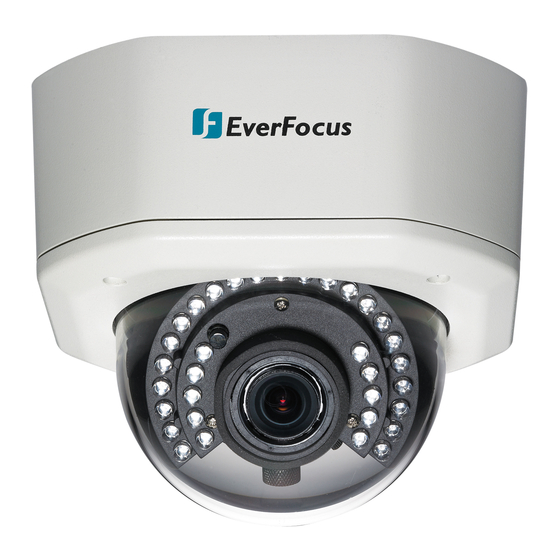
- Page 2 EHN Plus Series 1. Overview The EHN Plus series vandal proof IP dome Camera is designed for outdoor use. The series comes in three models: EHN3160 Plus / 3260 Plus / 3340 Plus. Model Name Megapixel P-Iris EHN3160 Plus 1.3 MP...
-
Page 3: System Requirement
Note: Contact the shipper if any items appear to have been damaged in the shipping process. If any items are missing, notify your EverFocus Electronics Corp. Sales Representative or Customer Service Branch. Please also keep the shipping carton for possible future use. -
Page 4: Terminal Block
EHN Plus Series 2. Terminal Block The I/O terminal block, located on the camera module, can be used to develop applications for alarm input and output, two-way audio, TV-output or a variety of other functions. Note: 1. You can unplug the terminal block from the camera module for easier wiring. 2. -
Page 5: Important Notice For The Installation
EHN Plus Series 3. Installation Important Notice for the Installation If you want to mount the camera on the wall where direct sunlight may occur, it is strongly recommended to mount the camera using the L-Shaped Mounting Bracket to prevent the camera from being damaged by direct sunlight. - Page 6 EHN Plus Series 2. Unscrew the four screws and remove the Base Plate from the Camera Case. Camera Case Base Plate 3. Unscrew the two screws and take out the camera module. 4. Screw the Base Plate to the Wiring Box using the supplied four screws. Wiring Box Base Plate...
- Page 7 EHN Plus Series If you want to wire the cables through the bottom of the Camera Case, follow the steps below: a. Remove the Circle Plate on the bottom of the Camera Case. You can simply loosen the Circle Plate using a coin. Circle Plate Camera Case b.
- Page 8 EHN Plus Series d. Screw Adapter Plate between the Base Plate and Wiring Box. Wiring Box Adapter Plate Base Plate 5. Screw the Camera Case back to the Base Plate. Base Plate Camera Case 6. Insert the network / PoE cable or the additional cables through the Cable Gland. Up to three cables can be inserted.
- Page 9 EHN Plus Series • Transparent x 3 (1 mm thickness) • Black x 1 (0.5 mm thickness) b. Remove the Plug(s) from the Stopper (depends on the number of cables inserted). One Cable Conduit can only be inserted with one cable. Cable Conduit Plug Stopper...
- Page 10 EHN Plus Series Due to the variable cable diameters, for better waterproofing, it is strongly recommended that you apply silicon sealants to the inner Screw Cap. 7. Connect the network / PoE cable to the LAN / PoE port on the camera module. 8.
- Page 11 EHN Plus Series 12. Access the camera live view for adjusting camera lens and angles. For details on how to access the camera live view, see Step 6 and 7 in 4. Accessing the Camera. a. To adjust camera lens, use the Zoom / Focus screws. Zoom Screw Focus Screw b.
-
Page 12: Adjustment Rings
EHN Plus Series 3.1 Adjustment Rings The four Adjustment Rings, including one black and three transparent rings, attached on the Cable Gland are used to tighten the cable gland for better waterproofing. The Cable Gland is designed with three cable conduits for inserting the cables. You can insert a network cable (Cat 5 or Cat 6) through one of the three conduits. -
Page 13: Accessing The Camera
EHN Plus Series 4. Accessing the Camera You have to assign an IP address for your camera to be accessible. To assign an IP address to the camera, use the IP Utility (IPU) software included in the software CD. Please connect the camera in the same LAN of your computer. - Page 14 EHN Plus Series 5. To change the IP address, double-click the IP Address of the camera. Type a new IP address and then click Set IP Address to save the settings. You can also change the other settings by double-clicking the values. After configuring the values, click Save Configuration.
-
Page 15: Connecting To The Network
EHN Plus Series 5. Connecting to the Network You can use one of the methods below to connect the camera to the network. Router or LAN Connection This is the most common connection in which the IP camera is connected to a router and allows multiple users on and off site to see the IP camera on a LAN/WAN (Internet). -
Page 16: Direct High-Speed Connection
EHN Plus Series Direct High-Speed Connection In a Direct High-Speed Connection, the camera connects directly to a modem without the need for a router. You need to set the static or dynamic WAN IP address assigned by your ISP (Internet Service Provider) in the camera’s configuration web pages. -
Page 17: Upgrading Firmware
EHN Plus Series 6. Upgrading Firmware You can upgrade camera’s firmware using the IP Utility software, which is included in the software 1. Follow Step 1 to Step 4 in 4. Assigning an IP Address to log in the camera. 2. - Page 18 FAX: +86 755 2765 0337 www.everfocus.com.cn www.everfocus.com.cn marketing@everfocus.com.cn marketing@everfocus.com.cn EverFocus USA - New York: EverFocus USA - California: 1801 Highland Avenue, Unit A, Duarte, CA 91010, USA 415 Oser Avenue, Unit S, Hauppauge, NY 11788, USA TEL: +1 626 844 8888...