Table of Contents
Advertisement
Advertisement
Table of Contents

Summary of Contents for Ironman Fitness ATIS 1000
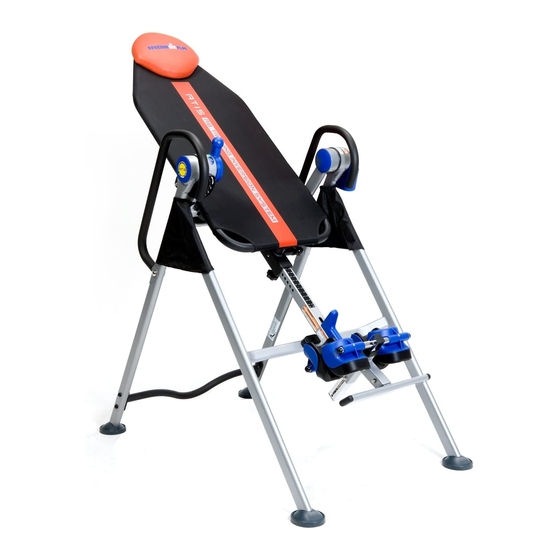
- Page 1 OWNER’S MANUAL 1000 2000 Model # 5900 / 5901 The specifications of this product may vary from this photo and are subject to change without notice. IRONMAN, IRONMAN TRIATHLON and M-DOT are registeved trademarks of World Triathlon Corporation. This product is licensed by the IRONMAN TRIATHLON.
-
Page 2: Table Of Contents
TABLE OF CONTENTS Page # Service Warning labels Safety precautions Included hardware & tools Overview drawing Part list Assembly How to use Warm-up Storage / maintenance instructions Warranty Part request form... -
Page 3: Service
SERVICE To request for product service and order replacement parts, please call our customer service department at 1-866-924-1688 Monday through Friday, 8:00 am-5:00 pm Pacific Standard Time, or email at: service@paradigmhw.com Please have the following information ready when requesting for service: Your name Phone number Owner’s manual... -
Page 5: Safety Precautions
SAFETY PRECAUTIONS This inversion Table was designed and built for optimum safety. However, certain precautions apply whenever you operate the exercise equipment. Be sure to read the entire manual before assembling and operating this equipment. Also, please note the following safety instructions: 1. -
Page 6: Included Hardware & Tools
INCLUDED HARDWARE & TOOLS Dimension: mm Shown in real size 1:1 scale 75 Nylon Washer (Ø8.5xØ25xt2.5) / 1 pc 50 Screw (ST4.8 x 20) / 1 pc 46 Bolt (M8 x 45) / 2 pc 57 Bolt (M6 x 15) / 2 pc 59 Bolt (M10 x 45) / 2 pc 61 Washer (Ø8.5xØ20xt1.5) / 3 pc 49 Bolt (M6 x 20) / 4 pc... -
Page 7: Overview Drawing
OVERVIEW DRAWING... -
Page 8: Part List
PART LIST Part# Part# Desc ription Quan. Desc ription Quan Front Frame 42 Round End Cap Ø25 2R Rig Heel Holder Frame 51 Hex Head Bolt M8x45 10 Upper Boom Bushing 11 Folding Arm 53 Screw M3.5x12 12 In-Step Frame 54 Screw M3.5x15 13 Plastic Bushing 15 In-Step Frame End Cap... -
Page 9: Assembly
ASSEMBLY Open the Frame and lay it on its side. 60 Washer 49 B Stand the Frame up 70R Right Protective Cover 70L Left Protective Cover Place Bed onto Pivot Frame Place the bed into the frame - just as the picture shows. Insert the two #43 bolts with one washer 62 Washer on each side as shown in the instructions. - Page 10 ASSEMBLY 6 Headrest (6 Adjustable Holes) 61 Washer 46 Bolt 9 Heel Holder Frame 3 Boom 8 Rear Rod 67 Nylon Nut 17 Square End Cap 50 Screw 68 Hex Head Bolt 60 Washer Assemble In Step Frame in the middle hole. Remove the 17 Square End Cap on the back of You can adjust to bottom or top hole later so the square bracket of 9 Heel Holder Frame.
- Page 11 ASSEMBLY Pull Spring Knob and insert First remove 80 Screws from the bars, insert Heel Holders, then fasten Screws and back off Boom, then fasten 19 Knob about ¼ turn. 79 Spring Knob 19 Knob 3 Boom 7 Heel Holder 80 Screw 72 Washer 57 Bolt...
- Page 12 ASSEMBLY Lock Boom You can proceed to this step if the unit is for retail display or if you wish to prevent unsupervised usage. 74 Bolt 75 Nylon Washer...
-
Page 13: How To Use
HOW TO USE Set Boom to your height Turn Knob counter-clockwise to losen Boom Pull Spring Knob as you adjust the Boom Release Spring Knob and turn Knob clockwise to de-rattle the Boom Spring Knob Knob Boom Mounting Make sure Lever is at STOP position To unlock Heel Holder: Press Release Handle forward to unlock as you pull Heel Holder Frame Release Handle... - Page 14 HOW TO USE Get to vertical angles Raise both arms above your head, grab Inversion Handle Push against the Inversion Handle with left arm, push Lever forward to STOP position If you can’t reach Inversion Handle after raising both arms, raise the Boom.
-
Page 15: Warm-Up
WARM-UP The WARM-UP is an important part of any workout. It should begin every session to prepare your body for more strenuous exercise by heating up and stretching your muscles, increasing your circulation and pulse rate, and delivering more oxygen to your muscles. HEAD ROLLS INNER THIGH STRETCH Rotate your head to the right for... -
Page 16: Storage / Maintenance Instructions
STORAGE ATIS 1000 /2000 can be folded for storage. MAINTENANCE INSTRUCTIONS You should check your inversion table for any kind of wear and tear before each use. 1. Check the pivot arms, bed, heel holders for wear and tear 2. Replace damaged and worn components immediately... -
Page 17: Warranty
ONE YEAR LIMITED WARRANTY Paradigm Inc. warrants to the original purchaser that this product is free from defects in material and workmanship when used for the purpose intended, under the conditions that it has been installed and operated in according to Paradigm’s Owner) ’ s Manual. Paradigm’s obligation under this warranty is limited to replacing free of charge, any parts which may prove to be defective under normal home use. -
Page 18: Part Request Form
PART REQUEST FORM Fax this form to 1-626-810-2166 Or email customer service requests to : service@paradigmhw.com NAME: ___________________________________________ ADRRESS: _________________________________________ TELEPHONE: (day) __________________________________ (night) ________________________________ (fax)__________________________________ MODEL #: _________________________________________ PURCHASE DATE: ___________________________________ PLACE OF PURCHASE: _______________________________ Part # Description Quan. * YOUR ORDER WILL BE PROCESSED WITHIN 3 BUSINESS DAYS OFFICIAL USE ONLY SHIP DATE: ____________________________________...


