Table of Contents
Advertisement
Quick Links
Advertisement
Table of Contents

Related Manuals for Ironman Fitness 5201


Summary of Contents for Ironman Fitness 5201
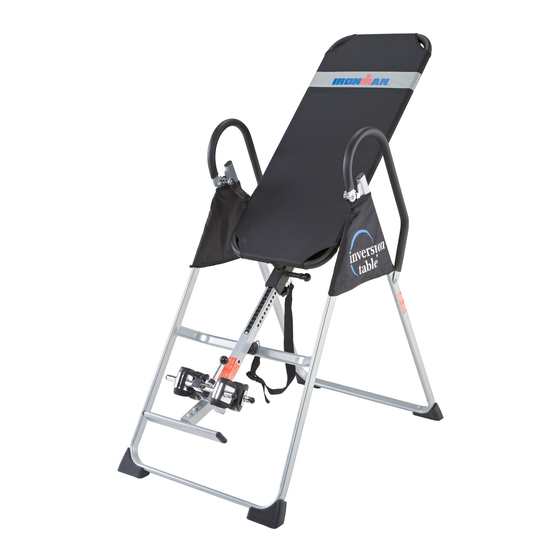
- Page 1 Gravity 1000 Model 5201 The specifications of this product may vary from this photo and are subject to change without notice. IRONMAN, IRONMAN TRIATHLON and M-DOT are registeved trademarks of World Triathlon Corporation. This product is licensed by the IRONMAN TRIATHLON.
-
Page 2: Service
SERVICE To request for product service and order replacement parts, please call our customer service department at 1-866-924-1688 Monday through Friday, 8:00 am-5:00 pm Pacific Standard Time, or email at: service@paradigmhw.com Please have the following information ready when requesting for service: Your name Phone number Owner’s manual... -
Page 3: Part Fax Request Form
PART REQUEST FAX FORM Fax this form to 1-626-810-2166 Or email customer service requests to : service@paradigmhw.com NAME: ________________________________________________________________ ADRRESS: ______________________________________________________________ TELEPHONE: (day ) ______________________________________________________ (night ) _____________________________________________________ (fax )_______________________________________________________ MODEL #: ______________________________________________________________ PURCHASE DATE: ________________________________________________________ PLACE OF PURCHASE: ____________________________________________________ Part # Description Quan. -
Page 4: Table Of Contents
TABLE OF CONTENTS Page # Service Part fax request form Safety precautions Overview drawing Part list Included hardware & tools Assembly How to use Storage Maintenance instructions Placement of warning labels Warm-up Warranty... -
Page 5: Safety Precautions
SAFETY PRECAUTIONS This inversion Table was designed and built for optimum safety. However, certain precautions apply whenever you operate the exercise equipment. Be sure to read the entire manual before assembling and operating this equipment. Also, please note the following safety instructions: 1. -
Page 6: Overview Drawing
OVERVIEW DRAWING... -
Page 7: Part List
PART LIST Part # Description Quan. Part # Description Quan. Front U-Frame Upper Bed Frame Bushing Rear U-Frame Handlebar Adjustable Boom Knob Bed Frame Rubber eel Holder Pivot Arm Nylon Strap Adjustable lnstep Frame Loop Strap Steel eel Holder Bracket Strap Lock Folding Arm Nylon Bed... -
Page 8: Included Hardware & Tools
INCLUDED HARDWARE / TOOL Part # Description Quan. Hex Head Bolt M6*47 Washer Ø 20 *Ø 8.5 * 1.5 Phillips Screw Driver Lock Nut M8 Lock Nut M6 Washer Ø 16 *Ø 6.5 * 1.0 Hex Head Bolt M8*23 Hex Head Bolt M8*50 Hex Head Bolt M8*38 Wrench (2 pcs) Bolt M6*20... -
Page 9: Assembly
ASSEMBLY Stand up the base by separating the u-frames. Pull the Front and Rear U-Frames (1,2) as far apart from each others as possible. Then push down on the middle of the two Folding Arms (8) until they are fully locked down. Attach the Left &... - Page 10 ASSEMBLY Slide the bottom of the Pivot Arms (5) into the brackets that located at each side of the Bed Frame (4), align to the desired hole on the arm with the peg on the bracket. Insert the peg into the hole to lock the Pivot Arms (5) in place.
- Page 11 ASSEMBLY Slide the Foot Bar (39) into the bottom of the Adjustable Boom (3) and align two of the holes on the Foot Bar (39) with two holes on the boom. Secure the Foot Bar (39) in place using two Hex Head Bolts (40), Lock Nuts (15), and four Wash- ers (13).
- Page 12 ASSEMBLY Attach the top end of Handlebar (29) onto the Rear U-Frame (2) and Pivot Arm Reinforcement Plate (54) with one Hex Head Bolt (38), Lock Nut (15), and two Washers (13). Attach the bottom end of the Handlebar (29) onto the Rear U-Frame (2) with one Hex Head Bolt (43), Lock Nut (15), and two Washers (13).
-
Page 13: How To Use
HOW TO USE Pivot Arm The Pivot Arms (5) can be adjusted to allow for a greater or lesser degree of inversion. To adjust the Pivot Arms (5) simply pull out on them until the post is out of the hole, slide them up or down to the desired hole, push in until the post goes through the desired hole, The bottom hole provides the least amount of inversion, while the top hole provides the greatest amount, It is recommended that begin- ners use the bottom hole until they are familiar with the inversion table. - Page 14 HOW TO USE Balaning the inversion table The inversion table is like a very sensitively balanced fulcrum. It responds to very slight changes in weight distribution. So, it is very important to make sure that the height is adjusted properly. To do this, mount the inversion table, lock your ankles into the heel holders, and lie back with your hands at your sides.
- Page 15 HOW TO USE Adjusting ankle holder Pull up the Small Spring Knob (17), slide the Adjustable Instep Frame (6) upward Stand on the foot-bar located at the bottom of the Adjustable Boom (3). Pull up on the Small Spring Knob (17), allow the Adjustable instep frame (6) to slide back into the Adjustable Boom (3).
-
Page 16: Storage
STORAGE For your storage convenience, the inversion table can be folded down to place against a wall, under a bed, or in a storage area. -
Page 17: Maintenance Instructions
MAINTENANCE INSTRUCTIONS You should check your INVERSION TABLE for any kind of wear and tear before every use. 1. Check the pivot arms, nylon bed, heel holder brackets, nylon straps, and the strap buckle for wear and tear. 2. Replace damaged and worn components immediately. 3. -
Page 18: Placement Of Warning Labels
PLACEMENT OF WARNING LABELS... -
Page 19: Warm-Up
WARM-UP The WARM-UP is an important part of any workout. It should begin every session to prepare your body for more strenuous exercise by heating up and stretching your muscles, increasing your circulation and pulse rate, and delivering more oxygen to your muscles. HEAD ROLLS INNER THIGH STRETCH Rotate your head to the right for... -
Page 20: Warranty
ONE YEAR LIMITED WARRANTY Paradigm Inc. warrants to the original purchaser that this product is free from defects in material and workmanship when used for the purpose intended, under the conditions that it has been installed and operated in according to Paradigm's Owner's Manual. Paradigm's obligation under this warranty is limited to replacing or of charge, any parts which may prove to be defective under normal home use.