Table of Contents
Advertisement
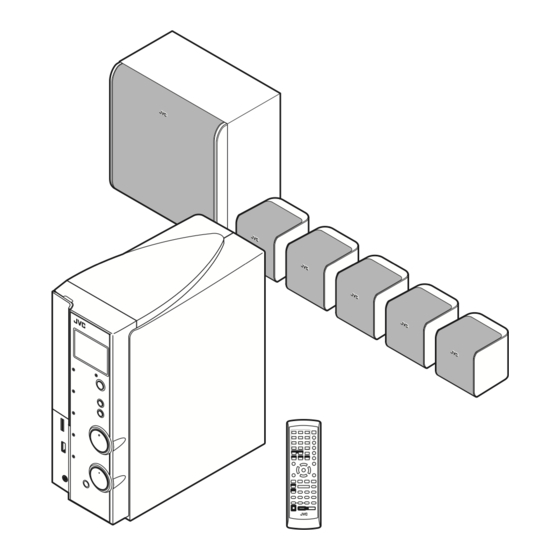
DIGITAL MEDIA SYSTEM
TH-L1
Consists of AX-THL1, SP-THL1W,
SP-THL1F, SP-THL1C and SP-THL1S
INSTRUCTIONS
For Customer Use:
Enter below the Model No. and Serial
No. which are located either on the rear,
bottom or side of the cabinet. Retain this
information for future reference.
Model No.
Serial No.
GVT0206-001A
[J, C]
Advertisement
Table of Contents

Related Manuals for JVC AX-THL1


Summary of Contents for JVC AX-THL1
- Page 1 DIGITAL MEDIA SYSTEM TH-L1 Consists of AX-THL1, SP-THL1W, SP-THL1F, SP-THL1C and SP-THL1S INSTRUCTIONS For Customer Use: Enter below the Model No. and Serial No. which are located either on the rear, bottom or side of the cabinet. Retain this information for future reference.
- Page 2 Warnings, Cautions and Others Mises en garde, précautions et indications diverses CAUTION— button! Disconnect the mains plug to shut the power off completely (the STANDBY lamp goes off). When installing the apparatus, ensure that the plug is easily accessible. button in any position does not disconnect the mains line.
- Page 3 – Consult the dealer or an experienced radio/TV technician for help. CAUTION Changes or modifications not approved by JVC could void the user’s authority to operate the equipment. CAUTION Excessive sound pressure from earphones or headphones can cause hearing loss.
- Page 4 Pour éviter les chocs électriques, les incendies et tout autre dégât, poser l’appareil sur une surface plate. Le dégagement minimum est indiqué ci-dessous: Front view/Face 15 cm (5-15/16") Wall or obstructions Mur, ou obstruction 15 cm (5-15/16") AX-THL1 15 cm No obstructions (5-15/16") 15 cm (5-15/16") Side view/Côté Wall or obstructions/Mur, ou obstruction AX-THL1...
-
Page 5: Table Of Contents
Table of contents Introduction ...2 Notes on handling ... 2 Supplied accessories ... 2 About files ...3 Playable file types for the USB MEMORY ... 3 Index of parts and controls ...4 Front panel (center unit) ... 4 Rear panel (center unit) ... 5 Remote control ... -
Page 6: Introduction
Introduction Notes on handling 7 Important cautions Installation of the system • Select a place which is level, dry and neither too hot nor too cold; between 5°C and 35°C (41°F and 95°F). • Leave sufficient distance between the system and the TV. •... -
Page 7: About Files
About files Playable file types for the USB MEMORY For all playable files • The system can only recognize and play files with one of the following extensions, regardless of the letter case— upper/lower: MP3: <.MP3>, <.mp3> WMA: <.WMA>, <.wma> WAV: <.WAV>, <.WAVE>, <.wav>, <.wave>... -
Page 8: Index Of Parts And Controls
Index of parts and controls The numbers in the figures indicate the pages where the details of the parts are described. Front panel (center unit) Display window 16, 20, 22, 25 20, 23 20, 23 Remote sensor:... -
Page 9: Rear Panel (Center Unit)
Index of parts and controls Rear panel (center unit) 9, 10, 11 9, 10, 11 9, 10, 11 10, 11... -
Page 10: Remote Control
Index of parts and controls Remote control Number buttons: 14, 15, 23 14, 15, 18, 24, 25, 29 – 31 15, 20, 23, 24 16, 20 16, 22 – 25 14, 15 7 Putting batteries in the remote control If the range or effectiveness of the remote control decreases, replace both batteries. -
Page 11: Connections
Connections Connecting the speakers and subwoofer SP-THL1F Front speakers SP-THL1C Center speaker CAUTION • If you connect speakers other than the supplied ones, use speakers of the same speaker impedance (SPEAKER IMPEDANCE) indicated on the rear of the center unit. •... -
Page 12: Speaker Layout
Connections Speaker layout To obtain the best possible sound from this system, you need to place all the speakers except the subwoofer at the same distance from the listening position. Surround left speaker If your speakers cannot be placed at the same distance from the listening position You can adjust the delay time of the speakers. -
Page 13: Connecting A Tv
Connections Connecting a TV • You can get better picture quality in the order — HDMI > Component video > S-video > Composite video. • Distortion of picture may occur when connecting the TV via a VCR, or to a TV with a built-in VCR. •... -
Page 14: Connecting The Video Components For The Source Of Video 1
Connections Connecting the video components for the source of VIDEO 1 7 To connect the video components for the source of VIDEO 1 • You can get better picture quality in the order — HDMI > Component video > S-video > Composite video. Center unit NOTE •... -
Page 15: Connecting The Video Components For The Source Of Video 2
Connections Connecting the video components for the source of VIDEO 2 7 To connect the video components for the source of VIDEO 2 • You can get better picture quality in the order — HDMI > Component video > S-video > Composite video. Center unit NOTE •... -
Page 16: Connecting The Video Components For The Source Of Video 3
Connections Connecting the video components for the source of VIDEO 3 7 To connect the video components for the source of VIDEO 3 • You can get better picture quality in the order — S-video > Composite video. Center unit Align the RCA pin plug cord... -
Page 17: Connecting A Usb Mass Storage Class Device
It may cause a malfunction of both the system and the device. • JVC bears no responsibility for any loss of data in the USB mass storage class device while using this system. • When connecting with a USB cable, use a cable less than 1 m (3.3 ft) in length. -
Page 18: Operating The Tv And Dvd Player
Operating the TV and DVD player You can use the remote control to operate not only this unit but also JVC and other manufacturers’ TV and DVD player. • Refer also to the manuals supplied for the TV and DVD player. -
Page 19: Operating The Dvd Player
Operating the TV and DVD player Operating the DVD player 7 To set the manufacturer’s code Press and hold DVD. Press and hold the button until step 3 is finished. Press ENTER. Press number buttons (1 - 9, 0) to enter the manufacturer’s code (2 digits). -
Page 20: Basic Operations
Basic operations The buttons on the remote control are used to explain most of the operations in this manual. You can use the buttons on the center unit if they have the same name or marks as on the remote control, unless otherwise noted. •... -
Page 21: Adjusting The Volume [Volume]
Basic operations Adjusting the volume [VOLUME] CAUTION • Always set the volume to minimum level before starting any source. If the volume is set at a high level, the sudden blast of sound may damage your hearing and/or blow out the speakers. -
Page 22: Adjusting The Output Level Of The Speakers And Subwoofer
JPEG/MPEG-1/MPEG-2/ASF file in the progressive scanning mode. In such a case, change the scanning mode to “INT-LACE. ” • All JVC progressive TVs and High-Definition TVs are fully compatible with this system. -
Page 23: Operations For Ipod
Operations for iPod The buttons described below are used on page 20. This button does not function as a stop button to operate an iPod. This button functions only to turn ON/OFF the charge mode to operate an iPod. Playing an iPod CAUTION •... -
Page 24: During Playback
Operations for iPod To turn ON/OFF the charge mode 7While “iPod” is selected as a source Display the current charge mode. On the remote control: Press and hold 7 for 2 seconds. On the center unit: Press and hold iPod/USB MEMORY CONTROL 7 for 2 seconds. -
Page 25: Operations For Usb Memory
Operations for USB MEMORY • The icon such as shows the file types the operation is available for. The buttons described below are used on pages 22 to Number buttons Basic operations for USB MEMORY When “USB MEMORY” is selected as the source, the following messages will appear on the TV screen. -
Page 26: Start Playback
Operations for USB MEMORY Basic playback for USB MEMORY 7 To play a file in a USB mass storage class device Connect a USB mass storage class device (see page 13) while the system is turned off. Turn on the system. (see page 16) Select “USB MEMORY”... - Page 27 Operations for USB MEMORY Fast-forward/fast-reverse search Press 1 or y during playback. Each time you press the button, the search speed changes (x2, x5, x10, x20, x60). To return to normal speed playback Press USB MEMORY 6 on the remote control. NOTE •...
-
Page 28: Advanced Operations For Usb Memory
Operations for USB MEMORY Advanced operations for USB MEMORY Using the on-screen bar You can check file information and use some functions through the on-screen bar. 7 Showing the on-screen bar Press ON SCREEN. Each time you press the button, the on-screen bar changes as follows on the TV screen. - Page 29 Operations for USB MEMORY Resuming playback When Resume Playback is set to “ON” (see page 31) and you stop playback by the following operations, the position where playback has been stopped is stored. ( RESUME “ ” appears the display window.) •...
-
Page 30: Repeating Playback
Operations for USB MEMORY Repeating playback When using the REPEAT button: Press REPEAT. Example: Repeat mode indicator Each time you press REPEAT, the Repeat mode changes. Display TV screen Meanings window Repeats the current track/files. REPEAT TRACK Repeats the current group. -
Page 31: Operations For Surround Mode
Operations for surround mode The buttons described below are used on page 28. Using the surround mode You can enjoy more realistic sound field than a stereo sound by using the surround mode. • The surround modes are also available for external components. -
Page 32: Display Window
Operations for surround mode 7 DSP • STADIUM STADIUM mode adds clarity and spreads the sound, like in an outdoor stadium. • All Channel Stereo All Channel Stereo (ALL CH STEREO) mode can reproduce a larger stereo sound field using all the connected (and activated) speakers. -
Page 33: Setting Preferences
Setting preferences The buttons described below are used on page 29 to 31. Using the setup menus • You can change the language used in the setup menus. See “Menu description” below. NOTE • You can use SET UP menu only when the source is USB MEMORY. - Page 34 Setting preferences 7 FILE TYPE When several types of files are recorded on a device, you can select which files to play. • AUDIO Select this to play MP3/WMA/WAV files. • STILL PICTURE Select this to play JPEG files. • VIDEO Select this to play MPEG-1/MPEG-2/ASF files.
-
Page 35: Setting The Audio Terminal
Setting preferences : Other setting menu (OTHERS) 7 RESUME (See page 25.) You can activate or deactivate Resume Playback function. 7 ON SCREEN GUIDE You can activate or deactivate the on-screen guide icons. (See page 23.) See page 29 for button locations. Setting the audio terminal You can set the analog or digital audio input terminal to use with the source of VIDEO 1-3. -
Page 36: References
References Troubleshooting PROBLEM Power does not come on. POWER The system suddenly turns off. The remote control does not work. REMOTE CONTROL The remote control does not work as expected. No sound. SOUND No picture is displayed on the TV screen. No picture is displayed on the TV or no sound come out through HDMI... -
Page 37: Specifications
References Specifications 7 Center unit Output power 40 W per channel, RMS at 3 Ω at Front/Surround: 1 kHz, with 10% total harmonic distortion. 100 W, RMS at 4 Ω at 1 kHz, with Center: 10% total harmonic distortion. 100 W, RMS at 4 Ω at 30 Hz, with Subwoofer: 10% total harmonic distortion. - Page 40 © 2007 Victor Company of Japan, Limited 0307JSKMDCJMM...