Table of Contents
Advertisement
RD-MD5(B)-Cover.fm Page 1 Wednesday, December 2, 1998 11:39 AM
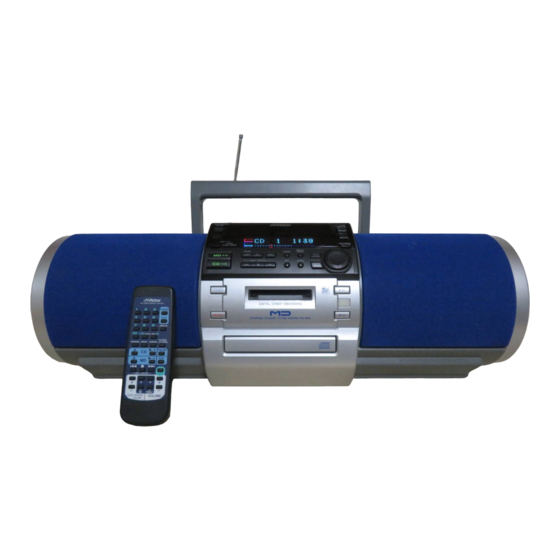
POWERED WOOFER CD-MD SYSTEM
RD-MD5
INSTRUCTIONS
For Customer Use:
Enter below the Model No. and Serial No.
which are located either on the rear, bot-
tom or side of the cabinet. Retain this
information for future reference.
Model No.
Serial No.
LVT0107-006A
[B]
Advertisement
Table of Contents

Related Manuals for JVC RD-MD5


Summary of Contents for JVC RD-MD5
- Page 1 RD-MD5(B)-Cover.fm Page 1 Wednesday, December 2, 1998 11:39 AM POWERED WOOFER CD-MD SYSTEM RD-MD5 INSTRUCTIONS For Customer Use: Enter below the Model No. and Serial No. which are located either on the rear, bot- tom or side of the cabinet. Retain this information for future reference.
- Page 2 RD-MD5(B)-Warning.fm Page 1 Wednesday, December 2, 1998 11:41 AM IMPORTANT for the U.K. DO NOT cut off the mains plug from this equipment. If the plug fit- ted is not suitable for the power points in your home or the cable is too short to reach a power point, then obtain an appropriate safety approved extension lead or consult your dealer.
-
Page 3: Safety Instructions
RD-MD5(B)-Warning.fm Page 2 Wednesday, December 2, 1998 11:41 AM “SOME DOS AND DON’TS ON THE SAFE USE OF EQUIPMENT” This equipment has been disigned and manufactured to meet international safety standards but, like any electrical equipment, care must be taken if you are to obtain the best results and safety is to be assured. -
Page 4: Table Of Contents
The controls and operations have been redesigned to make them very easy to use, freeing you to just enjoy the music. • With JVC’s COMPU PLAY you can turn on the System and automatically start the Radio, CD Player, MD Player with a single touch. -
Page 5: Getting Started
RD-MD5(B)-e.fm Page 2 Wednesday, December 2, 1998 11:40 AM Getting Started Accessories Check that you have all of the following items, which are supplied with the System. Power Cord (1) AM Loop Antenna (1) Remote Control (1) Batteries (2) If any of these items are missing, contact your dealer immediately. -
Page 6: Connecting The Fm Antenna
RD-MD5(B)-e.fm Page 3 Wednesday, December 2, 1998 11:40 AM CAUTION: Make all connections before plugging the System into an AC power outlet. Connecting the FM Antenna FM broadcast reception is made with the telescopic antenna. Fully extend and turn it to obtain the best reception. -
Page 7: Connecting Auxiliary Equipment
COMPU PLAY JVC's COMPU PLAY feature lets you control the most frequently used System functions with a single touch. With One Touch Operation you can play a CD, an MD, or turn on the radio with a single press of the play button for that function. One Touch Operation turns the power on for you, then starts the function you have specified. -
Page 8: Common Operations
RD-MD5(B)-e.fm Page 5 Wednesday, December 2, 1998 11:40 AM Common Operations DISPLAY ACTIVE CLEAR SOUND indicator SUPER WOOFER VOLUME+,– VOLUME+,– MID+,– TREBLE+,– Turning the Power On and Off Turning the System On —————— Press the button. The display comes on and the “STANDBY” indicator goes out. - Page 9 RD-MD5(B)-e.fm Page 6 Wednesday, December 2, 1998 11:40 AM ACS (Active Clear Sound) Effect The Active Clear Sound circuitry emphasizes the high frequency range level in conjunction with the bass level so that you can obtain clear sound at high frequencies. You can use this effect only for playback.
-
Page 10: Using The Tuner
RD-MD5(B)-e.fm Page 7 Wednesday, December 2, 1998 11:40 AM Using the Tuner Number Keys AUTO PRESET FM MODE TUNER BAND ¢ When the System is in use, the display shows other items as well. For simplicity, we show here only the items described in this section. - Page 11 RD-MD5(B)-e.fm Page 8 Wednesday, December 2, 1998 11:40 AM Presetting Stations Presetting Stations You can preset up to 30 FM stations and up to 15 AM (MW/LW) stations. Note: Preset numbers may have been set to factory test frequen- cies prior to shipment. This is not a malfunction. You can preset the stations you want into memory by following one of the presetting methods below.
-
Page 12: Using The Cd Player
RD-MD5(B)-e.fm Page 9 Wednesday, December 2, 1998 11:40 AM Using the CD Player Number Keys REPEAT PROGRAM RANDOM ¢ When the System is in use, the display shows other items as well. For simplicity, we show here only the items described in this section. - Page 13 RD-MD5(B)-e.fm Page 10 Wednesday, December 2, 1998 11:40 AM • Press the button or turn the JOG dial to the left by 1 click to skip to the beginning of the track being played. Press the button twice quickly or turn the JOG dial to the left by 2 clicks quickly to skip to the beginning of the previous track.
-
Page 14: Using The Md Player (Listening To An Md)
RD-MD5(B)-e.fm Page 11 Wednesday, December 2, 1998 11:40 AM Using the MD Player Number Keys DISPLAY RANDOM PROGRAM REPEAT ¢ When the System is in use, the display shows other items as well. For simplicity, we show here only the items described in this section. - Page 15 RD-MD5(B)-e.fm Page 12 Wednesday, December 2, 1998 11:40 AM Locating a Track with Remote Con- trol Directly ———————————— During playback or in Stop mode, press the number keys on the Re- mote Control to directly play a track. To directly play the track 5, press 5.
- Page 16 RD-MD5(B)-e.fm Page 13 Wednesday, December 2, 1998 11:40 AM Repeating Tracks You can repeat the tracks or individual track as many times as you like. Press the REPEAT button on the Remote Control. The Repeat indicator changes with each press of the button, as shown below.
-
Page 17: Recording Onto An Md
RD-MD5(B)-e.fm Page 14 Wednesday, December 2, 1998 11:40 AM Recording onto an MD DISPLAY MD REC When the System is in use, the display shows other items as well. For simplicity, we show here only the items described in this section. -
Page 18: Using The Md Player (Editing)
RD-MD5(B)-e.fm Page 15 Wednesday, December 2, 1998 11:40 AM Track Marking for Tuner/AUX Re- cording ——————————————— • Whenever no sound at the playback side continues for 3 or more seconds, the track number at the MD side is automati- cally increased by 1. -
Page 19: Title Function
RD-MD5(B)-e.fm Page 16 Wednesday, December 2, 1998 11:40 AM Moving tracks (MOVE function) Tracks can be moved around so that they are in the desired se- quence. Track No. Track A Track B Track C Track D MOVE Track A Track C Track D Track B Erasing tracks (ERASE function) This enables unnecessary tracks. -
Page 20: Join Function
RD-MD5(B)-e.fm Page 17 Wednesday, December 2, 1998 11:40 AM • You can also complete editing operation by pressing the button to turn off the power. To cancel the operation, press the CANCEL button in step 4, 5, or 7 until the display returns to the original display before editing the track. -
Page 21: All Erase Function
RD-MD5(B)-e.fm Page 18 Wednesday, December 2, 1998 11:40 AM 2. Press the MD6 button and then 7 button to set the function to MD. The track numbers and total playback time are displayed. 3. Press the EDIT button until "ERASE ?" is displayed. - Page 22 RD-MD5(B)-e.fm Page 19 Wednesday, December 2, 1998 11:40 AM 5. Input a preferred title (up to 32 charac- ters). Use the following buttons to input a title. [Title editing buttons and their functions] (see below) Button Function DISPLAY Changes the type of characters to be input as fol- /CHARA.
-
Page 23: Listening To An Auxiliary Equipment
RD-MD5(B)-e.fm Page 20 Wednesday, December 2, 1998 11:40 AM Listening to an Auxiliary Equipment Listening to External Equipment You can listen to an auxiliary equipment. First make sure that the auxiliary equipment is properly con- nected to the System.(See page 4). -
Page 24: Using The Timers
RD-MD5(B)-e.fm Page 21 Wednesday, December 2, 1998 11:40 AM Using the Timers SLEEP TIMER When the System is in use, the display shows other items as well. For simplicity, we show here only the items described in this section. The timers let you control listening and recording functions auto- matically. -
Page 25: Information On Mds (Minidiscs)
RD-MD5(B)-e.fm Page 22 Wednesday, December 2, 1998 11:40 AM The minute of the current OFF time blinks on the display. 3. Turn the JOG dial to set the minute. 4. Press the SET button. The music source "TUNER" blinks on the display. -
Page 26: Md Messages
RD-MD5(B)-e.fm Page 23 Wednesday, December 2, 1998 11:40 AM Two types of minidisc There are two types of minidisc, “recordable MDs” and “playback- only MDs.” The playback method for each is the same: a laser irra- diates the disc and the signal is read from the beam which comes back. -
Page 27: Minidisc Limitations
RD-MD5(B)-e.fm Page 24 Wednesday, December 2, 1998 11:40 AM Messsage You have tried to join tracks which cannot CANNOT JOIN be joined. DISC ERROR There is a problem (damage) with the disc. 7KHUH#LV#QRW#HQRXJK#VSDFH#OHIW#RQ#WKH#GLVF1 DISC FULL 7KHUH#DUH#RYHU#587#WUDFNV1 The disc is in accidental erasure protection DISC PROTECTED mode. -
Page 28: Care And Maintenance
RD-MD5(B)-e.fm Page 25 Wednesday, December 2, 1998 11:40 AM Care And Maintenance +DQGOH#\RXU#&'V#DQG#0'V#FDUHIXOO\/#DQG#WKH\#ZLOO#ODVW#D#ORQJ#WLPH1 Compact Discs ‡ 2QO\#&'V#EHDULQJ#WKLV#PDUN#FDQ#EH#XVHG#ZLWK# WKLV#6\VWHP1#+RZHYHU/#FRQWLQXHG#XVH#RI#LUUHJX0 ODU#VKDSH#&'V#+KHDUW0VKDSH/#RFWDJRQDO/#HWF1,# FDQ#GDPDJH#WKH#6\VWHP1 ‡ 5HPRYH#WKH#&'#IURP#LWV#FDVH#E\#KROGLQJ#LW#DW# WKH#HGJHV#ZKLOH#SUHVVLQJ#WKH#FDVH¶V#FHQWHU#KROH# OLJKWO\1 ‡ 'R#QRW#WRXFK#WKH#VKLQ\#VXUIDFH#RI#WKH#&'/#RU# EHQG#WKH#&'1 ‡ 3XW#WKH#&'#EDFN#LQ#LWV#FDVH#DIWHU#XVH#WR#SUHYHQW# ZDUSLQJ1 ‡ %H#FDUHIXO#QRW#WR#VFUDWFK#WKH#VXUIDFH#RI#WKH#&'# ZKHQ#SODFLQJ#LW#EDFN#LQ#WKH#FDVH1 ‡ $YRLG#H[SRVXUH#WR#GLUHFW#VXQOLJKW/#WHPSHUDWXUH# H[WUHPHV/#DQG#PRLVWXUH1 ‡ $#GLUW\#&'#PD\#QRW#SOD\#FRUUHFWO\1#,I#D#&'# GRHV#EHFRPH#GLUW\/#ZLSH#LW#ZLWK#D#VRIW#FORWK#LQ#D# VWUDLJKW#OLQH#IURP#FHQWHU#WR#HGJH1#... -
Page 29: Specifications
RD-MD5(B)-e.fm Page 26 Wednesday, December 2, 1998 11:40 AM Specifications Amplifier 2XWSXW#3RZHU +0D[1, ,QSXW#6HQVLWLYLW\2,PSHGDQFH#+4#N+], $8;#,1 833#P927:#NRKPV 2XWSXW#6HQVLWLYLW\2,PSHGDQFH#+4#N+], 3KRQHV 49#RKPV#0#4#NRKPV MD Player :RZ#$QG#)OXWWHU 8QPHDVXUDEOH CD Player :RZ#$QG#)OXWWHU 8QPHDVXUDEOH Tuner )0#7XQHU 7XQLQJ#5DQJH ;:18#0#43;13#0+] $0#7XQHU 7XQLQJ#5DQJH# +0:,#855#0#4/95<#N+] $QWHQQD# )0#WHOHVFRSLF#DQWHQQD Speakers )XOO#UDQJH :#FP# #5/7#777 RKPV... - Page 30 RD-MD5(B)-Back cover.fm Page 1 Wednesday, December 2, 1998 11:39 AM VICTOR COMPANY OF JAPAN, LIMITED 1198MNMCREJEM...