Table of Contents
Advertisement
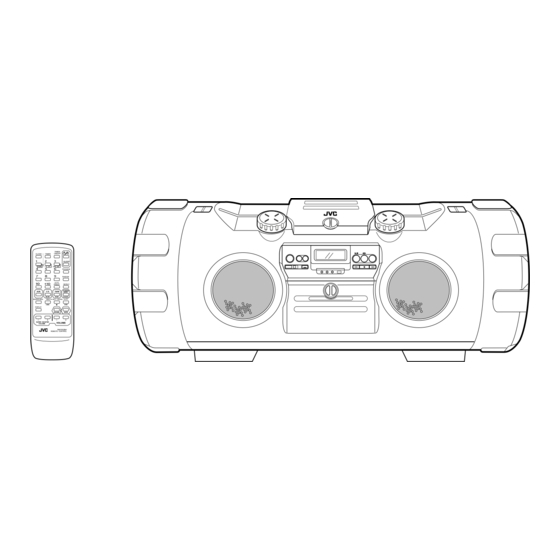
POWERED WOOFER CD SYSTEM
CD CON ALTAVOZ DE GRAVES Y AMPLIFICADOR INCORPORADO
LETTORE CD CON WOOFER A COMANDO INDIPENDENTE
RV-B90/B70
TIMER
ON/OFF
CLOCK
TIMER
SLEEP
DOWN
UP
SET
PROGRAM
RANDOM
AUTO
PRESET
REPEAT
TUNER
AUX
C D
TAPE
BAND
FM MODE
REVERSE MODE
REW
MULTI CONTROL
FF
DISPLAY
SOUND
ACS
SUPER WOOFER
VOLUME
VOLUME
RM-RXVB90
REMOTE CONTROL
TIMER
ON/OFF
CLOCK
TIMER
SLEEP
DOWN
UP
SET
PROGRAM
RANDOM
AUTO
REPEAT
PRESET
CD
TUNER
BAND/
FM MODE
UP
DOWN
TUNING
DISPLAY
SOUND
ACS
SUPER WOOFER
VOLUME
VOLUME
RM-RXVB70
REMOTE CONTROL
INSTRUCTIONS
INSTRUCCIONES
MANUALE DI ISTRUZIONI
RV-B90
CD
TUNER
RV-B70
VNN5219-253N
[E]
Advertisement
Table of Contents

Related Manuals for JVC RV-B70


Summary of Contents for JVC RV-B70
- Page 1 AUTO PRESET TUNER DOWN TUNING DISPLAY SOUND SUPER WOOFER VOLUME REMOTE CONTROL INSTRUCTIONS INSTRUCCIONES MANUALE DI ISTRUZIONI SLEEP PROGRAM RANDOM REPEAT TUNER BAND FM MODE VOLUME RM-RXVB90 SLEEP PROGRAM RANDOM REPEAT BAND/ FM MODE VOLUME RM-RXVB70 RV-B90 TUNER RV-B70 VNN5219-253N...
-
Page 2: Table Of Contents
ITALIANO Grazie per avere acquistato questo prodotto JVC. Si prega di leggere queste istruzioni con attenzione prima dell’uso per essere certi di ottenere prestazioni ottimali ed una lunga durata dell’unità. -
Page 3: Features
÷ Capacità di registrazione su nastri al cromo (CrO , tipo II) Solo per l’RV-B70 ÷ Meccanismo di bloccaggio dello sportello del vano portadischi ÷ Telecomando con 32 tasti, per il comando di tutte le funzioni del lettore CD e del sintonizzatore Per entrambi l’RV-B90 e -B70... -
Page 4: Safety Precautions
SAFETY PRECAUTIONS Prevention of Electric Shocks, Fire Hazards and Damage 1. Even when the button is set to STANDBY, a very small current will flow. To save power and for safety when not using the unit for an extended period of time, disconnect the power cord from the household AC outlet. -
Page 5: Handling Precautions
Caution: Proper Ventilation To avoid risk of electric shock and fire, and to prevent damage, locate the apparatus as follows: 1. Front: No obstructions and open spacing. 2. Sides/Top/Back: No obstructions should be placed in the areas shown by the dimensions below. 3. - Page 6 4. Volume setting CDs produce very little noise compared with analog sources. If the volume level is adjusted for these sources, the speakers may be damaged by the sudden increase of output level. Therefore, lower the volume before operation and adjust it as required during play.
-
Page 7: Shoulder Strap Attachment/ Detachment
SHOULDER STRAP ATTACHMENT/ DETACHMENT ÷ ATTACHMENT As shown in the illustration below, press in the metal fitting at and hook over ÷ DETACHMENT Press in the metal fitting at and unhook. Shoulder strap Correa para el hombro Tracolla CONNECTIONS ÷ Do not switch the power on until all connections are completed. -
Page 8: Power Supply
A. Operation on house hold AC ÷ Connect the AC power cord after all other connections have been made. CAUTIONS: 1. ONLY USE WITH JVC POWER CORD PROVIDED WITH THIS UNIT TO AVOID MALFUNCTION OR DAMAGE TO THE UNIT. 2. BE SURE TO UNPLUG THE POWER... - Page 9 TIME (MORE THAN TWO WEEKS) OR WHEN ALWAYS USING HOUSEHOLD AC, REMOVE THE BATTERIES TO AVOID A MALFUNCTION OR DAMAGE TO THE UNIT. ÷ WHEN THE JVC POWER CORD PROVIDED WITH THIS UNIT IS CONNECTED, THE POWER IS AUTOMATICALLY SWITCHED FROM BATTERIES HOUSEHOLD AC EVEN WHEN THE BATTERIES ARE LOADED.
- Page 10 CAUTION Alla presa dell’accendisigari della vettura (12 V) Optional exclusive car adapter (JVC model CA-R120E) Adaptador exclusivo para automóvil opcional (JVC modelo CA-R120E) Adattatore esclusivo per automobile opzionale (modello JVC CA-R120E) ÷ Primero conecte el adaptador al jack DC IN...
-
Page 11: Names Of Parts And Their Functions
Sección del reproductor de CD/ Generalidades 6 7 8 qw e RV-B90 4 56 7 8 TUNER RV-B70 Gancho de la correa para el hombro Botón Perilla de control SUPER WOOFER VOLUME Botón SOUND Ventanilla de indicación ndicación de función/número de pista Indicación del tiempo de reproducción... - Page 12 Tuner/Deck (RV-B90 only) section PRESET TUNING/BEAT CUT button (RV-B90) PRESET TUNING button (RV-B70) AUX button Display window Band display Radio frequency display Mode display during FM broadcast (STEREO/MONO) Tape (TAPE) display Reverse mode indicator ( / Recording indicator (REC) Tape direction indicators (2/3) TAPE 23 button Press to select the tape mode.
-
Page 13: Remote Control Unit
: Press to stop the tape. ¢ FF : Press to fast-forward the tape. (When the mode is set to TUNER) 4/¢ : Auto tuning/Manual tuning TUNING (DOWN/UP) button (RV-B70) 4DOWN/UP¢ : Auto tuning/Manual tuning Rear panel DC IN 12V jack ( Headphone jack (PHONES) (3.5 mm dia. - Page 14 SOUND SUPER WOOFER VOLUME VOLUME REMOTE CONTROL Remote control unit for RV-B70 Unidad de control remoto para RV-B70 Telecomando per l'RV-B70 Tasto del timer (TIMER) Premerlo per passare alla modalità del TIMER Tasto dell’orologio (CLOCK) Premerlo per poter regolare l’ora.
-
Page 15: Switching The Power On/Off
Tasti per la regolazione del volume (VOLUME, + e –) ÷ I tasti non menzionati hanno le stesse funzioni del tasti ballo stesso nome dell'unitê principale ACCENSIONE E SPEGNIMENTO button Botón Tasto TUNER RV-B70 Accensione e spegnimento dell’unità ÷ Accensione: ÷ Spegnimento:... -
Page 16: Volume, Sound Mode And Other Controls
Even when the power is set to STANDBY, pressing the button shown below switches on the power and selects the source. Function mode Modo de función Modo di funzionamento RV-B90 RV-B70 (RV-B90 only) (RV-B90 exclusivamente) (solo per l’RV-B90) TAPE TAPE BAND... - Page 17 Note: Because it is rotary, the VOLUME control knob and the SUPER WOOFER VOLUME control knob do not have a volume stopper. Check the volume level in the display window when adjusting. ACTIVE CLEAR SOUND* button Use the ACTIVE CLEAR SOUND (ACS) button to enhance the sound reproduction.
-
Page 18: Handling Cds
HANDLING CDs Since dirty, damaged and warped CDs may damage the unit, take care regarding the following: 1. Usable CDs Use CDs with the mark shown. 2. Notes on handling CDs ÷ Do not touch the reflective recorded surface. ÷ Do not stick or write anything on the label side. -
Page 19: Playing Cds
LOCK, listening for the click that indicates the CD door is securely closed. Press to start play. RV-B90 RV-B70 Adjust the volume. ÷ 8-cm (3") CDs can be used in this unit without an adapter. REPRODUCCION DE CD Reproducción de un CD completo... - Page 20 ÷ Take the disc out of the unit before transporting ÷ Do not place anything other than a CD in the CD player, as this may cause damage to the unit. ÷ Do not apply shock to the unit or use the unit in an unstable position, otherwise mistracking may occur.
- Page 21 ÷ La posición deseada puede ser ubicada utilizando la búsqueda de avance rápido o invertida mientras reproduce un CD. RV-B90 MULTI CONTROL STOP RV-B70 DOWN TUNING ÷ Mantenga presionado el botón; la búsqueda con reproducción se inicia lentamente y luego aumenta gradualmente la velocidad.
- Page 22 ÷ Se la durata dei brani programmati per la riproduzione supera i 99 minuti e 59 secondi, l’indicazione della durata della riproduzione scompare dal display. ÷ Per la riproduzione programmata non possono essere programmati più di 21 brani. RV-B70 è terminata.
-
Page 23: Handling Cassette Tapes
÷ When programming tracks to be recorded, the previous step is not needed. Press the ONE TOUCH REC button instead of the CD 3/8 button (RV-B90 only). ÷ If the wrong track number is accidentally pressed, press the 7 (stop) button to cancel it and perform the same operation from step ÷... -
Page 24: Cassette Playback (Rv-B90 Only)
Turn the pencil to tighten the tape. Gire el lápiz para ajustar la cinta. Ruotare la matita per stringere il nastro. Note: If the power is switched off while tape is running, it may be impossible to remove the cassette. If this happens, switch the power on again before attempting to remove the cassette. -
Page 25: Using With Another Audio Unit (Rv-B90 Only)
÷ After loading a cassette tape, simply press the TAPE 23 button. The power is switched on and the tape starts playback. (To select the playback direction, press the TAPE 2 3 button. The change in direction can be checked in the tape direction indicator (2 or 3).) ÷... -
Page 26: Radio Reception
Eseguire le operazioni nell’ordine indicato ÷ Se si usa corrente alternata. Se si usano invece batterie, accendere prima l'unitê quindi eseguire l'operazione. RV-B90 RV-B70 Premere il tasto TUNER BAND. ÷ L’apparecchio si accende. Selezionare la banda desiderata agendo di nuovo sul tasto TUNER BAND. - Page 27 MULTI CONTROL Press to move to higher frequencies. Presione para aumentar la frecuencia. STOP Premere o ruotare per aumentare la frequenza. RV-B70 DOWN TUNING Notas: ÷ Cuando la búsqueda de sintonía de la estación deseada no es posible debido a que la señal de radiodifusión es demasiado débil,...
- Page 28 ÷ Repeat the previous procedure for each of the other stations, using a different preset button each time. ÷ Repeat the previous procedure for the other band. ÷ To change preset stations Perform step after tuning to the required station. Notes: ÷...
-
Page 29: Recording (Rv-B90 Only)
Synchronized recording with the CD player ÷ In this system, the CD player starts play when the cassette deck enters the recording mode. Operate in the order shown Load a CD and close the CD door. - Page 30 ONE TOUCH REC button to locate the beginning of the track and enter the one track recording mode. After the recording is finished, the CD player and cassette deck both stop. To record only on side B or in the middle of a tape...
- Page 31 Recording from the radio or an external source connected to the AUX IN terminals Operate in the order shown Load a cassette with side A facing out. (Wind past the tape leader before starting recording.) ÷ Make sure the tape direction is set to 3 (forward direction).
-
Page 32: Clock Adjustment
CLOCK ADJUSTMENT USING THE REMOTE CONTROL UNIT) Names of parts in the clock/timer section, and their functions: 1 2 3 Timer mode indicator Timer indicator (ON/OFF) SLEEP indicator CLOCK indicator Time display CLOCK button TIMER button TIMER ON/OFF button DOWN/UP buttons SET button SLEEP button Setting the current time (when this unit... -
Page 33: Timer Operations
TIMER OPERATIONS (USING THE REMOTE CONTROL UNIT) Setting the timer ÷ The current time must be set before the timer can be used. Set the button to ON. Press the TIMER button. TIMER Set the start time. (Example: To set the timer to 12:15.) DOWN Set the stop time. - Page 34 Set the volume. DOWN ÷ When the volume setting is set to “VOL -” (volume level is not specified), the timer playback volume is at the level used before setting the timer. ÷ To confirm the timer setting 1 Press the SET button after pressing the TIMER button.
- Page 35 ON/OFF CLOCK TIMER SLEEP TUNER DOWN PROGRAM RANDOM AUTO PRESET REPEAT RV-B70 Impostare il tasto su ON. Impostare il timer (Vedi “Impostazione del timer” a pag. 33). Operations Operaciones Operazioni Load a disc. Coloque un disco. Inserire un CD. Load a cassette tape.
- Page 36 ÷ Timer playback will start at the timer start time and the power will be switched off at the timer stop time. The unit remains in the same timer mode even after the power is switched off. The same timer function will repeat at the same time on the following day.
-
Page 37: Maintenance
B. To fall asleep while listening to a tape (RV-B90 only), broadcast or CD and to perform timer playback the following morning Set the timer. (Refer to “Setting the timer” on page 33.) Set to the required source (tape (RV-B90 only), broadcast or CD). -
Page 38: Troubleshooting
* Was the power cord unplugged while the memory back-up batteries were not installed? (CD Player Section) ÷ The CD player does not play. * Is the CD upside down? * Is the CD dirty? * Is there condensation on the lens? (See “Cleaning the lens”... -
Page 39: Specifications
÷ Before making an important recording, be sure to make a test recording first to check that the deck, etc. is working correctly. SPECIFICATIONS CD player section Type : Compact disc player Signal detection system : Non-contact optical pickup... - Page 40 STANDBY) Dimensions : 690 (W) x 239 (H) x 296 (D) mm, including knobs (RV-B90) 690 (W) x 239 (H) x 292 (D) mm, including knobs (RV-B70) Mass : RV-B90 9.5 kg (without batteries) 10.6 kg (with batteries) : (transparent blue color model) 9.7 kg (without batteries)