Roland VersaStudio BN-20 Master Manual
Versastudio sign maker
Hide thumbs
Also See for VersaStudio BN-20:
- Manual (4 pages) ,
- First step manual (6 pages) ,
- Switching manual (25 pages)
Table of Contents
Advertisement
Quick Links
MASTER GUIDE
Thank you very much for purchasing this product.
To ensure correct and safe usage with a full understanding of this product's performance, please be sure to read through
this manual completely and store it in a safe location.
Unauthorized copying or transferral, in whole or in part, of this manual is prohibited.
The contents of this document and the specifications of this product are subject to change without notice.
The documentation and the product have been prepared and tested as much as possible. If you find any misprint or
error, please inform us.
Roland DG Corp. assumes no responsibility for any direct or indirect loss or damage which may occur through use of
this product, regardless of any failure to perform on the part of this product.
Roland DG Corp. assumes no responsibility for any direct or indirect loss or damage which may occur with respect to
any article made using this product.
Advertisement
Table of Contents

Related Manuals for Roland VersaStudio BN-20


Summary of Contents for Roland VersaStudio BN-20
- Page 1 The documentation and the product have been prepared and tested as much as possible. If you find any misprint or error, please inform us. Roland DG Corp. assumes no responsibility for any direct or indirect loss or damage which may occur through use of this product, regardless of any failure to perform on the part of this product.
- Page 2 This product is using GNU General Public License (GPL) / GNU Lesser General Public License (LGPL) software. You have the right to acquire, modify, and distribute the source code for this GPL/LGPL software. You can obtain the GPL/LGPL source code used in this product by downloading it from the following website. URL: http://www.rolanddg.com/gpl/ RolandDG Corp.
-
Page 3: Table Of Contents
Part Names ............................4 Roland BN-20 System Configuration ..................5 How to Open the BN-20 Driver's Printing Preferences Screen ......... 6 How to Open the Utility Window / Exit the Utility ..............7 How to Start the R-Works ......................8 How to Open the BN-20 Driver/R-Works Help ............... - Page 4 Locations of the Power Rating and Serial Number Labels..........99 Dimensional Drawing ........................ 100 Specifications ..........................101 System Requirements for USB Connection ................ 103 Company names and product names are trademarks or registered trademarks of their respective holders. Copyright © 2011 Roland DG Corporation http://www.rolanddg.com/...
-
Page 5: Chapter 1 The Basics
Introduction ..................4 Part Names ..................4 Roland BN-20 System Configuration...........5 How to Open the BN-20 Driver's Printing Preferences Screen ...6 How to Open the Utility Window / Exit the Utility ......7 How to Start the R-Works ............8 How to Open the BN-20 Driver/R-Works Help ......8 Usable Media ................10... -
Page 6: Introduction
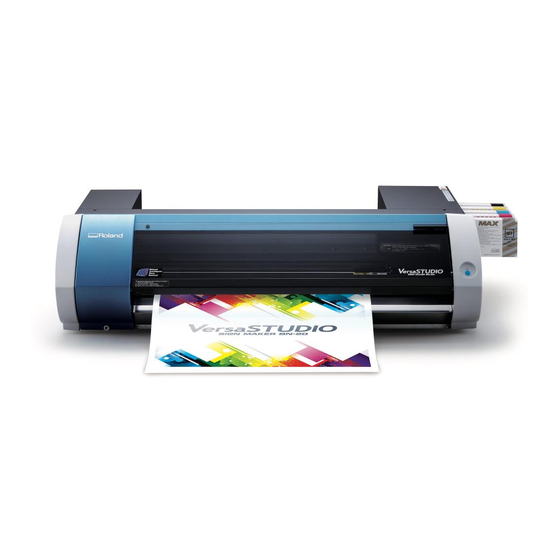
Introduction Part Names Maintenance cover Print-head carriage Remove when performing The print heads and blade manual head cleaning. are inside this section. P. 76, “Manual Head Cleaning” Front cover Open the cover to load media; in general use, always keep the cover closed. -
Page 7: Roland Bn-20 System Configuration
Driver software that is needed to output printing data from a computer to the machine. P. 6, "How to Open the BN-20 Driver's R-Works Printing Preferences Screen, " p. 8, "How Software that allows you to draw illustrations or to Open the BN-20 Driver/R-Works Help"... -
Page 8: How To Open The Bn-20 Driver's Printing Preferences Screen
Introduction How to Open the BN-20 Driver's Printing Preferences Screen Procedure Click [Devices and Printers] (or [Printers and Faxes]) from the Start menu ( Right-click the "Roland BN-20" icon, and then click Printing Preferences. The BN-20 driver's Printing Preferences screen opens. -
Page 9: How To Open The Utility Window / Exit The Utility
Utility from the Windows start menu. Starting from the Windows start menu From the start menu, click [All Programs] or [Program] >> [Roland BN-20] >> [Utility]. Utility starts. How to Exit the Utility... -
Page 10: How To Start The R-Works
), click [All Programs] or [Program] >> [R-Works] >> [R-Works]. How to Open the BN-20 Driver/R-Works Help BN-20 driver Open the BN-20 driver's Printing Preferences screen, and then click [Help]. P. 6, "How to Open the BN-20 Driver's Printing Preferences Screen" Chapter 1 The Basics... - Page 11 Introduction R-Works Start R-Works, and then click [Help] - [Table of Contents] from the menu. P. 8, "How to Start the R-Works" From the start menu ( ), click [All Programs] or [Program] >> [R-Works] >> [R-Works Help]. Chapter 1 The Basics...
-
Page 12: Usable Media
Sheet media: Any media that is not wound on to a paper tube, e.g. standard size paper sheets For both roll and sheet media, different types of paper can be selected according to the purpose. For details contact your media supplier. Media can also be purchased from the Roland DG Corp. website. http://www.rolanddg.com/... -
Page 13: Four Different Output Methods
Introduction Four Different Output Methods The following four output methods are available for this machine. Printing by using ink. It is also called "Printing Only" as well to distiguish Printing (Only) from "Printing and Cutting." Cutting by using cutter such as for cutting seal. It is also called "Cutting Cutting (Only) Only"... -
Page 14: Switching Power On And Off
Switching Power On and Off WARNING When output is not being carried out, remove media or switch the sub power off. If the same section is continuously heated, there is a fire risk or media may generate toxic gas. Switching the Power On Procedure ... -
Page 15: Switching The Power Off (Sub-Power Off)
Introduction Switching the Power Off (Sub-power Off) Procedure When output is completed, press and hold down the POWER key for one second or more. When the POWER key light is off, the power is off. Push the loading lever backward. Even if you are not going to switch the power off when the machine is not in use, make sure the loading lever is moved to the rear. -
Page 16: Printing
Printing This section describes operations when printing only. Refer to page 28 "Cutting / Printing & Cutting" and page 35 "Performing Printing and Cutting Separately." STEP 1: Loading Media Roll media Procedure Push the loading lever backward. Move the left media guide to the left. Loading lever Left media guide ... - Page 17 Printing Place the roll media loaded onto the media bar on the printer. Press both ends of the media bar into the grooves at the back of the printer while making sure the media does not become loose. Media feeding direction Media bar Main unit...
- Page 18 Printing Pass the media through the printer. Pull the media straight to keep it taut, and let it pass beneath the media clamps. Media clamp Make sure the left media guide is pressed against the media flange. Close the front cover. Pull the loading lever forward.
- Page 19 Printing Sheet Media Procedure Push the loading lever backward. Move the left media guide to the left. Loading lever Left media guide Move the media to the right, and apply it to the right media guide. Slide the left media guide and apply it to the media. Right media guide Left media guide Chapter 1 The Basics...
- Page 20 Printing Pass the media through the printer. Pull the media straight to keep it taut, and let it pass beneath the media clamps. Media Clamp Make sure the left media guide is applied to the media. Close the front cover. Pull the loading lever forward.
-
Page 21: Step 2: Bidirectional Adjustment
How to Perform Bidirectional Printing Procedure Display the BN-20 driver's Printing Preferences screen. P. 6, "How to Open the BN-20 Driver's Printing Preferences Screen" Select [CMYK(v)] from [Ink Mode] on the [Settings] tab. Select [Bidirectional Printing]. - Page 22 Printing Procedure Open the Utility window. P. 7, "How to Open the Utility Window / Exit the Utility" Click [Bidirectional adjustment]. Click [Test Print]. The test pattern is printed. Read the on-screen instructions and then enter a value in the [New Value] box. ...
-
Page 23: Step 3: Printing Tests And Normal Cleaning
Printing STEP 3: Printing Tests and Normal Cleaning Procedure Open the Utility window. P. 7, "How to Open the Utility Window / Exit the Utility" Click [Check Nozzle Condition]. Click [Test Print]. The test pattern is printed. Follow the on-screen instructions and check for dot drop-out. -
Page 24: Step 4: Calibrate Sheet Feeding Amount
Printing STEP 4: Calibrate Sheet Feeding Amount Procedure Open the Utility window. P. 7, "How to Open the Utility Window / Exit the Utility" Click [Calibrate Sheet Feeding Amount]. Click [Test Print]. The test pattern is printed. ... -
Page 25: Step 5: Starting Print Output
STEP 5: Starting Print Output This section explains how to output from R-Works. When outputting from Roland VersaWorks, refer to the "Roland VersaWorks Quick Start Guide" and the "BN- 20 Roland VersaWorks Metallic Silver Ink Guide". When outputting from commercially available application software for creating drawings, refer to the documentation supplied with your application software. -
Page 26: Stopping Print Output
Printing About the Output-Start Location The output-start location is always the point shown in the figure below. Print area 1.4 mm 5 mm Media feed direction Right pinch roller Print start position Blade protector Stopping Print Output To stop output on the printer side Press and hold down the POWER key for one second or more during output. - Page 27 Windows XP Click [Start] >> [Printers and Faxes]. Double-click the BN-20 icon. Click [Printer] >> [Cancel All Documents]. Depending on the computer data transfer status, it may be too late to cancel output. In this case, you need to cancel output from the printer.
-
Page 29: Chapter 2 Fully Utilizing The Machine
Chapter 2 Fully Utilizing the Ma- chine Cutting / Printing & Cutting............28 Adjusting cutting ................28 Accurately Adjusting the Cutting-in Amount.......30 Adjusting printing & cutting ............31 Creating Data for Cutting / Printing & Cutting ......32 Cautionary note on making output with cutting ......34 Performing Printing and Cutting Separately.........35 To Perform Printing and Cutting Separately ......35 Printing with Crop Marks ............35... -
Page 30: Cutting / Printing & Cutting
Cutting / Printing & Cutting Adjusting cutting Adjust the cutting conditions to obtain beautiful razor sharp cut lines. Making adjustments to suit the media thickness. Procedure Load the media to be cut. P. 14, "STEP1: Loading Media" Open the Utility window. - Page 31 Cutting / Printing & Cutting Enter values in the [Cut Force], [Cut Speed], and [Cut Times] boxes. Cut Force Force at cutting time. If this force is too strong, the blade cuts into the backing paper. (Default setting: 50 gf ) Cut Speed Cutting speed.
-
Page 32: Accurately Adjusting The Cutting-In Amount
Cutting / Printing & Cutting Accurately Adjusting the Cutting-in Amount When you want to perform accurate and fine adjustment of the cutting-in amount, such as when cutting media with thin backing paper, you can obtain good results by adjusting the tip of the blade. Turn the cap portion of the blade holder to adjust the amount of blade extension. -
Page 33: Adjusting Printing & Cutting
Cutting / Printing & Cutting Adjusting printing & cutting When printing and cutting at the same time, adjust and align the printing and cutting positions. Depend- ing on the media thickness, sometimes printing and cutting positions are very slightly out of alignment. It is recommended to set correction values to suit the media. -
Page 34: Creating Data For Cutting / Printing & Cutting
Open the R-Works Help, display [Contents] - [Procedure], and then refer to the instructions from "Introduc- tion" to "Step 4: Outputting". P. 8, "How to Open the BN-20 Driver / the R-Works Help" When using application software to create drawings Verified application software ... - Page 35 The Color Settings screen opens allowing you to create col- ors. Enter values for [Red (R)], [Green (G)], and [Blue (B)]. The BN-20 driver identifies the color specified using the values entered here as the cutting line, and outputs the color. Creating Print Data ...
-
Page 36: Cautionary Note On Making Output With Cutting
Do not cut the media before it is taken back when "Return to home position after printing" is ON in the "Printer Control" tab of the BN-20 driver. If the media is cut before it is taken back, ink might be ejected to a location where there is no media. -
Page 37: Performing Printing And Cutting Separately
P. 37, "Aligning Automatically and Cutting" Printing with Crop Marks This section describes how to specify settings when using the BN-20 driver. When using Roland VersaWorks, refer to the "Roland VersaWorks Quick Start Guide". Media Sizes Allowing Automatic Crop Mark Detection... - Page 38 Performing Printing and Cutting Separately Procedure Display the BN-20 driver's Printing Preferences screen. P. 6, "How to Open the BN-20 Driver's Printing Preferences Screen" Select [Cropmark] on the [Printer Adjust- ment] tab. Select [Print]. When [Printing & Cutting] is selected, pull back the media after printing the crop mark to start cutting immediately.
-
Page 39: Aligning Automatically And Cutting
Performing Printing and Cutting Separately Aligning Automatically and Cutting This section describes how to make settings when using the BN-20 driver. When using Roland VersaWorks, refer to the "Roland VersaWorks Quick Start Guide". Procedure Print with a crop mark, and then reload the media that was removed. - Page 40 Performing Printing and Cutting Separately Display the BN-20 driver's Printing Preferences screen. P. 6 "How to Open the BN-20 Driver's Printing Preferences Screen" Select [Cropmark] on the [Printer Adjust- ment] tab. Select [Cut]. Start cutting.
-
Page 41: Crop Cut Adjustment
Performing Printing and Cutting Separately Crop Cut Adjustment Depending on the composition of the media, the positioning of printing and cutting may be misaligned even when you're using crop marks. Make corrections for misaligned printing and cutting for the media you're using. -
Page 42: Using Metallic Silver Ink
Using Metallic Silver Ink Characteristics of Metallic Siver Ink and Important Notes The usage and handling of metallic silver ink involve some important considerations that do not apply to ink of other colors. Be sure to familiarize yourself with the characteristics of the inks before you use them. Metallic silver ink precipitate. -
Page 43: Creation Of Print Data Using Metallic Color (R-Works)
Using Metallic Silver Ink Creation of Print Data Using Metallic Color (R-Works) * When using Roland VersaWorks, refer to the "Roland VersaWorks Quick Start Guide" and the "BN-20 Roland VersaWorks Metallic Silver Ink Guide". Procedure Start R-Works. P. 8, "How to Start the R-Works"... - Page 44 Using Metallic Silver Ink Select [Spot Color]. You can now specify a metallic base color or plain silver. Metallic This color is a metallic color created by mixing CMYK ink and metallic silver ink. Silver This is the color of metallic silver ink by itself. You can specify the density. ...
-
Page 45: Creation Of Print Data Using Metallic Color (General Application For Drawing)
Using Metallic Silver Ink Creation of Print Data Using Metallic Color (General Application for Drawing) * When using Roland VersaWorks, refer to the "Roland VersaWorks Quick Start Guide" and the "BN-20 Roland VersaWorks Metallic Silver Ink Guide". Verified application software ... - Page 46 The Color Settings screen opens allowing you to create col- ors. Enter values for [Red (R)], [Green (G)], and [Blue (B)]. The BN-20 driver identifies the color specified using the values entered here as the metallic color used in printing, and outputs the color. Creating Print Data ...
-
Page 47: Blend Print And Layered Print
The printing method differs for blended printing and layered printing, and the metallic impression rendered by CMYK is different. You can make blended printing and layered printing selections by selecting [Ink Mode] in R-Works or the BN-20 driver. Select the best type to suit your situation. Blend Print (Metallic Silver + CMYK) This section describes how to perform the blend print with the metallic silver ink and CMYK ink. - Page 48 Using Metallic Silver Ink When using R-Works Procedure Creating print data. P. 41, "Creation of Print Data Using Metallic Color (R-Works)" Click The [Output Settings] screen opens. Click from [Printing Preferences]. The [Printing Preferences] settings are displayed. Chapter 2 Fully Utilizing the Machine...
- Page 49 Select the media you are using. Select [CMYKMt] from [Ink Mode]. Although you can set the [Media Type] and [Ink Mode] from the BN-20 driver's Printing Preferences, when outputting from R-Works, the settings in R-Works take priority. Click [Output].
- Page 50 P. 43, " " Open the BN-20 driver's Printing Preferences screen. P. 6, "How to Open the BN-20 Driver's Printing Preferences Screen" Select [Media Type] on the [Settings] tab. Select the media you are using. ...
- Page 51 Select [Job Type] on the [Printer Adjust- ment] tab. Click [OK]. The BN-20 driver's Settings screen closes. Output the print data from the application software. For more information on using the application software, refer to the documentation supplied with your application software.
-
Page 52: Layered Print (Metallic Silver Cmyk)
Using Metallic Silver Ink Layered Print (Metallic Silver CMYK) This section describes how to perform the layered print with the metallic silver ink and CMYK ink using the metallic silver ink as background. P. 45, “Blend Print and Layered Print” To perform the layered print, you need to use the printing data where the use of the metallic silver ink and the CMYK ink is designated. - Page 53 Using Metallic Silver Ink Click The [Output Settings] screen opens. Click from [Printing Preferences]. The [Printing Preferences] settings are displayed. Chapter 2 Fully Utilizing the Machine...
- Page 54 Select the media you are using. Select [Mt->CMYK] from [Ink Mode]. Although you can set the [Media Type] and [Ink Mode] from the BN-20 driver's Printing Preferences, when outputting from R-Works, the settings made in R-Works take priority. ...
- Page 55 P. 43, "Creation of Print Data Using Metallic Color (General Application for Drawing)" Open the BN-20 driver's Printing Preferences screen. P. 6, "How to Open the BN-20 Driver's Printing Preferences Screen" Select [Media Type] on the [Settings] tab.
- Page 56 Select [Job Type] on the [Printer Adjust- ment] tab. Click [OK]. The BN-20 driver's Settings screen closes. Output the print data from the application software. For more information on using the application software, refer to the documentation supplied with your application software.
-
Page 57: Layered Print (Cmyk Metallic Silver)
Using Metallic Silver Ink Layered Print (CMYK Metallic Silver) This section describes how to perform the layered print with the metallic silver ink and CMYK ink using the CMYK ink as background. P. 45, “Blend Print and Layered Print” To perform the layered print, you need to use the printing data where the use of the metallic silver ink and the CMYK ink is designated. - Page 58 Using Metallic Silver Ink When using R-Works Procedure Create print data. P. 41, "Creation of Print Data Using Metallic Color (R-Works)" Click The [Output Settings] screen opens. Click from [Printing Preferences]. The [Printing Preferences] settings are displayed. Chapter 2 Fully Utilizing the Machine...
- Page 59 Select [Standard Film] from [Media Type]. Select [CMYK->Mt] from [Ink Mode]. Although you can set the [Media Type] and [Ink Mode] from the BN-20 driver's Printing Preferences, when outputting from R-Works, the settings in R-Works take priority. Click [Output].
- Page 60 P. 43, "Creation of Print Data Using Metallic Color (General Application for Drawing)" Open the BN-20 driver's Printing Preferences screen. P. 6, "How to Open the BN-20 Driver's Printing Preferences Screen" Select [Standard Film] from [Media Type] on the [Settings] tab.
- Page 61 Select [Job Type] on the [Printer Adjust- ment] tab. Click [OK]. The BN-20 driver's Settings screen closes. Output the print data from the application software. For more information on using the application software, refer to the documentation supplied with your application software.
-
Page 62: Printing A Metallic Color Chart (R-Works)
Using Metallic Silver Ink Printing a Metallic Color Chart (R-Works) The Metallic Color Chart is the printing sample of the special metallic color. By printing the Metallic Color Chart, you can confirm the “complete metallic color chart” representing the special metallic color itself that can be printed with “Your Printer”... - Page 63 Using Metallic Silver Ink Click The [Output Settings] screen opens. Click from [Layout]. The [Layout] settings are displayed. Printing is performed at the size displayed in the [Output Possible Area]. Check the size of the loaded media. If the media size is too small, some areas will not be printed. Replace the media, or use [Size] to reduce the output-area.
-
Page 64: Utility : Other Function
√ ment * When printing with CMYK ink only, this is available when bidirectional printing is set in the BN-20 driver. * Bidirectional printing cannot be performed for print jobs that use metallic silver ink. Chapter 2 Fully Utilizing the Machine... -
Page 65: Setting Of Dry Time
Utility : Other Function Setting of Dry Time This section explains the method of setting the time that the printer needs to wait before it starts printing or cutting the next page. Especially, in the case of printing & cutting, ink needs to be sufficiently dried before cutting is started. - Page 66 The setting in the BN-20 driver is disabled. Although Dry Time can be set in the BN-20 driver, if you make output from R-Works, priority is given to the setting in R-Works, and the setting in the BN-20 driver is disabled.
- Page 67 Note on the setting in Roland VersaWorks When you set the dry time in Roland VersaWorks, if [Use Printer Settings] is set, 0 is set to the dry time. You should note that the setting in the BN-20 driver is not reflected.
-
Page 68: Resetting All Adjustments To Factory Default Values
Utility : Other Function Resetting All Adjustments to Factory Default Values Click "Factory Reset" in the "Option" tab of Utilities, and you can reset all the settings in utilities to the initial settings. Click "FactoryReset", and the message shown in the figure is displayed. Click "Yes" to reset the settings. Chapter 2 Fully Utilizing the Machine... -
Page 69: Chapter 3 Maintenance
Chapter 3 Maintenance Introduction: About Maintenance ..........68 Automatic Maintenance Function: Points to Note......68 Maintenance Schedule ..............68 Checking Ink Levels and Replacing ..........69 Checking Ink Levels ..............69 How to Replace Ink Cartridges ..........70 Daily Maintenance ...............71 Maintenance of Ink Cartridges...........71 Cleaning ..................71 Replacing the Waste Cartridge ..........72 Care and Maintenance of the Print Heads ........73 Periodical Cleaning Maintenance ..........74... -
Page 70: Introduction: About Maintenance
Introduction: About Maintenance Automatic Maintenance Function: Points to Note This machine has a function to automatically perform periodical maintenance tasks, e.g. to prevent the print heads from drying out. To ensure the maintenance is properly carried out, please observe the following points: ... -
Page 71: Checking Ink Levels And Replacing
Checking Ink Levels and Replacing Checking Ink Levels Ink levels can be checked in the Ink tab of the Utility window. A simple bar scale indicates the level of ink in each cartridge. * Displayed ink levels are estimates and are slightly different from the actual ink levels. MT: Metallic silver MG: Magenta CY: Cyan... -
Page 72: How To Replace Ink Cartridges
Checking Ink Levels and Replacing How to Replace Ink Cartridges When ink runs out, a warning beep is heard and printing is temporarily suspended. Pull out the empty cartridge and insert a new one. Then printing resumes. Always gently shake the new cartridge before installing. -
Page 73: Daily Maintenance
Daily Maintenance Maintenance of Ink Cartridges Ensure the following procedures are carried out without fail. The ink ingredients have a tendency to separate and settle. Metallic silver ink is particularly prone to separation; if left, such separated ingredients will dry and harden, and this may cause a malfunction. -
Page 74: Replacing The Waste Cartridge
If you do not have a waste cartridge that you can replace the existing one with, turn the printer off. To purchase a waste cartridge, contact your authorized dealer or Roland DG. Never use a used waste cartridge. The waste fluid may overflow because it cannot be managed prop- erly. -
Page 75: Care And Maintenance Of The Print Heads
P. 74, “Periodical Cleaning Maintenance” * Print heads are consumable parts and subject to wear. Depending on the frequency of use, periodical re- placement is required. Please order them directly from us or your authorized Roland DG Corp. dealer. Chapter 3 Maintenance... -
Page 76: Periodical Cleaning Maintenance
Periodical Cleaning Maintenance About Periodical Cleaning Menus There are four levels of cleaning for this machine. Choose the appropriate menu in accordance with the ma- chine condition and previous use. Normal Cleaning Carry out test printing before the start of daily operations; if dot drop- out occurs, perform Normal Cleaning. - Page 77 Periodical Cleaning Maintenance Click [Check Nozzle Condition]. Click [Test Print]. The test pattern is printed. Follow the on-screen instructions to check for nozzle clogging. Nozzle is clogged Proceed to Nozzle is not clogged Click [Finish] to finish. ...
-
Page 78: Manual Head Cleaning
Roland DG Corp. dealer. Print heads are consumable parts. Depending on the frequency of use, periodical replacement is required. Please order them directly from us or your authorized Roland DG Corp. dealer. Chapter 3 Maintenance... - Page 79 Please order cleaning sticks directly from us or your authorized Roland DG Corp. dealer. Do not use a cleaning stick more than once; the print quality will deteriorate. Dispose of the stick after each cleaning.
-
Page 80: Replacing Consumable Parts
To purchase a wiper, contact us directly or your au- thorized Roland DG Corp. dealer. When the warning alarm sounds during replacing the wiper An alarm sounds about 30 minutes after the start of the operation. Perform the operation by following the message displayed in the Utility window. -
Page 81: Replacing The Felt Wiper
To purchase a felt wiper, contact us directly or your authorized Roland DG Corp. dealer. When the warning alarm sounds during replacing the felt wiper An alarm sounds about 30 minutes after the start of the operation. Perform the operation by following the message displayed in the Utility window. -
Page 82: Replacing The Cutter Blade
Replacing Comsumable Parts Replacing the Cutter Blade When the cutter blade is blunt, the edge is chipped, or the cutting quality has deteriorated, replace with a new cutter blade. CAUTION Always carefully follow the procedures in accordance with the instruc- tions. - Page 83 Replacing Comsumable Parts Replace the blade. Press this pin. Install a new Remove the blade. old blade. Support the screw from below and insert the blade holder. Failure to do this may adversely affect the cut- ting quality. ...
-
Page 84: When Moving The Unit
When Moving the Unit Procedures from Preparing to Move Through Reinstalling To move the machine, you must completely drain all ink inside the machine and secure the print heads in place with packing materials to protect them. Attempting to move the machine without first doing this may result in damage to internal components due to leaking ink or damage to the heads. - Page 85 Chapter 4 Appendix Read this section whenever you face a problem ......84 The Machine Doesn’t Run ............84 Attractive Printing or Cutting is Impossible ........85 Media Jam Occurs! ..............87 Media Feed is Not Smooth ............87 Print Head Stops Moving............88 Installation is impossible ............89 When uninstalling the driver, perform following operation.
-
Page 86: Chapter 4 Appendix
Read this section whenever you face a problem The Machine Doesn’t Run The Printer Unit Doesn't Run Is the power switched on? Switch on the printer's main power, then press the POWER key and make sure the key lights up. Does the POWER key stay steadily lighted? Output is not performed when POWER key does not stay steadily lighted. -
Page 87: Attractive Printing Or Cutting Is Impossible
Read this section whenever you face a problem Attractive Printing or Cutting is Impossible Printed results are coarse or contain horizontal stripes Do the print heads show nozzle clogging? Carry out a printing test and make sure no nozzle clogging occurs. If nozzle clogging is present, perform head cleaning. -
Page 88: The Media Becomes Soiled When Printed
Read this section whenever you face a problem Is the printer installed in a level and stable location? Never install the machine in a location where it is tilted or where it may wobble or experience vibration. Also, make sure that the print heads are not exposed to circulating air. These factors may lead to nozzle clogging or reduced printing quality. -
Page 89: Media Jam Occurs
Read this section whenever you face a problem The printed surface is damaged when cutting Does the tip of the blade holder cap scrap the printed surface? The tip of the blade holder cap may scrape, and soil or damage the printed surface. If this happens, increase the amount of blade extension. -
Page 90: Print Head Stops Moving
Read this section whenever you face a problem Is the humidity of the room too high? Use this machine in the environment of 35 to 80 %RH (non condensation). Is the using media deflected? If using the deflected media, it cause winkle of the media. Media Feed Is Not Straight Is the media loaded and set up straight and securely? Feed is not smooth when the media is not straight or is tensioned unevenly on the left and right. -
Page 91: Installation Is Impossible
Read this section whenever you face a problem If the print-head carriage move to the standby If the heads still do not move after "What to Do First" is performed, carry out the following emergency response measure, then contact your authorized Roland DG Corp. dealer. Procedure ... -
Page 92: Windows Vista
9. Uninstall the driver. Carry out the steps from step 3 in page 91 “Uninstall the Driver Windows 7” to uninstall the driver. 10. Install the driver again according to "BN-20 First Step Guide. ” Windows Vista 1. If the [Found New Hardware] appears, click [Cancel] to close it. -
Page 93: When Uninstalling The Driver, Perform Following Operation
Read this section whenever you face a problem When uninstalling the driver, perform following operation. Windows 7 *If the driver is uninstalled without following the procedure given below, there is a possibility that it might not be able to be re-installed. 1. - Page 94 Read this section whenever you face a problem 19. If it is necessary to restart your computer, a window prompting you to restart it appears. Click [Yes]. 20. The uninstallation finishes after the computer restarts. When using the CD-ROM, specify the folder as shown below (assuming your CD-ROM drive is the D drive). D:\Drivers\25D\WINVISTAX64 (64 bit edition) D:\Drivers\25D\WINVISTAX86 (32 bit edition) Windows XP...
-
Page 95: Important Notes When Performing Output From General Application
Please don't cancel printing by operating Illustrator. If you cancel printing, press the BN-20 power key for a few seconds. When you print from Illustrator to BN-20, the now printing message is displayed. If you click [Cancel] button in the message box, but the printing process is still alive. -
Page 96: Handling Messages And Error Messages
Handling Messages and Error Messages A Message Appears These are the main messages that appear in the Utility window to prompt correct operation. They do not indicate any error. There are other messages that appear in the Utility window. Follow the displayed prompts and take action accordingly. -
Page 97: Error Messages
Utility window shows the causes of errors and troubleshooting information. If the troubleshoot- ing information displayed in the Utility window or action described here does not correct the problem, or if an error message not described here appears, contact your authorized Roland DG Corp. dealer. -
Page 98: Motor Error
Handling Messages and Error Messages [Motor error ] A motor error occurred. Operation cannot be continued. By following the messages displayed in the Utility window, remove the media, close the front cover, and then hold down the POWER key to switch the sub power off. This error may be caused by such factors as an incorrect loading of the media, a media jam, or an operation that pulls the media with excessive force. - Page 99 Note the number displayed on the screen, then switch off the main power. After you switch off the power, inform your authorized Roland DG Corp. dealer of the number that appeared on the screen. [Ink Cartridge error : *** ink cartridge ] A cartridge that cannot be used was installed.
-
Page 100: Main Specifications
Main Specifications Maximum Area The printing or cutting area along the horizontal plane (the direction in which the carriages move) is deter- mined by the position of the pinch rollers. Max. 480 mm (18.9 in.) Printing or cutting area 5 mm 1.4 mm 1.4 mm 5 mm... -
Page 101: About The Blade
Main Specifications About the Blade The cutting conditions and the service life of the blade change according to the media and the operating environment, even when you're using identical blades. The service life also differs according to the type of blade. -
Page 102: Dimensional Drawing
Main Specifications Dimensional Drawing Unit: mm 1009 305.5 Chapter 4 Appendix... -
Page 103: Specifications
Temperature: 20 to 32°C (68 to 90 °F), humidity: 35 to 80%RH (non- ment condensing) Power off Temperature: 5 to 40°C (41 to 104°F), humidity: 20 to 80%RH (non- condensing) Accessories Power cord, USB cable, blade, blade holder, Roland Software Pack- age, Software RIP , User's Manual,etc. (Roland VersaWorks) Chapter 4 Appendix... - Page 104 (*2) The length of printing or cutting is subject to the limitations of the program. (*3) Media type: Media specified by Roland DG Corp. Temperature: 25°C (77°F), humidity: 50% Roll media must be loaded correctly. Front margin: 35 mm or more ...
-
Page 105: System Requirements For Usb Connection
Main Specifications System Requirements for USB Connection Computer Model preinstalled with the 32- or 64-bit edition of Windows 7, Vista, XP, or upgraded computer originally preinstalled with Windows XP or later. USB cable Use the included USB cable. Chapter 4 Appendix... - Page 112 R2-110905...