Table of Contents
Advertisement
Advertisement
Table of Contents

Related Manuals for Denon DN-2500F


Summary of Contents for Denon DN-2500F
- Page 1 DOUBLE CD PLAYER DN-2500F OPERATING INSTRUCTIONS...
- Page 2 BY ANYONE EXCEPT PROPERLY QUALIFIED SERVICE PERSONNEL. In order to prevent electric shock, do not open the top cover. If problems occur, contact your DENON dealer. 3. Do not place anything inside Do not place metal objects or spill liquid inside the CD player.
-
Page 3: Safety Instructions
SAFETY INSTRUCTIONS Read Instructions – All the safety and operating Power-Cord Protection – Power-supply cords should be instructions should be read before the appliance is routed so that they are not likely to be walked on or operated. pinched by items placed upon or against them, paying particular attention to cords at plugs, convenience Retain Instructions –... - Page 4 SVENSKA NEDERLANDS ESPAÑOL FRANCAIS DEUTSCH ENGLISH NOTE ON USE / HINWEISE ZUM GEBRAUCH / OBSERVATIONS RELATIVES A L’UTILISATION NOTAS SOBRE EL USO / ALVORENS TE GEBRUIKEN / OBSERVERA • Do not let foreign objects in the set. • Keine fremden Gegenstände in das Gerät •...
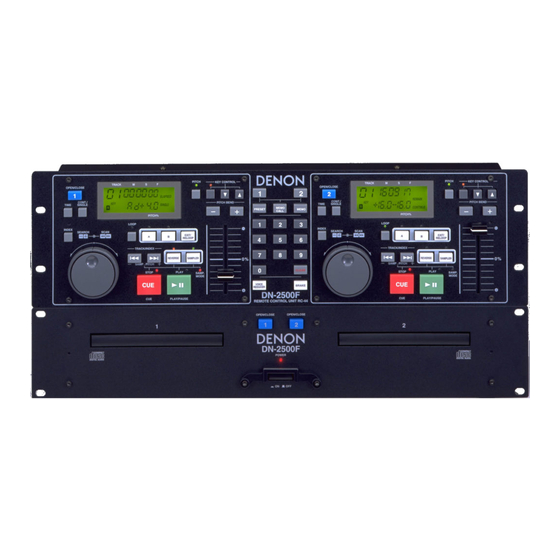
- Page 6 MAIN FEATURES The DN-2500F is a double CD player which incorporates all of the popular functions from the DN-2000FMKII and adds addi- tional features for more advanced DJ mixing and remixing. The DN-2500F can be easily mounted on a standard 19-inch rack.
-
Page 7: Table Of Contents
NAMES AND FUNCTIONS ....1 0---12 ( 4) Changing the sample's pitch ....20 Setting the normal disc playback mode after DN-2500F (Main Unit) Front Panel ... ( 5) RC-44 (Control Unit) Front Panel ..1 0, 11 recording a sample ......20 ( 2) DN-2500F (Main Unit) Rear Panel .... -
Page 8: Preparations
Mount the units onto your console or rack with 19" EIA rack rails. CAUTION: The DN-2500F will work normally when the main unit is mounted with the front panel within 20 degrees of the vertical plane. I f the unit is tilted excessively, discs may not load or unload properly. (Figure 5) -
Page 9: Names And Functions
NAMES AND FUNCTIONS Below is a description of the functions of the controls listed on Pages 4 and 5. A Buttons DN-2500F (Main Unit) Front Panel Use these buttons to set the starting point for loop play- POWER (Power Switch and Indicator) back. -
Page 10: Dn-2500F (Main Unit) Rear Panel
Connect this connector to the REMOTE connector on the out and set. DN-2500F (main unit) using the included control cord. PRESET Button Press the CD "1 " or "2" button while pressing this but- ton to set CD 1 or 2 to the preset mode. -
Page 11: Basic Operations
Custom Setting Memory Indicator Pitch Display This lights when there is data stored in the memory. This indicates the playback speed (pitch). (-16.0 to +16.0) Voice Reducer Indicator This lights when the voice reducer mode is on. Key/ Index Display This indicates the key when in the key control mode. -
Page 12: 2) Selecting Tracks Or Index
Figure 8 • When a track is selected, the DN-2500F automatically cues to the point at which the sound begins, skipping silent sections at the beginning of tracks. (Cue to Music) Level of cue point can be selected with preset item 4. -
Page 13: Stopping Playback
(4) Stopping Playback There are two ways to stop playback. Press the PLAY/PAUSE button during playback to pause at that point. Press the CUE button during playback to return to cue mode at the position at which playback started. (Back Cue) Blinking Figure 10 Pausing... -
Page 14: Cueing
(6) Cueing • "Cueing" is the action of moving to a specified point (the cue point) and waiting for playback to begin (cue mode). When the PLAY/PAUSE button is pressed after cueing, playback starts immediately. (Instant Start) • When the track search operation is completed after pressing the TRACK buttons, the player locates the position at which the sound starts and automatically cues there. -
Page 15: Scanning
MATCHING THE BEATS PER MINUTE (BPM) • With the DN-2500F, there are two ways to adjust the playing speed and match the BPMs of the two CDs: • Use the pitch slider to adjust the BPM statically. One of three adjustments ranges can be selected by the Preset Mode. -
Page 16: Pitch Bending
Figure 16 SEAMLESS LOOP The DN-2500F is equipped with a seamless loop function. NOTE: The seamless loop mode cannot be used at the same time as the sampler mode. Starting seamless loop playback Press the PLAY/PAUSE button. -
Page 17: Leaving The Seamless Loop Mode Temporarily
When the ending point (B) is set, playback starts from the starting point ( A) with no interruption in the sound. After this, the section between the starting point (A) and the ending point ( B) is played repeatedly with no interruption in the sound. Alternative way to set the seamless loop starting point (A) and ending point (B) While the disc is playing, press the LOOP and B buttons. -
Page 18: Canceling The Seamless Loop Settings
SAMPLER The DN-2500F is equipped with a function for recording the sound of a disc for up to 8 seconds on both players. In addition, the recorded sound can be played normally, in the reverse mode (backwards) and in a loop. These sampler functions eliminate the need for a separate sampler. -
Page 19: Playing The Sample
(2) Playing the sample • Press the PLAY/PAUSE button. ( The PLAY/PAUSE button's LED lights.) The sample is played. Stopping the sample ( 3) • Press the CUE button. (The CUE button's LED lights.) The sample is stopped. Changing the sample's pitch •... -
Page 20: Playing The Sample In Reverse
( The SAMPLER button's LED and the SAMP. MODE LED turn off.) This clears the recorded sample. KEY CONTROL The DN-2500F is equipped with a function for adjusting the key of the sound being played. Press the KEY CONTROL button. (The KEY CONTROL button's LED lit.) (The current setting appears in the key section of the display.) -
Page 21: Voice Reducer
The key control function is canceled. VOICE REDUCER The DN-2500F is equipped with a function to reduce the sound of the vocals in the music. This sound can be used as an effect sound for the sampler, etc. Press the CD1 (or CD2) button while pressing the VOICE REDUCER but- ton- appears in the voice reducer section of the display.) -
Page 22: Brake
BRAKE The DN-2500F is equipped with a function for gradually slowing the playback speed before stopping. This sound can be used as an effect sound. (Playback stops in about 0.5 seconds.) 9 Press the CD 1 (or CD 2) button while pressing the BRAKE button. -
Page 23: 2) Overwriting Previous Data
(2) Overwriting previous data ( This is only possible if 200 sets of data are already stored.) Press the CD 1 (or CD 2) button while pressing the MEMO button. flashes in the key section of the display.) Use the number buttons to input the number of the memory to be over- written. -
Page 24: 3) Recalling Data
( 3) Recalling data When a custom setting memory disc is set in the player, the i ndicator flashes, indicating that there is a memory. Use the TRACK >>l and l<< buttons to select the track whose data you want to recall. appears in the memory section of the display after the track is se- l ected.) Press the CD 1 (or CD 2) button while pressing the MEMO CALL button. -
Page 25: Direct Search
NOTE: Even when the data is cleared, the memory remains called out. DIRECT SEARCH The DN-2500F is equipped with a function for directly accessing a specific position on the disc or a specific index number using the number buttons and the CUE and PLAY/PAUSE buttons. -
Page 26: Direct Index Search
PRESETTINGS The DN-2500F is equipped with a function for storing various types of preset data. This data is not lost when the power is turned off. Use this function to store in the memory the desired settings for the items described on the table on Page 29. The presettings can be made independently for CD 1 and CD 2. - Page 27 Use the number buttons to input the number of the preset item. ( The preset item number appears in the track and time sections of the dis- play, and the preset data appears in the key section.) To select the preset data, press and hold in the number button correspond- i ng to the preset item number.
-
Page 28: Table Of Preset Functions
(2) Table of Preset Functions " ' indicates factory settings FADER INPUT Fader playback is possible by connecting a console fader to the fader input plug. Playback starts when the switch is turned on. The pause mode is set when the switch is turned off. (FADER INPUT LEVEL HCMOS (Ii = -3mA)) -
Page 29: Before Switching Off The Power
I f the disc is dirty, wipe it off with a soft dry cloth. dirt or damage. We recommend using DENON's AMC-22 CD CLEAN- Do not place discs in the following areas: 1) Areas exposed to direct sunlight for a considerable Do not use benzene, thinner, water, record spray, elec- ti me. -
Page 30: Specifications
SPECIFICATIONS GENERAL Type: Twin mechanism compact disc player with wired controller Disc type: Standard compact discs (12 cm and 8 cm discs) Dimensions: Player unit: 482 (W) x 88(H) x 252 (D) mm (without feet) 19" (W) x 3-15/32 (H) x 9-59/64 (D Control unit: 482 (W) x 132(H) x 40 (D) mm (without feet) 19"...