Table of Contents
Advertisement
Advertisement
Table of Contents

Related Manuals for Yamaha 01V96i


Summary of Contents for Yamaha 01V96i
- Page 1 2nd Edition...
-
Page 2: Table Of Contents
Recording Methods: To mix or not to mix...................23 Wordclock ..............................23 Software setup ............................24 Recording...............................24 Playback ..............................27 DAW Remote Control ...........................27 01V96i Editor ................................28 Setup: ..............................28 Convenient save and load data ......................29 01V96i Tips & Short-Cuts ............................30 Using the [SEL] switches........................30 Other Short-Cuts ..............................30 Other Tips ................................31 2/32... -
Page 3: Getting Started With A 'Blank' Desk
01V96i Quick Start Guide Getting Started with a ’blank’ desk To erase all memories in the desk, and return it to its factory settings, hold the SCENE MEMORY [STORE] switch while turning on the power, and choose the INITIALIZE option. (You don’t need to do this if you have just unpacked the product from its box for the first time)! To start from blank settings without erasing the memories, just recall SCENE 00. -
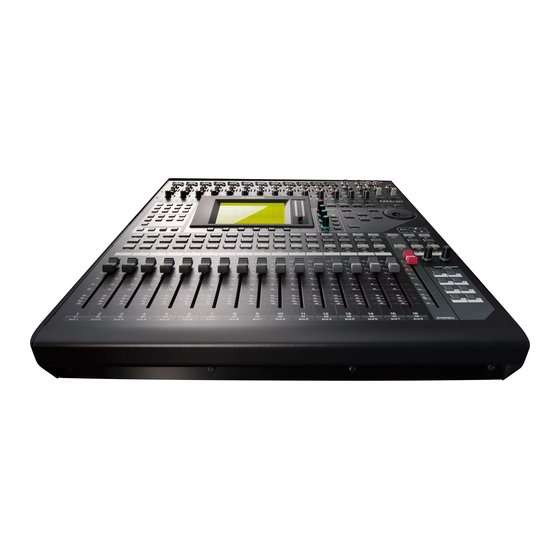
Page 4: Top Panel
01V96i Quick Start Guide Top Panel INPUT A/B connectors accept mic/line inputs with XLR and balanced TRS 4 Line inputs with phone jack respectively. If you plug cables to INPUT A and INPUT B of the balanced jacks same number, only the signal from INPUT B is effective. -
Page 5: Understanding The Front Panel
01V96i Quick Start Guide Understanding the Front Panel All the controls are on the front panel, laid out in logical areas: Display Access switches Analog input gain and pad (+48V switches are on the rear panel, (choose what to view on the LCD) -
Page 6: Controlling Channel Faders
Input channels 17-32 Remote Layer for controlling other Input channels 1-16 functions / devices Each fader controls a different input to the 01V96i. This assignment is not fixed: it can be changed in the PATCH menu. Here is the default patch: ☞... -
Page 7: Changing Input Patch
01V96i Quick Start Guide Changing INPUT PATCH To assign different inputs to the input channels, such as Slot 1 inputs 9-16, follow these steps: Press the [PATCH] DISPLAY ACCESS key. If necessary, press it repeatedly until the IN PATCH page is dis- played. -
Page 8: Fader Mode
01V96i Quick Start Guide FADER MODE There are nine FADER MODE keys to the left of the LCD. [HOME] is the normal mode for the faders. Pressing the [HOME] key will show various METER pages on the LCD, so input, output, and Effect channels can be metered. -
Page 9: Using The Selected Channel Controls
01V96i Quick Start Guide Using the SELECTED CHANNEL controls When a channel is selected, some of its settings can be seen and controlled in the SELECTED CHANNEL area. The cur- rently selected channel’s name and number is always shown in the top-left corner of the LCD screen. -
Page 10: Pan
01V96i Quick Start Guide ✦ The PAN settings of the selected input channel can be edited here (output channels do not have Pan). 01V96i can also perform surround panning. To select a SURROUND MODE, press the [PAN/ROUTING] Display Access Key so the SURR MODE page is shown on the LCD. -
Page 11: Dynamics
01V96i Quick Start Guide ✦ DYNAMICS Each input channel has both a GATE and a COMP. The output channels only have a COMP. When the [DYNAMICS] Display Access key is pressed, the LCD shows the relevant GATE or COMP screen. Gain Reduction meters and Key-In source can also be viewed here. -
Page 12: Routing
01V96i Quick Start Guide ✦ ROUTING In the [PAN/ROUTING] menu, the Selected Channel can be routed to any of the 8 Buses, to the Stereo Bus and to a Direct Output. Move the cursor to the required bus number ([1-8], [S] for Stereo and [D] for Direct output) and press [ENTER] to route the channel. -
Page 13: Ø / Insert / Delay
01V96i Quick Start Guide ✦ Ø / INSERT / DELAY Press this DISPLAY ACCESS key to see Phase, Insert and delay information on the LCD. Phase reverse is only avail- able for input channels. Insert and Delay are available for all channels except for the Stereo Inputs. Inserts need to be patched, choosing which rear-panel connection (or internal Effect) to use for INSERT OUT and INSERT IN. -
Page 14: Channel Pair
01V96i Quick Start Guide CHANNEL PAIR If some Stereo input sources are used, such as a Synthesizer or CD player, it could be useful to pair the relevant input channels together. There are two modes for pairing channels, as selected in the [PAIR/GROUP] menu. -
Page 15: Fader Groups
01V96i Quick Start Guide FADER GROUPS Fader Groups are useful for controlling many faders by just moving one fader. There are 8 Fader Groups available for input channels and 4 Fader Groups for output channels. Here is how to link faders together in a Group: Access the [PAIR/GROUP] displays on the LCD. -
Page 16: Mute Groups
01V96i Quick Start Guide MUTE GROUPS Mute Groups are useful for switching On/Off many channels by just pressing one switch. There are 8 Mute Groups avail- able for input channels and 4 Mute Groups for output channels. To assign channels to a Mute Group, follow the same 3 steps as made for a Fader Group, but while viewing the MUTE GROUP screens (Groups I to P are for Inputs, Groups U to X are for Outputs). -
Page 17: Effects
01V96i Quick Start Guide EFFECTS There are 4 Multi-Effect Units inside 01V96i. They can be viewed on the LCD by pressing the [EFFECT] Display Access key, and then pressing one of the buttons [F1]-[F4] below the LCD. ✦ EDITING AN EFFECT The Effect parameters can be edited using the data wheel and cursor keys to the right of the console. -
Page 18: Using An Effect
01V96i Quick Start Guide ✦ USING AN EFFECT Before an effect can be used properly, it needs to be patched. The default patch (factory setting) has Aux 1-4 patched to the inputs of FX1-4 respectively. The stereo out- puts of FX1-4 are patched to stereo input channels 1-4 respectively. -
Page 19: Scene Memory
01V96i Quick Start Guide SCENE MEMORY There are 99 SCENE MEMORIES available in 01V96i. Each Scene stores all the mixing parameters, including all input channel, output channel and Effects parameter data. The SCENE MEMORY list can be seen by pressing the [SCENE] Display Access key. -
Page 20: Scene Copy / Paste
01V96i Quick Start Guide ✦ SCENE COPY / PASTE If some settings need to be copied from one Scene to some others, the PATSE SRC and PASTE DST LCD screens can be used. In the PASTE SRC screen, choose which parameters of which channels should be copied. -
Page 21: Monitor
01V96i Quick Start Guide MONITOR In this section of the console, the operator chooses what to listen to, and controls the listening level. The MONITOR OUT LEVEL adjusts the main lis- tening level. The [MONITOR/2TR IN] button selects what to lis- ten to in the monitors, (and in the headphones). -
Page 22: Live Recording And Playback With Cubase Ai
Live Recording and Playback with Cubase AI The 01V96i features USB 2.0 connectivity that allows you to multi-track record 16 in/16 out, with audio streaming at 96kHz/24bit, using Steinberg's Cubase AI bundled DAW software. This chapter will show the simplest method to create your audio production with the 01V96i and a computer. -
Page 23: Recording Methods: To Mix Or Not To Mix
Wordclock is the signal that synchronizes digital audio equipment from one device to another. The 01V96i supports recording up to 96kHz/24bit with 16 channels. If you need to change the wordclock source on the 01V96i, press [DIO/ SETUP] button to access Wordclock page and assign (INT48k as default). -
Page 24: Software Setup
✦ Software setup The follwoing applications are necessary to be installed in the computer: ● Download and install Yamaha Steinberg USB Driver from Yamaha’s proaudio website. ☞ http://www.yamahaproaudio.com/global/en/downloads/firmware_software/ ● Install bundled Cubase AI and update it to the latest version. - Page 25 & 2 to check the level balance between them. Startup Cubase AI, open Device Setup in the Devices menu and set the driver to Yamaha Steinberg USB ASIO (Yamaha 01V96i) in the VST Audio System sec- tion. Open VST Connections in the Device...
- Page 26 01V96i Quick Start Guide If the Record Format (44.1kHz – 16 bit by default) is different to the 01V96i, it will be highlighted. Click on it to change the Record Format, making sure the sample rate matches that of the 01V96i.
-
Page 27: Playback
✦ DAW Remote Control The 01V96i’s Remote function enables you to control external DAW, such as Cubase. For the information on how to setup the 01v96i to control Cubase, please refer to P.83 of the 01V96i ref- erence manual. 27/32... -
Page 28: 01V96I Editor
Yamaha proaudio website. Setup: To control your 01V96i with the Editor, you need to assign the input and output ports on both Studio Manager V2 Host and 01V96i Editor. Press the [DIO/SETUP] Display Access key on the 01V96i to open the MIDI/HOST page, then patch the Studio Man- ager port to USB. -
Page 29: Convenient Save And Load Data
All of your console’s mix setting can be saved and loaded in your computer and synchronize between the 01V96i. In case of using a rental or another installed console, you can easily save your settings to a computer and load them into the other console at your convenience. The data files saved by 01V96i Editor have a filename extension of “.YSE”. -
Page 30: 01V96I Tips & Short-Cuts
01V96i Quick Start Guide 01V96i Tips & Short-Cuts Using the [SEL] switches 1. CHANNEL PAIR Hold [SEL] for one channel and press [SEL] for the adjacent channel to make a stereo pair. This works for input and output channels, so long as the left side is an odd number and the right side is an even number. The channel with the [SEL] button you hold first is the master channel for the pair: its settings are copied to the other channel (except for pan and bus routing). -
Page 31: Other Tips
01V96i Quick Start Guide Other Tips 1. Fader Groups To have DCA (or analog VCA) style Fader Masters, first check the INPUT FADER MASTER box near the top of the IN FADER GROUP display page. Then select the [REMOTE] FADER LAYER, and assign USER ASSIGNABLE LAYER as the TARGET. - Page 32 Scene +1/–1 Recall: to recall the next or the previous Scene. OSC On/Off: to control the internal Oscillator. Studio Manager: open and close various windows in the 01V96i Editor software on PC or Mac. Display Forward/Back: to scroll through previously viewed displays.