Advertisement
Quick Links
Models Included
• ALPHA 1GT
• ALPHA 2GT
• ALPHA 2GTW
• ALPHA 3GT
• ALPHA 3GTR
• ALPHA 3GTL
• ALPHA 4GT
• ALPHA 5GT
• ALPHA 5GTR
• ALPHA 5GTL
• ALPHA 6GT
• ALPHA 6GTN
CAUTION: Please use
this setup procedure
before attempting to use
this brewer. Failure to follow the
instructions can result in injury or the
voiding of the warranty.
CAUTION: DO NOT
connect this brewer to hot
water. The inlet valve is
not rated for hot water.
CAUTION: When
cleaning, DO NOT use
powders, liquids, cleans-
ers, or any substance containing
chlorine. These products promote
corrosion, cause pitting of
stainless steel and will void the
warranty.
C
ISO 9001:2008 REGISTERED
WILBUR CURTIS CO., INC.
6913 West Acco Street
Montebello, CA 90640-5403
For the latest information go to
www.wilburcurtis.com
Tel: 800-421-6150
Fax: 323-837-2410
W
ilbur
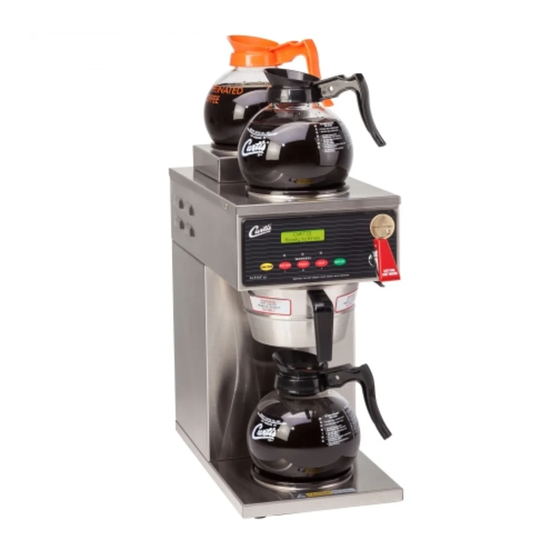
Service Manual, Alpha G3 - Decanter Brewer
Important Safeguards/Symbols
This equipment is designed for commercial use. Any servicing other than cleaning and routine maintenance should be
performed by an authorized Wilbur Curtis Company Service Technician.
• DO NOT immerse the unit in water or any other liquid
• To reduce the risk of fire or electric shock, DO NOT open service panels. There are no user serviceable parts
inside.
• Keep hands and other items away from hot areas of the unit during operation.
• Never clean with scouring powders or harsh chemicals.
Symbols:
WARNINGS – To help avoid personal injury
Important Notes/Cautions – from the factory
Sanitation Requirements
This Curtis Generation 3 Unit is Factory Pre-Set and Ready to Go Right from the Box.
Following are the Factory Settings for your Alpha Coffee Brewing System:
• Brew Temperature = 200°F • Warmer Setting on HIGH with Quality Timer off.
• Brew Volume = Set to Vessel Requirement.
System Requirements:
• Water Source: 20 – 90 PSI. Must have a minimum flow rate of ½ GPM (preferred flow rate is 1 gpm).
• Electrical: See attached schematic for standard model or visit www.wilburcurtis.com for your model.
SETUP STEPS
1. The unit should be level (left to right - front to back), on a secure surface.
2. Connect the water line to the water inlet fitting on the rear of the unit. Water volume flow to the machine should be consistent. Use
tubing sized sufficiently to provide a minimum flow rate of one gallon per minute.
NSF International requires the following water connection:
1. A quick disconnect or additional coiled tubing (at least 2x the depth of the unit) is required so that the unit can be moved
for cleaning.
2. This unit must be installed with adequate backflow protection to comply with applicable federal, state and local codes.
3. W ater pipe connections and fixtures directly connected to a portable water supply shall be sized, installed and maintained
in accordance with federal, state, and local codes.
3. Connect the unit to electrical outlet with appropriate amperage rating (see serial tag on machine).
4. Once power has been supplied to the unit, flip the toggle switch to the 'ON' position (located on the rear of the unit), the water tank
will begin to fill. When the water level in the tank reaches the probe, the heating element(s) will turn on.
5. Water in the heating tank will require approximately a half hour before reaching operating temperature (factory setting of 200°F).
Where applicable, turn on the Universal Control Module (UCM). When the unit reaches operating temperature, it will display
"READY TO BREW".
BREWING INSTRUCTIONS
1. The brewer should be ON. Confirm this at the rear toggle switch, then press the ON/OFF button. Ready-to-Brew should be displayed.
2. Place an empty decanter on warmer plate.
3. Place a new paper filter into the brewcone.
4. Pour the proper amount of ground
coffee into the brewcone.
For the latest specifications and information go to www.wilburcurtis.com
Technical Support: 1-800-995-0417 M-F 5:30am-4:00pm PT
C
C
urtis
ompany
5. Slide the filled brewcone into the
rails on the coffee brewer.
Email: techsupport@wilburcurtis.com
, i
.
nC
6. Press the BREW button on the
control panel to start brewing.
1
Advertisement

Related Manuals for Curtis ALPHA 1GT


Summary of Contents for Curtis ALPHA 1GT
- Page 1 Models Included Sanitation Requirements • ALPHA 1GT • ALPHA 2GT This Curtis Generation 3 Unit is Factory Pre-Set and Ready to Go Right from the Box. Following are the Factory Settings for your Alpha Coffee Brewing System: • ALPHA 2GTW • ALPHA 3GT • Brew Temperature = 200°F • Warmer Setting on HIGH with Quality Timer off.
-
Page 2: Program Menus
Your Curtis G3 System is Factory Pre‑Set for Optimum Performance. After connection to water and power; the rear toggle switch must be on. You will hear a beep sound, indicating power is available to the controller. <ALP3/4/5> CURTIS CURTIS The control displays . Press ON/OFF button and the screen will display . After three seconds, is displayed. CURTIS FILLING CURTIS Water will fill the tank (approximately 2-3 minutes depending on water flow rate). When the proper level is reached will appear on the screen. It takes approxi- HEATING mately 20 minutes to reach setpoint temperature of 200°F. CURTIS Control will display when temperature reaches the setpoint (200°F). Unit is now ready to brew. READY TO BREW To Go Into Programming Turn off (dark display) by pressing ON/OFF button (yellow). Press and hold BREW button (green) and then press and release ON/OFF button (yellow). ENTER CODE ENTERING PROGRAM Continue holding BREW button. Display will read , wait until is displayed Enter the 4-digit access code, the digits 1-4 correspond to the but- –... - Page 3 Banner Name (Factory set to CURTIS) Press to display letters and change letters or < to move place and EX to exit when complete. This feature allows up to 14 letters to be programmed for company name or regional name. Programming all blanks disables Banner Name.
- Page 4 COVER, TOP ASSY ALP4GT WC-8619 WARMER, TOP ASSY ALP6GT WC-2962-101K KIT, FITTING SPRAYHEAD KYNAR WC-37061* KIT, LABEL & UCM ALPHA 1GT CURTIS WC-37062* KIT, LABEL & UCM ALPHA 2GT CURTIS WC-37063* KIT, LABEL & UCM ALPHA 3GT CURTIS WC- 102*...
- Page 5 ILLUSTRATED PARTS LIST ALPHA GT Alpha 1GT Model Shown, Other Models Identical Except Where Noted. VIEWED FROM BELOW 19 18...
- Page 7 Repeat this step until the white layer is removed. Cleaning the Glass Decanter Curtis glass decanters are dish-washer safe. Coffee decanters may be hand washed. 1. Prepare a mild solution of detergent and warm water. 2. Immerse the decanter in detergent solution and clean with a sponge brush.
-
Page 8: Product Warranty Information
Curtis equipment that have not been purchased from the Wilbur Curtis Company, Inc. The Wilbur Curtis Company will not accept any responsibility if the following conditions are not met. The warranty does not cover and is void under the following circumstances: 1) Improper operation of equipment: The equipment must be used for its designed and intended purpose and function.