Advertisement
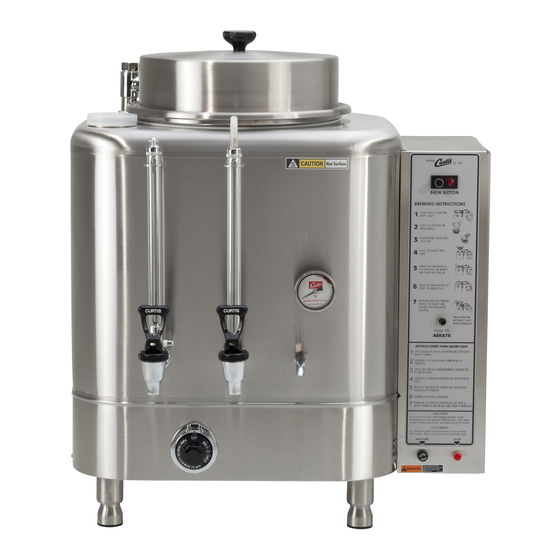
MODELS INCLUDED
• RU-150
• RU-225
• RU-300
• RU-600
• RU-1000
WARNING HOT
LIQUID, Scalding
may occur. Avoid
splashing.
ISO 9001:2008 REGISTERED
WILBUR CURTIS CO., INC.
6913 West Acco Street
Montebello, CA 90640-5403
For the latest information go to
www.wilburcurtis.com
Tel: 800-421-6150
Fax: 323-837-2410
W
Service Manual – RU Series Automatic Urns
Important Safeguards/Symbols
This appliance is designed for commercial use. Any servicing other than cleaning and maintenance
should be performed by an authorized Wilbur Curtis service center.
• To reduce the risk of fire or electric shock, do not open side or bottom panel. No user serviceable
parts inside.
• Repair should be performed only by authorized service personnel.
• Keep hands and other items away from hot parts of unit during operation.
• Never clean with scouring powders, bleach or harsh chemicals.
Symbols
WARNINGS – To help avoid personal injury
Important Notes/Cautions – from the factory
Sanitation Requirements
The RU Automatic Urn is Factory Pre-Set and Ready to Go... Right from the Carton.
Factory Settings:
• Brew Temperature = 200°F
• Brew Volume = Set to requirements of coffee liner
System Requirements
• Water Source: 20 – 100 psi (Min Flow Rate of 1 gpm)
• Electrical: See attached schematic for standard model or visit www.wilburcurtis.com for your
model.
CAUTION: Please use the setup procedures in this manual before attempting to use brewer.
Failure to follow the instructions can result in injury or the voiding of the warranty.
See setup procedures on page 2.
Brewing Instructions
1. Place filter in basket.
Pour coffee into filter.
Place basket into liner.
Technical Support: 1-800-995-0417 M-F 5:30am-4:00pm PT
C
C
ilbur
urtis
2. Rotate spray head over
bed of coffee inside
filter.
Email: techsupport@wilburcurtis.com
, i
.
ompany
nC
3. Press the BREW but-
ton on control panel to
begin brewing.
Advertisement
Table of Contents

Related Manuals for Curtis RU-150


Summary of Contents for Curtis RU-150
- Page 1 Place basket into liner. filter. begin brewing. may occur. Avoid splashing. ISO 9001:2008 REGISTERED WILBUR CURTIS CO., INC. 6913 West Acco Street Montebello, CA 90640-5403 For the latest information go to www.wilburcurtis.com Technical Support: 1-800-995-0417 M-F 5:30am-4:00pm PT Tel: 800-421-6150 Email: techsupport@wilburcurtis.com...
-
Page 2: Packing List
NOTE: A water filtration system must be used to help maintain trouble-free operation. Air must be purged from the cartridge prior to connection to equipment. In areas with extremely hard water, we recommend the use of a Curtis approved water filter. For our full line of filters, please log on to www.wilburcurtis.com. -
Page 3: Preventive Maintenance
CARE AND MAINTENANCE OF URN PREVENTIVE MAINTENANCE TWICE A WEEK I. Remove the spray head from the urn and clean Coffee urns must have a special coffee liner it once a week. More often in heavy lime scouring twice a week. areas. - Page 4 ILLUSTRATED PARTS LIST AUTOMATIC URNS, RU-150, RU-225, RU-300, RU-600, RU-1000 ELECTRIC *82 NOT INCLUDED WITH GAUGE GLASS ASSEMBLY.
- Page 5 BRACKET, AERATOR PUMP ALL RU URNS WC-3600 T-CONNECTOR 3/16 POLYPROPYLENE RU-150 & RU-225 WC-39570 LABEL, INSTRUCTION PANEL RU-150 & RU-300 (AFTER 1/29/13) WC-39571 LABEL, INSTRUCTION PANEL RU-225 & RU-600 (AFTER 1/29/13) WC-39574 LABEL, INSTRUCTION PANEL RU-1000 (AFTER 1/29/13) WC-2405 ELBOW, 1/2 FLARE x 1/2 NPT...
- Page 6 WC-405R TIMER, AGITATION 120V 50/60Hz WIR/BRKT ALL RU URNS WC-304 TERMINAL STRIP 14-S RU-225, RU-600, RU-1000 WC-303 TERMINAL STRIP 12-S RU-150, RU-300 WC-302 TERMINAL STRIP 6-S RU-1000 WC-3737 KIT, BREW SWITCH 120V RU’S ALL RU URNS WC-5802 BRACKET, WATER LEVEL CONTROL...
- Page 7 EQUIPMENT INDEX № PART № DESCRIPTION USED ON WC-2019 SHIELD, GAUGE GLASS 14” RU-225, RU-600 WC-2014 SHIELD, GAUGE GLASS 11” RU-150 WC-2016 SHIELD, GAUGE GLASS 12” RU-300 WC-2023 SHIELD, GAUGE GLASS 20” RU-1000 WC-2109 GAUGE GLASS ASSEMBLY 14” RU-600, RU-225 WC-2105 GAUGE GLASS ASSEMBLY 11”...
- Page 8 SPRAY ARM ASSEMBLY DESCRIPTION INDEX № PART № WC-2909 SPRAY ARM ASSEMBLY, RU-225/600/1000 WC-2908 SPRAY ARM ASSEMBLY, RU-300, RU-150 WC-4800 SCREW, 8-32 x 1/8” SET S.S. WC-3103 CAP, CLEAN OUT VALVE CORE PLATED WC-4307 RING, PACKING TEFLON 2-REQUIRED WC-2916 NEEDLE, BY-PASS PLATED (SPRAY ARM) WC-4202 NUT, 3/8”...
- Page 9 RU-150 & 225 3 PHASE WC-913-01 220V, 5 KW (CENTER) (LEFT) (RIGHT) (SPIRAL) RU-150-20 5.25 KW, 208/220V, 3PH, 3 OR 4 RU-225 1Ø WIRE + GND. 220V, 1PH, 3 WIRE + GND WC-907-01 220V @ 1.75 KW WC-907-02 220V @ 1.75 KW...
-
Page 10: Gas Connection
ELECTRIC THERMOSTAT ADJUST jacket through the steam hole (just under On electric urns, thermostats are set at the fac- the spray head). Turn the screw ½ turn to tory to cut off at 200ºF. We do not recommend the left. When the thermometer reaches changing this. - Page 11 PROCEDURE FOR ADJUSTING PILOT 1. Remove pilot adjustment cap. Adjust pilot 2. Adjust pilot burner air shutter (if provided) to key, allowing flame to completely envelop the obtain a soft blue flame. end ⅜” of the Thermocouple. TO RE-CALIBRATE THE THERMOSTAT The Unitrol thermostat is built to the most ex- acting standards and is a precision instrument which should never need re-calibration.
-
Page 12: Single Phase
15 KW ..#6 WIRE ELECTRICAL DATA MODEL VOLTS PHASE WIRES WATTS AMPS ELEMENTS RU-150 -12 3W + GND 5 KW 1 - WC-913 -01 220V, 5 KW RU-150 -20 208/220 3W OR 4W + GND 5.25 KW 1 - WC-907 -01 220V, 1.75 KW LEFT 1 - WC-907 -02 220V, 1.75 KW CENTER 1 - WC-907 -03 220V, 1.75 KW RIGHT... -
Page 16: Troubleshooting
TROUBLESHOOTING To help the service technicians in the field to HEAT SUPPLY understand the operation of the RU models, we PROBLEM: Water will not heat up or heats up separate the basic functions of the unit into four too slowly. different areas: PROCEDURE: Take a voltage reading at termi- Heat Supply... -
Page 17: Water Level Control Operation
WATER LEVEL CONTROL OPERATION For the contact points referenced in this section, Turn the unit on and clamp the leads of your volt- see the schematic diagram below. meter at the terminals of the valve coil as shown at B of the illustration below. Under normal Components Involved: conditions, the voltmeter should read 110 to 120 Probe Assembly... - Page 18 BREWING OPERATION Test Timer: The timer resets itself to the N. O. For the contact points referenced in this section, see the schematic diagram below. position after every brewing cycle but if it fails to stop itself, it will remain closed and cause the Components Involved: problem in question.
-
Page 19: Aeration System
AERATION SYSTEM For the contact points referenced in this section, PROBLEM: Aeration system fails to operate see the schematic diagram below. automatically. Components Involved: TEST: Determine that the aeration pump is operating by pressing the manual aeration button 1. Aeration Tubes. on the front panel to see that air comes from the 2. - Page 20 1 Year, Labor, from Original Date of Purchase on all electrical components, fittings and tubing. Additionally, the Wilbur Curtis Company warrants its Grinding Burrs for Forty (40) months from date of purchase or 40,000 pounds of cof- fee, whichever comes first. Stainless Steel components are warranted for two (2) years from date of purchase against leaking or pitting and replacement parts are warranted for ninety (90) days from date of purchase or for the remainder of the limited warranty period of the equipment in which the component is installed.