Sony RCP-TX7 Operating Instructions Manual
Remote control panel
Hide thumbs
Also See for RCP-TX7:
- Operating instructions manual (28 pages) ,
- Service manual (22 pages)

Related Manuals for Sony RCP-TX7


Summary of Contents for Sony RCP-TX7
- Page 1 3-859-859-13(1) Remote Control Panel Operating Instructions Before operating the unit, please read this manual thoroughly and retain it for future reference. RCP-TX7 © 1997 by Sony Corporation...
- Page 2 For the customers in the USA This equipment has been tested and found to comply with the limits for a Class A digital device, pursuant to Part 15 of the FCC Rules. These limits are designed to provide reasonable protection against harmful interference when the equipment is operated in a commercial environment.
-
Page 3: Table Of Contents
Table of Contents Overview ................4 Location and Function of Parts ........5 Operation Panel and Connector ........... 5 1 Main Operation Section ..........5 2 Menu Operation/Setting Display Section ..... 7 3 Paint section and CALL button ........8 Menu Operations ............. -
Page 4: Overview
Overview Overview The RCP-TX7 Remote Control Panel enables remote High-precision and high-speed control operation of the DXC-D30/D30P or DXC-637 series Color Video Camera. Commands can be issued at high speed, which means This unit’s features are described below. that remote operation with the unit’s knobs can be performed more smoothly than with previous remote control devices. -
Page 5: Location And Function Of Parts
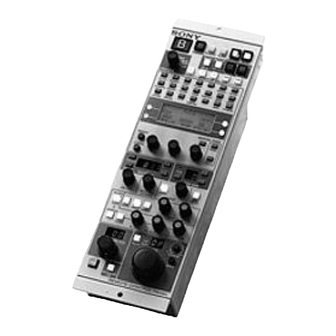
Location and Function of Parts Operation Panel and Connector The following figure shows external views of this unit. 1 Main operation section CCU/camera connector (10-pin): Use the supplied cable to connect this unit to a CCU or camera head. The power supply to this unit and the 2 Menu operation/setting display signal exchange are both... - Page 6 Location and Function of Parts 1 TALLY indicator Button Operation Lights in red when a red tally signal from the CA or SKIN DETAIL Recalls the AUTO SKIN menu and CCU is received and lights in green when a green tally (only for DXC- performs automatic designation of the D30/D30P)
-
Page 7: Menu Operation/Setting Display Section
2 Menu Operation/Setting Display Section DETAIL GAMMA KNEE FLARE RECALL STORE 1 Menu selection buttons SKIN SKIN SHADING MATRIX FILTER LENSE PAN/TILT GATE DETAIL AUTO DYNA BLACK TLCS DIAG OTHERS LATITUDE STRETCH FUNCTION 2 LCD panel 3 INDICATION button 8 Setting buttons PAGE INDICATION BRIGHT... -
Page 8: Paint Section And Call Button
Location and Function of Parts 3 Paint section and CALL button C.SCAN !™ Shutter setting block 1 Master gain setting block ON/OFF SHUTTER MASTER GAIN !¡ DETAIL knob 2 SKIN DETAIL button SKIN AUTO DETAIL MASTER 3 Knee correction block 0 MASTER GAMMA knob DETAIL KNEE... - Page 9 3 Knee correction block When using the DXC-637 series: Press the AUTO button to activate the auto knee Name Operation circuit. The button will light when pressed. However, AUTO (auto Press this button (which lights when when the DynaLatitude function is set to on (see adjust) button pressed) to perform automatic white and black balance adjustments.
- Page 10 Location and Function of Parts 5 Black balance adjustment/flare correction block When using the DXC-637 series: Use the buttons and knobs described below to perform Name Operation automatic or manual adjustment of black balance and FLARE button This button does not operate (because to perform flare correction.
- Page 11 7 IRIS/M.BLACK LINK (iris/master black !™ Shutter setting block adjustment link) button Use the buttons described below to set the shutter’s Press this button (which lights when pressed) to operation mode, speed, and CLS (clear scan) perform linked adjustments of iris and master black for frequency.
-
Page 12: Menu Operations
Menu Operations Location and Function of Parts Displaying menus Press one of the menu selection buttons to have the Setting the unit to the advanced setting corresponding menu displayed in the LCD panel. To mode access the AUTO SKIN menu (see peges 17 and 19), however, press the AUTO SETUP SKIN DETAIL button (see page 6). - Page 13 Button/menu title Principle settings When using DXC-637 series When using DXC-D30/D30P Normal settings Advanced settings DETAIL Detail correction-1 (page 15) • Detail correction-2 (page 17) – • Aperture correction (page GAMMA – Gamma correction (page 18) – KNEE Knee correction (page 15) White clip circuit on/off (page Knee correction (page 19) FLARE...
-
Page 14: Basic Menu Operations
Menu Operations Example: KNEE menu (KNEE MODE setting Basic Menu Operations page) Changing pages Setting buttons Press a menu selection button to display the first page KNEE of the corresponding menu. <PRESET MANUAL KNEE <VARIABLE Menu title MENU TITLE <A B>... -
Page 15: Menu Contents
Note When using the DXC-D30/D30P The adjustment values displayed on the LCD panel may be relative values (not real values). Slight turn of The list for the case of using the DXC-637 series is on page a knob sometimes causes undesirable sudden change of values. - Page 16 Menu Operations Menu title Knob/button Setting or operation MATRIX (1/2) ON/OFF buttons Select whether or not you will perform linear matrix adjustment. SAT/HUE knobs: –99 to 00 to +99 Saturation and hue MATRIX (2/2: SKIN) ON/OFF buttons Select whether or not you will perform matrix adjustment of the skin gate area.
- Page 17 Menu title Knob/button Setting or operation OTHERS (4/6: CLOCK CAM button Display the date/time. IND) OFF button Do not display the date/time. BARS button Display the date/time only when camera color bars are displayed. OTHERS (5/6: ON/OFF buttons Select whether or not you will display the center marker. CENTER MARKER) OTHERS (6/6: 80%/90% buttons...
- Page 18 Menu Operations Menu title Knob/button Setting or operation GAMMA (2/2: GAMMA 3.5/4.0 buttons Select the slope of the initial part of the gamma curve for INIT GAIN) low-brightness. KNEE (3/3: WHITE ON/OFF buttons Select whether or not you will activate the white clip circuit. CLIP) LEVEL knob: –99 to 00 to +99 Amount of white clip (As the value becomes larger, the...
- Page 19 Menu title Knob/button Setting or operation OTHERS (10/11: GAIN button Activate command link operation of gain setting among COMM LINK ITEM-1) several cameras. For details, see page SHUTTER button Activate command link operation of shutter setting among several cameras. OTHERS (11/11: WHITE button Activate command link operation of manual white balance COMM LINK ITEM-2)
- Page 20 Menu Operations Menu title Knob/button Setting or operation LENS ON/OFF buttons Activate optional control function 1 or not. FOCUS knob: –99 to 00 to +99 Focus ZOOM knob: –99 to 00 to +99 Zoom PAN/TILT ON/OFF buttons Activate optional control function 2 or not. PAN knob: –99 to 00 to +99 Rotation of the tripod head TILT knob: –99 to 00 to +99...
-
Page 21: File Operations
File Operations This unit can operate two types of files: scene files and 637 series camera, only scene files are available.) setup files. The table below shows the setting items which can be Setting data of cameras can be registered as scene files registered as either of the files. - Page 22 File Operations Setting item DXC-D30/D30P DXC-637 series Setup file Scene file Scene file Master gamma R/B gamma Gamma initial gain Black stretch level Upper/lower limit value for black stretch Upper/lower limit value for black compress DynaLatitude effect Matrix adjustment on/off Saturation/hue Matrix adjustment mode Matrix parameter (R-G, R-B, G-R, G-B, B-R, B-G)
-
Page 23: Operating Scene Files
Storing a scene file Operating Scene Files Use the STORE menu in the following way. Scene files are stored in the memory of the RCP. Perform the following procedure to recall or store File number scene files. Cursor Recalling a scene file Use the RECALL menu in the following way. -
Page 24: Operating Setup Files (For Dxc-D30/D30P Only)
File Operations Storing a setup file Operating Setup Files (for DXC- D30/D30P only) Use the STORE menu in the following way. Setup files are stored in the memory of the camera. File number Perform the following procedure to recall or store Cursor setup files. -
Page 25: Skin Detail Correction/Skin Matrix Adjustment (For Dxc-D30/D30P Only)
Skin Detail Correction/Skin Matrix Adjustment (for DXC-D30/D30P Only) The skin detail and skin matrix functions can adjust Press and set the SKIN DETAIL button to on (see detail level and matrix (saturation and hue) of a page 8). selected skin gate area (area designated by color range). -
Page 26: Multi-Camera Control
For more information about cables which can be used, setting on the master unit. consult your Sony dealer. Other than the adjustment or setting listed in the table, iris and master black can be adjusted by command link Notes in a different way. -
Page 27: Adjusting The Iris And Master Black Of Multiple Cameras At One Time
Adjustments/Settings To perform command link operation Gain setting (absolute mode) Select the GAIN button on the COMM LINK ITEM-1 page in the OTHERS menu on the master unit. Shutter setting (absolute mode) Select the SHUTTER button on the COMM LINK ITEM-1 page in the OTHERS menu on the master unit. -
Page 28: Specifications
Data transfer method New protocol complied with RS- 232C Accessories Number plates (1 set) Screws (+4 × 8, 2) Washers (2) Cable (1) Operating instructions (1) Design and specifications are subject to change without notice. Sony Corporation Printed in Japan...