Advertisement
READ THIS
Instruction Manual
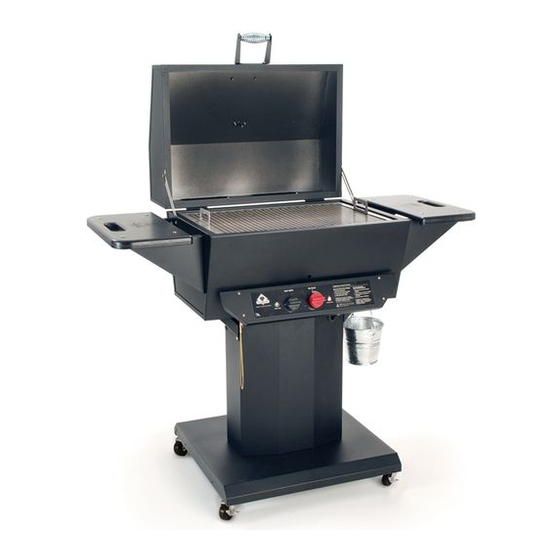
The Holland
Maverick
Maverick
BH421AG6
L.P. NOTICE: This grill shall be
L.P. Tank not included.
connected only to a 20 lb. L.P. cylinder that is
equipped with a Sherwood Valve #PV3349 and
an overfill protection device (OPD).
www.hollandgrill.com
ANSI Z21.58b - CSA 1.6b - 2010
©The Holland Grill Co., Inc. PN AG6-MAN V2011A
Gas Grill
Wrangler
Wrangler
3RR4
BARBECUE INDUSTRY
ASSOCIATION MEMBER
BOOK FIRST
For support and
to register your new
Holland grill, visit us at:
www.hollandgrill.com
The Holland
Gas Grill
BH421AG7
The only Grill
not to flare up!
Advertisement
Table of Contents

Related Manuals for Holland Maverick BH421AG6


Summary of Contents for Holland Maverick BH421AG6
- Page 1 Sherwood Valve #PV3349 and an overfill protection device (OPD). The only Grill www.hollandgrill.com ANSI Z21.58b - CSA 1.6b - 2010 not to flare up! 3RR4 ©The Holland Grill Co., Inc. PN AG6-MAN V2011A BARBECUE INDUSTRY ASSOCIATION MEMBER...
- Page 2 DANGER GRILL INSTALLER - LEAVE THIS INSTRUCTION BOOKLET FOR THE GRILL OWNER. IF YOU SMELL GAS: GRILL OWNER - SAVE THIS INSTRUCTION 1. SHUT OFF GAS TO APPLIANCE. BOOKLET FOR FUTURE REFERENCE. 2. EXTINGUISH ANY OPEN FLAME. 3. OPEN LID. 4.
- Page 3 It’s important that you are aware that the Holland Grill is unlike any other grill on the market today. By design, it allows you to grill, steam, smoke or bake without the worry of flare-ups associated with ordinary grills.* Now you can relax while preparing food without the worry and nuisance of...
-
Page 4: Safety Information
The visual inspection should include leak testing the entire length of PERFORMANCE. hose and fittings. (See final assembly instructions for more informa- • CHOOSE ONLY A LEVEL LOCATION FOR GRILL OPERATION. THE HOLLAND GRILL tion.) MUST BE SITTING SECURELY ON A LEVEL SURFACE FOR PROPER OPERATION AND EVEN HEAT DISTRIBUTION. - Page 5 12-3/8" in diameter with an overall height of 18- ting until snug. This connection, as well as all other fittings and con- 1/16". The Holland Grill does not come with an LP gas cylinder. This nections between the cylinder and burner valve, should be inspect- must be purchased separately and is available at most hardware stores.
-
Page 6: Tools Needed
HOLLAND GRILL ASSEMBLY INSTRUCTIONS Fasteners Guide 4 Caster Wheels, locking wheels go in front, 3/8” washer, lock washer and nut Tools Needed: 1. Phillips screwdriver 2. 3/8” & 7/16” nut driver #10 - 24 x 1” Carriage Bolt, Lockwasher & Locknut, Side shelves 3. - Page 7 Maverick & Wrangler Step 1. Open Boxes MAVERICK & WRANGLER Step 3. MAVERICK & WRANGLER On a flat surface (table or garage floor), OPEN AND EMPTY BOTH Assemble Grill Bottom Shell BOXES. REFER TO THE CONTENTS LIST TO BE SURE NO PARTS ARE MISSING.
- Page 8 Maverick & Wrangler Step 4. MAVERICK & WRANGLER Step 5. MAVERICK & WRANGLER Attach Grill Base to Grill Bottom Shell Attach Grill Lid to Grill Bottom Shell Select the following parts for assembly: Select the following parts for assembly: 1. grill bottom shell 3.
- Page 9 Maverick only Step 6. MAVERICK ONLY Tank Installation: MAVERICK & WRANGLER (Step 6. Wrangler on next page) Place your 20-lb propane tank into the hole in cabinet base. Lid Handle, Control Knobs & Drip Pan Drain Connect the regulator and hose assembly to the propane tank valve. Select the following parts for assembly: This connection is made by the QCC-1 fitting.
- Page 10 Wrangler only G. Place your cooking grid into the grill. Step 6. WRANGLER ONLY H. Install the brass drain valve onto the drain pipe, hand tighten. DO Lid Handle, Control Knobs & Drip Pan Drain NOT OVERTIGHTEN WITH A WRENCH OR PLIERS. (You may need to remove the valve ocassionaly for grill cleaning.
-
Page 11: Lighting Instructions
2. Open the grill lid and allow five full minutes to air out. NOTE: The Holland Grill uses a 2-position gas valve on the burner con- 3. BEFORE EACH USE, inspect the gas system of the outdoor cooking trol. -
Page 12: Turning Grill Off
Open lid, wait 5 minutes and follow lighting instructions. 1" CARE AND MAINTENANCE There is very little care and maintenance needed. The Holland Grill is designed and made of materials that will last many years with normal use. Following these instructions will improve the longevity and quality of cooking. -
Page 13: Helpful Tips
(see Figure 9). Be sure to check out the Holland Grill recipes, tips and tricks listed on the web site. Why not try to create a few of your own! www.hollandgrill.com... -
Page 14: Grilling Instructions
Fish 20 minutes total NOTE: Remember, the Holland Grill needs to warm up completely. Temperature will remain about 400 degrees F. All grilling times are approximate depending on size, weight and individual taste preference. Grill needs to remain closed at all times during grilling to be accurate with this time chart. Each time grill is opened during the grilling process, increase grilling time by approximately 10 minutes. - Page 15 MAVERICK-WRANGLER GRILL GAS CONVERSION INSTRUCTIONS SG5-LABEL-LP GAS CONVERSION INSTRUCTIONS MAVERICK/WRANGLER MODELS Natural Gas to LP (propane) Gas STEP 1 Close valve at gas supply. STEP 2 At the grill, remove on/off knob from gas valve. STEP 3 Remove the control panel by removing the Phillips head screws. STEP 4 Using 2 wrenches, loosen and remove the supply line from the gas valve inlet.
- Page 16 HOLLAND MAVERICK REPLACEMENT PARTS Model BH421AG6 The Holland Maverick parts are made from quality stainless steel, aluminum and aluminized steel with a quality powder coat paint finish. MAVERICK REPLACEMENTS PARTS LIST Stock No. Description Stock No. Description SS1-701SS BLACK SIDE SHELF...
- Page 17 HOLLAND WRANGLER REPLACEMENT PARTS Model BH421AG7 The Holland Maverick parts are made from quality stainless steel, aluminum and aluminized steel with a quality powder coat paint finish. WRANGLER REPLACEMENTS PARTS LIST Stock No. Description Stock No. Description SS1-701SS BLACK SIDE SHELF...
- Page 18 For more information on our complete line of Holland Grills and Accessories visit us on the web at: www.hollandgrill.com The Holland Grill Company, Inc. 121 Thomas Mill Road Holly Springs, NC 27540 1-800-880-9766 ©The Holland Grill Co., Inc. AG6-MAN Version 2011a...
- Page 19 The Company further warrants to the original purchaser that, during the functional parts term of this warranty, the drip pan section of the Holland grill will not flare-up, provided you use your grill under normal, non-commercial conditions and follow all manufacturer’s instruction regarding the care and maintenance of the grill. If a flare-up occurs, simply contact the dealer from which you purchased you Holland grill (or the Holland grill dealer nearest you), together with proof of purchase.
-
Page 20: Warranty Procedure
(please consult your use & care manual), or failure to follow local codes. Product repair or parts replacement at the option of the Holland Grill Co. is the exclusive remedy under this warranty. The Company shall not be liable for any incidental or consequential damages resulting from the use or transportation of any Holland grill, or for breach of any express or implied warranty on the Holland grill.