Table of Contents
Advertisement
Quick Links
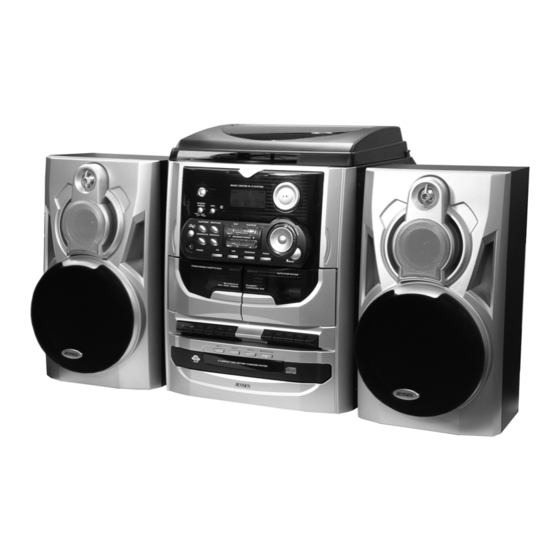
3-SPEED STEREO TURNTABLE
3 CD CHANGER MUSIC SYSTEM WITH
DUAL CASSETTE DECK AND
REMOTE CONTROL
OWNER'S MANUAL
JMC-1100
PLEASE READ THIS OPERATING MANUAL COMPLETELY BEFORE OPERATING
THIS UNIT AND RETAIN THIS BOOKLET FOR FUTURE REFERENCE.
DEAR JENSEN® CUSTOMER
Selecting fine audio equipment such as the unit you've just purchased is only the start of your
musical enjoyment. Now it's time to consider how you can maximize the fun and excitement
your equipment offers. This manufacturer and the Electronic Industries Association's
Advertisement
Table of Contents

Related Manuals for Jensen JMC-1100


Summary of Contents for Jensen JMC-1100
- Page 1 PLEASE READ THIS OPERATING MANUAL COMPLETELY BEFORE OPERATING THIS UNIT AND RETAIN THIS BOOKLET FOR FUTURE REFERENCE. DEAR JENSEN® CUSTOMER Selecting fine audio equipment such as the unit you've just purchased is only the start of your musical enjoyment. Now it's time to consider how you can maximize the fun and excitement...
- Page 2 Model Number: JMC-1100 TO PREVENT FIRE OR SHOCK HAZARD, DO NOT USE THIS PLUG WITH AN EXTENSION...
-
Page 3: Important Safety Instructions
INSERTED TO PREVENT BLADE EXPOSURE. TO PREVENT FIRE OR SHOCK HAZARD, DO NOT EXPOSE THIS APPLIANCE TO RAIN OR MOISTURE. IMPORTANT SAFETY INSTRUCTIONS Read these instructions - All the safety and operating instructions should be read before the appliance is operated Keep these instructions - The safety and operating instructions should be kept for future reference. - Page 4 Power Lines - An outdoor antenna should be located away from power lines. Outdoor Antenna Grounding - If an outside antenna is connected to the receiver, be sure the antenna system is grounded so as to provide some protection against voltage surges and built up static charges.
- Page 5 Note: This product complies with DHHS Rule 21 Subchapter J at date of manufacture. Follow the advice below for safe and appropriate operation. ON PROTECTION AGAINST LASER ENERGY EXPOSURE o As the laser beam used in this compact disc player is harmful to the eyes, do not attempt to disassemble the casing.
-
Page 6: Important Notes
use. Should any trouble occur, remove the power source and refer servicing to qualified personnel. PRECAUTION FORE USE • UNPACK ALL PARTS AND REMOVE PROTECTIVE MATERIAL. • DO NOT CONNECT THE UNIT TO THE MAINS BEFORE CHECKING THE MAINS VOLTAGE AND ALL OTHER CONNECTIONS HAVE BEEN MADE. •... -
Page 7: Getting Start
(1) this device may not cause harmful interference, and this device must accept any interference received, including interference that may cause undesired operation. NOTE : This equipment has been tested and found to comply with the limits for a Class B digital device, pursuant to Part 15 of the FCC Rules. -
Page 8: Connecting The Ac Power Cord
right speaker terminal 2. Connect the left speaker to the left speaker terminal with the red wire to L+ and the black wire to L -. 3. Connect the right speaker to the right speaker terminal with the red wire to R+ and the black wire to R -. -
Page 9: Front View & Back View
25) CD DOOR OPEN/CLOSE BUTTON 26) 45RPM RECORD ADAPTOR 27) 33/45/78 RPM SPEED SELECTOR 28) TONE ARM HOLDER 29) AM MODE BEAT CUT 1-2 SELECTOR 30) SPEAKER WIRE TERMINAL 31) TURNTABLE AUTO STOP SWITCH 32) FM WIRE ANTENNA 33) AC POWER CORD... -
Page 10: Battery Installation
POWER TURNS THE UNIT POWER ON / STANDBY DISC 1,2,3 PRESS TO SELECT THE DISC FOR PLAYBACK DIRECTLY DISC-CH PRESS TO SELECT THE NEXT DESIRE DISC AND ROTATE THE DISC TRAY SLEEP PRESS AND HOLD TO ACTIVE SLEEP FUNCTION TIMER ACTIVE/DE-ACTIVE THE ON/OFF TIMER PHONO PRESS TO ACTIVE PHONO MODE... -
Page 11: Battery Precautions
Insert two (2) AAA size batteries (not included) into the battery compartment as the polarity markings inside the battery compartment. Replace the battery compartment door. Follow these precautions when using a battery in this device: 1. Use only the size and type of battery specified. 2. -
Page 12: Listening To Radio
2. Press the “MEM/CLK-ADJ” button, the first two digits of the time (hours) “00” are flashing. Press “SKIP DOWN or UP button to store the correct hour. 3. The third & fourth digits of the time (minutes) “00” are flashing, press the “SKIP DOWN or UP ”... - Page 13 Be sure that the tone arm is being detached from the tone arm rest before operating, and re-secured again afterwards. 1. Raise the turntable dust cover. 2. Press the “PHONO” function button. 3. Set the 33/45/78 speed selector to the proper position depending on the record to be played.
- Page 14 again to resume playback. STOP MODE 1. If “STOP” button is pressed during PLAY or PAUSE mode, system will go to stop mode. SKIP MODE (SKIP UP /SKIP DOWN 1. During PLAY or PAUSE mode, if “SKIP +” button is pressed it will go to next track and display the track no.
- Page 15 CD PROGRAMMING Up to 60 tacks can be programmed to be programmed to be played in any required order from one CD or all CDs in the CD changer. 1. Set in CD mode and press the “STOP 2. Press the MEM/CLK-ADJ button 3.
- Page 16 Press the “PHONO” function button. Place a record onto turntable and insert a blank cassette tape into deck A. Press the “ PAUSE ” key and then press the “ RECORD ” and “ PLAY ” key at deck A.
- Page 17 B. ON/OFF TIMER SETTING (BY REMOTE ONLY) This function allows the system to turn on automatically and wake you up by soft CD music or radio and shut off itself into standby mode when time is up. 1. In unit standby mode, press the “ MODE ” button on remote once, the LCD display will show “...
-
Page 18: Care And Maintenance
Inserting the plug of your headphones (not included) into the Headphone jack will enable you to listen in private. When using headphones, the speakers will be disconnected. READ THIS IMPORTANT INFORMATION BEFORE USING YOUR HEADPHONES 1. Avoid extended play at very high volume as it may impair your hearing. 2. -
Page 19: Cassette Care
break off the erase prevention tab for side A. This prevents the record key form locking. If later you do wish to record on side A of the cassette, cover the tab opening with a piece of cellophane tape. This will allow the Record CASSETTE CARE Two common causes of trouble experienced when using cassettes are: Tape Jamming –... -
Page 20: Compact Disc Care
Keep your unit away from heating appliances and sources of electrical noise such as fluorescent lamps or motors. For better Clock Display clarity, avoid operating the unit under direct sunlight or in strong room illumination. Unplug the unit from the electrical power outlet immediately in case of malfunction. COMPACT DISC CARE Handle the disc only by its edges. -
Page 21: Cleaning The Unit
CLEANING THE UNIT To prevent fire or shock hazard, disconnect your unit from the AC power source when cleaning. The finish on the unit may be cleaned with a dust cloth and cared for as other furniture, Use caution when cleaning and wiping the plastic parts. If the cabinet becomes dusty wipe it with a soft dry dust cloth. -
Page 22: Specification
PROBLEM POSSIBLE CAUSE The unit is disconnected from the The unit does not AC outlet respond (no power) AC outlet is not functioning. AM band is too The reception at the set location is noisy poor. Radio paused about 1 second when switch from This is normal. - Page 23 Power Requirement Main unit: Remote control Frequency Range Radio Band Power Consumption Main Unit: Please refer to the instructions on the enclosed warranty card for returning your unit for service. When returning the unit, please remove the battery to prevent damage to the unit in transit and/or from possible battery leakage.