
Related Manuals for Digimerge D300 SERIES


Summary of Contents for Digimerge D300 SERIES
-
Page 1: Installation Manual
INSTALLATION MANUAL English version 1.0 D300 SERIES MPEG4 Networkable DVR Copyright „ 2006 Digimerge Technologies Inc. - Page 2 Easy access via the Free Digimerge DDNS Service is included. To learn more about this D300 Series DVR, and to learn about our complete range of accessory products, please visit our website at: http://www.digimerge.com...
-
Page 3: Important Safeguards
Important Safeguards PREFACE Important Safeguards In addition to the careful attention devoted to quality standards in the manufacture process of your video product, safety is a major factor in the design of every instrument. However, safety is your responsibility too. This sheet lists important information that will help to assure your enjoyment and proper use of the video product and accessory equipment. - Page 4 18. Heat - The product should be situated away from heat sources such as radiators, heat registers, stoves, or other products (including amplifiers) that produce heat. © INSTALLERS MANUAL | Copyright 2006 Digimerge Technologies Inc.
-
Page 5: General Precautions
4. Keep enough space around the unit for ventilation. Slots and openings in the storage cabinet should not be blocked 5. During lightning storms, or when the unit is not used for a long time, disconnect the power supply, antenna, and cables to protect the unit from electrical surge DIGIMERGE TECHNOLOGIES INC. http://www.digimerge.com Revision 1.0... -
Page 7: Table Of Contents
Section 1 - Feature List ................10 Section 2 - Packing Detail............... 11 Section 3 - Location and Control D300 Series - Front ............... 14 D300 Series - Back ................ 16 Section 4 - Turning On for the First Time Starting the DVR - Self Test Screens .......... - Page 8 Setting Up Your DDNS Account ............ 51 Setting up DDNS on the DVR............53 Section 6 - Troubleshooting ..............56 Appendix 1 - DVR Specifications............60 Appendix 2 - Connecting Motion / Alarm Device ........62 © INSTALLERS MANUAL | Copyright 2006 Digimerge Technologies Inc.
-
Page 9: Section 1 - Feature List
SECTION 1 FEATURE LIST D300 Series DVR Features ....10... - Page 10 D300 Series DVR Features SECTION 1 D300 Series DVR Features Technology • Embedded LINUX OS • Total maximum recording rate 120 fps • High-resolution & high-quality MPEG-4 algorithm • Uses Watermarking & scrambling technologies • Strong protection recorded data • MPEG-4: 1 ~ 2 Kbytes per image with resolution 360x240 •...
-
Page 11: Section 2 - Packing Detail
SECTION 2 PACKING DETAIL Packing Detail ........12... -
Page 12: Packing Detail
Packing Detail SECTION 2 Packing Detail The D300 Series comes with the following components: D300 SERIES DVR CHECK YOUR PACKAGE TO CONFIRM THAT YOU HAVE RECEIVED THE COMPLETE SYSTEM, INCLUDING ALL COMPONENTS SHOWN ABOVE. © INSTALLERS MANUAL | Copyright 2006 Digimerge Technologies Inc. -
Page 13: Section 3 - Location And Control
SECTION 3 LOCATION AND CONTROL D300 Series - Front......14 D300 Series - Back ......16... -
Page 14: D300 Series - Front
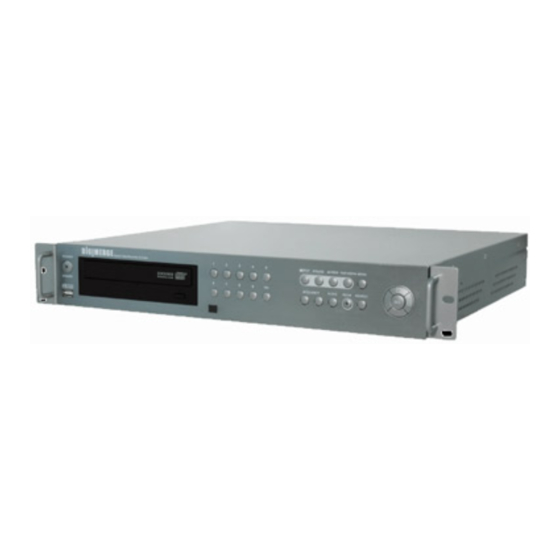
D300 Series - Front SECTION 3 D300 Series - Front 12 13 14 15 16 1. POWER - Turns the DVR unit ON/OFF. 2. NUMBER / LETTER PAD • Use the numbers to switch between cameras in View mode. • Use the Numbers and Letters for Menu data input. - Page 15 D300 Series - Front SECTION 3 12 13 14 15 16 9. USB PORT - Connection port for a removable USB Hard Drive (USB Key) 10. CDRW DRIVE - Drive bay for CD-RW Drive 11. IR RECEIVER - Used to receive a signal from a Remote Control 12.
-
Page 16: D300 Series - Back
D300 Series - Back SECTION 3 D300 Series - Back 1. BNC VIDEO INPUTS - Video inputs for direct connection to Cameras or for looping input to a DVR. The number of ports will vary based on the DVR model (4 Channel, 8 Channel or 16 Channel). - Page 17 D300 Series - Back SECTION 3 7. COMPOSITE - A Composite Video OUT connection used to connect the DVR to a Slave Monitor or DVR. 8. S-VIDEO - Outgoing connection for S-VIDEO. 9. VGA PORT - Used to connect the DVR to a computer Monitor.
- Page 19 SECTION 4 TURNING ON FOR THE FIRST TIME Starting the DVR-Self Test Screens..20 Main Menu Control ......21 Main Menu Tree ........22 Display Set .......... 23 Recording Set ........27 System Set.......... 35 Network Set......... 40 Event Notification ........ 42 USB-Updating the DVR Firmware..
-
Page 20: Starting The Dvr - Self Test Screens
In order to power down the DVR Unit, or to manually stop the current recording, the default system password of ‘00000000’ will need to be entered (when prompted). If the default password is changed, then the new user specified password will be used instead. © INSTALLERS MANUAL | Copyright 2006 Digimerge Technologies Inc. -
Page 21: Main Menu Control
Main Menu Control SECTION 4 Main Menu Control • Enter the MENU screen by pressing the MENU button. The System Password may be required, based on system settings. • Scroll through the 5 Main options by pressing the buttons. • To enter a sub-menu, navigate to the option and press the SEL button. •... -
Page 22: Main Menu Tree
Recording ON/OFF System Set Basic Disk Format Password Change Client Account Program Update Auto Delete (8/16 CH Only) Network Set DDNS Set IP Set Event Notification E-Mail Registration E-Mail Report Notification Out © INSTALLERS MANUAL | Copyright 2006 Digimerge Technologies Inc. -
Page 23: Display Set
Display Set SECTION 4 Display Set This submenu allows you to change the DISPLAY options for the DVR unit and any connected cameras. Selecting options on this Menu will access additional settings and options. Display Set Menu Tree Display Set Monitor Adjustment Left Key = Move Left Right Key = Move Right... -
Page 24: Camera Name
(A-Z, 0-9) to a maximum of 8 characters. Press the SEL button to accept the change. 3. SAVE & EXIT: Saves any changes made, and exits to the Main Menu. Press the buttons to highlight, and press the SEL button to accept the changes. © INSTALLERS MANUAL | Copyright 2006 Digimerge Technologies Inc. -
Page 25: Osd On/Off Covert
Display Set SECTION 4 OSD ON/OFF OSD ON/OFF OSD: Turns the information display/camera Save & Exit names, hard drive usage, date and time) ON/OFF. 1. OSD: Turns the ON SCREEN DISPLAY to ON/OFF. To change the setting, press the ←→ buttons to highlight, and press the buttons to switch between ON/OFF. -
Page 26: Event Clear
4. START QUAD DISPLAY SEQUENCE: Starts viewing Cameras in QUAD Display Sequence Mode (based on the settings configured in the QUAD DISPLAY SEQUENCE menu). Event Clear Clears the OSD characters related with events from the monitor display. © INSTALLERS MANUAL | Copyright 2006 Digimerge Technologies Inc. -
Page 27: Recording Set
Recording Set SECTION 4 Recording Set This submenu allows you to change the RECORDING options for the DVR unit. Selecting options on this Menu will access additional settings and options. Recording Set Menu Tree Recording Set (Enter Password) Global Parameter Audio 1 Rec: Audio 2 Rec: Audio 3 Rec:... - Page 28 Recording Set SECTION 4 Schedule Recording FPS/ QUALITY HIGH Setup Schedule Schedule Setup Details Save & Exit Alarm Rec: Recording ON/OFF Motion Rec: Schedule Rec: Save & Exit © INSTALLERS MANUAL | Copyright 2006 Digimerge Technologies Inc.
-
Page 29: Global Parameters
Recording Set SECTION 4 Recording Set Global Parameters Global Parameter Audio 1 Rec: Audio 2 Rec: Settings for General Parameters. Audio 3 Rec: Audio 4 Rec: Repeat Rec: Watermark Emb Rec Res 720 x 240 Save & Exit 1. AUDIO # REC: Turns Audio recording ON/OFF. press the buttons to highlight, and ←→... -
Page 30: Alarm Recording
• QUALITY: Set the quality level for the recording - High, Mid or Low. 2. POST ALARM: Set the duration that the DVR will record once the alarm is activated: 5, 30, 60, 90, 120, 150, 180, 210 or 240 seconds. © INSTALLERS MANUAL | Copyright 2006 Digimerge Technologies Inc. -
Page 31: Motion Recording
Recording Set SECTION 4 3. SETUP ALARM: Configuration Page: 1: Alarm 1: sub-menus for Alarm and Sensors. CH1: Alarm 2: Press the buttons to CH2: Alarm 3: highlight, and press the SEL button Alarm 4: CH3: to access the Alarm Submenu. Use to choose the CH4: Setup Sensor... - Page 32 High, Mid, Low or Off. 4. SAVE & EXIT: Saves any changes made, and exits to the Main Menu. Press the buttons to highlight, and press the SEL button to accept the changes. © INSTALLERS MANUAL | Copyright 2006 Digimerge Technologies Inc.
-
Page 33: Schedule Recording
Recording Set SECTION 4 Schedule Recording Setup and configurations for Scheduled events. Schedule Recording FPS/ QUALITY HIGH Setup Schedule Schedule Setup Details Save & Exit NOTE: The number of cameras, alarms and sensors displayed on submenus will change based on the Model of DVR: 4, 8 or 16 Cameras are available. 1. -
Page 34: Recording On/Off
ON and OFF. SAVE & EXIT: Saves any changes made, and exits to the Main Menu. Press the buttons to highlight, and press the SEL button to accept the changes. © INSTALLERS MANUAL | Copyright 2006 Digimerge Technologies Inc. -
Page 35: System Set
System Set SECTION 4 System Set This submenu allows you to change the SYSTEM options for the DVR unit. Selecting options on this Menu will access additional settings and options. Recording Set Menu Tree System Set Basic Language English Initialization Date Format MM-DD-YYYY Date/Time... -
Page 36: Basic
MAC Address ##:##:##:##:##:## 6. SAVE & EXIT: Saves any changes made, and exits to the Main Menu. Press the buttons to highlight, and press the SEL button to accept the changes. © INSTALLERS MANUAL | Copyright 2006 Digimerge Technologies Inc. -
Page 37: Disk Format
System Set SECTION 4 Disk Format Displays Hard Drive information. Disk Format Internal HDD External HDD Execute Format 1. INTERNAL HDD: Allows the user to format the HDD. Use the to change this option to YES or NO. To format the Drive, set this option to YES and select the EXECUTE FORMAT option. 2. -
Page 38: Client Account
Program Update Allows the user to update the DVR firmware by downloading the most current application from the Digimerge website, and using a Memory Stick. Download the most current program from the http://www.digimerge.com website, and copy it to a Memory Stick. Connect the Memory Stick to the USB 2.0 Port on the front panel of the DVR. -
Page 39: Ptz Menu
System Set SECTION 4 PTZ Menu Pan / Tilt / Zoom control (for Pelco D or Pelco P Model Cameras only) PTZ (enter Password) Pan/Tilt/Zoom Focus Setup PTZ Controller Set 1. PAN / TILT / ZOOM: Accesses the PTZ Control for a camera. -
Page 40: Network Set
DVR to set the Domain Save & Exit Name (i.e. To enter the Domain Name DHU504.digimerge.net, just enter DHU504) • USER NAME: Press the buttons to highlight, and press the button to set to enter setup. -
Page 41: Ip Set
Network Set SECTION 4 IP Set The options in the IP Set menu control the local network setup for the Unit. See 45 for additional network setup instructions. DHCP: • DHCP: Press the buttons to highlight, IP Address: ###.###.###.### ←→ and press the buttons to set to NO/YES. -
Page 42: Event Notification
Send Test Email Save & Exit Email Report Report: Immediately Save & Exit Email Notification Out Beep Alarm Out 5 Sec. Duration Video Loss Alarm Motion Power Loss Save & Exit © INSTALLERS MANUAL | Copyright 2006 Digimerge Technologies Inc. -
Page 43: Email Registration
Event Notification SECTION 4 Event Notification Email Registration Configuration settings for automatic emailing of events. Email Registration User 1: User 2: User 3: Send Test Email Save & Exit 1. USER 1 - USER 3: Setup of up to 3 email accounts to receive event emails. Press the buttons to highlight, and press the SEL key to enter the configuration. -
Page 44: Notification Out
4. DURATION: Specifies the length of time for an event. Press the buttons to highlight, and press the buttons to change the duration to 5 seconds, 10 seconds or 20 seconds. © INSTALLERS MANUAL | Copyright 2006 Digimerge Technologies Inc. -
Page 45: Usb - Updating The Dvr Firmware
• NEW PROGRAM NOT FOUND: If the application is not recognized, processing will not continue. Compatible USB Devices The following USB devices have been tested successfully with the D300 Series DVR: • Lexar Jumpdrive 128/256 MB • SanDisk Mini Cruzer 128 MB •... - Page 47 SECTION 5 NETWORK CONNECTIVITY Network Connectivity ......48 Router Port Forwarding .......50 Setting Up Your DDNS Account ..51 Setting Up DDNS on the DRV .....53...
-
Page 48: Section 5 - Network Connectivity
Local PC or Remote PC using Microsoft Internet Explorer 5 (or higher). See the Operator’s Manual for details. NOTE: Microsoft IE is the ONLY supported browser at this time. (Not Included) © INSTALLERS MANUAL | Copyright 2006 Digimerge Technologies Inc. -
Page 49: Dvr Network Settings
DVR Network Settings SECTION 5 DVR Network Settings Network Related settings for the DVR unit are set through the Menu options. See Page 36 for IP Set Menu options. 1. Press the Menu button on the front panel of the DVR. -
Page 50: Router Port Forwarding
The instructions found online in the Router Configuration Guide or at http:// www.portforward.com will assist you in the port forwarding configurations for a selection of different router models.Visit our website at http://www.digimerge.com for more details © INSTALLERS MANUAL | Copyright 2006 Digimerge Technologies Inc. -
Page 51: Setting Up Your Ddns Account
Setting Up Your DDNS Account Digimerge offers a free DDNS server for use with your System. A DDNS account allows you to set up a web site address that points back to your Local Network. The following outlines how to set up your free DNS account. - Page 52 Domain Name: _______________________________________________ User Name: _________________________________________________ Password: __________________________________________________ NOTE: The information sent to you in E-mail is CASE SENSITIVE. It is important when set- ting up your DDNS information on your DVR. © INSTALLERS MANUAL | Copyright 2006 Digimerge Technologies Inc.
-
Page 53: Setting Up Ddns On The Dvr
NOTE: When you configure your DDNS information, only the first part of the address needs to be input (i.e. dhu504.digimerge.net - for the Domain Name entry, only enter dhu504). • Select the DDNS Status Check to confirm that the DDNS Service can be reached. An error message will be displayed if a connection cannot be reached. -
Page 55: Section 6 - Troubleshooting
SECTION 6 TROUBLESHOOTING Troubleshooting ........56... -
Page 56: Troubleshooting
• Check the camera video cable and connections - Disconnect and reconnect the cable at the DVR and at the Camera • Try moving the camera to another channel or use another cable • Check if the Camera is in COVERT mode. © INSTALLERS MANUAL | Copyright 2006 Digimerge Technologies Inc. - Page 57 Troubleshooting SECTION 6 Problem: The message “Can't display page is shown when failing to connect to DVR (when inputting the IP Address or Domain Name in the Internet Explorer). Check: • Check the network connection • Try connecting the DVR to a different port on the Router •...
- Page 59 APPENDIX 1 DVR SPECIFICATIONS DVR Specifications ......60...
-
Page 60: Appendix 1 - Dvr Specifications
DVR Specifications APPENDIX 1 DVR Specifications © INSTALLERS MANUAL | Copyright 2006 Digimerge Technologies Inc. - Page 61 APPENDIX 2 CONNECTING MOTION/ALARM DEVICE Connection Motion/Alarm Device ..62...
-
Page 62: Appendix 2 - Connecting Motion / Alarm Device
GND port on the Alarm Block on the SENSOR (Not Included) 2. Connect the SIGNAL Cable to a numbered port (1-4) To start ALARM RECORDING on a DVR, refer to the RECORDING SET section of the manual. © INSTALLERS MANUAL | Copyright 2006 Digimerge Technologies Inc. - Page 64 It’s all on the web Product Information Specification Sheets User Manuals Software Upgrades Quick Start Guides Firmware Upgrades VISIT www.digimerge.com www.digimerge.com Digimerge Technologies Inc.