Advertisement
Quick Links
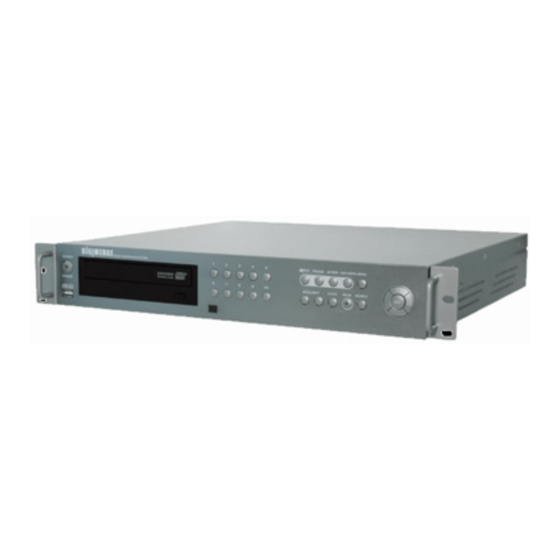
SETTING UP YOUR DIGITal VIDEO RECORDER (DVR)
* This set-up guide assumes you are connecting cameras (not included with this system) to the Digimerge DVR. Consult
your DVR's owners manual for alternative DVR connection's and/or information to install a hard drive.
Connect the cameras
Connect one end of the Power
1
2
(not supplied) to the CH1, CH2,
Cord to the DVR; the other
CH3, CH4 Video Inputs
end to an electrical outlet
(BNC Inputs)
BACK OF THE DVR
Your system is now ready to use. Refer to your DVR's owner's manual to learn how to record, playback, use the search features
and all other features available with this system. Refer to Step 4 for Setting Up Remote Security Monitoring.
The number of cameras displayed on submenus
will change based on the model of DVR: 4, 8, or 16
channel versions.
SETTING UP YOUR DIGITal VIDEO RECORDER (DVR)
CaMERa aND RECORDING SETUP –
SETTINGS FOR GENERal PaRaMETERS.
PRESS MENU BUTTON & SElECT RECORDING SET FOR CaMERa & RECORDING SETUP.
Normal Recording – Controls the
alarm Recording -
1
2
settings for your DVR
settings for Manual Recording
Alarm Recording
CH/
FPS
/QUALITY
Normal Recording
CH1
8
MID
CH2
8
MID
CH3
8
MID
CH4
6
MID
Save & Exit
Sensor 1: None
Alarm 1 : 1 2
Sensor 2 : None
Alarm 2 : 3 4
Sensor 3 : NC
Alarm 3 : 5 6
Sensor 4 : NO
Alarm 4 : 7 8
Alarm Out: Off
Setup Sesnor
Save & Exit
Save & Exit
1. CH1 - CH4: Lists all available cameras for configuration.
1. CH1-CH4: Lists all available cameras for configuration. Press the and
Press the and buttons to highlight, and press the
buttons to highlight, and press the SEL button to select the CH#. Use the
and and SEL buttons to change the FPS and Quality settings:
buttons to select the FPS or Quality for each CH. Use
the and buttons to change the settings, and press
• FPS: A set number of Frames Per Second (total) is divided between all
available cameras based on Resolution settings.
SEL to accept the changes:
• FPS: A set number of Frames Per Second (total) is divided
• QUALITY: Set the quality level for the recording - High, Mid or Low.
between all available cameras based on Resolution settings.
2. POST ALARM: Set the duration that the alarm will continue once detected: 5,
30, 60, 90, 120, 150, 180, 210 or 240 seconds.
• QUALITY: Set the quality level for the recording - High, Mid
or Low
3. SETUP ALARM: Configuration sub-menus for Alarm and Sensors. Press the
and buttons to highlight, and press the SEL button to access the Alarm
2. SAVE & EXIT: Saves any changes made, and exits to the
Submenu. Use the and buttons to choose the cameras to be
Main Menu. Press the and buttons to highlight, and
press the SEL button to accept the changes.
associated to each alarm:
4. SETUP SENSOR: Configuration for any Sensors attached to the Alarm block.
Press the and buttons to highlight, and press the SEL button to access
the Sensor Submenu. Use the and buttons to set the Sensor type: NO
(Normally Open), NC (Normally Closed) or None.
5. SAVE & EXIT: Saves any changes made, and exits to the Main Menu. Press
the and buttons to highlight, and press the SEL button to accept the
changes.
S T E P 1
Ensure to turn ON the
3
power switch (located at
the front of your DVR)
BACK OF THE DVR
FRONT OF THE DVR
NOTE: YOU WILL REQUIRE PASSWORD TO ACCESS CERTAIN
MENU. THE DEFAULT PASSWORD IS 00000000
Motion Recording – Configures for
Sets Alarm
3
Motion Sensor events
CH/
FPS
/QUALITY
CH/
FPS
CH1
8
HIGH
Motion Recording
CH1
8
CH2
8
MID
CH2
8
CH3
8
LOW
CH3
8
CH4
7
HIGH
CH4
7
Post Alarm Duration: 150 sec.
Post Motion Duration: 150 sec.
Setup Alarm
Setup Motion
Save & Exit
Save & Exit
Sensor 1: None
CH/ AREA/ SENSE
Sensor 2 : None
Sensor 3 : NC
CH1 AREA HIGH
Sensor 4 : NO
CH2 AREA MID
Alarm Out: Off
CH3 AREA LOW
Save & Exit
CH4 AREA HIGH
Save & Exit
1. CH1 - CH4: Lists all available cameras for configuration. Press the and buttons
to highlight, and press the buttons to select the FPS or Quality for each CH. Use
the and buttons to change the settings, and press SEL to accept the changes:
• FPS: A set number of Frames Per Second (total) is divided between all available
cameras based on Resolution settings.
• QUALITY: Set the quality level for the recording - High, Mid, Low
2. POST MOTION DURATION: Set the duration that the alarm will continue once
detected: 5, 30, 60, 90, 120, 150, 180, 210 or 240 seconds.
3. SETUP MOTION: Configuration for each Motion Sensor enabled Camera Press the ��
and �� b uttons to highlight the Setup Motion option, and press the SEL button to
access the SETUP MOTION submenu. Press the and buttons to highlight a
specific camera, and press the SEL button to select.
• AREA: Press the SEL button on the AREA option to specify segments of the Camera
view to have Motion Detection. Use the and buttons to navigate around the
Motion Setup screen, and press the SEL button to turn a segment ON. Press the
MENU button once complete. Dark Blue indicates that a section has been selected for
motion detection, and blank areas indicate that motion will not be detected in those
areas.
• SENSE: Sets the Sensitivity of the Motion Detection: Use the and and SEL
buttons to change the setting to High, Mid, Low.
4. SAVE & EXIT: Saves any changes made, and exits to the Main Menu. Press and
buttons to highlight, and press the SEL button to accept the changes.
SETTING UP YOUR DIGITal VIDEO RECORDER (DVR)
BaSIC SETUP –
SETTINGS FOR GENERal PaRaMETERS
CHECK YOUR OWNERS MaNUal FOR DETaIlED INFORMaTION.
Press Menu button & select SYSTEM SET to do the BASIC SETUP of your DVR
language – Displays the current
1
default language on the DVR
(English by default).
BASIC
Language
English
Initialization
Date Format
MM-DD-YYYY
Date/Time
MM-DD-YYYY
Information
Save & Exit
DaTE/TIME – Sets the Date
4
and Time for the unit.
BASIC
Language
English
Initialization
Date Format
MM-DD-YYYY
Date/Time
MM-DD-YYYY
Information
Save & Exit
ALWAYS REMEMBER TO SAVE YOUR
SETTINGS PRIOR TO EXITING THE MENU
CHECK YOUR OWNERS MaNUal FOR DETaIlED INFORMaTION.
Schedule Recording - Configures
4
for Scheduled events
/QUALITY
HIGH
MID
CH/
FPS
/QUALITY
Schedule Recording
LOW
CH1
8
HIGH
LOW
CH2
8
MID
CH3
8
LOW
CH4
7
HIGH
Setup Schedule
Save & Exit
1. CH1 - CH4: Lists all available cameras for configuration. Press the and buttons
to highlight, and press the buttons to select the FPS or Quality for each CH. Use
the the and buttons to change the settings, and press SEL to accept the changes:
• FPS: A set number of Frames Per Second (total) is divided between all available
cameras based on Resolution settings.
• QUALITY: Set the quality level for the recording - High, Mid, Low
2. SETUP SCHEDULE: Settings for scheduled recording times. Press the and
buttons to highlight, and press the SEL button to access the Schedule Setup Sub
menu
• Use the and buttons to choose a day (SUN-SAT) and SEL to set the schedule.
• Use the and buttons to set the recording Start Time and End Time
• Select SAVE & EXIT to return to the Menu
FROM
TO
SUN
00:00
00:00
MON
00:00
00:00
TUE
00:00
00:00
WED
00:00
00:00
THU
00:00
00:00
FRI
00:00
00:00
SAT
00:00
00:00
Save & Exit
3. SAVE & EXIT: Saves any changes made, and exits to the Main Menu. Press the ��
buttons to highlight, and press the SEL button to accept the changes.
Initialization – Resets all settings
Date Format – Configures
2
3
to Factory Default
Date Display on the DVR
BASIC
Language
English
BASIC
Initialization
Date Format
MM-DD-YYYY
Date/Time
MM-DD-YYYY
Information
Save & Exit
INFORMaTION – Displays System
SaVE & EXIT – Saves any
5
6
Information
changes made, and exits to
the Main Menu.
Language
English
BASIC
Initialization
BASIC
Date Format
MM-DD-YYYY
Date/Time
MM-DD-YYYY
Information
Save & Exit
HDD Capacity:
## GB / ## GB
FPGA Version:
############
Application:
############
RAMDisk Version: ############
Kernel Version:
############
IP Address:
###.###.###.###
MAC Address:
##:##:##:##:##:##
PaCKaGE CONTENTS
S T E P 3
Recording ON/OFF - Controls
5
the Recording for Event Types
1 - D300 SERIES DIGITal
VIDEO RECORDER
Alarm Rec:
OFF
1 - POWER CORD
Motion Rec:
OFF
Recording ON/OFF
Schedule Rec:
OFF
1 - OPERaTOR'S MaNUal
Save & Exit
1 - INSTallER'S MaNUal
1 - qUICK INSTallaTION GUIDE
1 - REMOTE CONTROl
1 - NEED HElP INSERT
ALARM RECORDING: Turns Alarm Recording ON/OFF. Press the and
buttons to highlight, and press the buttons to switch between
ON and OFF.
NOT INClUDED -
CaMERaS / BROaDBaND ROUTER
MOTION RECORDING: Turns Motion Recording ON/OFF. Press the
and buttons to highlight, and press the buttons to switch
between ON and OFF.
SCHEDULE RECORDING: Turns Schedule Recording ON/OFF. Press
the and buttons to highlight, and press the buttons to switch
between ON and OFF.
Information in this document is subject to
SAVE & EXIT: Saves any changes made, and exits to the Main Menu.
change without notice. As our products are
Press the and buttons to highlight, and press the SEL button to
subject to continuous improvement, Digimerge
accept the changes.
Technologies Inc. reserves the right to modify
Note: after setting the Normal,
product design, specifications and prices, without
alarm, Motion, Schedule Recording,
notice and without incurring any obligation. E&OE
RECORDING ON/OFF MUST BE set
© 2006 Digimerge. All rights reserved.
to ON individually to activate the
functions.
S T E P 2
Language
English
Initialization
Date Format
MM-DD-YYYY
Date/Time
MM-DD-YYYY
Information
Save & Exit
Language
English
Initialization
Date Format
MM-DD-YYYY
Date/Time
MM-DD-YYYY
Information
Save & Exit
Advertisement

Related Manuals for Digimerge D300 Series


Summary of Contents for Digimerge D300 Series
- Page 1 Recording ON/OFF - Controls Sets Alarm settings for your DVR settings for Manual Recording Motion Sensor events for Scheduled events the Recording for Event Types /QUALITY 1 - D300 SERIES DIGITal /QUALITY Alarm Recording HIGH Motion Recording /QUALITY HIGH VIDEO RECORDER...
- Page 2 Number from the drop down LAN (LOCAL AREA NETWORK) HDD Capacity: ## GB / ## GB FPGA Version: ############ menu (D300 Series) BACK OF A ROUTER (NOT INCLUDED) Application: ############ RAMDisk Version: ############ WAN (WIDE AREA NETWORK) 2. For Product Code enter...