Garmin Fishfinder 340C Owner's Manual
Garmin fishfinder 340c full-featured color sonar
Hide thumbs
Also See for Fishfinder 340C:
- Owner's manual (58 pages) ,
- Quick reference (2 pages) ,
- Declaration of conformity (1 page)
Table of Contents
Advertisement
Quick Links
Advertisement
Table of Contents

Related Manuals for Garmin Fishfinder 340C


Summary of Contents for Garmin Fishfinder 340C
- Page 1 Fishfinder 340C...
- Page 2 Information in this document is subject to change without notice. Garmin reserves the right to change or improve its products and to make changes in the content without obligation to notify any person or organization of such changes or improvements. Visit the Garmin Web site (www.garmin.com) for current updates and supplemental information concerning the use and operation of this and other Garmin products.
-
Page 3: About This Manual
™ • Using the Fishfinder 340C—provides details about the to CANet-capable Garmin chartplotters, so you can read the features and operations of the Fishfinder 340C. Sonar Pages on chartplotters located elsewhere in the boat. -
Page 4: Table Of Contents
Using the Main Menu ............26 Product Registration .............. iii Using the Adjustment Menu ..........34 Contact Garmin ..............iii Configuring Advanced Data Fields ........37 Caring for the Fishfinder ............iii Pausing a Sonar or Flasher Page ........39 Warning ................... -
Page 5: Product Registration
CLEANERS CONTAINING AMMONIA HARM THE ANTI-REFLECTIVE COATING. If you encounter any difficulty while using your Fishfinder, or if you have any questions, in the U.S.A. contact Garmin Product Storage Support by phone: 913/397.8200 or 800/800.1020, Monday–... -
Page 6: Warning
This Notice is being provided in accordance with California’s Proposition 65. If you have any questions or would like additional information, please refer to our Web site at http://www.garmin.com/prop65. Hg - LAMP(S) INSIDE THIS PRODUCT MAY CONTAIN MERCURY AND MUST BE RECYCLED OR DISPOSED OF ACCORDING TO LOCAL, STATE, OR FEDERAL LAWS. -
Page 7: Getting Started
The package number transducer with depth and temperature and an attached is on the outside of the box. If any parts are missing, contact your 30-foot cable Garmin dealer immediately. Optional Package (010-00505-03 with Worldwide Packing List Language Support) •... -
Page 8: Understanding The Fishfinder And Sonar
> ETTING TARTED NDERSTANDING THE ISHFINDER AND ONAR Understanding the Fishfinder and Sonar The transducer sends sound waves down into the water in a cone shape, similar to a flashlight beam (covering a smaller circular area The Fishfinder 340C is a fully automatic, color sonar unit that at the top and angling out to a larger circular area at the bottom). -
Page 9: Using Dual Beam
> ETTING TARTED NDERSTANDING THE ISHFINDER AND ONAR The wide beam is more helpful in shallow water, because it gives Using Dual Beam you a much wider view of objects in the water, including areas Dual beam works best for shallow water (for example, inland) beyond the sides of your boat. - Page 10 > ETTING TARTED NDERSTANDING THE ISHFINDER AND ONAR NOTE: If the Fishfinder is unable to track the bottom for any Surface Water reason, the digits which indicate depth flash on and off to alert clutter depth you that the Fishfinder is not tracking the bottom. Depth Along the top of the screen, you might see a grouping of intense scale...
-
Page 11: Installing The Fishfinder 340C
• Provides optimal viewing as you operate your vessel. or sanding. • Allows easy access to the unit’s keypad. If you experience difficulty installing the unit, contact Garmin Product Support or contact a professional installer. • Is strong enough to support the weight of the Fishfinder and protect it from excessive vibration or shock. -
Page 12: Mounting The Fishfinder
340C > NSTALLING THE ISHFINDER OUNTING THE ISHFINDER Mounting the Fishfinder There are two possible installation methods for your Fishfinder: • You can mount the Fishfinder onto a bracket that attaches to To mount the bracket assembly: the console or overhead. 1. - Page 13 340C > NSTALLING THE ISHFINDER OUNTING THE ISHFINDER Installing the Unit on the Mounting Bracket To install the Fishfinder on the mounting bracket: 1. Align the slot on the back of the Fishfinder with the long mounting knob, and slide the Fishfinder into place. If necessary, adjust the long knob to spread the bracket arms apart.
- Page 14 340C > NSTALLING THE ISHFINDER OUNTING THE ISHFINDER To flush mount the Fishfinder 340C: 8. Place washers over the mounting studs, and then thread on one hex nut per mounting stud. Tighten all four until the 1. Trim the Flush Mount Template, and tape it to the chosen Fishfinder is snug against the mounting surface.
-
Page 15: Mounting The Transducer
Fishfinder. If the transducer lead is too short, 1. Insert the rubber washer and plastic spacer into the extension cables are available from your Garmin dealer. Coil and transducer at the same time. DO NOT lubricate the rubber washer. - Page 16 340C > NSTALLING THE ISHFINDER OUNTING THE RANSDUCER Mounting the Transducer on a Trolling Motor 3. Place the transducer assembly against the motor body of the trolling motor, with the front of the transducer pointed (Dual Beam Only) away from the trolling motor propeller. To mount the transducer on a trolling motor: 4.
- Page 17 340C > NSTALLING THE ISHFINDER OUNTING THE RANSDUCER Mounting the Transducer on a Transom ��� ������� When selecting a transom mount location, consider the following for optimal performance: • For your sonar to operate properly, the transducer must be located in calm water. DO NOT mount the transducer behind strakes, rivet lines, struts, fittings, water intake, discharge �����...
- Page 18 340C > NSTALLING THE ISHFINDER OUNTING THE RANSDUCER Tool List (not included)—drill, 3/8" wrench or socket, 5/32" and Mark the location. Using a 1/8" bit, drill a pilot hole approximately 3/8" (10 mm) deep. 1/8" drill bits, masking tape, #2 Phillips screwdriver, and marine sealant.
- Page 19 340C > NSTALLING THE ISHFINDER OUNTING THE RANSDUCER Shoot-Thru-Hull Installation NOTE: Many modern hulls have a dedicated pocket for To avoid drilling a hole to mount a thru-hull transducer, a shoot-thru-hull transducer installation. If you are unsure if your transducer can be secured with epoxy inside a boat (shoot-thru- hull is equipped with a pre-located pocket, contact your hull manufacturer.
- Page 20 340C > NSTALLING THE ISHFINDER OUNTING THE RANSDUCER To permanently install the transducer: 1. Lightly sand the surface of the hull and face of the transducer with 400 grit wet or dry sandpaper. 2. Build a dam using strip caulk about 1/4" (6 mm) tall. Pour about 1/8"...
-
Page 21: Installing The Wiring Harness
340C > NSTALLING THE ISHFINDER NSTALLING THE IRING ARNESS Installing the Wiring Harness To install the wiring harness: 1. Use a test light or voltmeter to determine the polarity of the The Fishfinder comes with a wiring harness that connects the voltage source. - Page 22 1. Follow the voltage source installation steps (see page 15). *Garmin GPS units accept an SDWPL (WPL) NMEA sentence and create a For Garmin units, the ground (Black) wires serve as data waypoint (saved location) at that position (page 40).
- Page 23 340C > NSTALLING THE ISHFINDER NSTALLING THE IRING ARNESS (CANet L) Orange (Accessory On) (CANet H) (RX NMEA) (TX NMEA) Fishfinder 340C Pin Assignment DC Power Accessory On �������� Source CANet L CANet H Fishfinder 340C Wiring Harness Fishfinder 340C Owner’s Manual...
- Page 24 Fishfinder 2. Use a standard pair of pliers to fully depress the red button 340C to be shared with up to two CANet compatible Garmin into the connector. GPS units. A standard NMEA connection only allows depth, 3.
- Page 25 Connection Diagram Below Terminator Terminator GREEN GREEN Fishfinder CANet CANet WHITE WHITE Extension Cable 340C Compatable ORANGE ORANGE Garmin GPS Unit BLACK BLACK DRAIN BLACK FUSE BATTERY 10-35 VOLTS DC CANet Terminator Connection 3-Wire CANet CANet CANet Connector Unit Unit...
-
Page 26: Testing The Installation
340C > NSTALLING THE ISHFINDER ESTING THE NSTALLATION Testing the Installation Because water is necessary to carry the sounder’s sonar signal, the transducer must be in the water to work properly. It is not While it is possible to perform some checks with the boat trailered, possible to get a depth or distance reading when out of the water. -
Page 27: Using The Fishfinder 340C
340C > SING THE ISHFINDER ESTING THE NSTALLATION 340C Learning the Basic Functions SING THE ISHFINDER To turn the Fishfinder on or off: If you are turning on your Fishfinder 340C for the first time, use the Press and hold Power/Backlight to turn the Fishfinder on following procedure. -
Page 28: Using The Fishfinder 340C Keypad
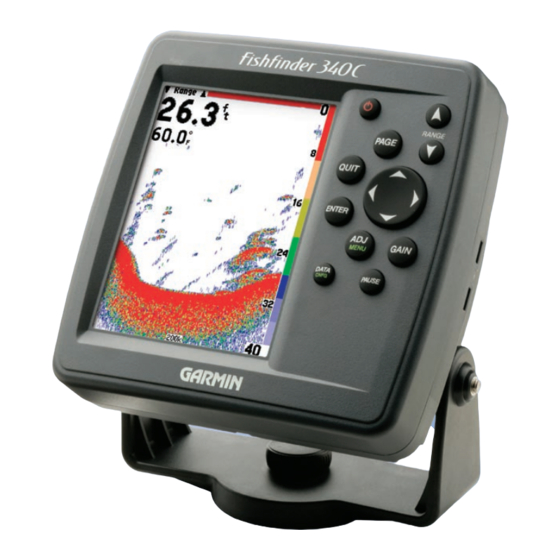
340C > 340C K SING THE ISHFINDER SING THE ISHFINDER EYPAD Using the Fishfinder 340C Keypad Power/Backlight Key RANGE Keys • Press and hold to turn the unit on or off. • Press to view the Range Menu and select a setting. -
Page 29: Understanding The Main Pages
340C > SING THE ISHFINDER NDERSTANDING THE AGES Understanding the Main Pages Using the Sonar Pages The Sonar Page that you see and the options that appear in its The Fishfinder 340C typically offers several main pages for you to Adjustment Menu depend on the transducer and settings that you use, including the Sonar Page, Flasher Page, and Numbers Page. - Page 30 340C > SING THE ISHFINDER NDERSTANDING THE AGES If you are using a dual frequency transducer and you set the Along the right side of the screen is a scale that reflects the depth of Frequency to Dual, you can access the Split Sonar Page, the Sonar the area shown.
- Page 31 340C > SING THE ISHFINDER NDERSTANDING THE AGES To split the screen: Using the Flasher Page 1. From a Sonar Page, press ADJ/MENU. The Adjustment If you prefer the appearance of flasher sonars, use the Flasher Page. Menu appears. It provides an almost instantaneous return of what is below your 2.
-
Page 32: Using The Main Menu
340C > SING THE ISHFINDER SING THE Using the Main Menu Using the Numbers Page When you use the Numbers Page, you can view three data fields of The Main Menu contains the Fishfinder settings that should not your choice. (See “Configuring Advanced Data Fields” on page 37 require frequent change. - Page 33 340C > SING THE ISHFINDER SING THE suspended targets appear as symbols. Background Graph Tab information appears, making the distinction The Graph tab enables you to determine the appearance of the between fish and structure easier. Sonar Pages. suspended targets appear as symbols with The following settings are available: background information shown.
-
Page 34: Sonar Tab
340C > SING THE ISHFINDER SING THE in sonar data presentation and is recommended for all Sonar Tab applications. The presentation is based on bottom strength. Use the Sonar tab to set up initial settings and calibrations. It makes the bottom and the fish easier to see and requires fewer adjustments. - Page 35 340C > SING THE ISHFINDER SING THE • Calibrate Water Speed—this appears only if you are using NOTE: If the boat is not moving fast enough or the speed a speed-capable transducer/sensor. Calibration is required sensor is not registering a speed, a “Boat Is Not Moving Fast to ensure that the water speed shown on your Fishfinder is Enough To Calibrate”...
-
Page 36: Alarms Tab
340C > SING THE ISHFINDER SING THE • Log Duration—sets how fast or slow the temperature Temp (Temperature) Tab log scrolls; the shorter the time duration, the faster the Use the Temp tab to control the temperature log (if your boat is temperature log scroll. - Page 37 340C > SING THE ISHFINDER SING THE To set an alarm: System Sub Tab 1. Use the ROCKER to highlight a sub tab of the Alarms tab. 2. Highlight the field below the alarm name that you want to set, and press ENTER. 3.
-
Page 38: System Tab
340C > SING THE ISHFINDER SING THE • NMEA Input/Output—controls the input and output of System Tab NMEA 0183 version 3.01 data to and from the Fishfinder. The System tab enables you to control various system and interface This setting must be On to receive GPS navigational data settings. - Page 39 340C > SING THE ISHFINDER SING THE (hddd°mm.mmm’). The following additional formats are Units Tab available: latitude/longitude in decimal degrees (hddd. The Units tab enables you to define the units of measure. ddddd°) and latitude/longitude in degrees, minutes, and seconds (hddd°mm’ss.s”). •...
-
Page 40: Using The Adjustment Menu
340C > SING THE ISHFINDER SING THE DJUSTMENT Using the Adjustment Menu The Adjustment Menu gives you direct access to the most commonly used settings and features. The Adjustment Menu also provides a quick review of how the sonar is configured. This menu varies depending on your transducer type, your current page, and your current settings. - Page 41 340C > SING THE ISHFINDER SING THE DJUSTMENT • Gain—controls the sensitivity of the Fishfinder’s sonar To change an Adjustment Menu setting: 1. Press ADJ/MENU. A list of all options and their current receiver. Auto (default) is the recommended setting. It settings appears.
- Page 42 340C > SING THE ISHFINDER SING THE DJUSTMENT Off (default)—all high-intensity bottom returns appear as a • Depth Line—adds a horizontal depth line across the screen solid color. that is used to measure the depth of underwater objects. The depth of the line appears on the right side of the line. Press up or down on the ROCKER to control the position of the line on the Sonar Pages.
-
Page 43: Configuring Advanced Data Fields
340C > SING THE ISHFINDER ONFIGURING DVANCED IELDS Configuring Advanced Data Fields • Tools—controls the appearance of useful sonar tools. The following options are available: The top-left corner of the screen contains configurable data fields A-scope—when you turn on A-scope, a vertical flasher for the Sonar Pages. - Page 44 340C > SING THE ISHFINDER ONFIGURING DVANCED IELDS The following selections require the proper NMEA data to view Data Field Definitions information in a data field: Bearing, Compass, Course, Distance to BRG (bearing)—the compass direction from a location to a Next, Off Course, Pointer, Position, Speed, Time Of Day, Track, destination, measured to the nearest degree.
-
Page 45: Pausing A Sonar Or Flasher Page
340C > SING THE ISHFINDER AUSING A ONAR OR LASHER Pausing a Sonar or Flasher Page TIME—the time of day, shown using your selected time format. Use a paused screen to take a better look at sonar returns. The TIMER—an alarm that counts down or up in the increments that depth continues to update while the page is paused, but the you set in the Alarms System sub tab. -
Page 46: Marking A Waypoint
Sonar Page to reference sonar items and mark waypoints for 2. Use the ROCKER to move the cursor around on the screen. that location (if your Fishfinder is attached to a Garmin GPS or Information about the Pointer location appears on the compatible NMEA navigation device;... - Page 47 To mark an underwater waypoint: 5. To change the name, highlight the name field, and press ENTER. 1. Make sure that your Garmin GPS or compatible NMEA navigation device is properly attached and the 6. Make your changes using the ROCKER. (Alphabetic and...
-
Page 48: Appendix
To exit Simulator mode, turn off the Fishfinder. standards Optional Accessories Temp. Range: 5°F to 131°F (-15°C to 55°C) Purchase the following optional accessories on the Garmin Web site: Power Source: 10-33v DC Quick-release flush mount kit—mounts your Fishfinder flush Usage: 17 watts max. -
Page 49: Messages And Alarms
Anchor Drag Alarm—you have drifted out of the specified distance range. Sonar Failed, Unit Needs Repair—there is an internal problem with the Fishfinder. Contact your dealer or Garmin Product Support to have the unit Battery Alarm—battery voltage has fallen below the value entered in the serviced. -
Page 50: Limited Warranty
Garmin will at its sole option repair or replace any components that fail in normal use. Such repairs or replacement will be made at no charge to the Garmin International, Inc. -
Page 51: Software License Agreement
Directive 1999/5/EC. under the United States of America copyright laws and international copyright To view the full Declaration of Conformity, see the Garmin Web site for your treaties. You further acknowledge that the structure, organization, and code... -
Page 52: Index
Garmin field definitions auto color gain installation, shoot-thru-hull current time and current date fish alarm installing custom range fish symbols 4, 27... - Page 53 NDEX NMEA data storage NMEA device strongest sonar returns language, changing the scale NMEA input/output 16, 40 stw (speed through water) language selection scale, log and graph NMEA setup surface clutter LCD screen screen, cleaning the numbers page surface mounting the fishfinder location for shoot-thru-hull installa- scroll swap split...
- Page 54 NDEX tools weakest returns transducer 2, 13 whiteline transducer, assembling the wide beam 3, 35 transducer cables wide data fields transducer type wiring harness 15, 16 transom wiring to an NMEA device transom, mounting on a wiring to a GPS transom mount installation wtr temp (water temperature) trolling motor, mounting on a...
- Page 56 Visit the Garmin Web site at www.garmin.com. © 2005, 2006 Garmin Ltd. or its subsidiaries Garmin International, Inc. 1200 East 151 Street, Olathe, Kansas 66062, USA Garmin (Europe) Ltd. Unit 5, The Quadrangle, Abbey Park Industrial Estate, Romsey, SO51 9DL, UK Garmin Corporation No.