Table of Contents
Advertisement
Advertisement
Table of Contents
Troubleshooting

Related Manuals for American Sportworks Trail Wagon TW400


Summary of Contents for American Sportworks Trail Wagon TW400
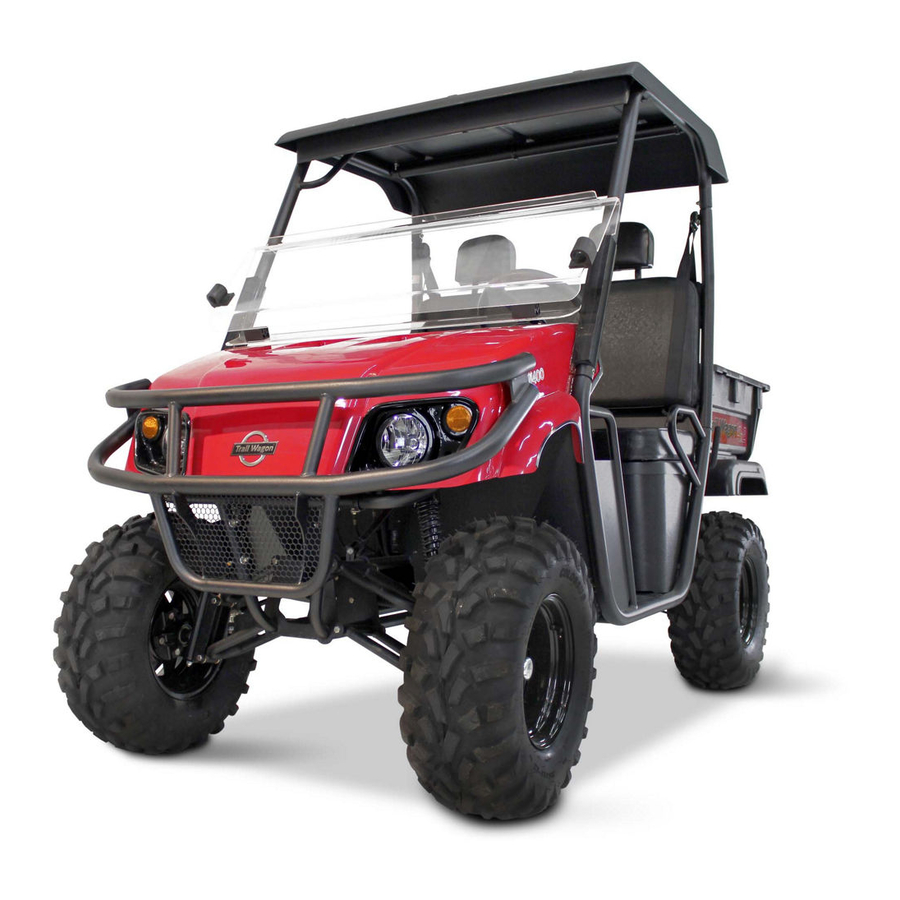
- Page 1 TW400 UTILITY VEHICLE O W N E R S M A N U A L Copyright June 7, 2012...
- Page 2 THIS PAGE INTENTIONALLY LEFT BLANK...
-
Page 3: Table Of Contents
INDEX Section 1 Introduction . . . . . . . . . . . . . . . . . . . . . . . . . . . . . . . . . . . . . . . . . . . . . . pages 1-2 Serial Number Plate Location . -
Page 4: Introduction
Safety First This off-road utility vehicle is a very unique vehicle American SportWorks is fully aware of the need for safe designed exclusively for off-road use . It is not designed, operating procedures around all of our equipment . We... -
Page 5: Serial Number Plate Location
American SportWorks products . Serial Number:__________________________________ Your American SportWorks dealer wants you to be satisfied with your new vehicle . If you do not understand any part of this manual or you’re not satisfied with the service received, please take the following actions . -
Page 6: Safety
SECTION 2 safety Read These Important Rules for Safe Operation Note: The Operator, Passenger, Parent or Guardian must read, study and understand all the items contained within this owners/operators manual before operating utility vehicle . Failure to follow these instructions could endanger the personal safety of the Operator, Passenger and any Bystanders . - Page 7 SECTION 2 safety It is very important to read, understand, and follow all instructions and warnings located on the decals on your Utility Vehicle. CAUTION USE ONLY MID-GRADE UNLEADED GASOLINE (89-93 OCTANE) This engine is designed to run on automotive gasoline with allowable ethanol blends from 0% - 10%.
-
Page 8: Warning Labels / Safe Operating Procedures
SECTION 2 safety Safe Operating Procedures • Always be aware of and avoid tree limbs and brush that The safe operation of any machinery is a big concern to have a potential of hitting and/or poking individuals riding all consumers . Your Utility Vehicle has been designed the vehicle . - Page 9 SECTION 2 safety • The Brush Guard Bar is not certified ROPS (Roll Over • When descending hills or slopes apply steady pressure to Protection System) . Always avoid rollovers . the foot brake to avoid potential of freewheeling or runaway . •...
-
Page 10: Pre-Delivery Steps / Checklists
Warranty Registration that is to be does not go to the floor . submitted to American SportWorks upon Retail Sale . The Pre-Delivery Certificate and Warranty Registration must be submitted to American SportWorks in order to activate the Make sure seats and seat belts are properly fastened to vehicle warranty . -
Page 11: Section 2 Safety
SECTION 2 safety Check forward, neutral, and reverse shifting response . Also check neutral start response . Customer has inspected the vehicle and it meets customer satisfaction . Check parking brake to make sure it engages, holds, and disengages . Customer understands the importance of following the owner’s manual instructions . -
Page 12: Assembly Instructions
SECTION 3 assembly UTILITY VEHICLE A S S E M B L Y I N S T R U C T I O N S WARNING Wear proper eye protection during the uncrating and assembly process to avoid potential eye injuries. 1 Uncrating the vehicle WARNING •... -
Page 13: Section 3 Assembly Instructions
. the bolt head is flush with the end of the nut . 3) If you have any questions or problems with your American SportWorks LLC product please call us, toll free 1-800-643-7332 . Seat / Brushguard Assembly Your new American SportWorks UTV uses two socket head 5/16”... -
Page 14: Steering Wheel Installation
SECTION 3 assembly Steering Wheel Installation 2) Place the cargo bed on the vehicle and insert a 5/8” x 4” hex head bolt through each pivot bracket and frame 1) Turn vehicle steering so that the tires are pointed stub tube . The bolt heads should be facing the straight forward . - Page 15 SECTION 3 assembly Rear Fender Installation 1) Fenders installation Tilt the cargo bed up . Line up the holes in the rear fenders with the square holes in the bed . The raised rectangular surface on the fender should be completely hidden under the bed . If not, turn the fender around .
-
Page 16: Operating Instructions
SECTION 4 operating instructions 4x2 Utility Vehicles General Operation Pre-Start Check List Start your Utility Vehicle by following the starting procedures Check tire pressure as indicated . as noted below . Make sure wheel lug bolts/nuts are tightened to 65ft . 1 . -
Page 17: Maintenance
SECTION 5 maintenance Fuel Type Engine Fuel Valve Lever The fuel tank is located under seat . Refer to Figure 5-1 390cc & 653cc Fuel Capacity is 5 Gal . The engine fuel valve opens and closes the passage between the fuel tank and carburetor . Leave fuel valve 265cc Fuel capacity is 1 .6 Gal . -
Page 18: Air Filter Elements Replacement Parts
SECTION 5 maintenance Foam element – Clean foam element with detergent in Air Filter Elements Replacement Parts warm water or in a nonflammable solvent . Do not wring Description Part No. element . Squeeze excess cleaning fluids out . Allow time for the element to dry and then soak it with clean engine Honda oil . -
Page 19: Engine Oil / Transaxle Oil / Drive Belt
SECTION 5 maintenance Engine Oil Level Check Transaxle Oil Refer to Figure 5-4 A general description for transaxle oil maintenance, Check engine oil daily with filler cap/dipstick located at the recommendations, and capacities is provided below . engine rear end as follows: NOTE: Running vehicle low on transaxle oil can damage 1 . -
Page 20: Section 5 Maintenance
SECTION 5 maintenance Transaxle Oil Change Drive Belt Warm oil drains quickly and completely . Therefore, drain used transaxle oil while transaxle housing is still warm as The dive belt is considered a wearable item . Replacement follows: intervals depend on vehicle use and environment . If your belt is slipping you may need to replace it . -
Page 21: Troubleshooting
SECTION 6 troubleshooting Fuel in the Cylinder Cavity In the event that the fuel valve is left open while transporting or towing this Utility Vehicle it is possible that fuel has leaked down into the cylinder cavity . If this has occurred the engine will not start . - Page 22 SECTION 6 troubleshooting SYMPTOMS PROBABLE CAUSES SUGGESTED REMEDIES Key switch left on Turn key off, recharge battery DEAD BATTERY Bad battery Replace battery Shorted starter solenoid Replace starter solenoid Loose or corroded battery connection Clean and tighten connections Defective voltage regulator Contact local service center Turn key on and pull rope to start engine.
- Page 23 Repeat, moving the shift lever from neutral to forward . kit . Please call American SportWorks Customer Service at • If the starter did engage, go to Cable 1-866-646-5278 . Have your Model and Serial number adjustment procedure section .
-
Page 24: Section 6 Troubleshooting
SECTION 6 troubleshooting Vehicles with serial number greater than 17063. (See brass tag near top of left rear shock absorber) 1 . Put the vehicle in neutral . 2 . Loosen the cable adjusters behind the dash board . (figure 6 .3) 3 . -
Page 25: Diagrams
SECTION 7 diagrams WIRING DIAGRAM E N G I N E M O D E L S... -
Page 26: Wiring Diagram Terminal Block
SECTION 7 diagrams WIRING DIAGRAM T E R M I N A L B L O C K... -
Page 27: 2Wd Dana Transaxle W/ Locking Differential
SECTION 7 diagrams 2 WHEEL DRIVE ( 2 - 2 0 8 3 3 ) TRANSAXLE P A R T S B R E A K D O W N For units equipped with locking differential... -
Page 28: Parts List & View
SECTION 7 diagrams Please contact our Customer Service Department (866-646-5278) To special order DANA Transaxle Parts Key No. DANA Part No. No. Req’d Description 012CH345X Housing, Axle (w/ Idler Shaft) 012CH320 Housing, Axle, Finished SPICER OUTDOOR POWER 012LK133 Kit, Detent 012HH122 Seal, Oil EQUIPMENT COMPONENTS DIVISION... -
Page 29: Section 7 Diagrams
SECTION 7 diagrams... - Page 30 Utility Vehicles (UTVs) American SportWorks (hereinafter referred to as “ASW”), hereby warrants to the original purchaser, that a new ASW UTV will be free from defects in material and workmanship. The period of warranty is one (1) year from date of purchase for the component parts (except as noted below) and three (3) years from the date of purchase for a Honda engine (engine warranties are covered by the engine manufacturer).
- Page 31 Service and Warranty Special Note Should your American SportWorks product require warranty repair, service or if you have any questions concerning assembly, replacement parts or how to care for your product please contact your local American SportWorks dealer or American SportWorks directly .
-
Page 32: Warranty Policy
UTILITY VEHICLE SET-UP, PRE DELIVERY CHECKLIST AND WARRANTY ACTIVATION MODEL # SERIAL # DATE OF PURCHASE DEALER SET-UP SET UP BY: VISUALLY - inspect for damage OWNER MANUAL - verify all are there FASTENERS - inspect for missing bolts, nuts WELDS - inspect for missing ...