
Related Manuals for IOGear GBS301


Summary of Contents for IOGear GBS301
- Page 1 Bluetooth to Serial Adapter Bluetooth to Serial Adapter Bluetooth to Serial Adapter Bluetooth to Serial Adapter Bluetooth to Serial Adapter User Manual (GBS301) ®...
- Page 2 Inc. Macintosh, G3/G4 and iMac are registered trademarks of Apple Computer, Inc. All other brand and product names are trademarks or registered trademarks of their respective holders. IOGEAR makes no warranty of any kind with regards to the information presented in this document. All information furnished here is for informational purposes only and is subject to change without notice.
-
Page 3: Table Of Contents
Table of Contents Package Contents... 2 Features... 3 System Requirements... 4 Introduction... 5 Operation... 8 Basic Configuration...11 ·Connecting GBS301 to Bluetooth-enabled device ·Interconnecting two IOGEAR Bluetooth adapters Advanced Configuration... 22 Unpairing Procedure... 29 Specification... 30 Appendix A-HyperTerminal Menu... 31 Technical Support... 38 Radio &... -
Page 4: Package Contents
Package Contents This package contains: 1 Bluetooth serial adapter 1 Null modem adapter 1 Power adapter 1 User manual 1 Quick Start Guide 1 Warranty/Registration card... -
Page 5: Features
· Eliminates messy cables, allowing you to communicate to serial RS-232 devices wirelessly · Easily accessible DIP switches for fast and easy configuration without using HyperTerminal · Communicates with another IOGEAR Bluetooth Serial Adapter or any other Bluetooth enabled device ·... -
Page 6: System Requirements
System Requirements • Device with DB-9 Connector and compliant with RS-232 protocol Note: Due to the various communication protocols and drivers involved, this adapter may not work with RS-232 modems, mice, keyboards, cell phones, and devices using proprietary communication protocols. -
Page 7: Introduction
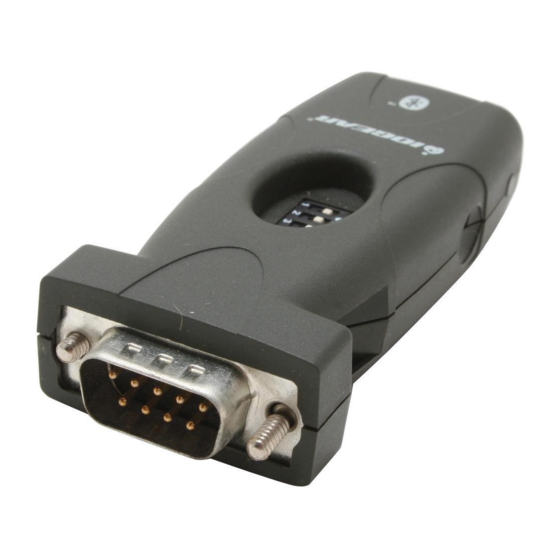
Introduction 1. IOGEAR logo, mark of Quality 2. Power jack 3. Status LED 4. DIP Switches 5. RS-232 interface... - Page 8 Pictorial Introduction Bluetooth Serial Adapter Pin-out...
- Page 9 Pictorial Introduction Null Modem Adapter Pin-out...
-
Page 10: Operation
Operation Factory Settings When using the Bluetooth serial adapter with your serial devices, you must make sure that all the settings below match on both devices; otherwise, you may encounter problems communicating. Below are the factory default settings of this unit: Encryption = disabled Authentication = enabled PIN key = 1234... - Page 11 Operation Switfches 1-3 DIP Switches 1, 2, and 3 are used to configure the baud rate. Table 1 Note: Most computer serial ports only support baud rate up to 115200. For higher baud rates, you may need to install a high-speed serial card in your computer. In addition, if you need to set a lower baud rate for your application, see the Advanced Configuration section on page 22.
- Page 12 Master mode: Switch 4 Slave mode: Switch 4 Master Mode If you are interconnecting two IOGEAR Bluetooth adapters, you must set one of them to master and the other to slave. Slave Mode Please note that Bluetooth software applications (like Widcomm) will only be able to discover and connect to slave devices.
-
Page 13: Basic Configuration
Basic Configuration SCENARIO 1: Connecting Bluetooth serial adapter with Bluetooth-enabled device The Bluetooth serial adapter has built-in dip switches for fast and easy configuration. If you would like to change any of the default settings, consult the Advanced Configuration section on page 22. Set baud rate Using table 1 on page 9, set the baud rate on the Bluetooth serial adapter by using the on-board DIP switches. - Page 14 Basic Configuration Set device mode When using the Bluetooth serial adapter with a Bluetooth-enabled device (PC/PDA), you must set the Bluetooth serial adapter in slave mode (Switch 4 = Off). Plug in Plug in the Bluetooth serial adapter to your serial device. If your device has a male RS232 interface, use the included null modem adapter.
- Page 15 Instructions Basic Configuration Pair and Connect Use your Bluetooth software to search for Bluetooth devices in range. Once the Bluetooth serial adapter is detected, pair to it. If prompted for a PIN code, enter “1234” (without the quotes). Once paired, establish a connection using the Bluetooth serial port profile (SPP). If you’re not sure how to do this, please consult the documentation for your Bluetooth hardware/software.
- Page 16 Basic Configuration Widcomm Bluetooth Software 1. Open My Bluetooth Places and Search for Devices in Range...
- Page 17 Basic Configuration 2. When found, pair to the Bluetooth serial adapter. The default PIN code is “1234” 3. Once paired, the unit will display the services available.The service offered by this unit is the Serial Port Profile (SPP).To establish a connection, right-click on it and select “Connect to Bluetooth Serial Port.”...
- Page 18 Basic Configuration 4. Once connected, you will see this window indicating the COM port number used for connection with the Bluetooth serial adapter. In our example below, this is COM 4, but most likely it will be different in your case. IMPORTANT: Make note of this COM port number, as this is the COM port that you need to specify for your specific application.
-
Page 19: Interconnecting Two Iogear Bluetooth Adapters
SCENARIO 2: Interconnecting two IOGEAR Bluetooth serial adapters When interconnecting two IOGEAR Bluetooth serial adapters, there are three methods you can use to pair and connect them: 1. Auto-pairing 2. Back-to-Back 3. Configuration Mode Basic Configuration... - Page 20 Basic Configuration Note: If you have previously paired to the Bluetooth serial adapter(s), make sure to follow the unpairing procedure on page 29 before attempting to connect to a new device. Method 1 – Auto-paring Follow steps below Set device mode Set one serial adapter to Master (switch 4 = ON), and the other to Slave (switch 4 = OFF) Set baud rate Set matching baud rates as needed...
- Page 21 Finished Upon successful connection, the blue LED on both adapters will turn off and remain off Note: Once you have paired both Bluetooth serial adapters, if you turn them off, please allow approximately sixty (60) seconds when turning them back on to re-establish a connection. Method 2 –...
- Page 22 Basic Configuration Back-to-Back Connect the serial adapters back-to-back, using the included Null Modem adapter Power ON Power ON both Serial adapters Pairing Almost instantly, the Red/Blue LED will light up and stay solid; this indicates successful pairing of the two serial adapters. (If this does not happen, make sure one device is set to Master and the other to Slave via dip switch 4).
- Page 23 Plug in You may now connect each adapter to your desired serial device for communication. After powering back ON both serial adapters, the blue LED will blink on both serial adapters indicating connection is in progress; which usually takes about sixty (60) seconds Finished After successful connection is made, the blue LED on both serial adapters will turn off and remain Note: Once you have paired both Bluetooth serial adapters, if you turn them off, please...
-
Page 24: Advanced Configuration
Advanced Configuration The Bluetooth serial adapter has an embedded configuration menu that allows you to change settings for your specific application. This menu can be accessed via HyperTerminal (Windows systems). Using this configuration mode, you can configure the baud rate, select Peer Device (Master only), change PIN code, enable/disable authentication, and enable/disable encryption. - Page 25 Configuring Serial Adapter Set baud rate Set the Baud rate on the Serial adapter to 9600 (see table 1 on page 9) Plug in Plug the Bluetooth serial adapter to an available serial port on your computer (Do NOT power on the serial adapter yet). Open Hyper Terminal Open HyperTerminal (Go to Start desired name for your hyperterminal session.
- Page 26 Advanced Configuration Note: HyperTerminal may also be found under Start Programs Accessories Communi - cati o ns HyperTerminal...
- Page 27 Advanced Configuration Specify COM port When prompted for the COM port number being used, make sure to select the correct one. If you only have one physical com port in your computer, this will probably be COM 1 However, if you’re unsure, contact your computer/motherboard manufacturer.
- Page 28 Advanced Configuration Port Settings Make sure to set your settings as shown on the window below:...
- Page 29 Advanced Configuration Power on Once you have initiated your HyperTerminal session, power ON the Serial adapter. It will display the words “PR” to indicate it is in configuration mode. Within six (6) seconds, enter the words “AT” (without quotes) to invoke the configuration menu Note: If this does not happen, simply power Off the serial adapter and back...
- Page 30 Advanced Configuration Make Changes Make your selection from the menu to change any desired settings. Exit and apply changes To apply any changes, you must select option E (Exit configuration) and accept the changes. Power Cycle Finally, power cycle the adapter by turning it off, then back on again.
-
Page 31: Unpairing Procedure
Method 3 Use HyperTerminal configuration menu and select “Clear Pairing Information” option. If interconnecting two IOGEAR Bluetooth serial adapters, this must be done on both adapters. For details on using the HyperTerminal configuration menu, please see Appendix A on page 31... -
Page 32: Specification
Specifications... -
Page 33: Appendix A-Hyperterminal Menu
Appendix A Appendix A HyperTerminal Menu The IOGEAR Bluetooth serial adapter has a built-in configuration menu that can be accessed via HyperTerminal in Windows systems. For instructions on how to invoke configuration mode refer to Advanced Configuration section of this manual. - Page 34 Appendix A IOGEAR GBS301 CONFIGURATION MENU 1. Search for Bluetooth adapter 2. Change local device name 3. Set authentication mode 4. Set pin key 5. Set encryption mode 6. Set baud rate 7. Change uart settings 8. Display device settings C.
- Page 35 Appendix A Option 1: Search for Bluetooth adapter Use this option to search for another IOGEAR Bluetooth serial adapter. This option is only available if device set as Master. Keep in mind that the other serial adapter must be set to slave in order to be discovered.
- Page 36 Appendix A Option 4: Set pin key The default PIN key for the serial adapter is “1234”. If you wish to change this to something else, use this option Option 5: Set encryption mode Use this option to enable/disable encryption mode. For example, there are some applications that might not work properly if encryption is enabled.
- Page 37 Appendix A Option 6: Set baud rate The dip switches on the serial adapter allow you to set baud rates ranging from 9600 to 921600. If you need to use a lower baud rate – like 2400bps or 4800bps – use this option. The baud rates available for this unit are listed below: Baud rate setting Baud rate selection from switch...
- Page 38 Appendix A Option 7: Change uart settings For certain applications, you might need to change the default UART settings. Below are the available options for this adapter: Parity : None, Odd, Even Stop bits: 1, 2 In case you are wondering, UART stands for Universal Asynchronous Receiver/Transmitter. Option 8: Display device settings Use this option to display the current settings of the serial adapter Option C: Clear pairing information...
- Page 39 Appendix A Option D: Display firmware version Displays the firmware version of the Bluetooth serial adapter; this is mostly used for troubleshooting purposes Option F: Restore factory settings Use this option to restore all values to their factory settings. Option E: Exit configuration This option is used to exit the configuration menu, and apply all changes made...
-
Page 40: Technical Support
Technical Support If you need technical support, please check out our IOGEAR Tech Info Library (T.I.L.) www.iogear.com/support for the latest tips, tricks, and troubleshooting. The IOGEAR T.I.L. was designed to provide you with the latest technical information about our products. Most of the answers to your questions can be found here, so please try it out before contacting technical support. -
Page 41: Radio & Tv Interference Statement
Radio & TV Interference Statement WARNING!!! This equipment generates, uses and can radiate radio frequency energy and, if not installed and used in accordance with the instruction manual, may cause interference to radio communications. This equipment has been tested and found to comply with the limits for a Class B computing device pursuant to Subpart J of Part 15 of FCC Rules, which are designed to provide reasonable protection against such interference when operated in a commercial environment. -
Page 42: Limited Warranty
Limited Warranty IN NO EVENT SHALL THE DIRECT VENDOR’S LIABILITY FOR DIRECT, INDIRECT, SPECIAL, INCIDENTAL OR CONSEQUENTIAL DAMAGES RESULTING FROM THE USE OF THE PRODUCT, DISK, OR ITS DOCUMENTATION EXCEED THE PRICE PAID FOR THE PRODUCT. The direct vendor makes no warranty or representation, expressed, implied, or statutory with respect to the contents or use of this documentation, and especially disclaims its quality, performance, merchantability, or fitness for any particular purpose. -
Page 43: Ce Safety Statement
CE Safety Statement This device has been tested and found to comply with the requirements set up in the council directive on the approximation of the law of member states relating to EMC Directive 89/336/EEC, Low Voltage Directive 73/23/EEC and R&TTE Directive 99/5/EC. The product has been approved for LVD and covered the following countries: Belgium, Denmark, France, Germany, Italy, Portugal, U.K., Spain, Sweden... - Page 44 ® Contact info. 23 Hubble • Irvine, CA 92618 • (P) 949.453.8782 • (F) 949.453.8785 • www.iogear.com...