Table of Contents
Advertisement
Advertisement
Table of Contents

Summary of Contents for Shindaiwa T2500
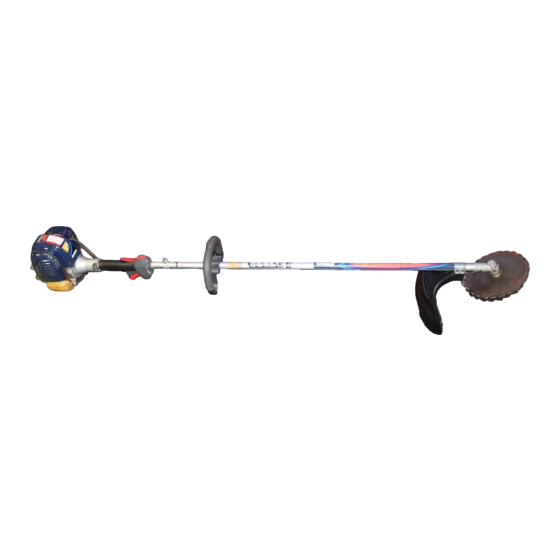
- Page 1 SHINDAIWA OWNER’S/ OPERATOR’S MANUAL T2500 TRIMMER T2500X TRIMMER T2500 T2500X WARNING! Minimize the risk of injury to yourself and others! Read this manual and familiarize yourself with the contents. Always wear eye and hearing protection when operating this unit. Part Number 80546...
-
Page 2: Table Of Contents
As an owner/ attachments not approved by operator, you’ll soon discover for Shindaiwa for use on this unit. CAUTION! yourself why Shindaiwa is simply in a A statement preceded by the word class by itself! Stay Alert “CAUTION” contains information... - Page 3 General Safety Instructions The Properly Equipped Operator WARNING! Wear hearing protection Use Good Judgment devices and a broad-brimmed Wear close-fitting clothing ALWAYS wear eye protection to hat or helmet. to protect legs and arms. shield against thrown objects. Gloves offer added Always wear eye protection such NEVER run the engine when protection and are strongly...
-
Page 4: Safety Labels
Safety and Operation Information Labels: Make sure all information labels are undamaged and readable. Immediately replace damaged or missing information labels. New labels are available from your local authorized Shindaiwa dealer. This label indicates the minimum distance between front handle and rear grip per ANSI B175.3. -
Page 5: Product Description
Category C = 50 hours (Moderate), B = 125 hours (Intermediate) and A = 300 hours (Extended). meets or exceeds these specifications and is recommended for all Shindaiwa products. Specifications are subject to change without notice. This unit comes fully assembled with... -
Page 6: Assembly And Adjustments
Assembly and Adjustments Handle Handle. Barrier Handle 1. The handle is attached to the outer tube at the factory and positioned Handle Handle Positioning Label vertically. See Figure 5. 2. Loosen the 4 socket-head capscrews on the handle and rotate the handle 90 degrees. See Figure 5A. - Page 7 Assembly and Adjustments Cutting Attachment Shield Socket- WARNING! Head Cap Screw NEVER operate the unit without the Outer cutting attachment shield installed Tube and tightly secured! Cutting Bracket Attachment The line cutter can be positioned in Shield 2 positions to obtain different line length for cutting.
- Page 8 Assembly Blade T2500X Mount the Saw Blade. Slide the safety clip off-center Shaft Bolt Turn the T2500X upside down so the gearcase output shaft is facing UP and Bolt Guard remove the shaft bolt, bolt guard and holder B from the gearcase shaft. Output Holder B 1.
-
Page 9: Engine Fuel
C4 engines, and should fuel tank and/or fuel tank cap than 30 days and oil with fuel never be used in your Shindaiwa are damaged. stabilizer is not used, it should first be engine. NEVER smoke or light any fires... -
Page 10: Stopping The Engine
4. Carburetor fuel mixture adjustments XST015 idle speed cannot be adjusted by are preset at factory and cannot be Idle Adjusting the procedure described here, Figure 22 serviced in the field. Screw return the trimmer to your Shindaiwa dealer for inspection. -
Page 11: Checking Unit Condition
See Figure 23. reduces fatigue during extended operation. Cutting Grass—Units equipped with a trimmer head. Your Shindaiwa unit may be equipped Hold the trimmer so the trimmer head CAUTION! with one of several Shindaiwa trimmer is angled slightly into the area to be cut. -
Page 12: Using A Blade T2500X
WARNING! WARNING! DO NOT use 2-tooth or non- When making vertical cuts, never Shindaiwa approved 4-tooth cutting allow the blade to exceed waist blades with Shindaiwa trimmers and height. brushcutters. -
Page 13: Maintenance
IMPORTANT! NOTE: MAINTENANCE, REPLACEMENT OR WARNING! Using non-standard replacement REPAIR OF EMISSION CONTROL parts could invalidate your Shindaiwa Before performing any maintenance, DEVICES AND SYSTEMS MAY BE warranty. repair or cleaning work on the unit, PERFORMED BY ANY REPAIR Muffler make sure the engine and cutting ESTABLISHMENT OR INDIVIDUAL;... - Page 14 Use Grease only lithium-base grease such as Shindaiwa Gear Case Lubricant or equivalent. See Figure 30. Lubricate main shaft splines. Use a hooked wire to extract the fuel Gear filter from inside the fuel tank.
- Page 15 The NGK CMR6H also meets the It is highly recommended that this is resistor type spark plug of the requirements for electro magnetic done by a Shindaiwa-trained service correct heat range. Set spark plug compliance (EMC). technician. electrode gap to 0.024-0.028 inch (0.6 -0.7 mm).
-
Page 16: Long Term Storage
Round Figure 33 Shindaiwa Tornado Blade File To sharpen the cutters on a Shindaiwa WARNING! Tornado Blade, use a 7/32-inch round Sharpen only the cutting file. File the leading edge of each tooth teeth of a blade. DO NOT alter the to a razor edge. -
Page 17: Troubleshooting Guide
Troubleshooting Guide ENGINE DOES NOT START What To Check Possible Cause Remedy Faulty recoil starter. Consult with an authorized servicing dealer. Does the engine crank? Fluid in the crankcase. Consult with an authorized servicing dealer. Internal damage. Consult with an authorized servicing dealer. Loose spark plug. - Page 18 Troubleshooting Guide (continued) ADDITIONAL PROBLEMS Symptom Possible Cause Remedy Clogged air filter. Clean the air filter. Poor acceleration. Clogged fuel filter. Replace the fuel filter. Lean fuel/air mixture. Consult with an authorized servicing dealer. Idle speed set too low. Adjust: 3,200 ( 300) rpm (min Switch turned off.
-
Page 19: Emission System Warranty
You are responsible for presenting your small off-road as the carburetor, the ignition system and, if equipped, the engine to an authorized Shindaiwa Dealer as soon as a catalytic converter. These components are specifically listed problem exists. The warranty repairs should be completed below. - Page 20 NOTES...


