Table of Contents
Advertisement
Quick Links
w w w. r o y a l l g r i l l s . c o m
WOOD PELLET GRILL
OWNER'S MANUAL
DESIGNED FOR RESIDENTIAL OUTDOOR USE ONLY. USE FOOD GRADE WOOD PELLETS.
MODELS: RG1000 RG2000 RG3000
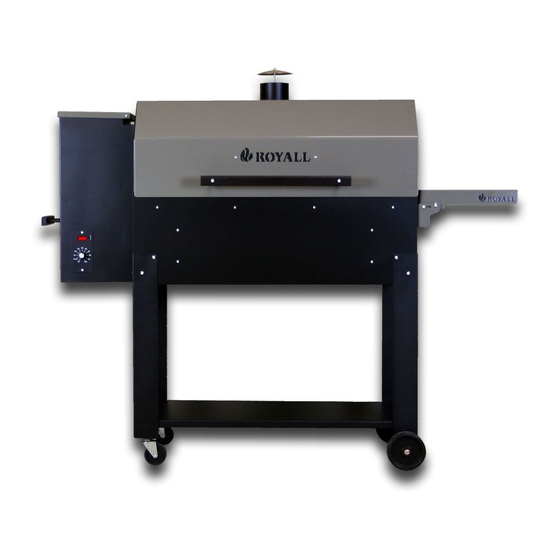
RG1000
CAUTION DO NOT USE
INCLUDING GASOLINE, THINNER, OIL, PAINTS OR FLAMABLE LIQUIDS
325 South Park Street Reedsburg, WI 53959
RG2000
OR STORE NEAR COMBUSTIBLE MATERIALS
(Side Hopper Construction)
RG3000
Phone 608-768-8508
Advertisement
Table of Contents

Related Manuals for Royal RG1000


Summary of Contents for Royal RG1000
- Page 1 WOOD PELLET GRILL OWNER’S MANUAL DESIGNED FOR RESIDENTIAL OUTDOOR USE ONLY. USE FOOD GRADE WOOD PELLETS. MODELS: RG1000 RG2000 RG3000 (Side Hopper Construction) RG1000 RG3000 RG2000 CAUTION DO NOT USE OR STORE NEAR COMBUSTIBLE MATERIALS INCLUDING GASOLINE, THINNER, OIL, PAINTS OR FLAMABLE LIQUIDS w w w.
-
Page 2: Tools Required
ROYALL Thank you for selecting for your wood pellet grill purchase. Your grill is proudly made in America and is designed to provide years of grilling enjoyment. SPECIAL FEATURES - EXTRA LARGE GRILLING SURFACE - ROOMY SMOKE CHAMBER PROFILE - UNIQUE SMOKE BAFFLE PLATE FOR ENHANCED CIRCULATION - SOLID WELD CONSTRUCTION FOR STRENGTH AND DRUABILITY - RG2000 &... - Page 3 STEP#3: Lay Grill base on its back . Unwrap COMBUSTION FAN ASSEMBLY & . Locate mounting holes of bracket over (4) MOUNTING BRACKET holes in bottom of auger box and secure to base with (4) 3/8 hex ½” long screws NOTE: check blade after installation to ensure that it spins without rubbing when mounted.
- Page 4 STEP#6: “LOOSELY” attach the 2 short legs to Hopper end of grill base corners using (4) 1/4-20 x 5/8 Phillips head bolts and (4) flange nuts per leg. Repeat for the 2 long legs to the other end of the grill base . NOTE: leave legs loose until bottom pan has been installed.
- Page 5 STEP#9: Assemble the handles to the grill lid and pull handle to hopper using hardware attached to the handle. (RG2000 & RG3000) STEP#10: Move grill into up right position. Attach side shelf assembly brackets to end of grill using (4) 1/4-20 x 5/8 Phillips head bolts and (4) flange nuts STEP#11: Attach chimney to roof by sliding up through from inside...
- Page 6 STEP#12: Attach Rain cap to Chimney by placing cap over rod and succuring cap with acorn nut. STEP#13: Attach smoke baffle plate inside, below chimney using (3) 3/8 phillips head screws & loc nuts GETTING READY FOR THE FIRST TIME FIRING OF YOUR GRILL CAUTION: Locate your new grill such that all surfaces are at least 18”...
- Page 7 STEP#16: Turn the control switch to the HIGH position. Visually check to see that the auger is turning. (it revolves once/min) STEP#17: Look under the bottom of the unit to see that the fan is circulating STEP#18: AFTER 2-3 minutes of power the hot rod in the fire pot should be emitting a little heat and may have a faint glow to it.
-
Page 8: Operating Do's And Don'ts
YOU ARE READY TO START GRILLING FIRST USE: WE RECOMMEND RUNNING THE GRILL FOR 20 MINUTES ON HIGH TO SEASON THE GRILL SET THE CONROL SWITCH TO HIGH TO START YOUR GRILL. THE HOT ROD WILL HEAT FOR ABOUT 3-4 MINUTES AND SHUT OFF. NORMALLY THIS IS ENOUGH TIME TO IGNITE THE PELLTS. -
Page 9: Grill Maintenance
5-10 minutes prior to adjusting the control or adding food. COOKING MODE SELECTION FOR 3 POSITION CONTROL RG1000: (RG2000 & RG3000 SEE SEPARATE CONTROL INSTURCTIONS) Note – always cook with lid closed... -
Page 10: Troubleshooting
dry ash and brush with soapy water where grease has helped to stick it to the surface. Cover the grill with a water proof cover when not in use. Or store under roof. Controls should not be exposed to the elements for long periods. - Page 11 - CHECK to make sure pellets are dry and being delivered to the burn pot o If pellets are not being delivered, make sure hopper is full and auger is not jammed (is turning) DO NOT STICK FINGERS INTO MOVING AUGER DANGER: - CHECK to see if hot rod glows red after a couple minutes o If hot rod does not glow.
- Page 14 Smoke Mode In Smoke Mode, the fuel feed rate is set manually by the operator. The grill operates at low temperature to provide maximum smoke. RG-Digital Control comes standard in the following Royall Grills: RGPRO RG2000 RG3000 RG5000VS RG-Three Speed comes standard in the following Royall Grills: RG1000 RGTAILGATER...
- Page 15 RG-DIGITAL CONTROL OPERATION OVERVIEW LED Readout Displays grill temperature, smoke settings, idle fuel feed settings, igniter status, low temperature status, and error messages. Cook Control Switch Selects off , smoke mode, or one of nine cook mode grill temperatures. Smoke Control Switch Selects one of sixteen smoke/idle fuel feed rates.
- Page 16 RG-DIGITAL CONTROL UNDERSTANDING THE DISPLAY Numbers When the grill is connected to AC power, the model number and software version of the control are displayed momentarily. Temperature In cook mode and smoke mode, the grill temperature is displayed in 5 degree (Fahrenheit) increments. Flashing Temperature In cook mode, the displayed temperature fl ashes if the grill temperature is below 150 degrees.
-
Page 17: Connecting The Grill To Ac Power
CONNECTING THE GRILL TO AC POWER Turn the Grill Off Set the cook control switch to the off position. Plug the Grill In Connect the grill to AC power. The control displays its model number and software version. If you see “ErP” If the cook control switch is in the smoke position or any temperature setting when the grill is plugged in, the control will display “ErP”... - Page 18 Temperature Settings 180 180 degrees 225 225 degrees 250 250 degrees 275 275 degrees 300 300 degrees 325 325 degrees 350 350 degrees 375 375 degrees High 450 degrees or Maximum Temperature High Temperature Setting If the cook control switch is set to high, the grill operates at 450 degrees. If the grill is unable to attain 450 degrees due to ambient temperature and humidity, fuel type and quality, and/or thermal characteristics of the grill, the auger feeds fuel continuously allowing the grill to operate at its maximum temperature.
- Page 19 SMOKING Smoke Control Set the cook control switch to smoke. Use the smoke control switch to manually select the auger fuel feed rate. The control displays the grill’s current temperature. Smoke sequence once the ignition sequence is complete and the igniter turns off , the auger delivers fuel at a constant rate determined by the smoke setting (P0 - P15).
- Page 20 “P” Settings The fuel feed rate setting is displayed momentarily whenever the cook control switch is set to the smoke position. It is also displayed whenever the smoke control switch is adjusted. The setting is designated with the letter “P” and a number.
-
Page 21: Error Modes And Messages
Smoke Mode Fuel Feed Rate In smoke mode, increasing the “P” setting decreases the fuel feed rate, lowering the grill temperature. Start at setting “P2”, adjust the “P” setting manually for the desiredtemperature and/or smoke output. ERROR MODES AND MESSAGES Inadvertent Start Error (ErP) If the cook control switch is set to Smoke or to a temperature setting at the time the grill is plugged in, the control will display “ErP”... - Page 22 AC AUGER THEORY OF OPERATION AC Auger The grill is equipped with an AC auger. AC augers operate at a single speed and deliver fuel at a constant rate while on The fuel feed rate (amount of fuel delivered in a given period of time) is adjusted by varying the on and off time intervals.
- Page 23 RG-DIGITAL CONTROL TROUBLESHOOTING Always disconnect the grill from AC power before accessing the control for service Warning or working under the grill. Removing the control from the grill, installing the control into the grill, or working under the grill while the grill is connected to AC power could result in shock or could damage the control.
- Page 24 Fire Goes Out Set cook control switch to the off position and allow grill to cool. No fuel in hopper Fill hopper with good, dry fuel. No fuel in fi repot Verify the control is properly connected to auger. Clear auger if jammed. Replace auger and/or auger motor if defective. Unburned fuel in fi repot Adjust smoke control switch (decrease the “P”...
- Page 25 Unexpected Temperature Displayed Auger idle fuel feed rate is too high. Adjust smoke control switch (increase the “P” setting) to decrease idle fuel feed rate. Auger idle fuel feed rate is too low Adjust smoke control switch (decrease the “P” setting) to increase idle fuel feed rate. Grill lid is open Close grill lid.
-
Page 26: Warranty
REPAIR PARTS Contact your local dealer or contact Royall Grills PHONE : 608-768-8508 : 608-768-8433 e-mail: info@royallgrills.com MAIL: Royall Grills 325 South Park Street Reedsburg, WI 53959 WARRANTY Grills used for residential purposes are warranted by Royall Grills against factory defects in material and workmanship for a period of 1 year from the date of purchase to the original owner.