Table of Contents
Advertisement
Advertisement
Table of Contents

Related Manuals for Teac TD-X300i


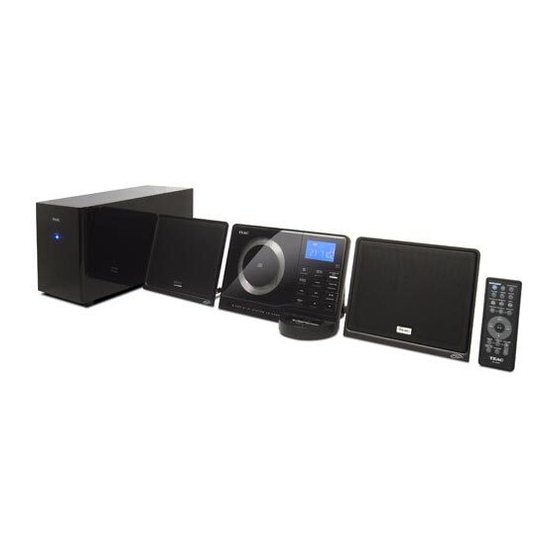
Summary of Contents for Teac TD-X300i
- Page 1 77-20D300I00020 TD - X300i Micro Hi-Fi System OWNER’S MANUAL...
-
Page 2: Important Safety Instructions
IMPORTANT SAFETY INSTRUCTIONS 1) Read these instructions. 2) Keep these instructions. CAUTION: TO REDUCE THE RISK OF ELECTRIC SHOCK, DO 3) Heed all warnings. NOT REMOVE COVER (OR BACK). NO USER-SERVICEABLE PARTS INSIDE. REFER SERVICING TO QUALIFIED SERVICE 4) Follow all instructions. PERSONNEL. -
Page 3: Table Of Contents
< Do not place any objects filled with liquids, such as vases, on the apparatus. Thank you for choosing TEAC. Read this manual carefully to get the best performance from this unit. < Do not install this apparatus in a confined space such as a book case or similar unit. -
Page 4: Before Using The Unit
Before Using the Unit Remote Control Unit Read this before operation The provided Remote Control Unit allows the unit to be operated from a distance. < As the unit may become warm during operation, always leave When operating the remote control unit, point it towards the sufficient space around the unit for ventilation. -
Page 5: Discs
CD standard may not play back correctly in this player. If you use such discs in this unit, TEAC Corporation and its subsidiaries < Never use a stabilizer. Using commercially available CD stabilizers... -
Page 6: Connection
Connection Speaker (R) Speaker (L) rAC outlet Side panel of the main unit Rear panel of the main unit Subwoofer CAUTION < Turn off the power of all the equipment before making connections. < Read instructions of each component you intend to use with this unit. -
Page 7: Am Loop Antenna
When using the PHONES jack of your mini player, you must adjust the volume of the mini-player or you may hear no sound from your TD-X300i. VIDEO OUT terminal Subwoofer This terminal outputs video signal from iPod. -
Page 8: Wall Mounting
< Drill holes into solid wall support, such as wooden frame or concrete wall. < TEAC supplies these brackets as a convenience to the product owner. Consult your local building codes and exercise all necessary caution when mounting these brackets. If you are unsure how to use the supplied brackets, consult with a local tradesmen or building supply expert. -
Page 9: Getting Started
The TD-X300i comes mounted with an adapter for iPod with color display (40GB, 60GB), “60GB (color) + Photo 40GB/60GB”. To play In case your iPod will not work with the TD-X300i or with the remote your iPod through the TD-X300i, you have first to check if the control unit, software update may solve the problem. -
Page 10: Unit Functions
Unit Functions Note: To simplify explanations, instructions in this manual refer to the names of the buttons and controls on the front panel only. Associated controls on the remote control will also operate similarly. - Page 11 display Dock connector Before use, insert an appropriate Dock adapter in the Dock (see page 9). STANDBY/ON ( Insert an iPod mobile digital device into this dock. Use this button to turn the unit on or standby. The main unit is powered via the subwoofer. You need to first VOLUME turn on the subwoofer.
-
Page 12: Basic Operation
Basic Operation (Rear panel of the subwoofer) Select a source by pressing the FUNCTION button. Turn on the subwoofer. Press the STANDBY/ON button ( ) on the main unit. < To listen to an external source connected to the AUX IN jack, select AUX. -
Page 13: Sleep Timer
Muting Sleep Timer To mute the sound temporarily, press the MUTING button. Press Repeatedly pressing the SLEEP button permits setting an interval the MUTING button again to restore the sound. (from 90 down to 15 minutes) after which you want the unit to automatically turn off and shift into Standby mode. -
Page 14: Listening To Ipod
To resume playback, press the play/ pause button (G/J) again. < If the iPod that is in playback mode is inserted into the Dock, the TD-X300i will automatically turn on and start playback of the iPod. To skip to the next or a previous song <... - Page 15 To go back to the previous menu To activate the shuffle mode Press the MENU button to go back to the previous menu. This button is equivalent to the MENU button on your iPod. During playback, press the SHUFFLE button to change the shuffle mode.
-
Page 16: Listening To Cd/Mp3
Listening to CD/MP3 < It takes a few seconds for the unit to load the disc. No buttons will work during loading. Wait until the total number of the files and the total play time of the disc are displayed. <... -
Page 17: To Stop Playback
To display MP3 information To suspend playback temporarily (pause mode) During playback of an MP3 disc, press the MP3 button for more than 1 second. The information about the current file is displayed Press the play/pause button (G/J) during playback. Playback as follows: stops at the current position. -
Page 18: Search Mode (Mp3 Only)
Search Mode (MP3 only) MEMORY/ TIME SET FUNCTION Search for a name of file Press and hold the skip button (. or /). You can select the file by searching for its name. Press the MP3 button once. An alphabet (initial letter of a file name) and a file name are displayed. -
Page 19: Shuffle Playback
Shuffle Playback Search for a file in a folder Press the MP3 button twice. The name of folder is displayed. < MP3 files recorded out of folders are in the “ROOT” folder. The tracks/files can be played randomly. Press the SHUFFLE button during playback or when in the stop mode. -
Page 20: Programmed Playback
Programmed Playback MEMORY/ TIME SET FUNCTION Up to 32 tracks/files can be programmed in the desired order. Press the skip button (.or/) repeatedly to select a track/file, then press the MEMORY button. Press the FUNCTION button to select “CD”. Press the MEMORY button. The track/file is programmed, and “P-02”... - Page 21 To check the programmed order To clear program In the stop mode, press the MEMORY button repeatedly. The To clear the programmed contents, press the MEMORY and the track/file number and program number will be shown on the stop button (H) in the stop mode. display.
-
Page 22: Repeat Playback
Repeat Playback Repeat one track/file Every time the REPEAT button is pressed, the mode is changed as follows: “REPEAT” lights. The track/file being played will be played repeatedly. If you press When a CD is loaded: the skip button (.or/) and select another track/file, the REPEAT REPEAT ALL track/file you selected will be played repeatedly. -
Page 23: Listening To The Radio
Listening to the Radio FM MODE button Pressing this button alternates between STEREO mode and MONO mode. Press the FUNCTION button to select “TUNER”. STEREO FM stereo broadcasts are received in stereo and the “STEREO” indicator lights in the display. <... -
Page 24: Preset Tuning
Preset Tuning How to select preset stations You can store FM and AM stations into preset channels 1 to 10 respectively. Press the FM/AM button to select a band. If the power switch of the subwoofer turned off, the settings kept in memory (clock, preset stations, timer setting) will be erased. -
Page 25: Rds
RDS (PTY Search 1) The Radio Data System (RDS) is a broadcasting service which allows stations to send additional information along with the regular radio programme signal. RDS works on the FM waveband in Europe only. FM/AM REPEAT/ Tune in an FM RDS station (see steps of page 23). -
Page 26: Listening To An External Source
Listening to an External Source PTY (Programme Type) Connect the PHONES jack (audio output jack) of a portable audio player to the AUX IN jack of the TD-X300i using the NEWS : brief announcements, events, public opinion, reports, supplied stereo mini plug cable. -
Page 27: Setting The Clock
Setting the Clock Press the skip button (.//) to set the current hour. MEMORY/ TIME SET STANDBY/ If the power switch of the subwoofer turned off, the settings kept in memory (clock, preset stations, timer setting) will be erased. Press the TIME SET button. The “minute”... -
Page 28: Setting The Timer
Setting the Timer Press the skip button (.//) to set the start time STANDBY/ (minute), and then press the TIMER button. TIMER < The unit can be programmed to turn on and off at a specified time. < Adjust the clock before setting the timer. “TIMER”... - Page 29 Press the STANDBY/ON button ( ) to turn the unit off Press the skip button (.//) to select a source (TUNER, (standby). CD or iPod), and then press the TIMER button. The clock and the TIMER indicator are displayed. The unit will turn on and off at the specified time every day. Don’t forget to turn the unit off (standby), or the timer won’t work.
-
Page 30: Troubleshooting
Cannot listen to any station, or signal is too weak. or TEAC service center. e Tune in the station properly. e Rotate the FM or AM antenna for the best reception position. -
Page 31: Specifications
Specifications Standard Accessories AMPLIFIER section Remote control unit (RC-1203) x 1 Output Power (L+R) ........5 W + 5 W Battery for remote control unit x 1 Output Power (Subwoofer) . - Page 32 7733 Telegraph Road, Montebello, California 90640 Phone: (323) 726-0303 TEAC CANADA LTD. 5939 Wallace Street, Mississauga, Ontario L4Z 1Z8, Canada Phone: (905) 890-8008 TEAC MEXICO, S.A. De C.V Rio Churubusco 364, Colonia Del Carmen, Delegación Coyoaćan, CP 04100, México DF, México Phone: (5255) 5010-6000 TEAC UK LIMITED Unit 19 &...