Table of Contents
Advertisement
Advertisement
Table of Contents

Related Manuals for Teac CD-X9


Summary of Contents for Teac CD-X9
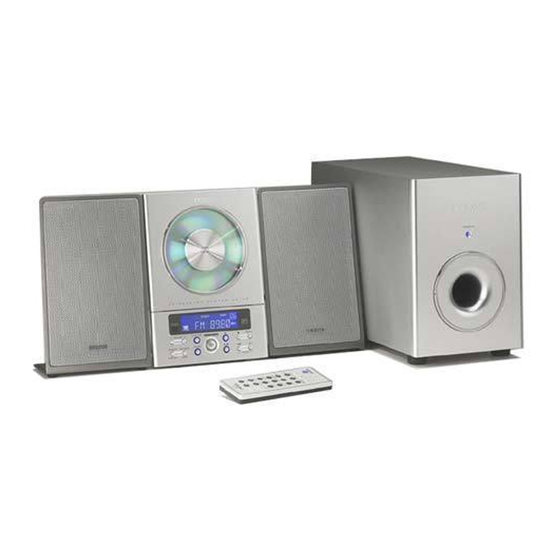
- Page 1 9A10303900 CD - X9 Micro Hi-Fi System OWNER’S MANUAL...
-
Page 2: Important Safety Instructions
IMPORTANT SAFETY INSTRUCTIONS 1) Read these instructions. 2) Keep these instructions. CAUTION: TO REDUCE THE RISK OF ELECTRIC SHOCK, DO NOT REMOVE COVER (OR BACK). NO USER- 3) Heed all warnings. SERVICEABLE PARTS INSIDE. REFER SERVICING TO QUALIFIED SERVICE PERSONNEL. 4) Follow all instructions. - Page 3 EXPOSE THE ELECTRONICS. NO USER SERVICEABLE PARTS ARE WITHIN! < IF YOU ARE EXPERIENCING PROBLEMS WITH THIS PRODUCT, CONTACT TEAC FOR A SERVICE REFERRAL. DO NOT USE THE PRODUCT UNTIL IT HAS BEEN REPAIRED. For U.S.A. < USE OF CONTROLS OR ADJUSTMENTS OR PERFORMANCE OF PROCEDURES OTHER THAN THOSE SPECIFIED HEREIN MAY RESULT IN HAZARDOUS RADIATION EXPOSURE.
-
Page 4: Table Of Contents
Contents Before Using the Unit Thank you for choosing TEAC. Read this manual carefully Read this before operation to get the best performance from this unit. < As the unit may become warm during operation, always leave sufficient space around the unit for ventilation. -
Page 5: Discs
CD standard may not play back correctly in this player. If you use such discs in this unit, TEAC Corporation and its < Never use a stabilizer. Using commercially available CD... -
Page 6: Connection
Connection Speaker (R) Speaker (L) Side panel of Subwoofer the main unit CAUTION FM antenna < Turn off the power of all the equipment before making While in FM mode, tune in an FM station and extend the connections. lead to find the best position for reception. This antenna <... -
Page 7: Wall Mounting
Connect the left speaker’s plug to L, and the right speaker’s concrete wall. plug to R. < TEAC supplies these brackets as a convenience to the product < If not using the included speakers, make sure the speakers owner. Consult your local building codes and exercise all you use are at least 4 Ω... -
Page 8: Names Of Each Control
Names of Each Control Remote Sensor FUNCTION When operating the remote control unit, point it towards Use this button to select a source (CD, AUX or TUNER). here. STANDBY/ON VOLUME Press this switch to turn the unit on or off (standby). Press the up “+”... -
Page 9: Remote Control Unit
Remote Control Unit The provided Remote Control Unit allows the unit to be operated SKIP (.//) / TUNING from a distance. In CD mode, momentarily press this button to skip tracks. When operating the remote control unit, point it towards the Hold down this button to search for a part of a track. -
Page 10: Basic Operation
Basic Operation (Rear panel of the subwoofer) Headphones For private listening, first reduce the volume level to minimum. Then insert the plug from your headphones into the PHONES jack, and adjust the volume using the VOLUME buttons. The sound from the speakers is cut off while the headphone jack is inserted. -
Page 11: Listening To Cd/Mp3
Listening to CD/MP3 (1) Press the OPEN/CLOSE button to close the CD door. < It takes a few seconds for the unit to load the disc. No buttons will work during loading. Wait until the total number of the tracks and the total play time of the disc are displayed. <... -
Page 12: Pause Mode
Listening to CD/MP3 (2) Search for a part of a track During playback, hold down the skip button (.or/) and release it when the part you want to listen to is found. ESP (Electronic Shock Protection) To suspend playback temporarily The ESP stores the music in the buffer to prevent sound from skipping. -
Page 13: Search Mode (Mp3 Only)
Search Mode (MP3 only) Press the PLAY/PAUSE button (G/J). Playback starts from the selected track. Search for a track in a folder Press the MP3 button twice. Search for a name of track You can select the track by searching for its name. The name of folder is displayed. -
Page 14: Programmed Playback
Programmed Playback Press the Skip button (.or/) repeatedly to select a track, then press the MEMORY button. MEMORY FUNCTION Up to 64 tracks can be programmed in the desired order. Shuffle function doesn’t work during programmed playback. Press the FUNCTION button to select “CD”. The track is programmed, and “P-02”... -
Page 15: Repeat Playback
Repeat Playback MEMORY To check the programmed order Every time the REPEAT button is pressed, the mode is changed as follows: When a CD is loaded: REPEAT 1 REPEAT ALL (off) In the stop mode, press the MEMORY button repeatedly. The track number and program number will be shown on the When a MP3 disc is loaded. -
Page 16: Shuffle Playback
Shuffle Playback Listening to an External Source The tracks can be played randomly. Press the SHUFFLE button Connect the PHONES jack (audio output jack) of a during playback or when in the stop mode. “SHUFFLE” will portable audio player to the AUX IN jack of the CD-X9 then light up in the display. -
Page 17: Listening To The Radio
Listening to the Radio FM MODE button Pressing this button alternates between STEREO mode and MONO mode. Press the FUNCTION button to select “TUNER”. STEREO FM stereo broadcasts are received in stereo and the “STEREO” indicator lights in the display. Press the FM/AM button to select a band. -
Page 18: Preset Tuning
Preset Tuning You can store FM and AM stations into preset channels 1 to 10 Within 5 seconds, press the MEMORY button. respectively. If the power switch of the subwoofer turned off, the settings kept in memory (clock, preset stations, timer setting) will be erased. -
Page 19: Setting The Clock
Setting the Clock Press the SKIP button (.//) to set the current hour. MEMORY/ TIME SET STANDBY/ON If the power switch of the subwoofer turned off, the Press the TIME SET button. settings kept in memory (clock, preset stations, timer The “minute”... -
Page 20: Setting The Timer
Setting the Timer Press the SKIP button (.//) to set the start time (minute), and then press the TIMER button. < The unit can be programmed to turn on and off at a specified time. < Adjust the clock before setting the timer. “TIMER”... - Page 21 To turn on or off the timer Press the SKIP button (.//) to select a source (CD or TUNER), and then press the TIMER button. When you don’t use the timer, press the TIMER button to turn it off. (The TIMER indicator disappears from the display.) Press the TIMER button again to turn it on.
-
Page 22: Troubleshooting
Cannot listen to any station, or signal is too weak. dealer or TEAC service center. e Tune in the station properly. e Rotate the FM or AM antenna for the best reception position. -
Page 23: Specifications
Specifications Standard Accessories AMPLIFIER section Remote Control Unit (RC-1045) x 1 Output Power (L+R) ..... . . 5 W + 5 W Subwoofer Cable x 1 Output Power (Subwoofer) . - Page 24 7733 Telegraph Road, Montebello, California 90640 Phone: (323) 726-0303 TEAC CANADA LTD. 5939 Wallace Street, Mississauga, Ontario L4Z 1Z8, Canada Phone: (905) 890-8008 TEAC MEXICO, S.A. De C.V Campesinos N°184, Colonia Granjas Esmeralda, Delegacion Iztapalapa, CP 09810, México DF Phone: (525) 581-5500 TEAC UK LIMITED Unit 19 &...