Table of Contents
Advertisement
Quick Links
2 Heading Head-
ing Heading
Quick Start
Discriminate Mode:
(For detecting non-ferrous metals)
Ensure that the battery pack is fully charged.
Set the mode switch to Disc (Discriminate).
Turn the detector 'On' by turning the Threshold control
clockwise until it 'clicks'. Continue turning until the audio
tone becomes 'just' audible.
(pg. 22)
Set the desired position of the Discriminate control.
Set the Sensitivity control to Auto or at the maximum
manual setting without electrical interference.
You are now ready to start searching!
Pinpoint/All Metals Mode:
of metals)
Ensure that the battery pack is fully charged.
Set the mode switch to Pinpoint/All Metals.
Turn the detector 'On' by turning the Threshold control
clockwise until it 'clicks'. Continue turning until the audio
tone becomes 'just' audible.
(pg. 22)
Set the Sensitivity control to Auto or at the maximum
manual setting without electrical interference.
You are now ready to start searching!
(pg. 14)
(pg. 27)
(pg. 28)
(pg. 25)
(For detecting all types
(pg. 14)
(pg. 27)
(pg. 25)
Instruction Manual
Advertisement
Table of Contents

Related Manuals for Minelab Excalibur II


Summary of Contents for Minelab Excalibur II
-
Page 1: Quick Start
2 Heading Head- ing Heading Quick Start Discriminate Mode: (For detecting non-ferrous metals) Ensure that the battery pack is fully charged. (pg. 14) Instruction Manual Set the mode switch to Disc (Discriminate). (pg. 27) Turn the detector 'On' by turning the Threshold control clockwise until it 'clicks'. - Page 2 Excalibur II or This document contains proprietary From our origins in 1985, Minelab have specialised in advanced electronics any other Minelab product, please feel free to contact us via information which is protected by technologies.
- Page 3 Metal detecting is a fascinating and rewarding activity enjoyed by people all over the world. By getting to know your Excalibur II, you may become one of the many who find gold and valuable treasure! The Excalibur II is an amphibious machine performing as well on land and the beach as it does underwater.
-
Page 4: Table Of Contents
Contents Quick Start Back Cover Threshold / Adjusting the Background Audio Level How Metal Detectors Work Volume / Setting the Volume of Target Signals BBS Technology Sensitivity List of Parts Identifying Targets Assembly Disc or Pinpoint/All Metals / Selecting a Mode Adjusting the Detector for Comfortable Use Discriminate / Rejecting Unwanted Targets Charging the Battery Pack... -
Page 5: How Metal Detectors Work
The Excalibur II's multiple frequency operation provides BBS technology allows the Excalibur II to locate targets in the most challenging areas of high mineralisation and the advantages of both. -
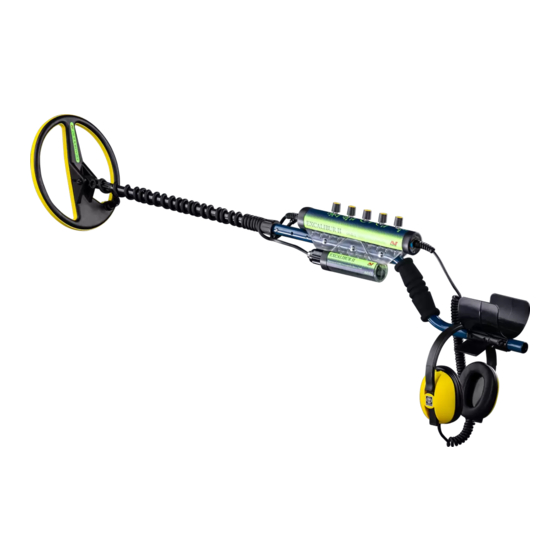
Page 6: List Of Parts
List of Parts Assembly Armrest Headphones Attaching the Armrest to the Upper Shaft: Upper Shaft If not already bolted to the upper shaft: 1 Ensure that the cup of the armrest is pointing in the same direction as the handle. Slide the armrest onto the end of the upper shaft aligning the shaft and armrest holes. -
Page 7: Assembly
The control cylinder is attached to the side-mount screw shaft using the same procedure as for the standard Minelab applies a silicone grease to the battery upper shaft. connections during the manufacturing process. This may need to be reapplied over time as part of your routine detector maintenance. - Page 8 Assembly Attaching the Lower Shaft to the Coil: Winding the Coil Cable: The short lower shaft is most commonly used for Wind the coil cable around the lower shaft enough underwater detecting, while the long lower shaft is times to take up the slack (try sitting down and mostly used for land detecting.
-
Page 9: Adjusting The Detector For Comfortable Use
Adjusting the Detector for Comfortable Use For comfortable, long Adjusting the Length of the Lower Shaft: term detecting, it is The correct length of the lower shaft should allow you important that you take to swing the coil in front of your body without any the time to adjust the uncomfortable stretching or stooping. -
Page 10: Charging The Battery Pack
Charging the Battery Pack The Excalibur II is supplied with a sealed battery pack which contains 10 NiMH rechargeable cells. This pack Alkaline Battery Pack (Available as an accessory) has been pressure tested to a depth of 66 m (200ft) -
Page 11: Detecting Basics
Detecting Basics Common Terms The Excalibur II is a ‘motion’ detector. This means that the Blanking coil must be 'moving' over a target to detect it. When sweeping over a rejected target, the threshold ‘blanks’ (becomes silent) indicating that a target is located If the coil is held stationary over a target the detector will underneath the coil, but has been rejected by you. -
Page 12: Control Panel
(pg. 22) This control is also used to turn the detector on/off. Disc or Pinpoint/All Metals The Excalibur II can operate in two different modes. This control allows you to switch between Disc mode and Pinpoint/All Metals mode. -
Page 13: A Detecting Exercise
8 Sweep the coil across the objects, one at a time, Threshold and observe the sounds of the detector as it detects each object. The Excalibur II should 'beep' on every target. Large targets or targets close to the ground surface emit a louder signal. -
Page 14: Threshold / Adjusting The Background Audio Level
Threshold Adjusting the Background Audio Level Threshold is the constant audible background audio When the threshold is tone or 'hum' produced by the detector. too high, a faint signal is threshold level masked, and only the peak The level of the Threshold should be set low/to a of the loud signal is audible minimum, but still audible and stable. -
Page 15: Volume / Setting The Volume Of Target Signals
At the most anti-clockwise position this control 'clicks' maximum/loudest, position. into the Auto position. In this setting the Excalibur II will If the Volume control is set to maximum, all target automatically select its level of sensitivity to suit the signals will be heard and will sound proportional to the detecting conditions. -
Page 16: Identifying Targets
Identifying Targets Disc or Pinpoint/All Metals Selecting a Mode In order to identify different targets, the Excalibur II rates The Excalibur II can operate in two different modes. them along a scale. The conductivity and size of a target This control selects either Disc (Discriminate) or determines where it will appear on the scale. -
Page 17: Discriminate Rejecting Unwanted Targets
Low setting while a rejected non-ferrous object will cause the rejected target. Blanking With the Discriminate control set to 1, the Excalibur II will returning threshold pitch to be higher. is a useful way of reject or 'blank' the threshold on ferrous metal objects distinguishing between while still accepting non-ferrous metal objects. -
Page 18: Pinpointing / Locating The Target
Pinpointing Locating the Target The exact location of a target can be determined by Pinpointing. Once the approximate target location is known: 1 Switch the detector to Pinpoint/All Metals mode. 2 Move the coil slowly over the target. The audio tone will increase in volume while moving towards the target and decrease in volume as you pass it. -
Page 19: Recovering The Target
Recovering the Target It is essential to carry at least a small, strong digging When digging, avoid sharp Put the detector down. Take a handful of the sand/ Your hands and wrists spade, shovel or sand scoop with you when searching. edges to the hole as they soil and pass it over the coil. -
Page 20: Taking Care Of Your Detector
• Do not short-circuit the battery. sediment. This is critical to allow for ear equalization when the Excalibur II is used for underwater detection at depth. • Do not incinerate the battery. -
Page 21: Troubleshooting
8” or 10” Round Double D • Try using a different battery pack, available from Audio Output Koss Headphones supplied - Impedance 8Ω your Minelab dealer. • Check for breaks, cracks or extreme kinks in the Length with standard shaft Extended - 1220 mm (48") cable assemblies. -
Page 22: Accessories
The following items are also available for purchase. There is a one-year parts and labour warranty for the control box of the Excalibur II. Refer to your Warranty • Alkaline Battery Pack Housing (batteries not included) Card for more details. The Excalibur II BBS coil is • Hipmount Kit... -
Page 23: Service Repair Form
Service Repair Form Today’s Date Detector / Model Serial Number Purchased From Purchase Date Faulty Part(s) Owner’s Name Address Telephone ( ) Day Home Fax ( Email Description of Fault Please explain how we can replicate the problem in order to fix your detector.