Table of Contents
Advertisement
Advertisement
Table of Contents

Related Manuals for Minelab E-Trac


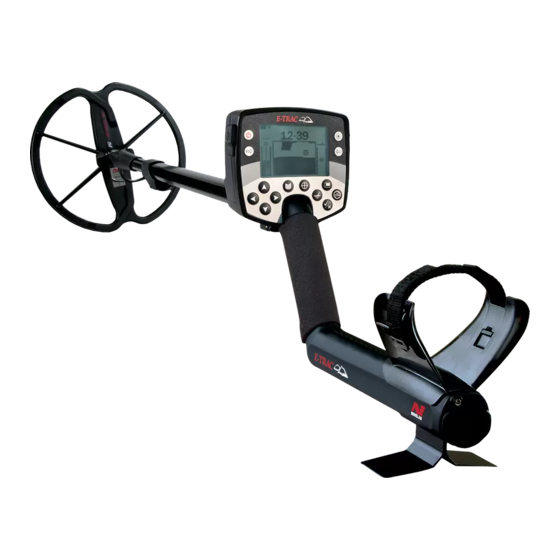
Summary of Contents for Minelab E-Trac
- Page 2 Instruction Manual...
-
Page 3: Quick Start
Metal detecting is a fascinating and rewarding activity enjoyed by people all over After 30 seconds electrical interference will be reduced. the world. By getting to know your E-Trac you can become one of the many successful detectorists who combine their passion E-Trac will locate valuable metal objects in 3. -
Page 4: Table Of Contents
Contents Inside Front Cover Quick Start Sensitivity Menu Auto Sensitivity How Metal Detectors Work Manual Sensitivity The Technology of E-Trac Audio Menu New Features Threshold Level Volume Limit Assembly Volume Gain Adjusting the Detector for Comfortable Detecting Response Battery Packs Tone ID Number (No.) of Tones... -
Page 5: How Metal Detectors Work
Although this technology has served the sends a signal back to the control box, industry well for years, Minelab found that E-Trac can be programmed in a number alerting the operator. a frequency that worked well in one area of ways to discriminate against unwanted... -
Page 6: New Features
Liquid Crystal Display (LCD) QuickMask Attaching the coil to the Lower Shaft: E-Trac’s LCD has a viewing area of 72mm x QuickMask allows you to adjust the Note: Before attaching the coil to the Lower 48mm and improved resolution compared... - Page 7 assembly Attaching the Lower Shaft to the Connecting the Shaft Assembly to the Attaching the Armrest Strap: Disconnecting the coil: Upper Shaft: Handle Assembly: 1 Clip both buckles onto the outer sides of 1 Reverse the steps in ‘Connecting the 1 Release the Upper Shaft camlock by pulling 1 Release the Control Box camlock by pulling the armrest.
-
Page 8: Adjusting The Detector For Comfortable Detecting
adjusting the Detector for Comfortable Detecting For comfortable detecting it is important to take the time to adjust the detector correctly. Holding the Detector Adjusting the Armrest Strap: Adjusting the Length of the Shafts Thread your arm through the armrest and 1 Loosen the strap by tilting the top edge A correct shaft length will allow you to strap. - Page 9 Detector for battery Packs Comfortable Detecting E-Trac is supplied with two types of battery pack. One is a sealed rechargeable Nickel-Metal Adjusting the Angle of the Coil: Removing the Battery Pack from the Hydride (NiMH) battery pack. This comes with...
-
Page 10: Battery Packs
– Please note the following: several charge/discharge cycles. – Do not use rechargeable Lithium Ion – Using a non-Minelab charger with the Note: The car charger is provided with a 5 Once charged, disconnect the battery batteries with your E-Trac. They may battery pack may damage it and will void fuse for short circuit protection. -
Page 11: Introducing The Control Panel
Introducing the Control Panel Power Backlight Pressing turns E-Trac On/Off. Press to turn the Backlight On/Off. The Backlight Holding for three seconds resets the detector (p. 19) provides greater screen clarity in dim conditions. The to the Factory Preset settings, prior to startup. -
Page 12: Turning The Detector On
Turning the Detector on Reset Overloading is not harmful to the electronics E-Trac is Factory Preset to allow you to start of the detector. E-Trac is designed to detecting straight away. E-Trac’s Factory withstand coil overload. Presets will respond to some low ferrous... -
Page 13: Discrimination
Smartfind magnetic material. Because they are not high ferrous characteristics. Similarly, a CO Discrimination Pattern. The Pattern shown above is E-Trac’s Factory magnetic, nonferrous targets will generally value of 1 represents low conductivity and 50 Preset Coins Mode Discrimination Pattern,... -
Page 14: Introducing The Detection Screens
During and after a detection, a of the appropriate Detection Screen for Screens, and returns you to these Screens if on the LCD and E-Trac is ready to begin Target Crosshair will appear in the Smartfind the current conditions will depend on your you are in the Main Menu, QuickMask or Edit detecting. -
Page 15: Digital Screen
Digital Screen Depth E-Trac has the Digital Screen that shows both To switch between Smartfind and Pattern The Depth Gauge, visible in the Pattern, the ferrous content (FE; range 1–35) and the displays, press the Detect button. The Digital and QuickMask Screens, indicates the conductivity (CO;... -
Page 16: Layout Summary Of The Detection Screens
Target information is presented via visual and time, the Pattern Screen will appear on the audio prompts. An introduction to the most LCD and E-Trac is ready to begin detecting. common elements of the Detection Screens is below: Minelab User Mode... -
Page 17: Detecting Basics
Detecting basics a Simple Detecting exercise Sweeping the Coil Practise sweeping the coil over the ground Before attempting to recover real targets, it is (p. 31), or by reducing the Sensitivity (pp. in a side-to-side motion while slowly walking important to understand how to interpret the 54–6) of the detector. -
Page 18: Noise Cancel
Simple Detecting exercise noise Cancel Detector Sounds The E-Trac may become noisy due to (cont) electrical interference from power lines, electrical equipment or other detectors operating close by. The detector interprets The Target Response is the sound produced Large objects close to the coil may Overload... -
Page 19: Quickmask
The pitch independent of the Pattern/Digital Smartfind (CO). This makes the QuickMask an ‘All Metal’ Normally E-Trac is a ‘motion’ detector; it must Discrimination Pattern. Discrimination Pattern, which means that you will increase as the strength of the signal be moving over a target in order to detect it. -
Page 20: Main Menu
Main Menu The Main Menu provides you with access Each Menu appears below the Main Menu to all of E-Trac’s functions and settings. By and the settings of that Menu can be selected pressing the Menu button at any time the and modified. -
Page 21: Menu Structure
Menu Structure Dialogue Boxes When you perform certain functions with E-Trac a dialogue box may appear asking you to confirm the adjustment you are making. Below is an example of a dialogue box. The three possible selections that can be made in a dialogue box are: Yes –... -
Page 22: E-Trac Modes
– Sensitivity – Manual Level and desired treasure type. Universal Settings – Sensitivity – Auto Level No. of Tones If Show Mode Info (p. 78) is turned on, E-Trac are determined according to your personal Sounds will display the Mode Information icons in Note: When a new User Mode is selected detecting choices (e.g. -
Page 23: User Modes Menu
To Select a Minelab User Mode: User Modes – Relics 1 Press the Menu button If a Minelab User Mode is selected then the 2 Scroll across to User Modes (using the Right Minelab logo and the User Mode Number or Left Navigation button) -
Page 24: Discrimination Menu
Coins, Foil, etc.) To Save a Discrimination Pattern: 4 Press either the Left or Right Navigation – 4 patterns that are attached to Minelab 1 Press the Menu button button to enter the Select sub-Menu User Modes (e.g. Coins Mode) -
Page 25: Edit Screen
By selecting the Edit option in the Discrimination Menu, you will enter the Edit If you enter the Edit Screen from QuickMask, In addition to the Edit Modes, E-Trac provides E-Trac has four different Edit Modes for Screen. You can use the various functions... - Page 26 Discrimination Menu Manual Mode Manual Mode allows you to manually move the Edit Frame around the Discrimination To move the Edit Frame: To reject the framed area: To accept the framed area: Pattern. By using the Accept/Reject button Press, or press and hold, the Navigation Press the Accept/Reject button.
- Page 27 QuickMask) once you have finished editing 5 Press the Detect button (or QuickMask 5 Answer ‘Yes’ to the dialogue box to return E-Trac needs to detect the target consistently button if you wish to load the pattern into to the Pattern/Digital (or QuickMask) Screen to accept it into the Smartfind Disc.
-
Page 28: The Combine Function
Pattern. Each Pattern that is pre-programmed If you have more than one target, repeat The two Smartfind Windows at the top into E-Trac is an ‘accepting’ pattern, i.e. the the procedure for each one of the Combine Screen are the Combine Jewellery Disc. - Page 29 Discrimination Menu To Combine Discrimination Patterns: 1 Press the Menu button 2 Scroll across to Discrimination (using the 6 Scroll down to the desired Pattern and The Accept/Reject button is used to modify While a Discrimination Pattern is selected, Right or Left Navigation button) the flashing area of a selected Discrimination press the Left or Right Shift button to inverse press the Accept/Reject button once to add...
-
Page 30: Sensitivity Menu
Manual and if set too high sensitivity individually by the detector to and E-Trac uses this to adjust the detector to prefer this if you do not mind a few false may cause unstable Target IDs. -
Page 31: Audio Menu
5 Adjust the Variability (p. 67) until you achieve your preferred pitch separation Sensitivity setting will decrease the amount While setting-up your E-Trac, take the time to between the Target IDs. false signals and may not detect very faint experiment with the Audio settings so that Target signals. -
Page 32: Threshold Level
Small signal Loud signal Too Low now inaudible at an appropriate level for E-Trac’s built-in speaker. If the Threshold is too loud whilst using headphones, use the Threshold Level setting to reduce the volume. If the Threshold Level is too high, accepted... -
Page 33: Volume Limit
The Factory Preset for Volume Limit is set The Volume Limit sets the maximum volume The Volume Gain controls the amplification at an appropriate level for E-Trac’s built-in of target signals. When detecting, the sound of a target’s audio response, relative to the speaker. -
Page 34: Response
Response Factory Preset ‘Normal’ audio Response. Threshold Threshold Time After becoming familiar with the way E-Trac Long Long lasts until the end of detection. Offers an almost continuous audio response. This interprets various targets, it is recommended There is no blanking at the end of detection. -
Page 35: Tone Id
audio Menu Tone ID Number (No.) of Tones Sounds Range: 1, 2, 4 or Multi Range: Conduct or Ferrous The Tone ID sub-menu allows you to define Factory Preset: Multi Factory Preset: Conduct how the tone of the audio varies when different target characteristics are detected. -
Page 36: Variability
audio Menu Tone ID Variability (cont) Range: 1–30 Factory Preset: 25 Ferrous It may be useful to select Ferrous if searching High Pitch Low Variability Variability controls how much the audio Selecting Ferrous causes emitted tones in QuickMask. There is less chance of a high- pitch will change depending on target to be generated according to the target’s ferrous target producing a high tone signal... -
Page 37: Limits
Limits setting High Conductivity Conductivity 7 Press the Detect button to exit the Menu and resume detecting A low Limit setting will allow E-Trac to only produce low pitched target signals. Low Limit High Conductivity Conductivity... -
Page 38: Expert Menu
Menu The Expert Menu contains some of E-Trac’s Recovery Deep Recovery Fast Recovery Fast Off more advanced settings and functions. Range: On–Off Range: On–Off While the settings and functions within the Factory Preset: Off Factory Preset: Off Expert Menu will allow you to get the most... -
Page 39: Trash Density
Factory Preset: Low It is recommended to use High in areas with The Trash Density setting will enable you to In Low setting, E-Trac locks onto the strongest high trash and where a “good” target may optimise the Discrimination of the detector... -
Page 40: Ground
The Noise Cancel setting allows you to 1 Find an area free of targets and set E-Trac 3 Scroll across to Expert (using the Right or the soil. The correct Ground setting for your manually select and listen to each channel for to accept ‘All Metals’... -
Page 41: Preferences Menu
Full response 1 Press the Menu button Narrow response Note: Pinpoint turns E-Trac into an ‘all metal’ 2 Scroll across to Preferences (using the Right detector, disabling discrimination. A long pause between coil sweeps will or Left Navigation button) -
Page 42: Show Sensitivity
5 Press the Detect button to exit the Menu and a tune will sound. Once the message and resume detecting disappears and the Pattern Screen appears on the LCD the detector has been reset and E-Trac is ready to detect again. -
Page 43: E-Trac Xchange
To connect E-Trac to your PC: Detector your Personal Computer Transmission Full Band Spectrum (FBS). 1 Insert the USB cable into your E-Trac Simultaneous Frequency Transmission ranging A significant feature of E-Trac is the inclusion from 1.5–100kHz of a USB connection facility, allowing you to Coil 11”... -
Page 44: Factory Presets Table
User Mode Settings Factory Presets Setting Title Range Factory Preset My Preferred Setting Title Range Coins High Trash Beach Relic User Modes Discrimination: Minelab Mode – Coins Mode Pattern – Coins Mode High Trash Beach Relic Mode Mode Mode Discrimination Audio: Pattern –... -
Page 45: Battery Performance
Performance E-Trac has a Battery Icon on the LCD that Note: The detector regulates the output voltage Typical alkaline batteries will power E-Trac for Charging the battery for longer than 18hrs indicates the present charge level, and so the performance of the detector will remain over 16 hours of constant use. -
Page 46: Recovering The Target
Recovering the Target Treasure locations A trowel, knife or small spade are good tools Check the hole for the target. If it is not in A question most new detectorists ask is, for recovering targets. the hole, place the detector on the ground “where do I find treasure”? There are actually with the coil flat, pick up a handful of soil and lots of areas in which you can search. -
Page 47: Accessories
CAUTION – Please note the following: – Koss UR-30 Headphones – Do not leave the battery pack in the E-Trac – Keep the detector clean and dry and avoid handle when the detector is not in use getting sand and grit into the shafts or for extended periods. -
Page 48: Troubleshooting
Repairs There is a two-year parts and labour warranty for the electronic control box of E-Trac. The – Ensure that you are not holding, or pressing, the Backlight button In the unfortunate circumstance that the while pressing the Power button. - Page 49 Minelab Electronics Pty Ltd PO Box 537, Torrensville Plaza Adelaide, South Australia, 5031 Australia Tel: +61 (0) 8 8238 0888 Fax: +61 (0) 8 8238 0890 Email: minelab@minelab.com.au Minelab International Ltd Laragh, Bandon Co. Cork Ireland Tel: +353 (0) 23 52101 Fax: +353 (0) 23 52106 Email: minelab@minelab.ie...