Table of Contents
Advertisement
Advertisement
Table of Contents

Related Manuals for RIKA Memo


Summary of Contents for RIKA Memo
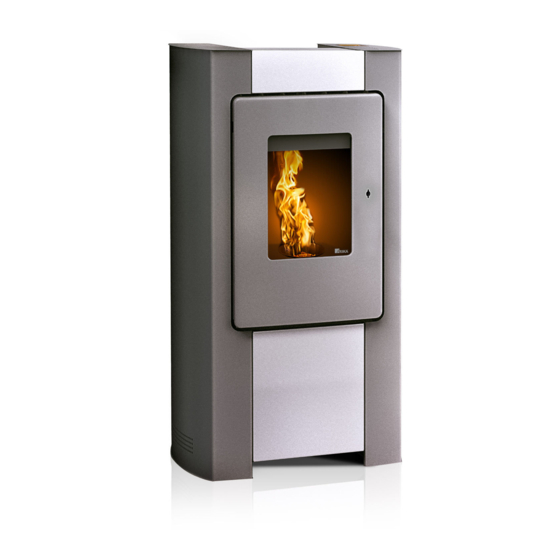
- Page 1 MEMO Operating Manual...
-
Page 2: Table Of Contents
Menu structure and main menu level ..............................17 Main menu time - time adjustment ...............................18 Main menu setup - additional functions ..............................20 Main menu info - additional information ..............................22 8. COMFORT OPTIONS RIKA room sensor/RIKA radio room sensor ............................24 RIKA phone option – GSM ..................................24... -
Page 3: Preface
RIKA interface for various options .................................24 External room thermostat ..................................24 External connection cable bridge ................................24 9. MODES Pellet operation Heat/Easy/Automatic/Room ............................25 Fuel addition pellet operation .................................25 Emergency - electrical heating up. without ignition ..........................25 10. MENU OVERVIEW V1.40 11. WARNINGS AND ERROR MESSAGES 12. -
Page 4: Spare Part Overview Exploded Diagram
Spare part overview exploded diagram... -
Page 6: Spare Part Overview Article Numbers
Spare part overview article numbers Art.Nr.: Description Art.Nr.: Description B15245 heat protection compl. Z35705 casing front/top silver Z31459 sensor clamp LB00442 casing left cpl., cast grey B16521 Control panel L00797 motor plate L00426 Flue plate B16030 additional board 4*** L02585 Flue plate up to serial number 1301733 the firebox door completely (B15249) must be supplied... -
Page 7: Dimensions
Dimensions Technical data heating power range [kW] 2,4 - 9 room heating capacity (depending on house [m³] 50 - 240 insulation) fuel consumption [kg/h] bis 2,2 pellet container capacity [kg] electric supply [V]/[Hz] 230/50 average electrical input ~ 20 fuse 2,5 AT Efficiency 92,1... -
Page 8: Important Information
> 80 cm b > 20 cm RIKA stoves should only be installed in rooms with normal humidity (dry areas according to VDE 0100 Part 200). The furnaces are not splash water please observe a minimum distance of 20 cm behind and sideways the stove protected and may not be installed in wet areas. -
Page 9: Prior To Set Up
Prior to set up Stoves type 1 (BA 1): Floor bearing capacity Suitable for multiple occupancy. (note the different country regulations) Ensure that the substructure is capable of bearing the weight of the stove prior to set-up. Note on ROOM-AIR DEPENDENT and Note ROOM-AIR INDEPENDENT OPERATION: No modifications may be made to the firing installation. -
Page 10: Brief Information On Fuel Pellets
3. BRIEF INFORMATION ON FUEL PELLETS What are pellets? Note Please ask your pellet stove dealer for tested fuel and a list of monitored fuel Wood pellets are a standardised fuel. Every manufacturer must adhere to certain manufacturers. conditions in order to enable flawless, energy-efficient heating. Pellets are made Using poor quality or prohibited pellet fuel will have a negative effect on the from wooden waste, from sawmills and planning workshops, as well as from function of your pellet stove and can also lead to the warranty becoming null... -
Page 11: Technology And Safet Y Functions
4. TECHNOLOGY AND SAFET Y FUNCTIONS The technological advances in your new combi stove are the result of years of Component monitoring testing and practical experience. The practical advantages of your pellet stove are convincing: All the electrical components used are continuously monitored during operation. If a component is defective or can no longer be actuated correctly, then operation is stopped and a warning or error message is issued (see WARNING Operating comfort... -
Page 12: Installing The Stove
The stove can also be pushed on this cardboard or carpet. Feeding in external combustion air We recommend original flue pipes from RIKA for proper connection. only for devices which are able to run in romm-air independent operation. Connection to the chimney Combustion air must be fed to the stove from outside via a sealed pipe for operation independent of the room air. -
Page 13: Assembly/Dismantling Stone And Options
6. ASSEMBLY/DISMANTLING STONE AND OPTIONS Open the 4 vertical hexagonal screws used to attach the convection fins and lift the convection fins up and away. Note Only work on the unit when the mains plug has been disconnected and the stove has cooled completely. -
Page 14: Internal Controls
Your stove is in simple heating mode EASY OFF when delivered in order to ease your start in the world of RIKA pellet stoves. The heat output of the stove can only be increased or reduced in 5 % increments in this mode. As soon as the Basics stove is connected to the socket, the standard display EASY OFF appears. -
Page 15: Stopping During Ignit Or Startphase
Cleaning and tipping during operation display description The automatic cleaning process is conducted every hour for approx. 2 minutes. EASY OFF During this phase the air vents that are necessary for combustion are blown Pressing starts the unit. IGNIT clean. This is shown by IGNITE in the display;... -
Page 16: Extended Heating Operation - Heat Mode - Comfort Funktions
Extended heating operation - HEAT MODE - comfort funktions In addition to the basic functions of simple heating operation, the RIKA pellet stove provides extra comfort functions. However, before you can use the comfort functions such as frost protection, installation of an external room thermostat, regulation of the stove mobile telephone, child safety device, you have to change from simple hating to comfort mode. -
Page 17: Menu Structure And Main Menu Level
Pressing once changes to display TIME MENU TIME Setting regarding the time are made here. (Heating time is only available with RIKA room sensor or RIKA wireless room sensor). Pressing once changes to display SETUP MENU SETUP All the additional functions can be regulated here. -
Page 18: Main Menu Time - Time Adjustment
Main menu time - time adjustment TIME TIME S et hours and m inutes using the „ + “ and „ -“ k ey 10 15 MENU MENU SE T MENU MENU h e a t i n g t i m e TIME S et day using the „... - Page 19 TIME SET Back to TIME SET. MENU (Setting the heating times. The menu item TIME AUTO only appears in connection with the RIKA room sensor and the RIKA (TIME AUTO) MENU wireless room sensor). (Please see the operating instruction enclosed for the option for setting the heating times).
-
Page 20: Main Menu Setup - Additional Functions
Main menu setup - additional functions SETUP FROST O FF MENU the ex ternal req uest is ac tivated or deac tivated b y using the „ + “ and „ -“ k ey. T he ex ternal req uest f unc tion O FF is only ac tive in c onnec tion with a room... - Page 21 Display to enter the control level for additional functions. You can change between the operating status On (active) and OFF SETUP (inactive). Display of operating status of additional function FROST, frost protection (only in connection with RIKA room sensor and RIKA wireless room sensor). Using you can switch between FROST OFF (inactive) and FROST ON (active). Frost protecion FROST OFF is only active in combination with the comfortfunctions HEAT OFF, ROOM OFF and AUTO OFF.
-
Page 22: Main Menu Info - Additional Information
Main menu info - additional information INFO MENU MENU MENU FLAME AUGER RUN-T 41 9C O FF s c r e w m o t o r o n / o f f d i s p l a y o f o p e r a t i n g h o u r s MENU MENU MENU... - Page 23 display description INFO Access to information menu, various system statuses, temperatures and operating information can be called up here. INFORMATION INPUTS FLAME Display of current flame temperature. ROOM Display of current room temperature. MENU R-MAX Display menu maximum duration without connection to wireless room sensor MENU EXTON Display of status of external release.
-
Page 24: Comfort Options
8. COMFORT OPTIONS We would point out that auxiliary units may only be connected to the RIKA External connection cable bridge interface connection and external connection socket by authorised specialists. (condition as delivered) RIKA room sensor/RIKA radio room sensor This option permits control of your stove via room temperature. You can set both the room temperature and the heating times required. -
Page 25: Modes
9. MODES Fuel addition pellet operation Note When operated correctly, your stove can not overheat. Improper operation may shorten the life expectancy of electrical components (blowers, motors Note and electric control) and is not allowed! CAUTION when filling! Do not allow the pellet sack to come into contact with the hot stove. -
Page 26: Menu Overview V1.40
10. MENU OVERVIEW V1.40 CHECK "CHECK" appears in the display whenever the stove ist re-supplied with power. c o m f o r t f u n c t i o n s m enu item m ode only ac tive display panel in c onnec tion with the R I KA room sensor... - Page 27 MENU INFO SETUP MENU MENU FROST MENU MENU O FF MENU FLAME AUGER RUN-T t h e e x t e r n a l r e q u e s t i s a c t i v a t e d o r d e a c t i v a t e d b y u s i n g t h e „...
-
Page 28: Warnings And Error Messages
Flame sensor defective Acknowledge the error message. FLAME SENSOR DEFECT >I/O< Rika room sensor reception defective Transmission between the transmitter and receiver has been lost. If the error message appears again immediately after re-starting the ROOM SENSOR SIGNAL LOST device, it means either the battery is flat or the component is defective. -
Page 29: Cleaning And Maintenance
12. CLEANING AND MAINTENANCE Basic information Cleaning the f ire trough Despite the automatic ash dumping prior to and during heating operation, Note care should be taken that the air intake openings are not blocked with ash or Your stove must be switched off and cooled before any maintenance work is clinker. -
Page 30: Cleaning Flue Pipes
Cleaning flue pipes Open and remove the wing nut, which serves to secure the firebox lid. For ease of disassembly, hold against the screw through the combustion chamber. Open the lower front panel by simply lifting. The front panel is simply hooked. Open the 2 lower hex screws used to secure the side panel. -
Page 31: Clean Flue Gas Collecting Channel
Clean flue gas collecting channel Clean flue gas fan housing The flue gas channel should be cleaned twice a year or after approximately The flue gas fan and the flue pipe connection should be cleaned at least 2 times 700kg of pellets. The flue gas duct is located in the lower region of the a year, or after about 700 kg of pellets. -
Page 32: Problems Possible Solutions
13. PROBLEMS POSSIBLE SOLUTIONS Problem 1 Problem 3 Fire burns with weak, orange flame. Pellets heap up in fire trough, window Flue gas discharge when wood is added and during heating phase. sooted up. Cause(s) Cause(s) Inspection openings leak Insufficient combustion air Chimney draught too low Poor chimney draught Flue pipe connection leaks... -
Page 33: Instructions For Commissioning Protocol
Difference between warranty (statutory) and guarantee (voluntary), terms of Note guarantee, determination of wearing parts, reference to pellet quality to be Please return 1 completed protocol for putting into service to RIKA Innovative used and the consequences of poor quality. Ofentechnik GmbH, Müllerviertel 20, A-4563 Micheldorf. - Page 34 Please contact your warranty partner for any warranty questions or claims. This is your dealer or installation company. No warranty claims can be accepted without proper putting into operation, proper operation according to the operating instructions and the supplements in this information sheet. Protocol for putting into operation for RIKA pellet and combi stoves date:____________________...
-
Page 35: Guarantee
For the purpose of timely damage limitation, the warranty claim on the part of the claimant is to be enforced at the RIKA dealer in writing using the invoice and stating the purchase date, model name, serial number and reason for complaint. - Page 36 Technical and design changes, as well as typesetting and printing errors reserved © 2014 | RIKA Innovative Ofentechnik GmbH RIKA Innovative Ofentechnik GmbH 4563 Micheldorf / Austria, Müllerviertel 20 Telefon: +43 7582 686 - 41, Fax-DW: 43 E-Mail: verkauf@rika.at RIKA.AT...