Table of Contents
Advertisement
Quick Links
Advertisement
Table of Contents

Related Manuals for Heat Controller PS-81A


Summary of Contents for Heat Controller PS-81A
- Page 1 INSTALLATION, OPERATION & MAINTENANCE MANUAL Portable Room Air Conditioner PS-81A PS-101A PS-121A French version of this manual is available on our website Heat Controller, Inc. • 1900 Wellworth Ave. • Jackson, MI 49203 • (517)787-2100 • www.heatcontroller.com...
-
Page 2: Table Of Contents
PS-81, 101, 121A Installation, Operation & Maintenance Heat Controller, Inc. TABLE OF CONTENTS SAFETY PRECAUTIONS SAFETY PRECAUTIONS Safety rules........................3 Safety rules ............................3 Operating conditions .........................3 Operating conditions......................3 Electrical information..........................4 Electrical information ......................4 IDENTIFICATION OF PARTS IDENTIFICATION OF PARTS Accessories ............................4 Accessories ........................4... -
Page 3: Safety Precautions Safety Rules
PS-81, 101, 121A Heat Controller, Inc. Installation, Operation & Maintenance SAFETY PRECAUTIONS Safety rules To prevent injury to the user or other people and property damage, the following instructions must be followed. Incorrect operation due to ignoring the instructions may cause harm or damage. -
Page 4: Electrical Information
PS-81, 101, 121A Installation, Operation & Maintenance Heat Controller, Inc. IDENTIFICATION OF PARTS For your safety WARNING Do not store or use gasoline or other flammable substances/vapors in the vicinity of this or any other appliance. To avoid fire hazard or electric shock, do not use an extension cord or an adaptor plug. Do not remove any prong from the power cord. -
Page 5: Identification Of Parts
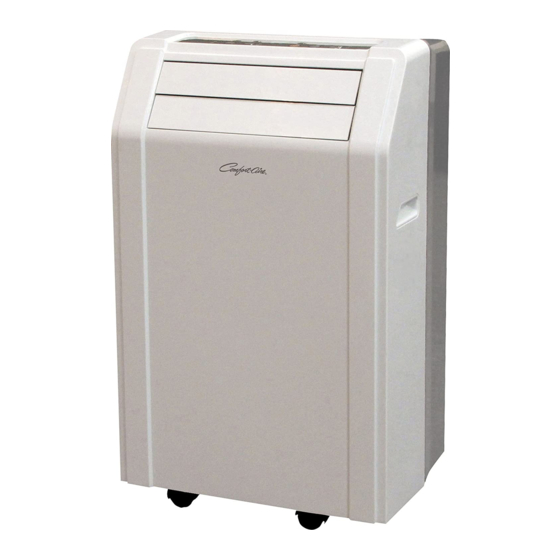
PS-81, 101, 121A Heat Controller, Inc. Installation, Operation & Maintenance IDENTIFICATION OF PARTS Front Control Panel Horizontal Louver Blade (swings automatically) Casters Carrying Handles (both sides) Fig.1 Rear Upper Air Filter (Behind the grille) Air Outlet Power cord outlet Air intake... -
Page 6: Air Conditioner Features
PS-81, 101, 121A Installation, Operation & Maintenance Heat Controller, Inc. AIR CONDITIONER FEATURES ELECTRONIC CONTROL OPERATING INSTRUCTIONS Before you begin, thoroughly familiarize yourself with the functions control panel and remote controller. The unit can be controlled by the unit control panel alone or with the remote controller . -
Page 7: Operating Instructions
PS-81, 101, 121A Heat Controller, Inc. Installation, Operation & Maintenance OPERATING INSTRUCTIONS SWING button FAN operation Used to initiate the automatic swing function. Press the "MODE" button until the When the swing mode is on, press the swing "FAN " indicator light comes on. -
Page 8: Operating Instructions
PS-81, 101, 121A Installation, Operation & Maintenance Heat Controller, Inc. OPERATING INSTRUCTIONS Other features Auto-Restart If there is a loss of power, once power is restored, the unit will automatically reset in the last mode it was operating prior to the power failure. -
Page 9: Installation Instructions
PS-81, 101, 121A Heat Controller, Inc. Installation, Operation & Maintenance INSTALLATION INSTRUCTIONS INSTALLATION INSTRUCTIONS Location The air conditioner should be placed on a firm foundation to minimize noise and virbration. For safe and secure positioning, place the unit on a smooth, level floor strong enough to support the unit. - Page 10 PS-81, 101, 121A Installation, Operation & Maintenance Heat Controller, Inc. INSTALLATION INSTRUCTIONS Installation in a double-hung sash window Foam seal A (adhesive type) 1. Cut the foam seal (adhesive type) to the proper length and attach it to the window stool. Fig.8 e unit.
-
Page 11: Installation In A Sliding Sash Window
PS-81, 101, 121A Heat Controller, Inc. Installation, Operation & Maintenance INSTALLATION INSTRUCTIONS Installation in a sliding sash window 1. Cut the foam seal (adhesive type) to the proper length and Foam seal A (adhesive type) attach it to the window frame. See Fig.12. -
Page 12: Exhaust Hose Installation
PS-81, 101, 121A Installation, Operation & Maintenance Heat Controller, Inc. INSTALLATION INSTRUCTIONS Exhaust hose installation: The exhaust hose and adaptor must be installed or removed in accordance with the usage mode. COOL or AUTO mode Install Fig.16 FAN, OR DEHUMIDIFY mode... -
Page 13: Condensate Drainage
PS-81, 101, 121A Heat Controller, Inc. Installation, Operation & Maintenance INSTALLATION INSTRUCTIONS Condensate drainage: While operating in Dry (dehumidifying) mode, Remove the remove the drain plug from the back of the unit, drain plug install the drain connector (5/8” universal female mender) with 3/4”... -
Page 14: Care And Maintenance
PS-81, 101, 121A Installation, Operation & Maintenance Heat Controller, Inc. CARE AND MAINTENANCE CARE AND MAINTENANCE Air filter (slide out) IMPORTANT: ode, 1) Be sure to unplug the unit before cleaning or servicing. e unit, 2) Do not use gasoline, paint thinner or other chemicals to clean female the unit. -
Page 15: Troubleshooting Tips
PS-81, 101, 121A Heat Controller, Inc. Installation, Operation & Maintenance TROUBLESHOOTING TIPS TROUBLESHOOTING PROBLEM POSSIBLE CAUSES SUGGESTED REMEDIES 1. Unit does not - P1 appears in the display window Drain the water in the bottom tray. Start when Pressing on/off - Room temperature is lower than Reset the temperature. - Page 16 3-2013 04/2009...