Blomberg DW 24100 B Use And Care Manual
Hide thumbs
Also See for DW 24100 B:
- Use and care manual (36 pages) ,
- Installation manual (26 pages) ,
- Installation manual (26 pages)
Table of Contents
Advertisement
Dishwasher
Use and Care Manual
FOR MODELS
DW 24100 B (ADA Height)
DW 24100 SS (ADA Height)
DW 24100 W (ADA Height)
DW 25200 BWS (ADA Height)
DW 25200 SSWS (ADA Height)
DW 25200 WWS (ADA Height)
DWT 23100 B
DWT 23100 SS
DWT 23100 W
DWT 24100 B
DWT 24100 SS
DWT 24100 W
DWT 24400 SS ULTRA
DWT 24400 W ULTRA
USA
DWT 25100 B
DWT 25100 SS
DWT 25100 W
DWT 25200 BWS
DWT 25200 SSWS
DWT 25200 WWS
DWT 25500 SS
Advertisement
Table of Contents

Related Manuals for Blomberg DW 24100 B


Summary of Contents for Blomberg DW 24100 B
- Page 1 Dishwasher Use and Care Manual FOR MODELS DW 24100 B (ADA Height) DWT 25100 B DWT 23100 SS DW 24100 SS (ADA Height) DWT 25100 SS DWT 23100 W DW 24100 W (ADA Height) DWT 25100 W DWT 24100 B...
-
Page 2: Table Of Contents
9. FILLING THE DISHWASHER SALT DISPENSER 10. CARE AND MAINTENANCE 10.1 CARING FOR YOUR DISHWASHER EXTERIOR 10.2 CARING FOR YOUR DISHWASHER INTERIOR 11. TROUBLE SHOOTING 12. TECHNICAL FEATURES 13. WARRANTY STATEMENT FOR THE BLOMBERG DISHWASHERS 14. HOW TO GET SERVICE... -
Page 3: Important Safety Instructions
1. IMPORTANT SAFETY INTRODUCTION INSTRUCTIONS Please read this user manual and particularly the safety instructions WARNING completely and carefully. They will save you When using the dishwasher, follow time and effort and help to ensure optimum basic precautions, including the dishwasher performance. - Page 4 This appliance must be grounded. In the when the door is opened. Consult a • doctor immediately if detergent has been event of a malfunction or breakdown, swallowed or inhaled. grounding will reduce the risk of electric Do not drink water from the dishwasher! shock by providing a path of least •...
-
Page 5: Installation
2. INSTALLATION WARNING Danger of suffocation! Ensure that any plastic wrappings, bags, WARNING small pieces etc. are disposed of safely When installing the dishwasher, follow and kept out of the reach of children. basic precautions, including the Remove the door to the washing •... -
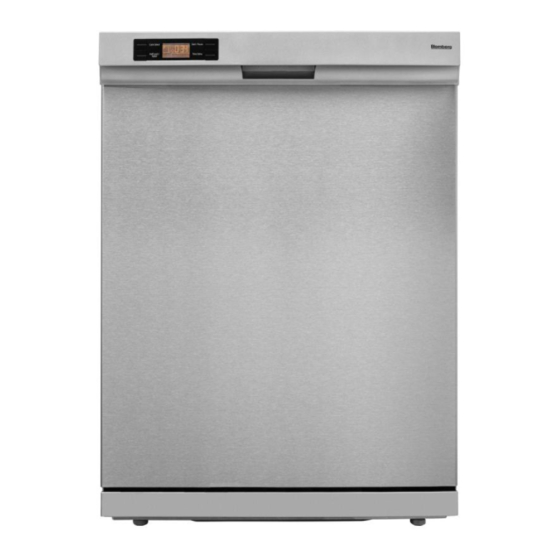
Page 6: Getting To Know Your Dishwasher
3. GETTING TO KNOW YOUR DISHWASHER FOR MODELS DWT 23100 W DWT 25100 SS DW 24100 B (ADA Height) DWT 24100 B DWT 25100 W DW 24100 SS (ADA Height) DWT 24100 SS DWT 25200 BWS DW 24100 W (ADA Height) -
Page 7: Loading The Dishwasher
4. LOADING THE CAUTION DISHWASHER Large knives and other utensils with • 1. Pull the handle to open the door. If sharp tips and edges must be placed horizontally into the upper rack due to the door is opened during operation, the risk of injury. -
Page 8: Upper Rack
4.1 UPPER RACK Load the upper rack with dessert plates, cups, glasses etc. 4.1.1 HEIGHT SETTING (MODEL DEPENDING) In certain models, the height setting of the upper rack may be changed using the wheels which are present at two height levels. -
Page 9: Lower Rack
LOWER UPPER RACK 4.1.4 ADJUSTABLE SHELVES (MODEL 1. To lower the upper rack, hold and press DEPENDING) in the rack lever on one side and carefully Depending on the size of the glasses lower the rack without releasing the lever and cups, the shelf height setting may be adjusted. - Page 10 remove the dishes from the basket and place them separately into the kitchen drawers or shelves. If you don’t want to use the Removable 3rd basket, pull it back to yourself to remove it from the machine, rotate the rail lids A towards outside and pull them towards yourself to take them out.
- Page 11 4.2.3 SLIDING CUTLERY BASKET Designed to allow free placement of the dishes according to their size, the Sliding Cutlery Basket can slide over the tines to the left A and right B side. Use the basket inset C for your cutlery so that all items in the basket are surrounded by a sufficient water flow.
-
Page 12: Proper And Improper Loading Of Dishware
4.3 PROPER AND IMPROPER LOADING OF DISHWARE Notice : Place all large and • very dirty items in the lower rack. Place all • containers such as cups, glasses and pots into the dishwasher with the opening facing 1: Salad Fork downwards (so 2: Teaspoon that no water can... -
Page 13: What Should Not Be Washed In Your Dishwasher
Disposable plastics and disposable 5. WHAT SHOULD NOT • aluminum cannot withstand high BE WASHED IN YOUR temperatures; do not wash them in the DISHWASHER dishwasher. Notice : CAUTION Rust-sensitive steel parts like iron and • If in doubt, wash by hand or follow the •... -
Page 14: Operating The Dishwasher
6. OPERATING THE DISHWASHER 9 10 12 13 1 On/Off button 2 Start/Pause/Cancel button 3 Display 4 Program Selection buton 5 Half Load/Combi Tablet button 6 Time Delay buton 7 Door Handle 8 Program Indicator 9 Salt level indicator led * 15 Program Steps Follow-up Indicator 10 Rinse aid level indicator led a Washing Step Indicator “... - Page 15 upper baskets and you can save from both FUNCTION BUTTONS water and power. This function helps you to ON/OFF BUTTON save water and energy. Turn the dishwasher on with the On/Off button. When turning on, the icon on the TABLET DETERGENT FUNCTION display module of the last used program Depending on the hardness level of the tap will light up.
- Page 16 REMAING TIME INDICATOR/DELAY TIME PROGRAM CHANGE To change the program selection while the INDICATOR dishwasher is running: You can follow the remaining program duration from the time indicator display. 1. Open the door. 2. Press Start/Pause/Cancel and select a new program. TIME DELAY BUTTON 3.
-
Page 17: Detergent & Rinse Aid Dispenser
9 SALT LEVEL INDICATOR LED Notice : (MODEL DEPENDING) Only use detergents suitable for • dishwashers. 9 10 Do not use detergent in Rinse & Hold • cycle. Don’t forget to pour / put the detergent into • the dispenser before turning the machine Too much detergent may mean that the •... -
Page 18: Filling Rinse Aid Dispenser
The detergent container holds a total of 7.2 FILLING RINSE AID DISPENSER • 40 ml / 8 tsp of detergent 1. Marking lines on the inside of the • WARNING detergent container aid in providing the Keep your rinse aids out of the reach of correct amount of detergent. - Page 19 SET THE DOSE OF RINSE AID The dose of rinse aid to be used can be set by means of the dispenser regulator 4 between levels 1 and 6. Change the setting, only if the following applies after washing: Watermarks are visible on the dishes: Set •...
-
Page 20: Setting The Water Softener
8. SETTING THE WATER SOFTENER (MODEL DEPENDING) 1 Min. 1 Second 1 Minute Remove the test Turn on the tap and Hold the test strip in Remove the test strip Wait for 1 minute. The test strip shows strip from the packet. let the water run for the water for about a from the water and... -
Page 21: Filling The Dishwasher Salt Dispenser
9. FILLING THE DISHWASHER SALT DISPENSER (MODEL DEPENDING) CAUTION Never use culinary or table salt. These types of salt do not dissolve in water easily and will damage the function of the softening device. Notice : Only use special dishwasher salt in your •... -
Page 22: Care And Maintenance
10. CARE AND MAINTENANCE Cleaning the colored doors: Use only soft cloth that is lightly dampened with mild detergent. WARNING Before cleaning or carrying out • Cleaning the stainless steel doors: Use a maintenance, switch off the appliance, soft cloth with a cleaner made for cleaning disconnect the mains plug and turn stainless steel. - Page 23 10.2.2 CLEANING THE SPRAY ARMS Notice : Dirt and/or calcium residue may block the nozzles on the spray arms. For this reason, regularly check the spray nozzles. 1. Lower spray arm 2. Upper spray arm 1. Remove the lower rack from the machine.
- Page 24 Check if the holes on the top of the additional upper spray arm are clogged. If they are clogged, remove and clean them. To remove them, slightly 1 push them upwards and then turn clockwise 2. To replace the impeller, seat it into its slot, push slightly upwards and turn it anticlockwise until it is securely fitted.
-
Page 25: Trouble Shooting
11. TROUBLE SHOOTING What if the dishwasher will not run : Is the machine plugged in? • Are all fuses operative? • Is the water supply fully turned on? • Is the dishwasher door closed securely? • Have you pressed the On/Off button? •... -
Page 26: The Dishes Are Not Clean
The dishes are not clean Possible causes How to fix these problems Improper loading. Load the dishwasher as suggested in this • • manual. Wrong program selection. Select a program that washes at a higher • • temperature or takes a longer amount of time. - Page 27 Detergent is moist or Bleaches in cleaners lose their efficiency • • clumping in box. when stored under unfavorable conditions. Store detergents in a dry location. Close the lid of the container securely. Using cutlery with a low Cleaning of these items is made difficult •...
- Page 28 Milky appearance or rainbow on the glasses (glass corrosion) Possible causes How to fix these problems Excessive use of Add a smaller amount of detergent. • • detergent when water Compare the water hardness level setting • hardness is low. on the dishwasher against the stated values from the local water supplier.
- Page 29 Fading of glasses, china, porcelain pattern Possible causes How to fix these problems Fading of decoration on Glasses, porcelain and cutlery of this type • • glasses and porcelain. are not suited for the dishwasher. Detergent residue remains in the dispenser Possible causes How to fix these problems...
- Page 30 Dishes break Possible causes How to fix these problems Improper loading. Load the dishwasher as suggested in this • • manual. Overloaded racks. Do not overload the dish rack. Dishes may • • hit against each other and break. Scratched dishes Possible causes How to fix these problems Dish items/parts made...
-
Page 31: Technical Features
Foam Possible causes How to fix these problems The dishes are pre- Dishes do not need to be pre-washed. • • washed by hand with Coarse dirt may be removed with a a large amount of dish dishcloth, or you may hold the dishes detergent. -
Page 32: Warranty Statement For The Blomberg Dishwashers
Lifetime limited warranty from date of through official quality assurance first installation * ++ inspections before leaving the original (parts only) Blomberg will repair or replace manufacturing site. Warranty terms for to the original owner the stainless this Blomberg household appliance is not... -
Page 33: How To Get Service
No Other Warranties. This Warranty Statement is the complete and exclusive warranty from the manufacturer. No employee of Blomberg or any other party is authorized to make any warranty in Statement addition to those made in this Warranty Statement. - Page 34 17 9052 01 00-AA-USA...