
Related Manuals for Keurig OFFICEPRO B145


Summary of Contents for Keurig OFFICEPRO B145
- Page 1 USE & CARE GUIDE B145 SINGLE-CUP BREWING SYSTEM BREWING EXCELLENCE ONE CUP AT A TIME ™ Please read and save these instructions. Pour des directives en français, veuillez vous reporter à la page 13.
-
Page 2: Table Of Contents
Holder and the other in ® the bottom of the K-Cup Holder. ® Model B145 Use & Care Guide To avoid risk of injury, do not put your TABLE OF CONTENTS fingers in the K-Cup Chamber. SECTION 1 CAUTION: There is extremely hot water in SET-UP &... -
Page 3: Set-Up & Operation
5. Carefully pull the plastic bag (and 2. For the best tasting gourmet coffee or tea, packaging materials) toward you and out Keurig recommends using bottled or filtered of the box. The Brewer will still be encased water. in the polyfoam. -
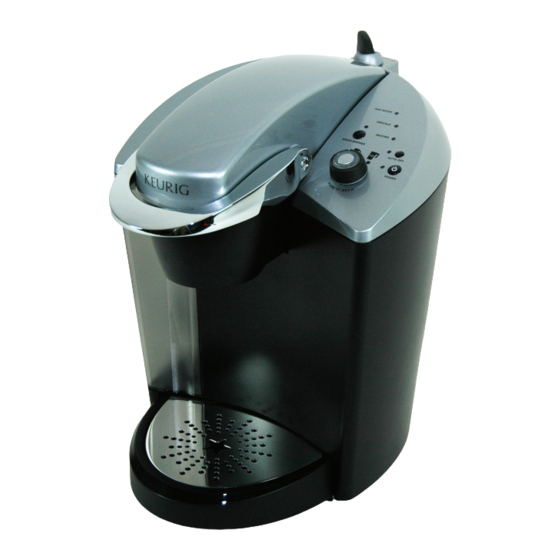
Page 4: Features
Features odel B145 Brewer Water Reservoir Lid Water Reservoir Water Reservoir Lock Tab Slots Handle K-Cup Portion Pack Holder (E and F are ® the K-Cup Holder Assembly) Funnel Controls and Indicators K-Cup Portion Pack Assembly Housing ® Brew Button... -
Page 5: Set-Up & First Brew
Please note, a K-Cup should not be used ® for the Priming Sequence. IMPORTANT: You cannot use your Keurig brewer until it has been primed for its first use as set forth below. NOTE: If Brewer has been exposed to tempera-... -
Page 6: Stopping The Brew Process
® ® of the K-Cup Holder. To avoid risk of injury, be hot. do not put your fingers in the K-Cup Chamber. 12.Enjoy your first cup of Keurig Brewed ® gourmet coffee or tea! 4. Select a K-Cup portion pack. -
Page 7: Controls & Indicators
Draining the Brewer a. Press the Power Button to turn on the Brewer. The Hot Water tank of the B145 can be com- b. Press the black button above the Power pletely drained. We recommend that the Button to turn the Auto-Off Timer feature on. -
Page 8: Cleaning & Maintenance Cleaning
SECTION 3 CLEANING & MAINTENANCE Cleaning External Parts using a paper clip or similar tool. Remove K-Cup Holder, insert the paper clip into the ® Regular cleaning of the Brewer’s external Needle to loosen the clog and remove it. The components is recommended. -
Page 9: Storage
while still on. (The Auto-Off feature should be turned off). c. RINSE Step 1: Now perform a drain process. Step 2: Empty and re-fill the water reservoir with fresh water. Step 3: Re-prime the brewer and re-fill the water reservoir. Step 4: Place a ceramic cup on the Drip Tray NOTE: The Brewer will continue to function even and run a regular brew cycle without using a... -
Page 10: Troubleshooting
SECTION 4 TROUBLESHOOTING SITUATION SOLUTION Brewer does not • Plug Brewer into an independent outlet. have power • Check to be sure that it is plugged in securely. • Plug into a different outlet. • Reset the power outlets’ circuit breaker if necessary. •... -
Page 11: Warranty
SECTION 5 WARRANTY Other Limitations Keurig warrants that your Keurig Model B145 Brewer will be free of defects in THIS WARRANTY IS EXCLUSIVE AND IS IN materials or workmanship under normal use LIEU OF ANY OTHER EXPRESS WARRANTY, for one year from the date of purchase.