
Related Manuals for Husqvarna Robotic Lawn Mower


Summary of Contents for Husqvarna Robotic Lawn Mower
-
Page 1: Auto Mower
Operator´s manual Auto Mower Please read these instructions carefully and make sure English you understand them before using the machine. - Page 2 We congratulate you in becoming a new owner of a Husqvarna Auto Mower. You have chosen a product that we hope will fulfil and even exceed the expecta- tions you have a right to demand. Automatic lawn mowing is a new step in development, which in- volves a new way of thinking and behaviour, not least from the consumer himself.
-
Page 3: Table Of Contents
SYMBOL EXPLANATION/LIST OF CONTENTS Symbols on the Auto Mower IMPORTANT! Read through the Operator’s Manual carefully and make sure you understand it before you start to use the Auto Mower. WARNING! This tool can be dangerous if used incorrectly. The warnings and safety instructions in the Operator’s Manual must be followed carefully for the Auto Mower to be used safely and efficiently. -
Page 4: Safety Regulations
• Read through the Operator’s Manual carefully and make sure you understand its contents before using the Auto Mower. • Check that there are no stones, twigs, tools, toys or other objects on the lawn that can damage the blades or cause the mower to stop. -
Page 5: Parts Of The Auto Mower
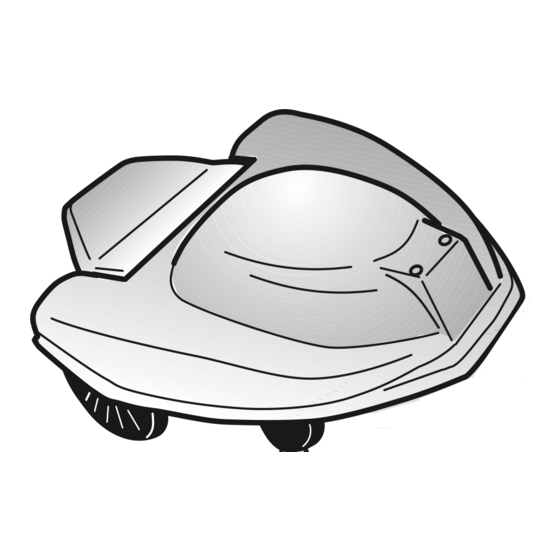
PARTS OF THE AUTO MOWER What is what? 1. Handle and cover rest 2. Box containing computer, battery and wheel motors 3. Cutting disc 4. Protective disc 5. Loop sensor 6. Hinged cover 7. Drive wheel 8. Front wheel 9. Body 10. -
Page 6: Function
Technical data Battery NiMH special battery, 12 V Mowing system Cutting disc with three pivoting blades Cutting height Variable adjustment, approx. 3–9 cm Weight 7.1 kg Length 72 cm Width 60 cm Height 26 cm Cutting width 22 cm Working capacity 1500 m ±... -
Page 7: Installation
It may be necessary to cut the grass using a traditional lawn mower before using the Auto Mower for the first time. The Auto Mower will then prevent the grass from growing long. -
Page 8: Installation Of The Charging Station
If the charging station has to be placed in a passage, the grass in the passage around the charging station could be mown too often. To avoid this the Auto Mower can be programmed to leave the charging station in any chosen direction within the range 45–315°. -
Page 9: Installation Of Boundary Wire
There is a momentary switch on the charging station for testing. A continuous beep when the switch is switched on indicates that the charging station is receiving power and that the search and boundary wires are connected. A series of beeps indicates that the charging station is receiving power, but the search or boundary wires or both are disconnected or broken. -
Page 10: Installation Of Search Wire
If the boundary wire needs to be joined this must be done so that the joint is waterproof. The best contact is obtained if the joint is made using Husqvarna’s solder-free connector, item number 535 04 43-01. The joint can also be soldered and then insulated using shrink tube. -
Page 11: Extra Wire
INSTALLATION In exceptional cases and over short distances the wires can be laid closer together, i.e. in a narrow passageway or in the final metre approach to the charging station. If so, it is important that the wires are equally spaced. Search wire Boundary wire Fence... -
Page 12: Installation, Step By Step
Installation, step by step The wires must be connected to the charging station’s terminal block, as shown in this wiring diagram, when steps 3-11 in these installations instructions are carried out. 8 7 6 5 4 3 2 1 15 V 535 09 65 - AX Use the tool supplied to connect the six wires to the terminal block. -
Page 13: Use
Start and stop WARNING! There are rotating blades under the Auto Mower. Never put your hands or feet close to or under the body of the Auto Mower while the motor is running. WARNING! Read carefully through the safety regulations in this Operator’s Manual before you start the Auto Mower. -
Page 14: Charging An Empty Battery
Charging an empty battery These instructions apply when Auto Mower is new, or after a long period of storage. If the Auto Mower has been used recently it does not need to be started in the charging station, see the chapter “Start and stop”. Place the Auto Mower in the charging station for 60 minutes The charging pins must be in contact with the... -
Page 15: Settings
Settings The keypad is used to deactivate the theft alarm, enter the security code and to change some of the Auto Mower’s settings. If you have started to enter a value by pressing buttons on the keypad and wish to cancel the input, press Resetting the values Pressing 21 # resets everything back to the settings the Auto... - Page 16 The start and stop times can be zeroed by keying in * 35 #. This does not affect the setting of the clock. The number of hours it takes to mow an area depends on many factors, such as its size, the shape of the working area and the rate of grass growth.
-
Page 17: Lamp And Sound Indications
Sound and lamp indications This table shows the Auto Mower’s sound and lamp signal indications. When the mower cover is opened and the alarm has been switched off, the LEDs on the keypad panel will light for 12 seconds. A green LED indicates an information message and a red LED an error message. -
Page 18: Replacing The Blades
If the charging station is taken indoors the ends of the wires must be protected from dampness by inserting them in Husqvarna’s waterproof connectors. If this is not done the wires will become oxidised, which will lead to contact problems and operating problems with the mower. -
Page 19: Trouble Shooting
Use the test switch on the charging station to check loop wires and power supply. Repair the break in the loop wire using Husqvarna’s waterproof connector, part no. 535 0443-01. Check by moving the position of the bound- ary wire. - Page 20 Observation The Auto Mower goes outside the working area Uneven mowing result The Auto Mower works at the wrong time The Auto Mower vibrates Auto Mower runs around but the cutting disc does not rotate. The mower runs for shorter periods than usual between recharging.
- Page 21 We, Husqvarna AB, S-561 82 Huskvarna, Sweden, tel +46 36-146500, declare under sole responsibility that the automatic lawn mower Husqvarna Auto Mower from 2002’s serial numbers and onwards (the year is clearly stated in plain text on the type plate with subsequent serial number), is in conformity with the following standards or other normative documents following the provisions in the COUNCIL’S DIRECTIVES:...
- Page 22 ´+H#|¶6h¨...
- Page 23 English –...
- Page 24 114 00 39-26 ´+H#|¶6h¨ 2002W02...
- Page 25 We hope you find the links below useful. For further gardening information visit Blower Vacs Brush cutters Cultivators Cylinder lawn mowers Electric Fertiliser chainsaws spreaders Garden tractors Garden vacuums Hover mowers Husqvarna chainsaws Lawn scarifiers Lawn tractors Petrol hedge Ride on lawn cutters mowers Ryobi strimmers Scarifiers Gardening Tools Direct Brushcutters Chainsaws...