Table of Contents
Advertisement
Advertisement
Table of Contents

Related Manuals for Teac MC-DX40DAB


Summary of Contents for Teac MC-DX40DAB
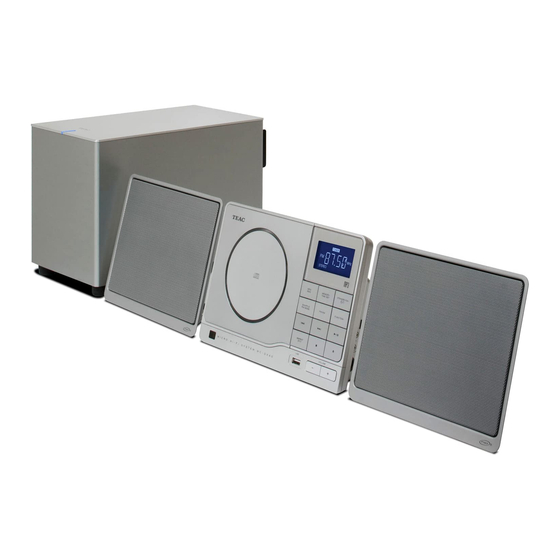
- Page 1 CQX1A1385Z MC-DX40DAB Micro Hi-Fi System OWNER’S MANUAL...
-
Page 2: Important Safety Instructions
IF YOU ARE EXPERIENCING PROBLEMS WITH THIS PRODUCT, < 3) Heed all warnings. CONTACT TEAC FOR A SERVICE REFERRAL. DO NOT USE THE 4) Follow all instructions. PRODUCT UNTIL IT HAS BEEN REPAIRED. 5) Do not use this apparatus near water. -
Page 3: Table Of Contents
Contents Before Using the Unit Read this before operation Thank you for choosing TEAC. Read this manual carefully to get the best performance from this unit. As the unit may become warm during operation, always leave < sufficient space around the unit for ventilation. -
Page 4: Discs
CD standard may not play back correctly in this player. If you card size, etc.). CDs of this sort can damage the unit: use such discs in this unit, TEAC Corporation and its subsidiaries cannot be responsible for any consequences or guarantee the quality of reproduction. -
Page 5: Speaker Installation
To hook the speakers on the wall, drill holes into solid wall < support, such as wooden frame or concrete wall. TEAC supplies the wall mounting brackets as a convenience < to the product owner. Consult your local building codes and exercise all necessary caution when mounting these brackets. -
Page 6: Connection
Connection CAUTION: Turn off the power of all the equipment before making connections. < Read instructions of each component you intend to use with this unit. < Be sure to insert each plug securely. To prevent hum and noise, do not bundle <... -
Page 7: Fm Indoor Antenna
Connect the LINE OUT or PHONES jack (audio output jack) of your audio device using the commercially available stereo mini plug cable. When using the PHONES jack of your mini player, you must adjust the volume of the mini-player or you may hear no sound from your MC-DX40DAB. Reserved jack... -
Page 8: Unit Functions
Unit Functions Note: To simplify explanations, instructions in this manual refer to the names of the buttons and controls on the front panel only. Associated controls on the remote control will also operate similarly. - Page 9 display VOLUME (–, +) Press the + or the – button to adjust the volume. STANDBY/ON ( CD door Use this button to turn the unit on or standby. The main unit is powered via the subwoofer. You need to first turn on the subwoofer.
-
Page 10: Remote Control Unit
Remote Control Unit Basic Operation The provided Remote Control Unit allows the unit to be operated from a distance. When operating the remote control unit, point it towards the remote sensor on the front panel of the unit. Even if the remote control unit is operated within the effective <... -
Page 11: Sleep Timer
Headphones To listen to an external source connected to the AUX IN jack, < select AUX. For private listening, first reduce the volume level to minimum. In AUX mode, the display always shows the clock. < Then insert the plug from your headphones into the PHONES If you press and hold the TIME SET button for 2 seconds in CD or <... -
Page 12: Listening To A Disc
Listening to a disc Audio CD The total number of the tracks and total play time of the disc are displayed. Press the FUNCTION button to select “CD”. MP3/WMA disc The total number of files of the disc is displayed. “MP3“... - Page 13 Search for a part of a track During playback, hold down the skip button (. or /) and To suspend playback temporarily (pause mode) release it when the part you want to listen to is found. During searching, ”Search” is displayed. To display MP3/WMA information Press the play/pause button (G/J) during playback.
-
Page 14: Folder Search (Mp3/Wma Only)
Folder Search (MP3/WMA only) Programmed Playback FUNCTION MEMORY While in stop or playback mode, you can select and playback a Up to 32 tracks can be programmed in the desired order. desired folder or a desired file in a folder. Press the FUNCTION button to select “CD”. - Page 15 To check the programmed order Press the skip button (. or /) repeatedly to select a track, then press the MEMORY button. In the stop mode, press the MEMORY button repeatedly. The track number and program number will be shown on the display. To add a track to the end of the program The track/file is programmed, and “P-02”...
-
Page 16: Shuffle Playback
Shuffle Playback Repeat Playback Every time the REPEAT button is pressed, the mode is changed as The tracks/files can be played randomly. Press the SHUFFLE follows: button during playback or when in the stop mode. “Shuffle” will then appear in the display. If you press the / button during shuffle playback, next track/ <... -
Page 17: Listening To The Dab Radio
Listening to the DAB Radio SELECT FM/DAB FUNCTION AUTO SCAN Auto Tuning When the scanning process has finished, press the skip button (. or /) to select the station you want to Press the FUNCTION button to select “Radio”. listen to. Press the FM/DAB button to switch to DAB mode. -
Page 18: Display Setting Of The Dab
Display Setting of the DAB Ensemble name You can choose the type of information displayed in the second line of the display while listening to DAB. This displays the name of the Ensemble that is broadcasting the programme. Each time the INFO button is pressed, the information is displayed as follows. -
Page 19: Controlling The Various Dab Functions 1
Controlling the Various DAB Functions 1 SELECT DISPLAY In DAB mode, each time the DISPLAY button is pressed, the Function Select the desired option in the second line of the display Control is changed as follows. using the skip button (. or /). Station order Manual tune DRC value... -
Page 20: Manual Tune
Controlling the Various DAB Functions 2 SELECT DISPLAY Manual tune Press the SELECT button when the channel you wish to tune in is displayed in the second line of the display. This option allows you to manually tune in a channel and view The current signal strength and the required level indicator are a continuously updated display of the strength of the signal. -
Page 21: Preset Select
DRC value Preset select This option sets the Dynamic Range Control (DRC) value to be Use this option to select the DAB preset station. applied to received broadcasts. DRC is used to reduce the range between high and low volumes of audio and is sometimes While listening to a DAB broadcast press the DISPLAY applied at the broadcast source. - Page 22 Controlling the Various DAB Functions 3 SELECT DISPLAY Preset save Sw version (Software version) Use this option to save up to 30 DAB stations to preset into This option shows the version number of the installed software. memory. This is for information only and no adjustment is available. While listening to the DAB station you want to save press While listening to a DAB broadcast press the DISPLAY the DISPLAY button.
-
Page 23: Listening To The Fm Radio
Listening to the FM Radio FM MODE button Pressing this button alternates between STEREO mode and MONO mode. Press the FUNCTION button to select “Radio”. STEREO (Auto) FM stereo broadcasts are received in stereo and the “St” appears You can also use the FM/DAB button to select “Radio”. <... -
Page 24: Preset Tuning (Fm)
Preset Tuning (FM) How to select preset stations You can store FM stations into preset channels 1 to 30 respectively. Press the FM/DAB button to select FM. Tune in a station you want to listen to (see steps page 23). Press the MEMORY button. -
Page 25: Rds
RDS (PTY Search) The Radio Data System (RDS) is a broadcasting service which allows stations to send additional information along with the regular radio programme signal. RDS works on the FM waveband in Europe only. Tune in an FM station (see steps of page 23). -
Page 26: Pty
: a k i n d o f s u g g e s t i o n i n c l u d i n g p r a c t i c a l jack of the MC-DX40DAB using the commercially available announcements other than news, documents, stereo mini plug cable. -
Page 27: Setting The Clock
Setting the Clock STANDBY/ON TIME SET If the power switch of the subwoofer turned off, the clock will Press the TIME SET button. be reset. The “minute” value blinks. If the unit is on, press the STANDBY/ON button ( ) to turn it standby. -
Page 28: Setting The Timer
Setting the Timer Press the skip button (.//) to set the start time (minute), and then press the TIMER button. STANDBY/ON TIMER The unit can be programmed to turn on and off at a specified < time. Adjust the clock before setting the timer. <... - Page 29 Press the SKIP button (.//) to select a source (Radio Press the STANDBY/ON button to turn the unit off or CD), and then press the TIMER button. (standby). The clock and the TIMER indicator are displayed. The unit will turn on and standby at the specified time every day. Do not forget to turn the unit into standby mode, or the timer will not work.
-
Page 30: Troubleshooting
This may occur if a broadcaster changes the label of a service or The sound is noisy. removes a label whilst you are listening to it. The MC-DX40DAB The unit is too close to a TV or similar appliances. Install the unit will try to retune to this station, or alternatively follow the apart from them, or turn them off. -
Page 31: Specifications
Specifications Information for Users on Collection and Disposal of Old Equipment and used Batteries These symbols on the products, packaging, and/or accompanying documents mean that used electrical and electronic products AMPLIFIER section and batteries should not be mixed with general household waste. Output Power (L+R) . - Page 32 7733 Telegraph Road, Montebello, California 90640 Phone: (323) 726-0303 TEAC CANADA LTD. 5939 Wallace Street, Mississauga, Ontario L4Z 1Z8, Canada Phone: (905) 890-8008 TEAC MEXICO, S.A. De C.V Rio Churubusco 364, Colonia Del Carmen, Delegación Coyoacàn, CP 04100, México DF, México Phone: (5255)5010-6000 TEAC UK LIMITED Unit 19 &...