Garmin GPS 40 Owner's Manual & Reference
Personal navigator
Hide thumbs
Also See for GPS 40:
- Owner's manual & reference (67 pages) ,
- Declaration of conformity (1 page)
Table of Contents
Advertisement
Quick Links
Advertisement
Table of Contents

Related Manuals for Garmin GPS 40


Summary of Contents for Garmin GPS 40
- Page 1 Owner’s Manual & Reference GPS 40 Personal Navigator ®...
- Page 2 GARMIN™, GPS 40 ™, Personal Navigator™, AutoLocate™, TracBack™ and MultiTrac8™ are all trademarks of GARMIN Corporation, and may not be used without the expressed permission of GARMIN. May 1996 Part #190-00124-00 Rev. A Printed in Taiwan.
- Page 3 Section Three provides a detailed reference to the advanced features and operations of the GPS 40 in a topical format. This allows you to concentrate on a specific topic quickly, without reading through entire sections of text that you may not need.
- Page 4 AID (NAVAID), any NAVAID can be misused or misinterpreted and therefore, become unsafe. Use the GPS 40 at your own risk. To reduce the risk of unsafe operation, carefully review and understand all aspects of this Owner’s Manual and thor- oughly practice operation using the simulator mode prior to actual use.
-
Page 5: Table Of Contents
Introduction Table of Contents SECTION ONE Introduction GPS Definitions/Navigation Basics ......2-4 Initializing the Receive/Remote Antenna and Wrist Strap Usage ..5-8 SECTION TWO Getting Started Power On/Satellite Status Page . -
Page 6: Gps Definitions/Navigation Basics
Introduction Definitions The GPS 40 is a powerful navigation tool that can guide you anywhere in the world. To better understand its operation and capabilities, it may be help- ful to review the basic terms and concepts briefly explained below. - Page 7 Introduction Definitions Grid A coordinate system that projects the earth on a flat surface, using square zones for position measurements. UTM/UPS and Maidenhead formats are grid systems. Ground Speed The velocity you are traveling relative to a ground position. Latitude A north/south measurement of position perpendicular to the earth’...
- Page 9 To get the most out of your GPS 40, be sure to read through the initialization and Getting-Started sections of this manual, and refer to the reference section for complete details on the GPS 40’s advanced features.
- Page 10 “shaded” the receiver can simply use an alternate satellite to maintain the position fix. Although a GPS receiver needs four satellites to provide a 3D fix, the GPS 40 can maintain a 2D fix with only three satellites.
- Page 11 Before You Initialize Powering Up Take the GPS 40 outside and find a large, open area (try a nearby park) that has a clear view of the sky from horizon to horizon. Hold the receiver at a comfortable height, at arm’s length from your body, with the unit parallel to the...
- Page 12 To prevent accidental battery power loss, ized. The prompt may also the GPS 40 will automatically shut off 10 minutes after the appear during normal use if last keystroke if the unit is not tracking at least one satellite the antenna is shaded or the and has never acquired a position fix.
-
Page 13: Power On/Satellite Status Page
(solid bar status). Once indicated at the bottom of a fix has been calculated, the GPS 40 can take on the easier the screen. task of updating your position, track and speed by selecting... -
Page 14: Sky View/Position Page
Position Page The second page in the GPS 40’s main page sequence is the position page. The position page shows where you are, what direction you’re heading and how fast you’re going, and is particularly helpful when you do not have an active destination selected. -
Page 15: Marking A Position
‘save’ field to the name field. simply press the ENTER 2. Press to clear the default waypoint name. key. The GPS 40 will return to the page previously 3. Press and hold the key to scroll through the alphabet displayed. - Page 16 15 meters, this will ensure you travel far enough to register useful information. You’ll also get a much better indication of how the GPS 40’s steering guidance and mapping fea- tures work to guide you wherever you go. 1. Walk in a straight line for 3-4 minutes at a fast pace and watch the position page.
- Page 17 Compass Page Once you’ve stored a waypoint in memory, you can use the GPS 40 to guide you to it by performing a simple GOTO. A GOTO is really nothing more than the receiver drawing a straight-line course from your present position to the destination you’ve selected.
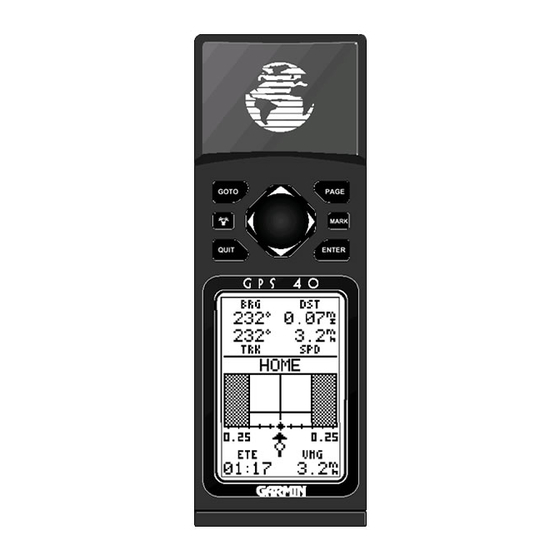
- Page 18 Highway Page and the direction of the destination at a glance. The GPS 40 will also pro- vide steering guidance with The bottom of the compass page displays your curre n t a graphic highway page.
-
Page 19: Page Sequence And Menu Page
Menu Page Now that you’ve arrived ‘HOME’, let’s take a minute to see how the GPS 40’s main pages work together. The GPS 40 features five main pages, which are linked together in a chain. You can quickly scroll through the pages in either d i rection using the keys. -
Page 20: Clearing The Track Log/Power Off
We encourage you to experiment with the GPS 40 until it becomes an extension of your own navigation skills. If you encounter any problems using the unit or want to take advantage of the GPS 40’s more advanced features, refer to the reference section. -
Page 21: Satellite Status Page
Signal Strength Satellite Indicators Number The GPS 40 satellite status page displays the status of various receiver functions. The status information will help Satellites in view but not you understand what the GPS is doing at any given time, currently in use (03 & 17) - Page 22 (estimated position error, in feet or meters) at the top right. The status will show one of the following conditions: Searching— the GPS 40 is looking for any available satellites in view. AutoLocate — the GPS 40 is initializing and collect- ing new almanac data.
-
Page 23: Battery Level Indicator
2. To adjust the duration of screen backlighting, refer to the operation setup section (page 46). Using the screen backlighting can greatly affect battery life. If you’re using your GPS 40 primarily in daylight hours, you should keep the backlight time- out at the default 15 second setting. -
Page 24: Position Page
Reference Position Page Position Page The GPS 40’s position page shows you where you are, what direction you’re heading and how fast you are going (up to 99.9 mph), and is most useful when you are travel- ling without an active destination waypoint. A graphic com- pass tape at the top of the page displays your cardinal head- ing (while you’re moving), with your current track and... - Page 25 The GPS 40 allows you to mark, store and use up to 250 waypoints. A waypoint position can be entered by tak- ing an instant electronic fix or by manually entering a coor- dinate or range and bearing in reference to an existing way- point.
-
Page 26: Creating And Using Waypoints
Reference Creating & Waypoint Submenus Using The GPS 40 has three waypoint submenu pages that let Waypoints you manage a large number of waypoints quickly and effi- ciently. The nearest waypoints, waypoint list and waypoint definition pages are accessed through the menu page. - Page 27 The waypoint list page provides you with a complete Waypoints list of all waypoints currently stored in the GPS 40. The total number of used and empty waypoints is indicated above the waypoint list. From the waypoint list page, you can retrieve a waypoint definition page, delete all user- defined waypoints, or GOTO a selected waypoint.
-
Page 28: Creating And Using Waypoints
Reference Creating & Waypoint Definition Page Using The last of the three waypoint management pages is the Waypoints waypoint definition page. This page lets you create new waypoints manually, or review and edit existing waypoints. Position Waypoint Coordinates Name Reference Waypoint Distance from Reference... -
Page 29: Reference Waypoints
To create a new waypoint manually without knowing its Waypoints position coordinates, you’ll need to enter its bearing and distance from an existing waypoint. The GPS 40 will then calculate the position coordinates for you. To create a new waypoint by referencing a stored The GPS 40’s advanced... -
Page 30: Waypoint Comments
4. Press the key to confirm your changes. Waypoint Comments Each waypoint stored in the GPS 40 has a user-defined 16-character comment field. The default comment is the UTC date and time of the waypoint’s creation. To change or add a comment:... -
Page 31: Scanning Waypoints
GOTO h a s been cancelled. Scanning Waypoints As you manually enter a waypoint’s name, the GPS 40’ s waypoint scanning feature will automatically display the first numerical or alphabetical match of the character you have entered to that point. This helps eliminate the need to always enter a waypoint’s complete name. - Page 32 GOTO & MOB Selecting a GOTO Destination Navigation The GPS 40 provides four ways to navigate to a destina- tion: GOTO, MOB, TracBack and route navigation. The most basic method of selecting a destination is the GOTO function, which lets you choose any stored waypoint as the destination and quickly sets a direct course from your pre- sent position.
-
Page 33: Tracback Navigation
Navigation The third method of navigating to a destination is by using the GPS 40’s TracBack feature. The TracBack function allows you to quickly and easily retrace your path using the track log automatically stored in the receiver’s memory. The... -
Page 34: Tracback Navigation
Tips on Creating and Using the TracBack Feature Navigation The GPS 40’s TracBack feature is designed to help you quickly create and activate a route that follows your path back to a user-defined starting point. To get the most out of the TracBack feature, remember the following tips: •... - Page 35 Navigation The last form of navigating to a destination with the GPS 40 is by creating a user-defined route. The route navi- gation feature lets you plan and navigate a course from one place to another using a set of pre-defined waypoints.
- Page 36 Reference Route Route Definition Page Navigation The GPS 40 lets you create and store up to 20 routes of 30 waypoints each. Routes are created, copied and edited through the route definition page, which is accessed through the menu page.
-
Page 37: Copying And Clearing Routes
Reference Route To create a route from the route definition page: Navigation 1. Highlight the route number field and press 2. Enter a route number and press the key to confirm. 3. Press to begin entry of a route comment. (Note that the default [first and last waypoint] comment will only appear if the comment field is blank.) 4. - Page 38 Reference Route Clearing Routes (continued) Navigation The clear route warning will appear, asking you to con- firm that you want to remove all waypoints from the route. 1. Highlight the ‘Yes?’ field with the key. 2. Press to confirm your action. 3.
- Page 39 Reference Route Active Route Page Navigation Once a route has been activated, the active route page will appear, displaying the waypoint sequence of your route with the estimated time enroute (ETE) at your present speed and distance to each waypoint. As long as you are navigating an active route, the active route page will become part of the main page sequence of the unit.
- Page 40 On-Route GOTOs At the beginning of this section, we mentioned that the GPS 40 will automatically select the route leg closest to your position as the active leg. This will give you steering guidance to the desired track of the active leg. If you would prefer to steer directly to a route waypoint, you can per- form an ‘on-route GOTO’...
- Page 41 Navigation Selecting a User-Defined Navigation Page Guidance Once you’ve selected a GOTO destination or activated a MOB or route, the GPS 40 will provide graphic steering guidance to the destination with one of two navigation pages: Highway Page Compass Page To switch the navigation •The compass page (the default navigation page) pro-...
- Page 42 When you (286º) of your current a re one minute away from the destination (based on your cur- direction of travel. rent speed and track over the ground), the GPS 40 will alert you with a flashing on-screen message box.
- Page 43 Reference Using the Highway Page Highway Page The GPS 40’s highway page also provides graphic steer- ing guidance to a destination, with a greater emphasis on the straight-line desired course and the distance and direc- tion you are off course. The bearing and distance to way-...
- Page 44 Moving Moving Map Page Map Page The GPS 40 features a powerful real-time moving map that can do much more than just plot your course and route. The map page also provides you with a target cursor that will let you pan ahead to nearby waypoints, determine the distance and bearing to any map position, and mark new waypoints while you navigate.
- Page 45 Reference Moving Zooming and Panning Map Page There are three main functions you can perform from the map page— zooming, pointing and panning. Each of these functions has its own ‘field’, which may be selected and activated for use.Whenever the map page first appears, the zoom field (at the top left) is always highlighted.
- Page 46 Reference Moving To GOTO a waypoint highlighted in the map field: Map Page 1. Press the key. 2. Press the key to confirm the GOTOwaypoint page. To stop the panning function and display the present position diamond: 1. Press the key.
- Page 47 Reference Moving Using the Cursor to Mark and GOTO Waypoints Map Page During panning, the crosshair represents a target posi- tion right on the moving map, with the range and bearing to the target displayed at the top corners of the screen. You can also use the target crosshair to mark a new waypoint Marking a Waypoint position or as a GOTO destination right from the map field.
- Page 48 Press the key to display the sun information. Message Page The message page displays all current messages in the GPS 40. There are two types of messages: temporary alerts Distance/Sun Calculation (eg., approaching a waypoint) and condition alerts (eg., bat- tery power is low).
-
Page 49: Simulator Mode
The first setup page is the system setup page, which is used to select the operating mode, time offset and screen preferences. The GPS 40 has four operating modes: • Normal Mode operates the unit at maximum perfor- mance, and provides a battery life up to 12 hours on alkaline batteries. - Page 50 2. Select 12-or 24-hour display, and press to confirm. Screen Contrast The GPS 40 features adjustable screen contrast and is controlled by using an on-screen bar scale. To set the screen contrast: 1. Move the field highlight to the ‘CONTRAST’ field and press key.
-
Page 51: Appendix B-Map Datums
CDI scale, and distance, speed and heading information. Position Formats The default position setting for the GPS 40 is latitude and longitude in degrees and minutes (hdddºmm.mmm’). You may also select degrees, minutes and seconds (hdddºmm’ss.s’’);... - Page 52 NAV & Map Units of Measure Setup The GPS 40 lets you select statute (default), nautical or metric units of measure for all speed and distance fields. To change the unit of measure: 1. Highlight the ‘units’ field and press the key.
- Page 53 Setting the value at 000 will Track Log Setup Page not prevent a track log from The track log setup page lets you manage the GPS 40’ s being recorded. tracking data. From this page, you can select whether or...
-
Page 54: Tracback Function
Reference Track Log Setup (continued) Track Log Setup To turn the track log on or off: 1. Highlight the ‘RECORD’ field and press 2. Select ‘Yes’ or ‘No’ and press . NOTE: Turning the track recording off will disable the TracBack feature. Track Criteria The stored track criteria determines how often positions are stored in the track log. - Page 55 The GRMN/GRMN setting is a proprietary format that lets you exchange information such as waypoints, routes and track logs between two GARMIN GPS devices or a PC. During data transfer, the number of packets being exchanged will be displayed on screen.
- Page 56 The RTCM/NMEA selection controls the GARMIN GBR- 21 differential beacon receiver. Once a RTCM setting has been selected, the GPS 40 will automatically try to tune the last frequency and bit rate you selected or will switch to the default frequency of 304.0 kHz with a bit rate of 100 bps if no previous beacon has been tuned.
-
Page 57: Navigation Simulator
A simulated position attempt to use the simulator mode for actual navi- may also be entered on the gation. The GPS 40 will always power up in the last position page. selected satellite mode. - Page 58 RTCMInput has Failed—DGPS data being received has been lost. You are no longer receiving the beacon signal. Searching the Sky—The GPS 40 is in searching the sky for almanac data or the unit is in AutoLocate mode.
- Page 59 RTCM Input has Failed—DGPS data being received has been lost. You are no longer receiving the beacon signal. Searching the Sky—The GPS 40 is in searching the sky for almanac data or the unit is in AutoLocate mode.
- Page 60 Map Datums Preface the GPS 40. Menu page abbreviations are listed first, fol- lowed by the corresponding map datum name and area. The default map datum for the GPS 40 is WGS 84. Adindan Adindan- Ethiopia, Mali, Easter Isld 67...
- Page 61 Introduction Appendix B Massawa Massawa- Eritrea (Ethiopia) Map Datums Preface Merchich Merchich- Morocco Midway Ast ‘61 Midway Astro ‘61- Midway Minna Minna- Nigeria NAD27 Alaska North American 1927- Alaska NAD27 Bahamas North American 1927- Bahamas (excluding San Salvador Island) NAD27 Canada North American 1927- Canada and Newfoundland NAD27 Canal Zone North Am.
- Page 62 NOTE: Alkaline batteries lose a significant amount of their capacity as temperature decreases. If you’re using the GPS 40 in below freezing temperatures, use lithium batteries for longer battery life. Extensive use of screen backlighting will significantly reduce battery life.
- Page 63 Wiring &Battery Replacement Three optional cables are available to connect the GPS 40 to an external power source or interface with another unit or PC: • Cigarette Lighter Adapter— Allows connection to a 12 volt DC cigarette lighter plug and reduces voltage to 5-8 volts DC.
- Page 64 Appendix D Accessories Preface Garmin offers a full line of accessories for the GPS 40, which are available from your local dealer or GARMIN direct. Orders may be placed Monday through Friday from 8AM-5PM CST by calling 1-800-800-1020, or by fax to 1-913-397-8282...
- Page 65 Appendix E Index Accessories ....60 Active Waypoints ....31 Active Route Page ....35 Acquiring Satellite Signals .
- Page 66 Introduction Preface Appendix E Index Satellite Status Page ..9-10, 17-19 Screen Backlighting ... . .19 Screen Contrast ....46 Setup Pages .
- Page 67 GARMIN warrants this product to be free from defects in materials and work- manship for one year from the date of purchase. GARMIN International, Inc. will at its sole option, repair or replace any components which fail in normal use. Such repairs or replacement will be made at no charge to the customer for parts or labor.
- Page 68 ® © 1996 GARMIN Corporation 1200 E. 151st Street, Olathe, KS USA 66062 GARMIN (Europe) LTD Unit 5, The Quadrangle Abbey Park Industrial Estate, Romsey, UK SO51 9AQ Part Number 190-00124-00 Rev. A...