Synology DX513 User Manual
Disk storage system
Hide thumbs
Also See for DX513:
- User manual (20 pages) ,
- Technical information (39 pages) ,
- User manual (24 pages)
Table of Contents
Advertisement
Quick Links
Download this manual
See also:
Technical Information
Advertisement
Table of Contents

Summary of Contents for Synology DX513
- Page 1 Инструкция Synology DX513 Перейти в карточку товара 8 800 775 98 98...
- Page 2 DX513 User’s Guide Syno_UsersGuide_DX513_20120727...
-
Page 4: Table Of Contents
Table of Contents Chapter 1: Get Started with DX513 Package Contents Appearance Default/Manual Switch Behavior LED Indication Table Safety Instructions Chapter 2: Set Up DX513 Tools and Parts for Hard Disk Installation Install Hard Disks Connect with Synology DiskStation Work with Synology DiskStation... -
Page 6: Chapter 1: Get Started With Dx513
Get Started with DX513 Congratulations on your purchase of Synology DX513. This product is specially designed for the storage expansion of Synology DiskStation. This user’s guide will guide you through the installation. Package Contents Before installation, please check the package contents to verify that you have received the items below. - Page 7 DS1512+, DS1812+ Supported Models (Used as independent volume: DS112, DS112+, DS212+, DS213+, DS412+, DS413) Note: 1 Please visit www.synology.com for the latest compatible models. 2 DSM needs to be upgraded to version 4.0-2240 or above. Chapter 1: Get Started with DX513...
-
Page 8: Appearance
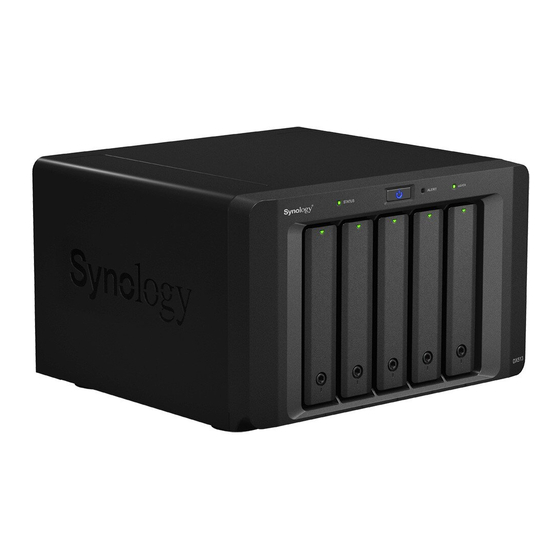
Port Article Name Location Description The POWER button is used to turn DX513 on or off. Press and hold the button for 7 seconds to shut down DX513. Note: DX513 will be turned on or off automatically when POWER Button Front the connected Synology DiskStation powers on or off. -
Page 9: Default/Manual Switch Behavior
The expansion port is used to connect any Synology Expansion Port Back DiskStation listed in the table: Supported Models. The fan is built to exhaust waste heat out of DX513. Back If the fan is not working, DX513 will “beep” every few seconds. - Page 10 Fan is functioning Solid Green Disk is ready and idle Hard Disk Flashing Green Disk is being accessed Status Solid Orange Read/write or other errors are encountered (on tray) No internal disk is found Chapter 1: Get Started with DX513...
-
Page 11: Safety Instructions
Do not use chemical or aerosol cleaners to clean it. Do not place the Synology product on a cart, table, or desk, which is not stable to avoid the product from falling over. The power cord must plug in to the right supply voltage. Make sure that the supplied AC voltage is correct and stable. -
Page 12: Chapter 2: Set Up Dx513
A screwdriver At least one 3.5” or 2.5” SATA hard disk (Please visit www.synology.com for compatible hard disk models.) Warning: If you install a hard disk that contains data, system will format the hard disk and erase all data. If you need the data in the future, please back it up before installation. - Page 13 2 Press the lower part of the hard drive tray to pop out the handle. 3 Pull the handle to remove the hard drive tray from DX513. 4 Load the hard disk in the hard drive tray. For 3.5” Hard Disk: Place the hard disk in the hard drive tray, and then tighten the screws to secure the hard disk.
- Page 14 5 Insert the loaded hard drive tray into the empty hard drive bay. Important: Make sure the tray is pushed in all the way. Otherwise, the hard disk might not be able to function properly. place. Chapter 2: Set Up DX513...
-
Page 15: Connect With Synology Diskstation
Connect with Synology DiskStation 1 Connect one end of the power cord to the power port of DX513, and the other to the power outlet. -
Page 16: Work With Synology Diskstation
2 Go to Main Menu > Storage Manager to manage DX513 for storage creation or expansion. If you want to create a new volume with DX513, click Create and follow the Volume Creation Wizard to complete the creation. Chapter 2: Set Up DX513... -
Page 17: Learn More
The data of applications (such as Photo Station and Audio Station) can be stored on DX513 only if you expand DiskStation internal volume with DX513. They will not be stored on DX513 if you create a new independent volume with it. -
Page 18: Copyright Notice
LIMITED WARRANTY AND LIABILITY Synology provides a limited warranty for its Products only to the initial person or entity that originally purchased the Product from Synology or its authorized distributor or retailer. Synology warrants that every hardware portion of the Products will be free from physical defects in material and workmanship within warranty period, or the Product will be repaired or replaced as determined solely by Synology. - Page 19 (ii) the related order for, purchase, delivery, receipt or use of any product or service from Synology, or iii) any other dispute arising out of or relating to the relationship between You and software), and/or any third party who provides products or services purchased from or distributed by Synology;...
- Page 21 P/N: 15-06D0101B1 Printed in Taiwan...
- Page 22 Synology DX513 Описание...


