Table of Contents
Advertisement
Quick Links
Advertisement
Table of Contents

Related Manuals for Synology CS407


Summary of Contents for Synology CS407
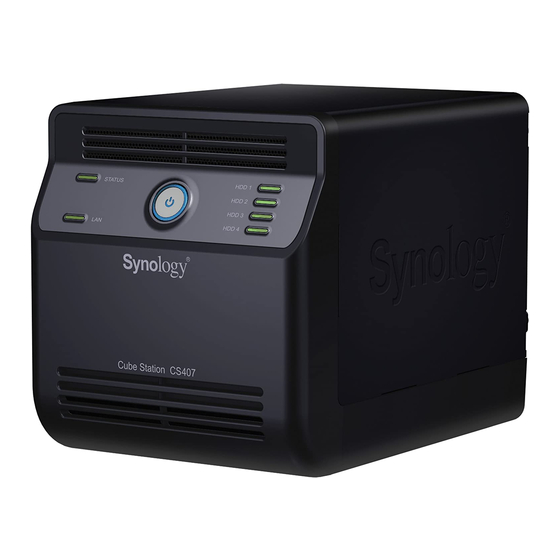
- Page 1 Cube/Disk Station CS407, CS407e, DS408 Quick Installation Guide...
-
Page 2: Safety Instructions
Please read these safety instructions carefully before use, and keep this manual in a safe place for your future reference. Keep away from direct sunlight Do keep Synology product Do not place the Synology and away from chemicals. upright. Do not lay it down product close to any liquid. -
Page 3: Package Contents
PACKAGE CONTENTS Before you begin, please check the package contents to verify that you have received the items below. Main Unit X 1 Installation CD AC power adapter 2M RJ-45 LAN cable AC power cord Assembling Kit Screws for fixing hard drive and SATA cable X 4 HDD cable X 4 case X 16... -
Page 4: Install Hard Disk
INSTALL HARD DISK Cube/Disk Station requires 3.5” SATA hard drives for installation. Refer to the following steps for details: Warning! If you use a hard disk with data on it to install, system will format the hard disk and erase all data in some cases. Please back up the data if you need it in the future. - Page 5 INSTALL HARD DISK The 4 black connectors on the mother board are for SATA cables, and the 4 white connectors are for hard disk power cables. You can see the disk identity numbers printed beside the connectors. HDD power cable SATA cable Connect the 4 hard disk power cables.
- Page 6 INSTALL HARD DISK Fix the hard disks with the 5mm screws provided. Use 2 screws on each side of the hard disk. Connect the SATA cables and the hard disk power cables to the hard disks. Please note that the longest SATA cable is for HDD 1.
- Page 7 INSTALL HARD DISK Fix the cable lock to its hole on the back cover. Make sure on the inner side of the back cover, the cable lock is hooked. Close the back cover and fix it with the four screws.
-
Page 8: Turn On Server
TURN ON SERVER Connect the AC adapter to the power port, and fix the cable to the cable lock. Then plug the power cord into a power socket. Connect the RJ-45 cable to the server and connect the other end to your switch/hub/router or notebook/desktop PC. -
Page 9: Install System Software
Windows User Insert the installation CD to your computer. Choose Set up the Synology Server on the autorun menu. Click Browse to select the “.pat” installation file in the installation CD. Follow the on-screen instructions to complete the setup process. - Page 10 INSTALL SYSTEM SOFTWARE Double click MacOSX. Double click Synology Assistant-SYNOLOGY.dmg. Double click on the automatically generated thumbnail Synology Assistant-SYNOLOGY.dmg on the desktop. Double click Synology Assistant to run the Setup Wizard.
- Page 11 Note: If you choose One-Click Setup, the admin password will be blank. CONGRATULATIONS! Server has been set up. Refer to the User’s Guide in the installation CD for advanced settings and management. For more information or online resources, please visit http://www.synology.com.
-
Page 12: Gnu General Public License
GPL Notice This Synology product uses software partially or completely licensed under the terms of the GNU GENERAL PUBLIC LICENSE. The author of the software does not provide any warranty. This does not affect the warranty for the product itself. - Page 13 GPL Notice translated into another language. (Hereinafter, translation is included without limitation in the term “modification”.) Each licensee is addressed as “you”. Activities other than copying, distribution and modification are not covered by this License; they are outside its scope. The act of running the Program is not restricted, and the output from the Program is covered only if its contents constitute a work based on the Program (independent of having been made by running the Program).
- Page 14 GPL Notice The source code for a work means the preferred form of the work for making modifications to it. For an executable work, complete source code means all the source code for all modules it contains, plus any associated interface definition files, plus the scripts used to control compilation and installation of the executable.
- Page 15 GPL Notice SERVICING, REPAIR OR CORRECTION. 12. IN NO EVENT UNLESS REQUIRED BY APPLICABLE LAW OR AGREED TO IN WRITING WILL ANY COPYRIGHT HOLDER, OR ANY OTHER PARTY WHO MAY MODIFY AND/OR REDISTRIBUTE THE PROGRAM AS PERMITTED ABOVE, BE LIABLE TO YOU FOR DAMAGES, INCLUDING ANY GENERAL, SPECIAL, INCIDENTAL OR CONSEQUENTIAL DAMAGES ARISING OUT OF THE USE OR INABILITY TO USE THE PROGRAM (INCLUDING BUT NOT LIMITED TO LOSS OF DATA OR DATA BEING RENDERED INACCURATE OR LOSSES SUSTAINED BY YOU OR THIRD PARTIES OR A FAILURE OF THE PROGRAM TO OPERATE WITH ANY OTHER PROGRAMS), EVEN IF SUCH HOLDER OR OTHER PARTY HAS...