Table of Contents
Advertisement
Quick Links
Installing the AVS 3120
This chapter explains how to install the AVS 3120 in an equipment rack, or on a table or workbench.
This chapter also provides instructions for connecting cables, AC power, and for booting the AVS 3120.
Read the installation instructions before connecting the system to the power source. Statement 1004
Warning
This chapter contains the following major sections:
Unpacking and Inspecting the AVS 3120, page 3-2
•
Installing Your AVS 3120, page 3-2
•
Connecting Cables, page 3-6
•
Connecting AC Power, page 3-7
•
Booting the AVS 3120, page 3-8
•
Establishing a Serial Console Connection, page 3-9
•
Configuring Network Settings, page 3-10
•
Setting the Time, page 3-12
•
Checking the Front Panel LEDs, page 3-13
•
Removing or Replacing an AVS 3120, page 3-14
•
Before you begin the installation, be sure you have read the Regulatory Compliance and Safety
Information for the Cisco AVS 3120 Application Velocity System document and
for Installation."
Also, you may want to familiarize yourself with the AVS software by reading the following related
documents, which you can obtain from Cisco.com:
Release Note for the Cisco Application Velocity System
•
•
Cisco Application Velocity System User Guide
OL-11805-01
Cisco AVS 3120 Application Velocity System Hardware Installation Guide
C H A P T E R
Chapter 2, "Preparing
3
3-1
Advertisement
Table of Contents

Related Manuals for Cisco AVS 3120


Summary of Contents for Cisco AVS 3120
-
Page 1: Table Of Contents
C H A P T E R Installing the AVS 3120 This chapter explains how to install the AVS 3120 in an equipment rack, or on a table or workbench. This chapter also provides instructions for connecting cables, AC power, and for booting the AVS 3120. -
Page 2: Unpacking And Inspecting The Avs 3120
Installing Your AVS 3120 Place the AVS 3120 in the desired location. You can mount it in a rack for your convenience, or place it on a solid, stable surface. If you do not plan to install the AVS 3120 in an equipment rack, proceed to “Installing the AVS 3120 on a Workbench or Tabletop”... - Page 3 • Attaching a Two-Post Rack Bracket to the AVS 3120 You may install the AVS 3120 in either a four-post rack or a two-post rack by using the two-post rack brackets included in the accessory kit. Follow these steps: Place the right-hand bracket on the right side of the AVS 3120, as shown in Figure 3-1.
- Page 4 Align the right side bracket on the AVS 3120 to the front of the rack, and then insert and tighten the two round head retaining screws to secure the AVS 3120 to the rack, as shown in Figure 3-2.
- Page 5 Installing the AVS 3120 on a Workbench or Tabletop When you install an AVS 3120 on a workbench or tabletop, ensure that the surface is clean and in a secure location and that you have complied with the following requirements: •...
-
Page 6: Connecting Cables
6.0 and greater, the other ports have different functions depending on how you configure the AVS software. For details on port assignments, see the Release Note for the Cisco Application Velocity System and the Cisco Application Velocity System User Guide. -
Page 7: Connecting Ac Power
NEC code for ampacity. A lug is not supplied with the appliance. Plug the AC power cord into the power cord receptacle at the rear of the AVS 3120 (see Figure 1-2). -
Page 8: Booting The Avs 3120
During power-up, the green status LED on the front of the AVS 3120 blinks. At this point, you are ready to configure and use the AVS 3120. Refer to following sections for information on establishing a console connection and configuring the network settings. -
Page 9: Establishing A Serial Console Connection
Establishing a Serial Console Connection Before you can configure the AVS 3120 by using the command line interface (CLI), you must establish a serial console connection to it. This requires a PC, a DB-9 to RJ-45 adapter (provided), an RJ-45 180/rollover cable (provided), and terminal emulation communication software (Hyper Terminal or equivalent). -
Page 10: Configuring Network Settings
Configuring Network Settings Configuring Network Settings After you have installed the AVS 3120, you must configure the basic network settings by using the set command in the CLI from a console connection. After the basic network settings have been configured, you can perform additional CLI configuration through the network by using an SSH connection. - Page 11 You can view the host name setting by using the show hostname command: velocity>show hostname velocity Cisco AVS 3120 Application Velocity System Hardware Installation Guide 3-11 OL-11805-01...
-
Page 12: Setting The Time
We recommend that you use an NTP time synchronization source. Note For information on using the CLI to configure the AVS 3120, refer to the Cisco Application Velocity System User Guide. For an example of using the set ntp and set date commands, refer to the previous... -
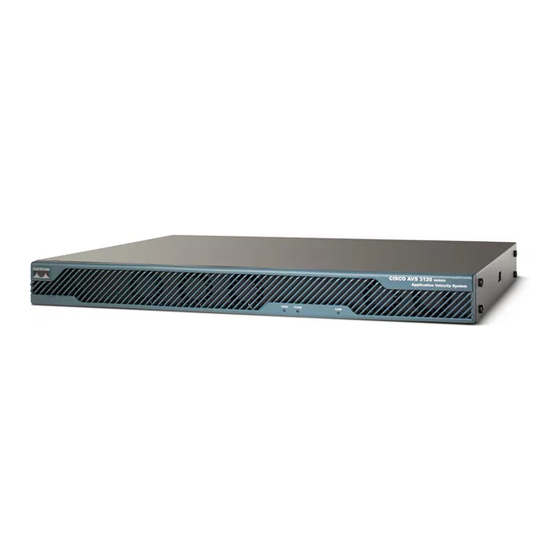
Page 13: Checking The Front Panel Leds
Installing the AVS 3120 Checking the Front Panel LEDs Checking the Front Panel LEDs When the AVS 3120 is up and operational, observe the front panel LEDs to monitor the AVS 3120 operating status. Figure 3-5 shows the location of front panel LEDs, and... -
Page 14: Removing Or Replacing An Avs 3120
Execute the poweroff command: -sh-2.05b# /sbin/poweroff Power down the AVS 3120 by turning off the power switch on the rear panel of the AVS 3120. Disconnect the power cords and network cables. Physically remove the chassis from the rack.