Table of Contents
Advertisement
Advertisement
Table of Contents

Related Manuals for Fisher & Paykel OB60SL9


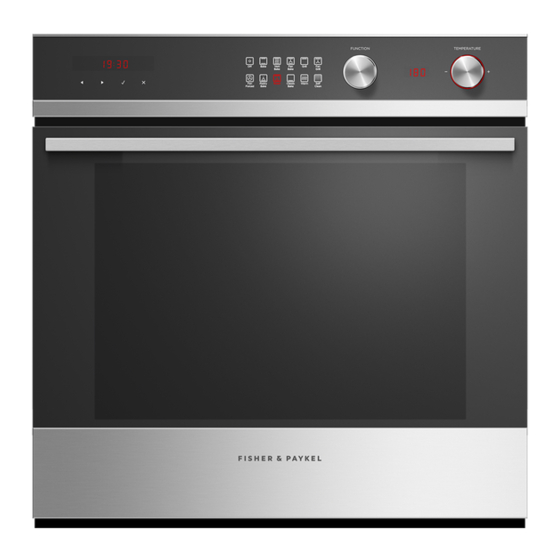
Summary of Contents for Fisher & Paykel OB60SL9
-
Page 1: User Guide
Built-in Oven User guide OB60SL9 & OB60SL11 models NZ AU GB IE... - Page 3 This user guide is an accompaniment to your ‘Quick start guide’ which is included with your oven. For operating instructions, and to get going with your new oven see your ‘Quick start guide’ . If you no longer have your ‘Quick start guide’ , you can download it from our local website, listed on the back cover.
-
Page 5: Table Of Contents
Contents Safety and warnings Cooking guide Oven functions Cooking charts Automatic cooking Using the meat probe Using the rotisserie kit User preference settings Sabbath setting Care and cleaning Using the Self Clean function Troubleshooting Alert codes Warranty and service Important! SAVE THESE INSTRUCTIONS The models shown in this user guide may not be available in all markets and are subject to change at any time. -
Page 7: Safety And Warnings
Safety and warnings Your oven has been carefully designed to operate safely during normal cooking procedures. Please keep the following safety instructions in mind when you are using it: WARNING! Electrical Shock Hazard Turn the oven off at the wall before replacing the oven lamp. - Page 8 Safety and warnings WARNING! Fire Hazard Follow the instructions on starting a Self Clean cycle carefully. Items made from combustible materials (for example: wood, fabric, plastic) may catch fire if left in the oven during a Self Clean cycle. Do not place aluminium foil, dishes, trays, water or ice on the oven floor during cooking, as doing so will irreversibly damage the enamel;...
- Page 9 Safety and warnings WARNING! Hot Surface Hazard Accessible parts may become hot when in use. To avoid burns and scalds, keep children away. Use oven mitts or other protection when handling hot surfaces such as oven shelves or dishes. Use care when opening the oven door. Let hot air or steam escape before removing or replacing food.
- Page 10 Safety and warnings WARNING! Cut Hazard Take care - some edges are sharp. Failure to use caution could result in injury or cuts.
-
Page 11: Important Safety Instructions
Safety and warnings Important safety instructions To reduce the risk of fire, electrical shock, injury to persons or damage when using the oven, follow the important safety instructions listed below: Read all the instructions before using the oven. Use the oven only for its intended purpose as described in these instructions. - Page 12 Safety and warnings Important safety instructions Children of less than 8 years old must be kept away from the appliance unless continuously supervised. This appliance can be used by children aged from 8 years and above, and persons with reduced physical, sensory or mental capabilities or lack of experience and knowledge, if they have been given supervision or instruction concerning the use of the...
- Page 13 Safety and warnings Important safety instructions Use only dry oven mitts or potholders. Moist or damp potholders on hot surfaces could result in burns from steam. Do not let potholders touch hot areas or heating elements. Do not use a towel or a bulky cloth for a potholder.
- Page 14 Safety and warnings Important safety instructions Caution: Hot air can blow from the vent at the top of the oven as part of the oven’s cooling system. Placement of oven shelves: always position shelves in the desired location while the oven is cool (before preheating).
- Page 15 Safety and warnings Important safety instructions Do not use a steam cleaner to clean any part of the oven. Before starting a Self Clean cycle, remove oven shelves, side racks, and all other cookware/ utensils, and wipe up large food spills or grease deposits.
-
Page 16: Cooking Guide
Cooking guide Congratulations on your new purchase. Your Fisher & Paykel oven has a number of features to make cooking a great experience for you: a wide choice of oven functions a convenient Self-Clean function (some models only) – see ‘Using the Self Clean function’ intuitive controls and displays illuminated halos around the dials for visual feedback Before you start... - Page 17 Cooking guide BAKING For best results when baking, always pre heat your oven. The halo will turn from red to white when the preset temperature is reached. Do not open the door until at least ¾ of the way through cooking. Make sure cake pans do not touch each other or the sides of the oven.
- Page 18 Cooking guide GRILLING This is a healthier alternative to frying. Always grill with the oven door completely shut. If you use glass or ceramic pans, be sure they can withstand the high temperatures of the grill. To avoid piercing the meat and letting juices escape, use tongs or a spatula to turn the meat halfway through cooking.
-
Page 19: Oven Functions
Oven functions Important! Depending on your model, you may only have some of these functions. Bake upper outer and lower elements Heat comes from both the upper and lower elements. The fan is not used in this function. Ideal for cakes and foods that require baking for a long time or at low temperatures. This function is not suitable for multi-shelf cooking. - Page 20 Oven functions Fan Bake fan plus upper outer and lower elements The oven fan circulates hot air from the top outer and the lower elements and distributes it around the oven cavity. Food cooked tends to brown more quickly than foods cooked on the traditional Bake function. You may need to decrease the time from that recommended in traditional recipes.
- Page 21 Oven functions Fan Grill fan plus upper inner and outer elements This function uses the intense heat from the elements for top browning and the fan to ensure even cooking of foods. Use in combination with separately purchased Rotisserie kit. The slowly rotated food is basted continuously in its own juices, making it tender on the inside and well browned and full of flavour on the outside.
- Page 22 Oven functions Pastry Bake fan plus lower element The fan circulates heat from the lower element throughout the oven. Excellent for cooking pizza as it crisps the base beautifully without overcooking the topping. Ideal for foods such as sweet and savoury pastry foods and delicate foods that require some top browning eg frittata, quiche.
- Page 23 Oven functions this is not a cooking function Provides a constant low heat of less than 90°C. Use to keep cooked food hot, or to warm plates and serving dishes. To Warm reheat food from cold, use another oven function to heat the food piping hot and only then change to Warm, as this function alone will not bring cold food up to a high enough temperature to kill any harmful bacteria.
-
Page 24: Cooking Charts
Cooking Charts Shelf positions are counted from the base up (1 is the lowest, 6 is the highest). Position shelves before you turn the oven on. For best results preheat the oven to the required temperature. The halo on the temperature dial will change from red to white when the oven has reached the selected temperature. - Page 25 Cooking Charts The information in these charts are guidelines only. Refer to your recipe or the packaging and be prepared to adjust the cooking times and settings accordingly. Shelf Recommended Temp (°C) Time (mins) Function positions Fan Bake 180-190 13-17 Fan Forced 3 and 5 160-170...
- Page 26 Cooking Charts SAVOURY Food Shelves Pies Chicken / Steak / Mince Single Sausage Rolls Single Meat Loaf Single Pizza Single Lasagne Single Quiche Single Potatoes Traditional Baked Single Frittata Grill to fi nish Single Casseroles Single Oven meals Single ROASTING Food Shelves Rare...
- Page 27 Cooking Charts Shelf Recommended Temp (°C) Time (mins) Function positions Pastry Bake 190-195 30-40 Pastry Bake 190-195 30-40 Bake 175-180 55-65 Bake 225-250 15-20 Fan Bake 175-180 45-50 Pastry Bake 180-200 30-40 Vent Bake 175-190 40-50 Pastry Bake 170-180 30-45 Vent Bake 170-190 55-70...
- Page 28 Cooking Charts GRILLING Food Shelves Rare Single Steak Medium Single Beef Burgers Single Meatballs Single Medium Single Lamb Chops Well done Single Chops (well done) Single Pork Ham steak Single Bacon Single Chicken Boneless pieces Single Sausages Single Fillets Single Fish Whole Single...
- Page 29 Cooking Charts Shelf Recommended Temp (°C) Time (mins) Function positions Grill 8-10 Grill 10-15 Grill 12-15 Grill 12-15 Grill 15-20 Grill 20-25 Grill 15-20 Grill 15-20 Grill Fan Grill 175-190 30-50 Grill 10-15 Fan Grill 200-220 8-12 Fan Grill 200-220 15-20 Grill 8-12...
-
Page 30: Automatic Cooking
Automatic cooking You can set the oven to automatically turn on later, cook for a preset time (cooking time), then automatically turn off at a preset stop time. See the example and instructions below (steps 1 to 7). If you start cooking manually and only want the oven to turn off automatically after a set cooking time: simply set the cooking time following steps 1 to 3 below and selecting a function and temperature. - Page 31 Automatic cooking Select function and temperature Select a function. Adjust the temperature. The function halo will stop flashing. When automatic cooking is set The oven and the lights will stay off, the halos will be unlit, but your oven is now set for automatic cooking.
- Page 32 Using the meat probe (some models only) Using the meat probe Use your meat probe to accurately judge when your meat is perfectly cooked. You can use the probe with any function. Important! Do not use the meat probe when using the rotisserie kit (the cable could become entangled and damaged). Select the oven function and temperature.
-
Page 33: Using The Meat Probe
Using the meat probe (some models only) Press the right scroll button 4 times Use the scroll buttons to set the and the meat probe indicator will come required meat temperature (eg 75 on and the display will show Press the select button to confirm. -
Page 34: Using The Rotisserie Kit
Using the rotisserie kit Important! The rotisserie kit itself is not supplied but can be ordered separately. The kit is available from the nearest Fisher & Paykel Authorised Service Centre, Customer Care or through our local website listed on the back cover. The product number for the rotisserie kit is 85109. Do not use the meat probe when using the rotisserie kit (the cable could become entangled and damaged). - Page 35 Using the rotisserie kit Fastening screw Skewer Handle Fork Secure the meat. Important! Take care, the forks are sharp! Slide one fork on to the skewer (prongs facing inward) and tighten the fastening screw to secure in place. Carefully slide the meat onto the skewer until it rests firmly against the fork. Fit the second fork, ensuring the meat is held firmly in place.
- Page 36 Using the rotisserie kit Select a function. For best results we Press the right scroll button until the recommend using Fan Grill. rotisserie indicator comes on. Press the select button to confirm. The rotisserie icon will glow steadily. Shaft Rotisserie Telescopic sliding Drive hole shelf set on shelf...
- Page 37 Using the rotisserie kit Set the temperature. We recommend around 190 °C. Cancelling the rotisserie You may turn off the rotisserie function without turning off the oven. Press the right scroll button and scroll through the indicators until the rotisserie indicator comes on again.
- Page 38 User preference settings You can set your oven to: display the temperature in degrees Celsius or Fahrenheit give audio feedback (tones and beeps) or operate quietly display time as 12-hr or 24-hr operate with the display off have its lights on or off during cooking operate in Sabbath setting (see ‘Sabbath setting’...
-
Page 39: User Preference Settings
User preference settings Press the right scroll button to scroll Press the select button to save the new through the options for that particular option . setting. Refer to the table below. For all options except ‘Display off’ : press the cancel button to quit the user preference menu. -
Page 40: Sabbath Setting
Sabbath setting This setting is designed for religious faiths that observe a ‘no work’ requirement on the Sabbath. While your oven is in Sabbath setting The display, dial halos and indicators will be unlit, the buttons will be unresponsive. No tones or beeps will sound. No alert codes or temperature changes will be displayed. - Page 41 Sabbath setting Press the right scroll button to scroll to Press the right scroll button to scroll to the Sabbath setting. the ‘Sabbath on’ option. Press the select button to select the Press the select button to activate the Sabbath setting. The default option is new option.
-
Page 42: Care And Cleaning
Care and cleaning Manual cleaning ALWAYS NEVER Before any manual cleaning or Never use a steam cleaner. maintenance, first wait for the oven to cool Never store flammable substances in the down to a safe temperature to touch, then oven. turn its power supply off at the wall. -
Page 43: Manual Cleaning
To clean light soiling off the surfaces: ‘self-cleaning’ because their panels Wipe with a damp cloth and a special enamel breaks down solution of hot water and mild (OB60SL9 greasy splatters when the detergent or an ammonia-based models only) oven is used for ‘non-greasy’ cleaner. - Page 44 Important! Oven cavity Remove everything from the oven: To prevent soiling from all shelves and trays, the side racks, becoming ‘baked on’ and (OB60SL9 the catalytic panels. stubborn, we recommend models only) Remove the oven door (see removing any easy-to-reach instructions on following pages).
- Page 45 Clean cycle. They will become discoloured or damaged. Clean with a solution of mild detergent Oven seal and hot water (OB60SL9 models only) Oven seal Do not clean this part. (OB60SL11 models only) Wipe with a damp cloth.
- Page 46 Care and cleaning Removing the side racks and catalytic panels (some models only) Important! Always turn off the oven at the wall first. Ensure the oven has cooled down completely before starting. Remove all the shelves Remove all the shelving, taking special care with the telescopic sliding shelves. To remove a telescopic sliding shelf, grip it at the front (making sure you are gripping the wire shelf and the sliding frame together), lift upwards and pull it out of the oven.
- Page 47 Care and cleaning Remove the catalytic panels Once you have removed the side racks, pull the catalytic panel toward the centre of the oven, until it is clear of the lower locating nut. Catalytic panel Refitting the side racks and catalytic panels Once you have cleaned the side racks and catalytic panels, follow the instructions in the ‘Quick start guide’...
- Page 48 Holding the replacement bulb in a soft cloth or tissue (touching the bulb will reduce its life span) insert it into the socket. Replace the glass cover pushing it firmly into place. Replace the catalytic panels (OB60SL9 models only), side racks and oven shelves . Prise the cover off using these notches...
- Page 49 Care and cleaning Removing and refitting the oven door Important! Take care, the oven door is heavy! To remove the door Open the levers fully. Open the door fully. Lever Close the door until it connects Hold the door. with the top of both levers To refit the door Disengage the hinges and remove the door.
- Page 50 Care and cleaning Removing the door glass panes for cleaning Important! Make sure you follow the precautions and instructions below very carefully. Replacing the glass panes and the door incorrectly may result in damage to the oven and may void your warranty. Take care, the oven door is heavy (11 kg).
- Page 51 Care and cleaning Remove the inner pane Glass retainer Press in on both tabs to release the Glass Lift the top of the pane slightly. retainers. Note: Only lift the pane slightly. Angling Slide both Glass retainers away from the the pane too much may result in damage pane.
- Page 52 If you are experiencing difficulties replacing the panes, remove them and start the process again from the beginning. If this still does not help, call Customer Care. Replace the middle pane (OB60SL9 models only) Bottom Clamp (lower...
- Page 53 Care and cleaning Replace the inner pane Glass retainer (OB60SL9 models only) Top Clamp (upper notch) Lower the pane onto the upper notch on Ensure the pane is the right way up (ie the logo the top clamps at the top of the door.
- Page 54 Using the Self Clean function (OB60SL11 models only) During the pyrolytic Self Clean cycle the extremely high temperature burns off and breaks down grime and grease deposits. All that is left is a small amount of grey ash that you can easily remove. There is a choice of Self Clean cycles: - Self Clean (3 hours) (for normal soiling).
-
Page 55: Using The Self Clean Function
Using the Self Clean function (OB60SL11 models only) Select the Self Clean function. The display will flash Press the right scroll button once for the Self Clean cycle - the display will flash , or Press the right scroll button a second time for the Light Self Clean cycle - the display will flash The temperature indicator will be blank, as... - Page 56 Using the Self Clean function When a Self Clean cycle has finished The oven will: emit a long tone automatically turn off automatically unlock the door. In a few seconds, the display will show the time of day. You need to: wait for the oven to cool down completely remove the grey ash with a small brush or damp cloth wipe out the oven with a clean damp cloth...
-
Page 57: Troubleshooting
Troubleshooting Troubleshooting chart If there is a problem, check the chart below to see if you can fix it. If the problem cannot be fixed or persists, call your Authorised Repairer or Customer Care. Problem Possible causes What to do General The oven does not work. - Page 58 Troubleshooting Problem Possible causes What to do General I can feel hot air blowing This is normal. For safety reasons the cooling out of the vents after I fans will continue to run even have turned the oven off. when you have turned the function dial to ‘Off’...
- Page 59 Troubleshooting Problem Possible causes What to do General The displays work, The oven is in ‘Demo’ mode. Call Customer Care. and the function and temperature dials halos come on but the oven does not heat up. The oven sounds a You are trying to use a meat probe You cannot use the meat probe negative tone...
- Page 60 Troubleshooting Problem Possible causes What to do Self Clean function During a Self Clean This is normal: the oven’s cooling fans operate at their highest speed. cycle, the oven is louder than usual. The meat probe mode has been Ensure the meat probe is The display shows selected but the meat probe is not plugged into the socket.
- Page 61 Troubleshooting Problem Possible causes What to do Self Clean function I have cancelled a Self This is normal: if the function dial Wait until the cool-down phase Clean cycle but cannot halo is unlit, you have has finished. A long tone will use the oven: successfully cancelled the sound and the oven door will...
-
Page 62: Alert Codes
Alert codes If there is a problem, the oven will: automatically suspend all oven functions beep five times display an alert code. Important! Do not turn off the mains power supply to the oven (wall switch) if you get an alert code, unless the instructions in the chart following specifically instruct you to. - Page 63 Alert codes Alert code Possible causes What to do The oven has overheated. Allow the oven to cool down. Once the oven has cooled down and the door has unlocked, the alert code will disappear. You can now use the oven again.
-
Page 64: Warranty And Service
Warranty and service Before you call for service or assistance ... Check the things you can do yourself. Refer to the installation instructions and your user guide and check that: your product is correctly installed. you are familiar with its normal operation. If after checking these points you still need assistance or parts, please refer to the Service &... - Page 68 www.fi sherpaykel.com Copyright © Fisher & Paykel 2013. All rights reserved. The product specifications in this booklet apply to the specific products and models described at the date of issue. Under our policy of continuous product improvement, these specifications may change at any time. You should therefore check with your Dealer to ensure this booklet correctly describes the product currently available.