Table of Contents
Advertisement
Advertisement
Table of Contents
Troubleshooting

Related Manuals for Horizon Fitness DT680


Summary of Contents for Horizon Fitness DT680
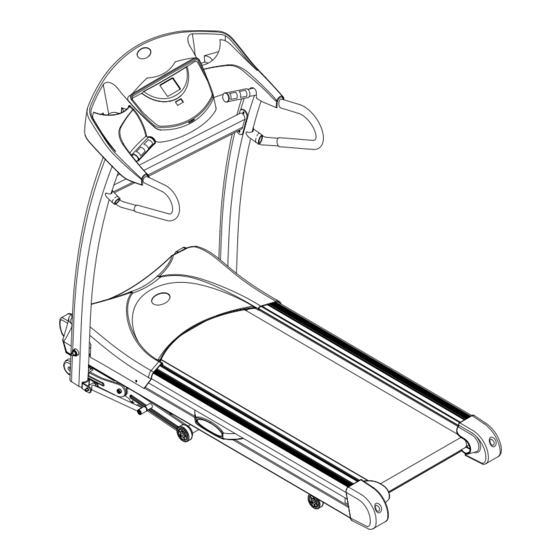
- Page 1 DIGITAL SERIES FOR MODEL : DT680 TRE ADMILL US ER ’S GUID E...
-
Page 3: Table Of Contents
CONGRATULATIONS and THANK YOU for your purchase of this Digital Series treadmill! Whether your goal is to win races or simply enjoy a fuller, healthier lifestyle, a Digital Series treadmill can help you attain it – adding club-quality performance to your at-home workouts, with the ergonomics and innovative features you need to get stronger and healthier, faster. -
Page 4: Important Precautions
Read all instructions before using this treadmill. It is the responsibility of the owner to ensure that all users of this treadmill are adequately informed of all warnings and precautions. If you have any questions after reading this manual, contact Customer Tech Support at the number listed on the back panel of this manual. - Page 5 Failure to comply will void the warranty. • Do not use treadmill in any location that is not temperature controlled, such as but not limited to garages, porches, pool rooms, bathrooms, car ports or outdoors. Failure to comply may void the warranty.
-
Page 6: Assembly
Never grab hold of any portion of the incline frame and attempt to lift or move the treadmill. FAILURE TO FOLLOW THESE INSTRUCTIONS COULD RESULT IN INJURY! Before proceeding, find your treadmill’s serial number... - Page 7 5 mm Allen Wrench 6 mm T-Wrench PARTS INCLUDED 1 Safety Key 1 Console Assembly (located under treadmill deck) 1 Power Cord 3 Hardware Bags 1 Support Bar If you have questions or if there are any missing parts, contact Customer Tech Support.
- Page 8 * NOTE: If the straps have been removed before completing step 1-D and the linkage arms can not be aligned, refer to the TROUBLESHOOTING section (page 26) in order to restore the treadmill to its proper position. DO NOT CUT STRAPS UNTIL STEP 1-E!* cardboard packaging that is not beneath the treadmill.
- Page 9 A S S E M BLY ST E P 2 HARDWARE BAG 2 CONTENTS : LOCK WASHER (C) BOLT (B) ARC WASHER (D) * Be sure to tighten bolts after all are lined up. ASSEMBLED IN STEP 2-D Open HARDWARE BAG 2. With running deck in lowered position, place CONSOLE on upright masts.
- Page 10 A S SE MB LY S T E P 3 HARDWARE BAG 3 CONTENTS : SUPPORT BAR A S SE MB LY S T E P 4 CONSOLE POST HANDLE BAR COVER A Open HARDWARE BAG 3. B Align SUPPORT BAR with holes C Insert 1 BOLT (E), 1 SPRING D Tighten all 4 BOLTS (E).
- Page 11 ARC WASHER (K) D Repeat on other side. SCREW (J) Connect power plug to the treadmill and connect the cord to a power outlet. The on/off switch is located next to the power cord. Flip this switch to the ‘on’ position, so that the switch is lit.
-
Page 12: Before You Begin
SAFETY KEY Your treadmill will not start unless the safety key is placed in position. Attach the clip end securely to your clothing. This safety key is designed to cut the power to the treadmill if you should fall. Check the operation of the safety key every 2 weeks. -
Page 13: Proper Usage
PROPER USAGE Your treadmill is capable of reaching high speeds. Always start off using a slower speed and adjust the speed in small increments to reach a higher speed level. Never leave the treadmill unattended while it is running. When not in use, remove the safety key, turn the on/off switch to off and unplug the power cord. -
Page 14: Tensioning The Running Belt
CAUTION: Running belt should NOT be moving during tensioning. Over-tightening the running belt can cause excessive wear on the treadmill as well as its components. Never over-tighten the belt. If you can feel a slipping sensation when running on the treadmill, the running belt must be tightened. -
Page 15: Treadmill Operation
READOUT: Tracks Fat, Calories & Protein levels expended during workouts. ™ C) STOP: Press to pause/end your workout. Hold for 3 seconds to reset the treadmill. D) START: Simply press to begin exercising or starts your program. E) ENTER: Used to select Program, Level and Time. Press during workout to change display readouts. - Page 16 M O N IT OR DI S PL AY SPEED • Shown as MPH. Indicates how fast your walking or running surface is moving. TIME • Shown as Minutes:Seconds. View the time remaining or the time elapsed in your workout. INCLINE •...
- Page 17 G ETTIN G S TA R T ED / S EL EC T I N G A P ROG RA M Check to make sure nothing is on or will hinder the movement of the treadmill. Plug in the power cord and turn the treadmill ON.
- Page 18 Allows ‘On The Fly’ manual SPEED and INCLINE changes. Time-based goal. NOTE: After 99 minutes of constant use the treadmill will shut down. You must re-start the treadmill to continue. P RO G RAM : I NT E R VA L S Walk or run a series of alternating SPEED levels.
- Page 19 PR OG R A M: W E I GH T L O S S Challenges with various combinations of hills and valleys (INCLINE & SPEED levels). Time-based goal with 10 difficulty levels to choose from. WEIGHT LOSS PROGRAM SEGMENTS (all segments last 30 seconds) WARM-UP Elevation Level 1...
- Page 20 CUSTOM 2 THR ZONE 1 PROGRAM: THR zONE THR ZONE 2 Automatically adjusts incline to maintain your Target Heart Rate. Perfect for simulating the intensity of your VALLEY favorite sport or everyday activity. Time-based goal. TOUR Once the THR zONE program has been chosen, press ENTER. Choose a TARGET HEART RATE using the SPEED ARROW KEYS and press ENTER.
-
Page 21: Conditioning Guidelines
HOW HARD? (Intensity of Workouts) How hard you workout is also determined by your goals. If you use your treadmill to prepare for a 5K run, you will probably work out at a higher intensity than if your goal is general fitness. Regardless of your long term goals, always begin an exercise program at low intensity. - Page 22 TA R G ET H EA R T R AT E zO N E C HA RT What is Target Heart Rate zone? Target Heart Rate Zone tells you the number of times per minute your heart needs to beat to achieve a desired workout effect.
-
Page 23: Stretching
STRETCHING STRETCH FIRST Before using your product, it is best to take a few minutes to do a few gentle stretching exercises. Stretching prior to exercise will improve flexibility and reduce chances of exercise related injury. Ease into each of these stretches with a slow gentle motion. - Page 24 TI P S WARM UP The first 2 to 5 minutes of a workout should be devoted to warming up. The warm-up will limber your muscles and prepare them for more strenuous exercise. Make sure that you warm-up on your product at a slow pace.
- Page 25 W E E K LY L O G S H EE T S W EEK # D AT E DI S TA N CE S UND AY M ON D AY TUE S D AY W ED N ES DAY THU R SD AY F RIDAY S ATU R D AY...
- Page 26 W E E K LY L O G SH EETS W EEK # D AY DAT E D I STA NC E SUN DAY MO N DAY T UE S DAY W E D NE S DAY T HU RS DAY FRI D AY SAT U R DAY W EEKLY TO TALS :...
- Page 27 MO N TH LY L O G SH E ETS M ON T H W EEK # DIS TA NCE M ON T HLY TOTA LS : M ON T H W EEK # DIS TA NCE M ON T HLY TOTA LS : M ON T H W EEK # DIS TA NCE...
-
Page 28: Troubleshooting & Maintenance
WHEN SHOULD I BE WORRIED ABOUT A NOISE? As long as the sounds your treadmill makes are no louder than a normal conversational tone of voice, it is considered normal noise. -
Page 29: Troubleshooting - Heart Rate
• Date of Purchase (receipt or credit card statement) In order for Customer Tech Support to service your treadmill they may need to ask detailed questions about the symptoms that are occurring. Some troubleshooting questions that may be asked are: •... -
Page 30: Lubrication
• Inspect the power cord. If the power cord is damaged, contact Horizon Fitness. • Make sure the power cord is not underneath the treadmill or in any other area where it can become pinched or cut. • Check the tension and alignment of the running belt. Make sure that the treadmill belt will not damage any other components on the treadmill by being misaligned. -
Page 31: Limited Warranty
All repairs attempted by you on your fitness equipment are undertaken AT YOUR OWN RISK and Horizon Fitness shall have no liability for any injury to the person or property arising from such repairs. - Page 32 C o t t a g e G r o v e , W I 5 3 5 2 7 T e l : 1 . 8 0 0 . 2 4 4 . 4 1 9 2 DT680. Rev. 1.1 | © 2006 Horizon Fitness Products | Designed & Engineered in the U.S.A. | Made in China...