Table of Contents
Advertisement
Advertisement
Table of Contents

Related Manuals for Horizon Fitness Horizon T81


Summary of Contents for Horizon Fitness Horizon T81
- Page 1 TREADMILL USER'S GUIDE...
-
Page 2: Contact Information
CONGRATULATIONS and THANK YOU foryour purchaseof this HorizonSeriestreadmill! Whether your goal is to win races or simply enjoy a fuller, healthier lifestyle, a Horizon Series treadmill can help you attain it- adding club-quality performance toyour at-home workouts, with the ergonomics and innovative features you need to get stronger and healthier, faster. -
Page 3: Grounding Instructions
SAVE THESE I NSTRUCTIONS Read all instructions before using this treadmill. Whenusing an electrical product, basic precautions should alwaysbe followed,including the following: Readaft instructions beforeusing this treadmill. It is the responsibilityof the ownerto ensurethat aft usersof this treadmill are adequatelyinformed of aft warnings and precautions.If you haveany questionsafter readingthis manual, contact CustomerTech Supportat the number listed on the backpanel of this manual GROUNDING I NSTRUCTIONS... -
Page 4: Operation
• Never use the treadmill before securing the safety tether clip toyour clothing. • Ifyou experience any kind of pain, including but not limited to chest pains, nausea, dizziness, or shortness of breath, stop exercising immediately and consult your physician before continuing. •... - Page 5 IMPORTANT.. READTHESE SAFETY INSTRUCTIONS BEFORE USE! During the assembly process of the treadmill there are several areas that special attention must be paid. It is very important to follow the assembly instructions correctly and to make sure aft parts are firmly tightened.
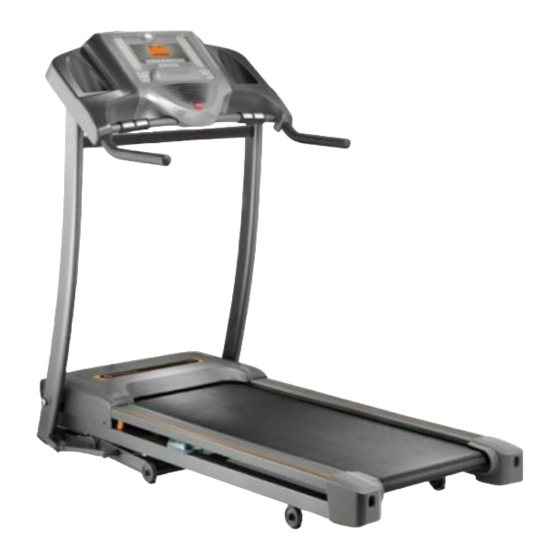
- Page 6 READING R ACK CONSOLE (T83SHOWN) MP3-1N JACK TOUCH PAD PANEL SPEAKERS (T83ONLY) HEADPHONEJACK ON/OFF SWITCH SAFETY KEYPLACEMENT CIRCUIT BREAKER CONSOLE MAST MOTOR COVER FOOT LOCK LATCH RUNNING BELT/RUNNING D ECK SIDERAIL TRANSPORT WHEEL _ ROLLER E ND CAP AIRCELL REAR ROLLER ADJUSTMENT BOLTS 4 mm Allen Wrench...
- Page 7 NOTE= D uring each assembly step, ensure that ALL nuts and bolts are in place and partially threaded in before completely tightening any ONEbolt. NOTE:A light application of grease may aid in the installation of hardware. Any grease, such as lithium bike grease is recommended. I--h_RD_S_RE B_O _c_Hrl_z_, j BOLT ( A)
- Page 8 FLAT W ASHER WAVY W ASHER 27mm 29ram BOLT ( D) Qty: 1 Qty: 1 Qty: 1 MAST MAINFRAME CONSOLE CABLES BOLT (B) ELEVATION FRAME CONSOLE CABLES A. PuffLEAD WIREthroughRIGHT CONSOLE MASTAfter puffing the LEAD WIREthrough the mast, the top of the CONSOLE CABLES s houldbe locatedat the top of the movethe treadmill from the box mast.
- Page 9 BOLT (G) SPRING WASHER (H) FLAT W ASHER (B) 20mm 15mm 20 mm Qty: 4 Qty: 4 Qty: 4 >CONSOLE C ABLE i_ I _ i_ii CONSOLE MAST ÷ FLAT WASHER (B) SPRING WASHER ( H) A OpenHARDWARE BAG3. B Withrunningdeckin loweredposition, place CONSOLE on the consolemasts.Align the bracketsthat are underneaththe consolewith the top holesof the consolemasts.
- Page 10 15 mm BOLT ( I) Qty: 4 BOLT(i) OpenHARDWARE B AG4. Align SUPPORT B ARwith holesin CONSOLE MASTS. InsertBOLTS (I) into all 4 holesof the SUPPORT B AR. NOTE: L ookinto holesin the right mast beforeinserting bolts to avoidpinching cables. D.
- Page 11 IIIRBI#IR£III 5 {I'0R[£#_'_ : i 12 rnm SET SCREW (l) Qty: 4 / ....SET SCREWS ( J) HANDLEBARS A OpenHARDWARE B AG5. B AttachLEFTHANDLEBAR to CONSOLE using 2 SETSCREWS ( J). C Repeaton otherside. Connectpower pluE to the treadmill POWER SWITCH and connect the cord to a power outlet.
-
Page 12: Location Ofthe Treadmill
CONGRATULATIONS! on choosing your treadmill. You've takenan important step in developingand sustaining an exerciseprogram! Your treadmill is a tremendouslyeffective tool for achievingyour personal fitness goals. Regularuseof your treadmill can improvethe quality ofyour life in so many ways. HERE ARE JUST A FEW OFTHEHEALTH BENEFITS O FEXERCISE: •... -
Page 13: Proper Usage
PROPER USAGE Your treadmill is capableof reaching high speeds.Alwaysstart off using a slowerspeedand adjust the speedin srnafl incrementsto reach a higher speedlevel Neverleave the treadmill unattendedwhile it is running. When not in use, removethe safety key,turn the on/off switch to off and unplug the powercord. Makesure to follow the MAINTENANCE schedulelocatedon page34 in this manual. -
Page 14: Tensioning T Herunning Belt
TENSIONING T HERUNNING BELT The running belt has been properly adjusted at the factory before it was shipped. At times the belt can moveoff-center during shipment. CAUTION: R unning belt should NOT be moving during tensioning. Over-tightening the running belt can cause excessivewear on the treadmill as well as its components. - Page 15 i_ I : Note: Thereis a thin protective sheetof clear plastic on the overlayof the consoleand should be removed. A) MONITOR DISPLAY: Speed,Time,Pulse,Distance,Incline, Caloriesand ProgramProfiles. B) STOP: P ressto pause/endyour workout.Hold for 3 secondsto reset the treadrni//. C) START/PAUSE: Simplypress to begin exercising;press again to pauseyour workout. D) ENTER/PROGRAM SETTING KEYS: P ressto adjust Time,Incline, Speedand Level.
- Page 16 r,_;*0 t3"U-I 000000000 ||0000|000| 0000000000000 0000000000000 SPEED • Shown as MPH. Indicates how fast your walking or running surface ismoving. TIME • Shown as Minutes: Seconds. View the time remaining or the time elapsed in your workout. PULSE • Shown as Beats Per Minute. Used to monitor your heart rate (displayed when contact is made with both pulse grips).
-
Page 17: Select A Program
Checkto makesure nothing will hinderthe movement o f the treadmill. Plug in the powercordand turn the treadmill ON. Standon the side rails of the treadmill. Attach the safetykeyclip topart ofyour clothing. Insertthe safetykeyinto the safetykeyholein the console. Youhavetwo options to start your workout: QUICK START UP Simplypress the START keyto begin workingout. - Page 18 ¸¸4¸¸ Allows 'On TheFly'manual SPEED and iNCLINE changes.Time-basedgoal. { :2L ;¸¸¸¸¸¸¸¸ ¸¸¸¸¸¸ ¸¸¸¸¸¸¸¸¸ ¸¸¸¸¸¸ ¸¸¸¸¸¸ L?LL?L?/ Walkor run a series of alternating SPEED levels. Time-based goal with 10 difficulty levels to choosefrom. INTERVALS 1 PROGRAM S EGMENTS (Peak segments last 30 seconds, valley segments last 90 seconds) 2:00 2:00 Levell...
- Page 19 i_. ¸-._._U_._,_._,,7._e_._,7_.,_ ............. _< CROOR MWEJOHT L OSSf Challengeswith variouscombinations of hills and valleys (INCLINE& SPEED levels). Time-basedgoal with 10 or 12 difficulty levels to choosefrom. WE/GHT LOSSI PROGRAM SEGMENTS ( all segmentslast 30 seconds) Elevation 015' LevelI Speed LO ' _ 1,5 ,evat, onO0...
- Page 20 ¸¸4¸¸ WEIGHT LOSS 2 PROGRAM SEGMENTS - Non-repeating segments.Dividesworkouttime bynumberof segments. ' i2 Elevation 0,0 ' LevelI Speed Elevation 010 ' Level2 Speed 3.,5 4.,5 Elevation Level3 Speed Elevation Level4 Speed ' 2,6 4.,5 5.,5 ,5.0 Elevation Level5 Speed 5.,5 ,5.5 ,5.0 Elevation...
- Page 21 ¸sE L!!!I ¸! !!!I! ¸L !i! !L LI! !!LL!L!!!I! i , Simulates various INCLINES and yardages for holes on a golf course, with 4 tee-off boxes and 9 or I8 holes to choose from. Distance-basedgoal. GOLF COURSE P ROGRAM SEGMENTS HOLE HUMBER: Redtee...
- Page 22 ¸¸4¸¸ Letsyou create and reusea perfect workoutfor you with specific speed,incline and time combination. Theultimate in personalprogramming. Time-basedgoal. I. Oncethe CUSTOM programhas beenchosen,press ENTER. 2.Choose thedesired TIMEusing the PROGRAM SETTING KEYSand press ENTER. Choosethe desiredSPEEDfor all 15 segmentsusing the ARROW KEYS and press ENTER.
- Page 23 ALWAYS C ONSULT Y OUR PHYSICIAN B EFORE BEGINNING A NEXERCISE PROGRAM. HOW OFTEN? (Frequency o f Workouts) The American Heart Association recommends that you exercise at least 3 to 4 days per week to maintain cardiovascular fitness. If you have other goals such as weight or fat loss, you will achieve your goal faster with more frequent exercise.
- Page 24 ¸¸4¸¸ Whatis Target HeartRateZone? Target Heart Rate Zone tells you the number of times per minute your heart needs to beat to achieve a desired workout effect. It is represented as a percentage of the maximum number of times your heart can beat per minute. Target Zone will vary for each individual, depending on age, current level of conditioning,...
- Page 25 STRETCHING • STRETCH F IRST Before using your product, it is best to take a few minutes doing a few gentle stretching exercises. Stretching prior to exercise will improve flexibility and reduce chances of exercise related injury. Ease into each of these stretches with a slow gentle motion. Do not stretch to the point of pain. Make sure not to bounce while doing these stretches.
-
Page 26: Keeping A Nexercise Diary
WARM UP The first 2 to 5 minutes of a workout should be devoted to warming up. The warm-up will limber your muscles and prepare them for more strenuous exercise. Make sure that you warm-up on your product at a slow pace. - Page 27 WEEK# WEEKLYGOAL DATE DISTANCE CALORIES TIME COMMENTS $UNDAY MONDA Y TUES DAY WEDNESDAY THURSDA Y FR/DAY SATURDAY WEEKLYTOTALS: WEEK# WEEKLYGOAL i_ I "_ i_ii DATE DISTANCE CALORIES TIME COMMENTS SUNDAY MONDA Y TUESDAY WEDNESDAY THURSDA Y FRIDAY SATURDAY WEEKLYTOTALS: DATE DISTANCE CALORIES TIME...
- Page 28 ¸¸4¸¸ DATE DISTANCE CALORIES TIME COMMENTS SUNDAY MONDA Y TUES DAY WEDNESDAY THURSDA Y FRIDAY SATURDAY WEEKLYTOTALS: WEEK# WEEKLYGOAL DATE DISTANCE CALORIES TIME COMMENTS SUNDAY MONDA Y TUESDAY WEDNESDAY THURSDA Y FRIDAY SATURDAY WEEKLYTOTALS: WEEK# WEEKLYGOAL DATE DISTANCE CALORIES TIME COMMENTS SUNDAY MONDA Y...
- Page 29 i IIIIRI-N{I I II 5HIll, WEEK # DIS TANCE CALORIES TIME MONTHLY TOTALS: MONTH MONTHLY GOAL WEEK# DIS TANCE CALORIES TIME MONTHLY TOTALS: MONTH MONTHLY GOAL WEEK# DIS TANCE CALORIES TIME MONTHLY TOTALS:...
- Page 30 ¸¸4¸¸ WEEK # DISTANCE CALORIES TIME MONTHLY TOTALS : WEEK # DISTANCE CALORIES TIME MONTHLY TOTALS : WEEK # DISTANCE CALORIES TIME MONTHLY TOTALS :...
-
Page 31: Common P Roduct Questions
COMMON P RODUCT QUESTIONS ARETHE SOUNDS M Y TREADMILL MAKES NORMAL? All treadmills make a certain type of thumping noise flue to the belt rifling over the milers,especially new treadmills. This noise wit diminish over time, although may not totally go away.Overtime, the belt will stretch, causing the belt to ride smootherover the rollers. -
Page 32: Troubleshooting - Heart R Ate
PROBLEM: Thetreadmill circuit breakertrips during a workout. $SLUTJON: Verifythe following: • Make sure the treadmill is plugged into a dedicated 20-amp circuit. • Verifythat you do not ha ve the machine on an extensioncord or surge protector • Confirm that the machine is not plugged into a GFCI-equippefi outlet or on a circuit that has a GFCI-equippefloutlet on it. PROBLEM: The running belt does not stay centered during a workout. -
Page 33: Every Week
5 seconds to suspend message for 5 miles. Yourtreadmill came with a bottle of lubricant which can be used for two appfications. If you need RUNNING BELT hinricant, contact HorizonFitness. Only use lubricant provided by Horizon Fitness. • Turnoffthe treadmill with the on/offswitch, then unplug the power cord at the waft outlet. -
Page 34: Exclusions And Limitations
LABOR• I YEAR • Equipmentused for commercialpurposesor any use otherthan a Horizon Fitness shall cover the labor cost for the repair single family or Household, u nless endorsedby HorizonFitness for of the device for a period of oneyear from the date of the coverage. - Page 35 Customer Tech Support Hotline.. 1- 800- 244- 4192 Email.. comments@horizonfitness.com Website.. www.horizonfitness.com Everyemployeeat HorizonFitnesstakes pride in providing you with a high quality product. HZSeriesT81.Rev.2.0 I © 2007 Horizon FitnessProductsI Destined& Engineered in the U.S.A.I Madein China...