
Related Manuals for HoMedics BPA-200


Summary of Contents for HoMedics BPA-200
- Page 1 Automatic Blood Pressure Monitor BPA-200 El manual en español empieza en la página 32...
-
Page 2: Table Of Contents
Why Measure Your Blood Pressure? Blood Pressure Standard ....5 How This Blood Pressure Monitor Works ..7 USAGE INFORMATION: Name/Function of Each Part ....8 Display Explanations . - Page 3 Important Notes Regarding Your Blood Pressure Measurement ... . .23 Care, Maintenance & Cleaning ... . .25 Potential for Radio/Television Interference . .27 Troubleshooting .
-
Page 4: Important Product Notices And Safety
IMPORTANT PRODUCT NOTICES AND SAFETY INSTRUCTIONS When using your blood pressure monitor, basic precautions should always be followed. Please read and follow all instructions and warnings before using this product. Save these instructions for future reference. • Please note that this is a home healthcare product only and it is not intended to serve as a substitute for the advice of a physician or medical professional. - Page 5 (e.g. mobile telephones, microwave ovens). These may lead to temporary impairment of measurement accuracy. • Use blood pressure monitor only for its intended use. • Do not wrap the cuff around body parts other than your arm. • This unit is intended for use in measuring the blood pressure and pulse rate of adults.
-
Page 6: About Blood Pressure
ABOUT BLOOD PRESSURE What is Blood Pressure? Blood pressure is the pressure exerted on the artery walls while blood flows through the arteries. The pressure measured when the heart contracts and sends blood out of the heart is systolic (highest) blood pressure. - Page 7 Categories for Blood Pressure Levels in Adults For adults 18 and older who are not on medicine for high blood pressure, are not having a short-term serious illness, and do not have other conditions, such as diabetes and kidney disease. To determine category of risk when systolic and diastolic readings fall into two areas, use the higher of the two numbers for classification.
-
Page 8: How This Blood Pressure Monitor Works
HOW THIS BLOOD PRESSURE MONITOR WORKS This monitor uses Smart Sense™ Technology to detect your blood pressure. With one touch of a button, the cuff will automatically inflate to block the blood flow through your artery. Next, the deflation process starts. Smart Sense™... -
Page 9: Name/Function Of Each Part
NAME/FUNCTION OF EACH PART Smart Fit™ Arm Cuff Air Tube and Connector Memory Recall Button START/STOP Button Other Accessories Included : Date/Time Set Buttons (Located on back of unit) User-Select Button 1 12V DC Output AC Adapter and 4 “AA” size, 1.5V alkaline batteries Note: Please unload the batteries when operating with the AC adapter for an extended period of time. -
Page 10: Display Explanations
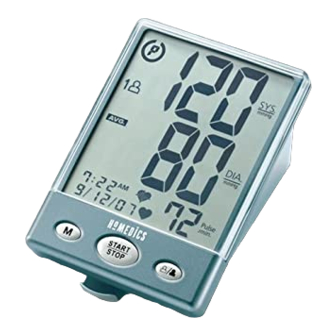
DISPLAY EXPLANATIONS Systolic Pressure Diastolic Pressure Date/Time Indicator Pulse Rate... -
Page 11: Display Symbols
Display Symbols: User 1: Appears when the monitor is operated by User 1. User 2: Appears when the monitor is operated by User 2. Weak Battery Symbol: Appears when batteries should be replaced. Pulse Symbol: Shows the pulse rate per minute. Important Health Bulletin: See page 21 for more information. -
Page 12: Installing Batteries
INSTALLING BATTERIES Note: It is recommended that you use batteries only for travelling or when it is not possible to use the AC adapter. 1. Extend the tray so that the battery cover is fully exposed. 2. Press down on latch and lift the battery cover towards you to open the battery compartment. -
Page 13: Using The Ac Adapter
As the supplied batteries are for test only, they may be discharged earlier than batteries you buy in stores. Replace the batteries in pairs. Remove batteries when unit is not in use for extended periods of time. Note: Batteries are hazardous waste. Do not dispose of them together with the household garbage. -
Page 14: Date & Time Set Procedure
3. Change the time and date as described in Step 2 above, using the numbers and the Set button entries. 4. A “0” will reappear as the blood pressure monitor is ready for measurement again. repeat process to set time and date button to change the... -
Page 15: Applying The Cuff
APPLYING THE CUFF 1. If the cuff is not assembled, pass the end of the cuff furthest away from the tubing through the metal D-ring in order to form a loop. End of cuff D-ring 2. Plug the cuff tube into the left side of the unit. Insert plug here... - Page 16 3. Remove tight fitting clothing from around your upper left arm. 4. Position cuff edge 0.8-1.2 inches (2-3cm) above elbow. 5. Center tube over middle of arm. 6. Pull the end of the cuff so that it tightens evenly around your arm. Press the hook and loop material together to secure.
- Page 17 If the Arrow falls outside of the Solid Color Line, you will need a cuff with other circumferences. Contact HoMedics Consumer Relations regarding additional cuff sizes. Arrow Solid Color Line...
-
Page 18: Measurement Procedure
• During the measurement, do not talk or move your arm or hand muscles. • See page 23 for additional notes regarding your blood pressure measurement. If you are using this blood pressure monitor for the first time, please remove the protective film from the screen. - Page 19 1. Press the User Select Button to choose User 1 or User 2. After the user number is selected, press the START/STOP button to confirm the chosen user. 2. With the cuff wrapped around your arm, press the START/STOP button. Do not inflate the cuff unless it is wrapped around your arm.
- Page 20 4. Once your systolic pressure is determined, the monitor will begin deflating to measure your diastolic pressure. Note: This monitor will re-inflate automatically if the system detects that your body requires more pressure for measurement. 5. When the measurement is completed, the cuff will deflate entirely.
-
Page 21: Risk Category Indicator
Note: 1. This monitor automatically turns off approximately 1 minute after last operation. You may also press the START/STOP button to turn the unit off. 2. To interrupt the measurement, you may press the START/STOP (recommended), “M”, User-Select or Date/Time Set immediately after a button is pressed. - Page 22 IMPORTANT HEALTH BULLETIN This device may have difficulty determining the proper blood pressure for users with irregular heartbeat, diabetes, poor circulation of blood, kidney problems, and for users who have suffered a stroke or other medical conditions. If the icon appears often, it is recommended that you consult your physician.
-
Page 23: Recalling Values From Memory
RECALLING VALUES FROM MEMORY This monitor can be used by two individuals. Each user can store up to 60 measurements. 1. Press the User-Select button. 2. Choose User 1 or User 2. 3. Press the “M” button to access the memory. 4. -
Page 24: Clearing Values From Memory
CLEARING VALUES FROM MEMORY 1. Press the User-Select button to select User 1 or User 2. 2. Continue to press the “M” button for approximately 5 seconds, then the data for the selected user will be erased automatically. IMPORTANT NOTES REGARDING YOUR BLOOD PRESSURE MEASUREMENT •... - Page 25 • Do not move or talk during measurement as this can elevate readings. • Do not move or cross legs during measurement. Keep feet flat on floor. • Do not touch cuff or monitor during measurement procedure. • It is suggested that you take your measurements at the same time each day and use the same arm for consistency.
-
Page 26: Care, Maintenance & Cleaning
You should not use any tool to open the device nor should you attempt to adjust anything inside the device. If you have any problems with this device, please contact HoMedics Consumer Relations (contact information can be found on the warranty page). - Page 27 8. Do not disassemble the monitor or cuff. If in need of repair, refer to the warranty section of this manual. 9. Do not subject the monitor to extreme shocks (do not drop on floor). 10. Do not inflate the cuff unless wrapped around arm. 11.
-
Page 28: Potential For Radio/Television Interference
POTENTIAL FOR RADIO/TELEVISION INTERFERENCE For USA only: This product has been tested and found to comply with the limits for a Class B digital device, pursuant to part 15 of FCC rules. These limits are designed to provide reasonable protection against harmful interference in a residential installation. -
Page 29: Troubleshooting
E3 error symbol shown on display Note: If the unit still does not work, contact HoMedics Consumer Relations. Under no circumstance should you disassemble or attempt to repair the unit by yourself. Contact information for HoMedics Consumer Relations Department can be found on the warranty page. -
Page 30: Specifications
SPECIFICATIONS Power Source: Measurement Method: Measurement Range: Accuracy: Pressure Sensor: Inflation: Deflation: Memory Capacity: Auto-shut-off: Operation Environment: Storage Environment: Weight: Arm Circumference: 8.7"-18.1" (22-46cm) Dimensions: Note: These specifications are subject to change without notice. Four 1.5V DC (AA) batteries or supplied 12V DC AC adapter Oscillometric Pressure: 40~250 millimeters mercury (mmHg) -
Page 31: Lifetime Limited Warranty
HoMedics sells its products with the intent that they are free of defects in manufacture and workmanship for the life of the original purchaser from the date of original purchase, except as noted below. HoMedics warrants that its products will be free of defects in material and workmanship under normal use and service. - Page 33 Monitor Automático de Presión Sanguínea BPA-200...
- Page 34 ÍNDICE INFORMACIÓN INICIAL: Avisos importantes del producto e instrucciones de seguridad .......35 Sobre la presión sanguínea .
- Page 35 Cuidado, mantenimiento y limpieza ... .57 Potencial de interferencia con radio/televisión . . .59 Diagnóstico y resolución de problemas ..60 Especificaciones ......61 Garantía limitada de por vida .
-
Page 36: Avisos Importantes Del Producto E Instrucciones
AVISOS IMPORTANTES DEL PRODUCTO E INSTRUCCIONES DE SEGURIDAD Cuando utilice su monitor de presión sanguínea, debe seguir siempre las precauciones básicas. Sírvase leer y seguir todas las instrucciones y advertencias antes de utilizar este producto. Guarde estas instrucciones para referencia futura. •... - Page 37 • La pantalla de pulso no es adecuada para verificar la frecuencia de los marcapasos. • Interferencia electromagnética: el dispositivo contiene componentes electrónicos sensibles. Evite los campos eléctricos o electromagnéticos fuertes cercanos al dispositivo (por ejemplo, teléfonos celulares, hornos de microondas). Éstos pueden causar la imposibilidad temporal de medir con precisión.
-
Page 38: Sobre La Presión Sanguínea
SOBRE LA PRESIÓN SANGUÍNEA ¿Qué es la presión sanguínea? La presión sanguínea es la presión que se ejerce en las paredes de la arteria cuando la sangre fluye por las arterias. La presión medida cuando el corazón se contrae y sale la sangre es la presión sanguínea sistólica (la mayor). - Page 39 Categorías de niveles de presión sanguínea en adultos Para adultos de 18 años o más que no están tomando medicinas para presión sanguínea elevada, no padecen de ninguna enfermedad que podría ser grave en corto tiempo, y no sufren de ninguna otra condición, tal como diabetes y enfermedades renales.
-
Page 40: Cómo Funciona Este Monitor De Presión Sanguínea
CÓMO FUNCIONA ESTE MONITOR DE PRESIÓN SANGUÍNEA Este monitor utiliza la tecnología Smart Sense™ para detectar la presión sanguínea. Al presionar un botón, el brazalete se inflará automáticamente para bloquear la circulación de sangre a través de la arteria. Luego, comienza el proceso de desinflado. La tecnología Smart Sense™... -
Page 41: Nombre/Función De Cada Pieza
NOMBRE/FUNCIÓN DE CADA PIEZA Brazalete Smart Fit™ Tubo de aire y conector Botón de recuperar memoria Botón de START/STOP (COMENZAR/DETENER) Otros accesorios que se incluyen: Botones de definición de fecha/hora (parte trasera de la unidad) Botón de selección del usuario 1 Adaptador de CA de salida de 12 V CC y 4 pilas alcalinas “AA”... -
Page 42: Explicaciones De La Pantalla
EXPLICACIONES DE LA PANTALLA Presión sistólica Presión diastólica Indicador de fecha/hora Pulso... - Page 43 Símbolos de la pantalla: Usuario 1: aparece cuando el Usuario 1 opera el monitor. Usuario 2: aparece cuando el Usuario 2 opera el monitor. Símbolo de pilas bajas: aparece cuando tiene que cambiar las pilas. Símbolo de pulso: muestra los pulsos por minuto. Importante Boletín de Salud: Vea la página 53 para obtener más información.
-
Page 44: Instalación De Las Pilas
INSTALACIÓN DE LAS PILAS Nota: Se recomienda el uso de baterías sólo para viajes, o cuando no sea posible usar el adaptador de CA. 1. Deslice la bandeja para que la tapa de las baterías quede completamente expuesta. 2. Presione el seguro y levante la tapa de las pilas hacia usted para abrir el compartimiento de las pilas. -
Page 45: Uso Del Adaptador De Ca
Como las pilas que se suministran son de prueba únicamente, puede que se descarguen antes que las pilas que compra en la tienda. Reemplace las pilas en pares. Saque las pilas cuando la unidad no esté en uso durante mucho tiempo. Nota: las pilas son desechos peligrosos. -
Page 46: Procedimiento De Configuración De Fecha Y Hora
PROCEDIMIENTO DE CONFIGURACIÓN DE FECHA Y HORA 1. Para ajustar la fecha/hora, presione el botón Set que se encuentra en la parte trasera del monitor. 2. La pantalla mostrará un número intermitente mostrando la hora. Cambie la hora presionando el botón Cada vez que lo presione aumentará... -
Page 47: Aplicación Del Brazalete
APLICACIÓN DEL BRAZALETE 1. Si el brazalete no está armado, pase el extremo del brazalete que se encuentra más lejos del tubo a través del anillo metálico en D, para formar un aro. Extremo del brazalete Anillo en D 2. Conecte el tubo del brazalete en el costado izquierdo de la unidad. - Page 48 3. Retire la ropa apretada de la parte superior del brazo izquierdo. 4. Coloque el borde del brazalete de 0,8 a 1,2" (2-3 cm) arriba del codo. 5. Centre el tubo en la mitad del brazo. 6. Hale el extremo del brazalete para que quede ajustado y parejo alrededor de su brazo.
- Page 49 Si la flecha se encuentra fuera de la línea de color sólido, puede necesitar un brazalete con otra circunferencia. Póngase en contacto con Relaciones con el Consumidor de HoMedics para ver tamaños adicionales de brazalete. Flecha...
-
Page 50: Procedimiento De Medición
PROCEDIMIENTO DE MEDICIÓN Notas importantes: • La presión sanguínea cambia con cada latido del corazón y está en constante fluctuación durante todo el día. • La medición de la presión sanguínea puede verse afectada por la posición del usuario, sus condiciones fisiológicas y demás factores. - Page 51 1. Presione el botón de Selección de usuario para elegir Usuario 1 o Usuario 2. Después de seleccionar el número de usuario, presione el botón START/STOP para confirmar el usuario elegido. 2. Con el brazalete puesto en el brazo, presione el botón START/STOP.
- Page 52 3. Una vez que el símbolo desaparezca, la pantalla mostrará un “0” en forma intermitente. El monitor está “Listo para medir” e inflará el brazalete automáticamente para comenzar a medir. 4. Cuando la presión sistólica ha sido determinada, el monitor empieza a desinflarse para medir la presión diastólica.
-
Page 53: Indicador De Categoría De Riesgo
Nota: 1. Este monitor se apaga automáticamente aproximadamente 1 minuto después de la última operación. También puede presionar el botón de START/STOP (COMENZAR/ DETENER) para apagar la unidad. 2. Para interrumpir la medición, puede presionar los botones START/STOP (COMENZAR/DETENER) (recomendado), “M”, Selección del usuario o Configurar El brazalete se desinflará... - Page 54 BOLETÍN DE SALUD IMPORTANTE Este dispositivo puede tener dificultad para determinar la correcta presión sanguínea de usuarios con latidos irregulares, diabetes, mala circulación sanguínea, trastornos renales o usuarios que han sufrido una apoplejía u otras afecciones médicas. Si el icono aparece con frecuencia, se recomienda que consulte a su médico.
-
Page 55: Cómo Recuperar Los Valores De La Memoria
CÓMO RECUPERAR LOS VALORES DE LA MEMORIA Este monitor puede ser utilizado por dos individuos. Cada usuario puede almacenar hasta 60 mediciones. 1. Presione el botón de Selección de usuario. 2. Elija Usuario 1 o Usuario 2. 3. Presione el botón “M” para acceder a la memoria. -
Page 56: Cómo Borrar Los Valores De La Memoria
CÓMO BORRAR LOS VALORES DE LA MEMORIA 1. Presione el botón de Selección de usuario para elegir Usuario 1 o Usuario 2. 2. Continúe presionando el botón “M” durante aproximadamente 5 segundos, luego los datos para el usuario seleccionado se borrarán automáticamente. -
Page 57: Notas Importantes Con Respecto A Las Mediciones De Presión Sanguínea
NOTAS IMPORTANTES CON RESPECTO A LAS MEDICIONES DE PRESIÓN SANGUÍNEA • Tome su lectura en un entorno cómodo ya que las medidas pueden verse afectadas por las temperaturas calurosas o frías. Tome su presión sanguínea a una temperatura corporal normal. •... -
Page 58: Cuidado, Mantenimiento Y Limpieza
Si tiene problemas con este dispositivo, póngase en contacto con Relaciones con el Consumidor de HoMedics (encontrará la información de contacto en la página de la garantía). 5. No sumerja la unidad en el agua ya que puede dañarla. - Page 59 9. No exponga el monitor a golpes extremos (no lo deje caer al suelo). 10. No infle el brazalete a menos que esté puesto en el brazo. 11. No coloque el brazalete en otra parte de su cuerpo que no sea el brazo.
-
Page 60: Potencial De Interferencia Con Radio/Televisión
POTENCIAL DE INTERFERENCIA CON RADIO/TELEVISIÓN Para EE.UU. únicamente: Este producto ha sido probado y se ha observado que cumple con los límites para un dispositivo digital de Clase B, conforme a la parte 15 de las reglas FCC. Estos límites están diseñados para proporcionar una protección razonable contra la interferencia peligrosa en una instalación residencial. -
Page 61: Diagnóstico Y Resolución De Problemas
Relaciones con el Consumidor de HoMedics. Bajo ningún concepto deberá desarmar ni intentar reparar la unidad por su cuenta. Podrá encontrar la información de contacto del Departamento de Relaciones con el Consumidor de HoMedics en la página de garantía. CAUSAS POSIBLES Se han acabado las pilas. -
Page 62: Especificaciones
ESPECIFICACIONES Fuente de energía: Método de medición: Rango de medición: Precisión: Sensor de presión: Inflado: Desinflado: Capacidad de memoria: 60 memorias para cada Usuario (120 en total) Apagado automático: Ambiente de funcionamiento: Ambiente para guardar: Peso: Circunferencia del brazo: 8,7"-18,1" (22-46cm) Dimensiones: Nota: estas especificaciones están sujetas a cambios sin previo aviso. -
Page 63: Garantía Limitada De Por Vida
Esta garantía se extiende únicamente a consumidores y no a distribuidores. Para obtener servicio para su producto HoMedics, envíe por correo el producto y su recibo de compra fechado (como comprobante de compra), con franqueo pago, a la siguiente dirección: HoMedics Consumer Relations Service Center Dept.