
Related Manuals for HoMedics BPA-150


Summary of Contents for HoMedics BPA-150
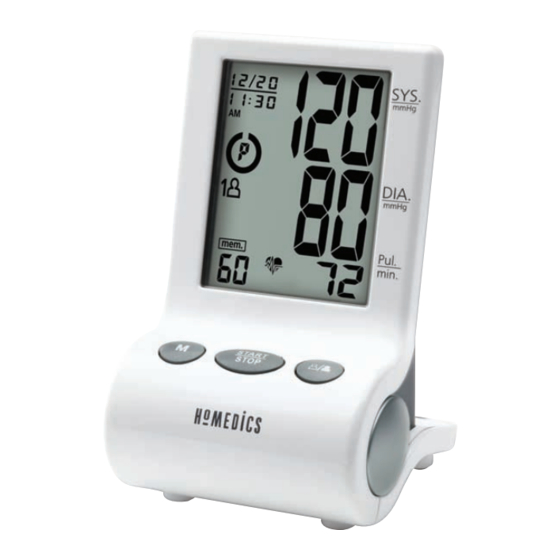
- Page 1 Deluxe Automatic Blood Pressure Monitor BPA-150 El manual en español lifetime empieza en la página 34 limited warranty...
-
Page 2: Table Of Contents
TABLE OF CONTENTS INTRODUCTORY INFORMATION: Important Notes Regarding Your Blood Pressure Measurement ... . .25 Important Product Notices and Safety Instructions ......3 Recalibration Service . -
Page 3: Important Product Notices And Safety
HoMedics observer using the cuff/stethoscope ausculatory Consumer Relations regarding additional cuff sizes. -
Page 4: About Blood Pressure
Categories for Blood Pressure Levels in Adults ABOUT BLOOD PRESSURE Systolic (mmHg) Diastolic (mmHg) W W h h a a t t i i s s B B l l o o o o d d P P r r e e s s s s u u r r e e ? ? Stage 2 Hypertension >160 >100... -
Page 5: How This Blood Pressure Monitor Works
NAME/FUNCTION OF EACH PART HOW THIS BLOOD PRESSURE MONITOR WORKS Date/Time On/Off Switch (Located on Set Buttons This monitor uses Smart Sense™ Technology to back of unit.) (Located on detect your blood pressure. With one touch of a but- back of unit) Smart Fit™... -
Page 6: Display Explanations
Display Symbols: DISPLAY EXPLANATIONS User 1: Appears when the monitor is operated by User 1. User 2: Appears when the monitor is operated by User 2. Weak Battery Symbol: Appears when batteries should be replaced. Date/Time Indicator Pulse Symbol: Shows the pulse rate per minute. Irregular Heartbeat Detector: Indicates an irregular heartbeat was detected. -
Page 7: Installing Batteries
INSTALLING BATTERIES Replace the batteries if: 1. The weak battery symbol appears on the display. Note: It is recommended that you use batteries only 2. Nothing appears on the display when the power is for travelling or when it is not possible to use the switched on. -
Page 8: Using The Ac Adapter
USING THE AC ADAPTER DATE & TIME SET PROCEDURE Note: • Please unload the batteries from the battery 1. Slide the “On/Off” Switch located on the back pack when operating with the AC adapter for of the monitor into the “On” position. an extended period of time. -
Page 9: Applying The Cuff
APPLYING THE CUFF 3. Remove tight fitting clothing from around your upper left arm. 1. If the cuff is not assembled, pass the end of the cuff furthest away from the tubing through the 4. Position cuff edge 0.8-1.2 metal D-ring in order to form a loop. inches (2-3cm) above elbow. -
Page 10: Measurement Procedure
If the Arrow falls outside of the Solid Color Line, • See page 25 for additional notes regarding your you will need a cuff with other circumferences. Contact blood pressure measurement. HoMedics Consumer Relations regarding additional cuff sizes. Position cuff edge 0.8˝... - Page 11 1. Press the User Select Button to choose User 1 3. After all symbols disappear, the display will show a blinking “0”. The monitor is “Ready to or User 2. Measure” and will automatically inflate the cuff to start measurement. START STOP After the user number is selected, press the...
-
Page 12: Risk Category Indicator
Note: Symbols are described below and classifications fol- 1. This monitor automatically turns off approximately low the guidelines as described earlier in this manual 1 minute after last operation. You may also press the (page 5). START/STOP button to turn the unit off. 2. -
Page 13: Recalling Values From Memory
CLEARING VALUES FROM MEMORY RECALLING VALUES FROM MEMORY 1. Press the User-Select button to select User 1 This monitor can be used by two individuals. or User 2. Each user can store up to 60 measurements. 1. Press the User-Select button. START 2. -
Page 14: Important Notes Regarding Your Blood Pressure Measurement
• The measurement results that users receive address below with a check or money order in the are for reference only. If users have any blood amount of $10 payable to HoMedics, Inc. for recalibration pressure concerns, please consult a physician. service and shipping & handling: •... -
Page 15: Care, Maintenance & Cleaning
Humidity: Humidity: 10~90% RH max. 40~85% RH max. this device, please contact HoMedics Consumer Relations (contact information can be found on the warranty page). 5. Do not immerse the unit in water as this will result in damage to the unit. -
Page 16: Potential For Radio/Television Interference
ICES-003 édictée par le ministre des communications. Note: If the unit still does not work, contact HoMedics Consumer Relations. Under no circumstance should you disassemble or attempt to repair the unit by yourself. Contact information for HoMedics Consumer Relations Department can be found on... -
Page 17: Specifications
(Valid in USA only) SPECIFICATIONS HoMedics sells its products with the intent that they are free of defects in manufacture and workmanship for the life of the original purchaser from the date of original purchase, except as noted below. HoMedics warrants that its products will be free of defects in material and work- Four 1.5V DC (AAA) batteries or... - Page 18 Monitor de Presión Sanguínea Automático De Lujo BPA-150 garantía limitada de por vida...
- Page 19 ÍNDICE INFORMACIÓN INICIAL: Cómo borrar los valores de la memoria ..58 Avisos importantes del producto e instrucciones Notas importantes con respecto a las mediciones de seguridad .......37 de presión sanguínea .
-
Page 20: Avisos Importantes Del Producto E Instrucciones
Las mediciones de la presión sanguínea que se determinen con en el brazo del usuario, póngase en contacto con Relaciones este dispositivo son equivalentes a las obtenidas por un con el Consumidor de HoMedics para ver tamaños adicionales observador capacitado que use el método de auscultación con de brazalete. -
Page 21: Sobre La Presión Sanguínea
SOBRE LA PRESIÓN SANGUÍNEA Categorías de niveles de presión sanguínea en adultos ¿Qué es la presión sanguínea? Sistólica (mmHg) Diastólica (mmHg) La presión sanguínea es la presión que se ejerce en las paredes Etapa 2 de hipertensión >160 >100 de la arteria cuando la sangre fluye por las arterias. La presión Etapa 1 de hipertensión 140~159 90~99... -
Page 22: Cómo Funciona Este Monitor De Presión Sanguínea
NOMBRE/FUNCIÓN DE CADA PIEZA CÓMO FUNCIONA ESTE MONITOR DE PRESIÓN SANGUÍNEA Botones de definición Interruptor On/Off Este monitor utiliza la tecnología Smart Sense™ para detectar la de fecha/hora (encendido/apagado – (parte trasera parte trasera de la unidad) presión sanguínea. Al presionar un botón, el brazalete se inflará de la unidad) automáticamente para bloquear la circulación de sangre a través Brazalete... -
Page 23: Explicaciones De La Pantalla
Símbolos de la pantalla: EXPLICACIONES DE LA PANTALLA Usuario 1: aparece cuando el Usuario 1 opera el monitor. Usuario 2: aparece cuando el Usuario 2 opera el monitor. Símbolo de pilas bajas: aparece cuando tiene que cambiar las pilas. Indicador de fecha/hora Símbolo de pulso: muestra los pulsos por minuto. -
Page 24: Instalación De Las Pilas
INSTALACIÓN DE LAS PILAS Reemplace las pilas si: Nota: Se recomienda el uso de baterías sólo para viajes, 1. El símbolo de pilas bajas aparece en la pantalla. o cuando no sea posible usar el adaptador de CA. 2. No aparece nada en la pantalla cuando enciende el dispositivo. -
Page 25: Uso Del Adaptador De Ca
USO DEL ADAPTADOR DE CA PROCEDIMIENTO DE CONFIGURACIÓN DE FECHA Y HORA Nota: • Por favor retire las pilas del paquete de pilas cuando lo haga funcionar con el adaptador de CA durante mucho 1. Deslice el interruptor “On/Off” ubicado al respaldo del monitor tiempo. -
Page 26: Aplicación Del Brazalete
APLICACIÓN DEL BRAZALETE 4. Retire la ropa apretada de la parte superior del brazo izquierdo. 1. Si el brazalete no está armado, pase el extremo del brazalete 5. Coloque el borde del brazalete que se encuentra más lejos del tubo a través del anillo de 0,8 a 1,2"... -
Page 27: Procedimiento De Medición
Si la flecha se encuentra fuera de la línea de color sólido, puede a la medición de su presión sanguínea. necesitar un brazalete con otra circunferencia. Póngase en contacto con Relaciones con el Consumidor de HoMedics para ver tamaños adicionales de brazalete. Position cuff edge 0.8˝... - Page 28 1. Press the User Select Button to choose User 1 or User 2. 3. Una vez que el símbolo desaparezca, la pantalla mostrará un “0” en forma intermitente. El monitor está “Listo para medir” e inflará el brazalete automáticamente para comenzar a medir.
-
Page 29: Indicador De Categoría De Riesgo
Nota: DETECTOR DE LATIDOS IRREGULARES 1. Este monitor se apaga automáticamente aproximadamente Los latidos irregulares puedan causar o indicar la presencia 1 minuto después de la última operación. También puede de una enfermedad cardiovascular. Este monitor presenta una presionar el botón de START/STOP (COMENZAR/ tecnología avanzada para alertar al usuario sobre la presencia DETENER) para apagar la unidad. -
Page 30: Cómo Recuperar Los Valores De La Memoria
CÓMO RECUPERAR LOS VALORES DE LA MEMORIA CÓMO BORRAR LOS VALORES DE LA MEMORIA Este monitor puede ser utilizado por dos individuos. 1. Presione el botón de Selección de usuario para elegir Cada usuario puede almacenar hasta 60 mediciones. Usuario 1 o Usuario 2. 1. -
Page 31: Notas Importantes Con Respecto A Las Mediciones De Presión Sanguínea
• Los resultados de las mediciones que los usuarios reciben suma de $10 pagadero a HoMedics, Inc. para el servicio de son únicamente para referencia. Si los usuarios tienen recalibración, porte y manejo:... -
Page 32: Cuidado, Mantenimiento Y Limpieza
Si tiene problemas con este dispositivo, póngase en contacto 10~90% RH máx. 40~85% RH máx. con Relaciones con el Consumidor de HoMedics (encontrará la información de contacto en la página de la garantía). 5. No sumerja la unidad en el agua ya que puede dañarla. -
Page 33: Potencial De Interferencia Con Radio/Televisión
Nota: si la unidad aún sigue sin funcionar, póngase en contacto con Relaciones con el Consumidor de HoMedics. Bajo ningún concepto deberá desarmar ni intentar reparar la unidad por su cuenta. Podrá encontrar la información de contacto del Departamento de Relaciones con el Consumidor de HoMedics en la página de garantía. -
Page 34: Especificaciones
(Válida únicamente en los EE.UU.) ESPECIFICACIONES HoMedics vende sus productos con la intención de que no tengan defectos de fabricación ni de mano Cuatro pilas de 1,5V CC (AAA) o adaptador de obra durante la vida del comprador original a partir de la fecha de compra original, con las siguientes Fuente de energía:...