
Related Manuals for Radio Shack PRO-92


Summary of Contents for Radio Shack PRO-92
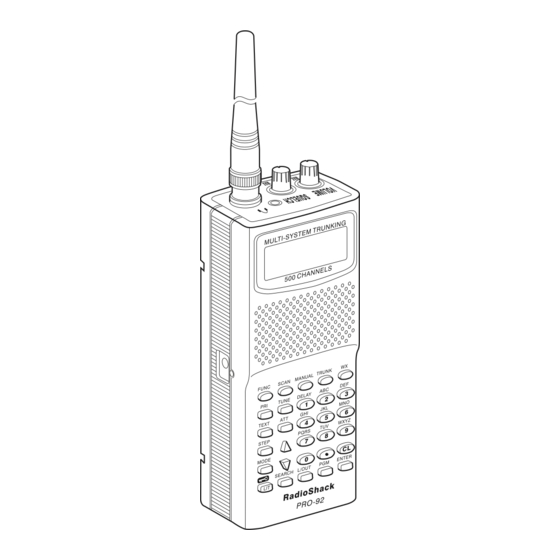
- Page 1 20-522.fm Page 1 Friday, September 17, 1999 12:46 PM Owner’s Manual Cat. No. 20-522 PRO-92 500-Channel Portable Trunking Scanner Please read before using this equipment.
- Page 2 The PRO-92 monitors the data sent with a 2-way radio trans- mission, so you can hear the call and response for that user and more easily “follow” the conversation.
- Page 3 Data Cloning — lets you transfer the programmed data to another PRO-92 scanner. You can also upload or download the programmed data to or from a PC using an optional interface kit.
- Page 4 IDs when tracking trunked sys- tems. Key Lock — lets you lock the scanner’s keys to help pre- vent accidentally changing the scanner’s programming. Flexible Antenna with BNC Connector — provides ex- cellent reception and is designed to help prevent antenna breakage.
-
Page 5: Fcc Notice
DC adapter (not supplied). Supplied Police Call Trunking Guide — provides a quick reference to public safety trunking radio systems in the United States. Your PRO-92 scanner can receive these frequencies: • 29–54 MHz • 108–136.9875 MHz • 137–174 MHz •... -
Page 6: Scanning Legally
(2) this device must accept any interference received, including interference that may cause undesired operation. Note: Mobile use of this scanner is unlawful or requires a permit in some areas. Check the laws in your area. SCANNING LEGALLY Scanning is a fun and interesting hobby. -
Page 7: Table Of Contents
A Look at the Display ... 23 Understanding Banks ... 25 Channel Storage Banks ... 25 Search Banks ... 25 Understanding Your PRO-92’s Modes ... 28 AM Mode ... 29 FM Mode ... 29 Coded Squelch Modes (PL, DPL, and Trunking) ... 29 PL Mode ... - Page 8 Turning the Key Tone On and Off ... 55 Using the Keylock ... 55 Changing the Display Contrast ... 56 Cloning the Programmed Data from Scanner to Scanner ... 56 Trunking Operation ... 57 Understanding Trunking ... 57 Programming Trunking Frequencies ... 58 Programming Fleet Maps ...
- Page 9 Typical Band Usage ... 67 Primary Usage ... 67 Band Allocation ... 68 Frequency Conversion ... 72 Troubleshooting ... 73 Resetting/Initializing the Scanner ... 75 Resetting the Scanner ... 75 Initializing the Scanner ... 75 Care and Maintenance ... 77 Specifications ... 78...
-
Page 10: Preparation
See “Resetting/Initial- izing the Scanner” on Page 75. Using Batteries You can power the PRO-92 with six AA batteries. For the longest operation and best performance, we recommend alkaline batteries, available at your local RadioShack store. - Page 11 Follow these steps to install the batteries. 1. Press down on the battery compartment cover on the bottom of the scanner and slide the cover in the direction of the arrow to remove it. 2. Pull out and slide the battery holder out of the battery...
- Page 12 20-522.fm Page 12 Friday, September 17, 1999 12:46 PM 3. Insert six AA batteries in the battery holder as indi- cated by the polarity symbols (+ and –) marked on the holder. Cautions: • Use only fresh batteries of the required size and recommended type.
-
Page 13: Charging Rechargeable Batteries
Warning: Always dispose of old batteries promptly and properly. Do not bury or burn them. Caution: If you do not plan to use the scanner with bat- teries for a month or longer, remove the batteries. Batter- ies can leak chemicals that can destroy electronic parts. -
Page 14: Using Ac Power
RadioShack store, recycling collection centers, and mail-back programs. Using AC Power You can power the scanner using an 9V, 300 mA AC adapter and a size H Adaptaplug (neither supplied). We recommend RadioShack Cat. No. 273-1767 (available at your local RadioShack store). -
Page 15: Using Vehicle Power
3. Plug the adapter into a standard AC outlet. Using Vehicle Power You can power the scanner from a vehicle’s 12V power source (such as a cigarette-lighter socket) using a 9V, 300 mA DC adapter and a size H Adaptaplug (neither supplied). -
Page 16: Connecting The Antenna
20-522.fm Page 16 Friday, September 17, 1999 12:46 PM 3. Plug the adapter’s cigarette-lighter plug into your vehicle’s cigarette-lighter socket. Note: If the scanner does not operate properly when you connect a DC adapter, unplug the DC adapter from the cigarette-lighter socket and clean the socket to remove ashes and other debris. -
Page 17: Connecting An Optional Antenna
Connecting an Optional Antenna The antenna connector on your scanner makes it easy to use the scanner with a variety of antennas, such as an external mobile antenna or outdoor base station antenna. Your local RadioShack store sells a variety of antennas. -
Page 18: Listening Safely
CONNECTING AN EXTENSION SPEAKER In a noisy area, an amplified speaker (not supplied), available at your local RadioShack store, might provide more comfortable listening. Plug the speaker cable’s inch (3.5-mm) mini-plug into your scanner’s jack. -
Page 19: Using The Belt Clip
Slide the belt clip over your belt or waistband. CONNECTING THE CLONE CABLE You can transfer the programmed data to and from an- other PRO-92 using the supplied clone cable. Connect the cable between each scanner’s PC/IF jacks. See “Cloning the Programmed Data from Scanner to Scan- ner”... -
Page 20: About Your Scanner
Once you understand a few simple terms used in this manual and familiarize yourself with your scanner’s fea- tures, you can put the scanner to work for you. You sim- ply determine the type of communications you want to receive, then set the scanner to scan them. - Page 21 TUNE tune a frequency along with (attenuate) — turns attenuation on to reduce the scanner’s sensitivity, or turns it off to increase it. — selects the search direction during search or tuning to a frequency. — lets you search the ten search banks.
- Page 22 20-522.fm Page 22 Friday, September 17, 1999 12:46 PM — programs frequencies into channels. — lets you complete the entry of frequencies and ENTER text. — enters a 1, or programs a 2-second delay for DELAY the selected channel/search bank, or inputs characters 0 through 9.
-
Page 23: A Look At The Display
20-522.fm Page 23 Friday, September 17, 1999 12:46 PM A LOOK AT THE DISPLAY Receiving a Signal ( Priority Freq. (T)runked Channel 00–(49) Bank 0–(9) Manual Mode Current Frequency Current Bank Manual Mode (AM or FM) Channel 00–(49) Bank 1 (M)anual Mode (P)rogram (S)can... - Page 24 20-522.fm Page 24 Friday, September 17, 1999 12:46 PM 6 and 7 are turned off Search Mode Searching Frequency Delay Scanning Up for Range in Bank 3 Search Mode Upper Limit Stepping Search Bank 5 Search Mode Motorola...
-
Page 25: Understanding Banks
(00–49). Search Banks This scanner is able to search 10 search banks. You can also replace a bank with one of the 60 pre-programmed service bands. (For the default setting, see “Searching a Preprogrammed Frequency Range”... - Page 26 20-522.fm Page 26 Friday, September 17, 1999 12:46 PM Low Freq. Hi Freq. Step (MHz) (MHz) (kHz) 450.9250 452.1875 453.9875 454.9875 460.9750 462.5500 463.1750 465.0000 851.0000 866.0000 12.5 935.0000 944.0000 12.5 33.0400 33.9800 29.7000 33.0400 33.9800 42.0200 46.6000 50.0000 928.0000 929.0000 12.5 932.0000...
- Page 27 20-522.fm Page 27 Friday, September 17, 1999 12:46 PM Low Freq. Hi Freq. (MHz) (MHz) 144.0000 148.0000 420.0000 450.0000 902.0000 928.0000 12.5 150.9650 151.9850 462.9250 463.1750 156.2500 157.4250 161.7600 161.9150 380.0000 400.0000 806.0000 823.9875 12.5 894.0000 902.0000 12.5 161.5650 161.7600 173.2250 173.4000 450.0000...
-
Page 28: Understanding Your Pro-92'S Modes
This means that you may hear transmissions from a distant system when your local system is not transmit- ting. By entering the PL for a local system, and operating the bank in closed mode, the scanner will not stop on transmissions from the distant system. Description... -
Page 29: Am Mode
If you operate the bank in open mode, the scanner will display the appropriate code. AM Mode This sets the scanner to receive transmissions using am- plitude modulation (AM). AM is used for aircraft, military, some amateur radio, and some government transmis- sions. -
Page 30: Dpl Mode
PL tone on the bottom line of the display (or displays None if no tone is included). In the Closed mode, the scanner only stops on the transmission if the PL tone matches the tone that you specified for the channel. -
Page 31: Ltr (E. F. Johnson) Mode
20-522.fm Page 31 Friday, September 17, 1999 12:46 PM LTR (E. F. Johnson) Mode This sets the scanner to decode the talk group ID’s used with an LTR system. This is a trunking system used pri- marily by business or private communications service providers, such as taxi cabs, delivery trucks, and repair services. -
Page 32: Motorola Mode
20-522.fm Page 32 Friday, September 17, 1999 12:46 PM Motorola Mode This sets the scanner to decode the talk group ID’s used with Motorola trunking systems. These systems are used by business and public safety groups to efficiently allo- cate a small number of frequencies (as few as 5) to many groups of users (as many as several thousand). -
Page 33: Edacs Mode
EDACS frequencies are organized in a specific order. Each frequency is assigned a Logical Channel Number (LCN). For the PRO-92 to correctly switch to an active frequency, you must program the frequencies in LCN or- der, starting with Memory 01. EDACS talk group ID’s are... - Page 34 20-522.fm Page 34 Friday, September 17, 1999 12:46 PM When there is activity on an EDACS system, that infor- mation is sent out on the control channel. The scanner decodes the ID for the active talk group. In the Open mode, the scanner then goes to the transmission and dis- plays the talk group ID on the bottom line of the display.
-
Page 35: Operation
SQUELCH missions. • If is adjusted so you always hear a hiss- SQUELCH ing sound, the scanner does not scan. 4. To turn off the scanner when you finish, turn counterclockwise to clockwise. VOLUME Trunking VOL-... -
Page 36: Storing Known Frequencies Into Channels
ENTER The blinking cursor disappears. Notes: • If you made a mistake in Step 3, briefly appears and the scanner beeps Freq when you press . Start again from Step 3. ENTER MANUAL to enter the frequency for about 0.5... -
Page 37: Storing Text Tags
• Press then press FUNC function on or off. If you want the scanner to pause 2 seconds on this channel after a transmis- sion ends before it proceeds to the next active transmission, see “Using the Delay Function” on Page 48. -
Page 38: Assigning A Text Tag To A Bank
20-522.fm Page 38 Friday, September 17, 1999 12:46 PM 3. Press . The cursor appears at the 3rd line on TEXT the display. 4. Enter the text using the numeral keys (see “Text Input Chart” on Page 39). Note: If you make a mistake, press or to the character you want to change. -
Page 39: Text Input Chart
20-522.fm Page 39 Friday, September 17, 1999 12:46 PM Note: If the channel is programmed for P/L, DPL, LTR, MOT or ED mode, the scanner displays the mode infor- mation on the 4th line. Text Input Chart Notes: • To access the numbers, after you press... -
Page 40: Finding And Storing Active Frequencies
The search bank is divid- ed into 10 search bands. You can change the bands with the 60 preprogrammed search bands in the scanner (see “Search Banks” on Page 25). You can also change the search bank’s search ranges manually. -
Page 41: Searching A Preprogrammed Frequency Range
20-522.fm Page 41 Friday, September 17, 1999 12:46 PM Searching a Preprogrammed Frequency Range The scanner contains these preprogrammed search ranges, stored in search banks (0–9). Search Bank Search Range (MHz) 460–460.625 153.725–156.000 462.925–463.175 118.000–136.00 156.250–157.425 866.000–868.9875 50.000–54.000 144.000–148.000 440.000–450.000 462.550–462.725... -
Page 42: Storing A Frequency While Searching For A Specified Channel
20-522.fm Page 42 Friday, September 17, 1999 12:46 PM 3. When the scanner finds an active frequency, it stops searching. To save the frequency into a channel in the channel storage bank (bank 9 only), press then press Stored @ 9xx ENTER display (xx: channel number). -
Page 43: Changing A Search Range With
20-522.fm Page 43 Friday, September 17, 1999 12:46 PM Changing a Search Range with One of the 60 Preprogrammed Ranges You can replace the search range with one of the 60 pre- programmed ranges. 1. Press then press FUNC SEARCH gram mode. -
Page 44: Scanning The Channels
To begin scanning channels or to start scanning again af- ter monitoring a specific channel, press Note: You must store frequencies into channels before the scanner can scan them. The scanner does not scan empty channels. The scanner scans through all channels (except those you have locked out) in the active banks (see “Turning... -
Page 45: Manually Tuning A Frequency
. Press FUNC TUNE frequency. Notes: • The PRO-92 cannot change the step frequency when it is in the tune mode. • You can change the receiving mode in the tune mode. then press FUNC Stored @ 9xx... -
Page 46: Deleting Frequencies From Channels
Listening to a Weather Channel To hear your local forecast and regional weather informa- tion, press . Your scanner scans through the weather band. Your scanner stops within a few seconds on your local weather broadcast. changes to... -
Page 47: Weather Alert Feature
The weather service precedes each weather alert with a digitally-encoded SAME signal, then a 1050 Hz tone. The PRO-92 responds to each signal. You can receive weath- er alerts any of three ways. • Press to listen to the weather channel . -
Page 48: Special Features
You can program a 2-second delay in any of three ways. • If the scanner is scanning and stops on an active channel, quickly press FUNC before it starts to scan again . -
Page 49: Reviewing The Lock-Out Channels
L/OUT Locking Out Frequencies To lock out a frequency during a search, press when the scanner stops on the frequency. The scanner locks out the frequency, then continues searching. Notes: • The scanner does not store locked out frequencies during a search. -
Page 50: Reviewing Locked-Out Frequencies
FUNC and begin the search for locked out channels within that bank. 4. As you press , the scanner displays all locked-out frequencies within a bank. Locked-out Clearing a Locked-Out Frequency To clear a locked-out frequency, select that frequency in... -
Page 51: Priority
The scanner is preset to select Channel 00 in Bank 8 as the priority channel. You can program a different channel as the priority channel. Also, you can program a weather channel as the priority channel. - Page 52 Notes: • The WX priority is only for receiving a weather alert. • When the scanner detects a 1050 Hz tone, the WX priority activates and you receive a weather alert. To turn off the priority feature, press appears on the display and display.
-
Page 53: Changing The Receive Mode
20-522.fm Page 53 Friday, September 17, 1999 12:46 PM CHANGING THE RECEIVE MODE The scanner is preset to the most common AM or FM re- ceive mode for each frequency range. The preset mode is correct in most cases. However, some amateur radio transmissions and trunked systems do not operate in the preset mode. -
Page 54: Changing The Frequency Step
20-522.fm Page 54 Friday, September 17, 1999 12:46 PM CHANGING THE FREQUENCY STEP The scanner searches at a preset frequency step for each frequency range. Press STEP crement when moving between frequencies of a search band or follow these steps to change steps in a specific bank. -
Page 55: Using The Display Backlight
20-522.fm Page 55 Friday, September 17, 1999 12:46 PM Note: If you turn on this feature, the scanner might not re- ceive weak signals. To turn off the attenuator, press from the display. This setting is stored for each channel. -
Page 56: Changing The Display Contrast
DATA FROM SCANNER TO SCANNER You can transfer the programmed data to and from an- other PRO-92 using the supplied clone cable. To clone the data, follow these steps. 1. Turn on both scanners. 2. Connect the supplied clone cable to each scanner’s jack. -
Page 57: Trunking Operation
20-522.fm Page 57 Friday, September 17, 1999 12:46 PM TRUNKING OPERATION The PRO-92 scanner tracks transmissions that use the ® Motorola Type I and Type II (such as Smartnet and Pri- vacy Plus) and hybrid analog trunking systems, plus GE/... -
Page 58: Programming Trunking Frequencies
20-522.fm Page 58 Friday, September 17, 1999 12:46 PM PROGRAMMING TRUNKING FREQUENCIES Program trunking frequencies just as you program nor- mal, non-trunked frequencies, but store the appropriate mode (MO, ED, or LT) with each frequency. Notes: • EDACs systems must be stored in banks by them- selves. - Page 59 20-522.fm Page 59 Friday, September 17, 1999 12:46 PM 5. Press and the display below appears. 6. Enter the size code information supplied with the Type I system information, referring to the instruction that appears on the display. If the information was not supplied, try these common fleet maps.
-
Page 60: Talk Group Id's
TALK GROUP ID’S You can program up to 100 talk group ID’s in each bank. When the scanner stops on a transmission in the LTR, Motorola, or EDACS mode, it checks to see if the ID has been stored. In the Closed mode, the scanner only stops on the transmission and displays its text tag if you have stored and not locked out the ID. -
Page 61: Talk Group Id Hold
Steps 4 and 5 to enter more IDs. 8. Press to start scanning. SCAN Talk Group ID Hold You can set your scanner to follow a trunking signal, which you wish to track while scanning. Hold down more than 2 seconds. TRUNK the display. -
Page 62: Locking Out Talk Groups Id
Locking Out Talk Groups ID Note: You can only lock out talk group ID’s when the scanner is in the closed mode (see “Open and Closed Modes” on Page 63). To lock out a talk group ID, follow these steps: 1. -
Page 63: Clearing All Talk Group Id's In One Bank
OPEN AND CLOSED MODES When set to the open mode, the scanner only uses the ID list to look up ID text tags and stops on any ID code. When set to the closed mode, the scanner stops only on signals that have an ID code that is found in the ID list for the bank. -
Page 64: Changing The Open/Closed Mode
OPEN/CLOSED mode at the top line while the scanner is in manual mode or while the scanner is receiv- ing a signal during scanning. When no ID code is programmed into the scanner, it re- ceives the signal in PL, DPL, LTR, MOT, or ED mode without regarding the open or closed mode. -
Page 65: A General Guide To Scanning
20-522.fm Page 65 Friday, September 17, 1999 12:46 PM A GENERAL GUIDE TO SCANNING Reception of the frequencies covered by your scanner is mainly “line-of-sight.” That means you usually cannot hear stations that are beyond the horizon. GUIDE TO FREQUENCIES US Weather Frequencies 162.400... - Page 66 Occasionally, the searching will stop as if it had found a signal, often without any sound. This is a birdie. Make a list of all the birdies in you scanner for fu- ture reference. 475.2375 479.2375...
-
Page 67: Guide To The Action Bands
20-522.fm Page 67 Friday, September 17, 1999 12:46 PM GUIDE TO THE ACTION BANDS Typical Band Usage VHF Band Low Range 6-Meter Amateur U.S. Government 2-Meter Amateur High Range UHF Band Military Aircraft U.S. Government 70-cm Amateur Low Range FM-TV Audio Broadcast, Wide Band 800 Band Law Enforcement Conventional Systems... -
Page 68: Band Allocation
To help decide which frequency ranges to scan, use the following listing of the typical services that use the fre- quencies your scanner receives. These frequencies are subject to change, and might vary from area to area. For a more complete listing, refer to the RadioShack “Police Call,”... - Page 69 20-522.fm Page 69 Friday, September 17, 1999 12:46 PM TOW ........Tow Trucks TRAN .
- Page 70 20-522.fm Page 70 Friday, September 17, 1999 12:46 PM VHF High Band (148–174 MHz) 148.050–150.345 ..... . CAP, MAR, MIL 150.775–150.790 .
- Page 71 20-522.fm Page 71 Friday, September 17, 1999 12:46 PM ULTRA HIGH FREQUENCY (UHF) U. S. Government Band (406–420 MHz) 406.125–419.975 ......GOVT, USXX 70-cm Amateur Band (420–450 MHz) 420.000–450.000 .
-
Page 72: Frequency Conversion
20-522.fm Page 72 Friday, September 17, 1999 12:46 PM Private Trunked Band 935.0125–939.9875 ......PTR General Trunked Band 940.0125–940.9875 . -
Page 73: Troubleshooting
20-522.fm Page 73 Friday, September 17, 1999 12:46 PM TROUBLESHOOTING If you have problems with your scanner, here are some suggestions that might help you eliminate the problem. If they do not, take your scanner to your local Ra- dioShack store for assistance. - Page 74 Remedy Avoid storing birdie fre- quencies or only select them manually. See “Birdie Frequencies” on Page 65. Turn the scanner off then on again, or reset the scanner. See “Resetting/Initializing the Scanner” on Page...
-
Page 75: Resetting/Initializing The Scanner
20-522.fm Page 75 Friday, September 17, 1999 12:46 PM RESETTING/INITIALIZING THE SCANNER If the scanner’s display locks up or does not work proper- ly after you connect a power source, you might need to reset or initialize it. Important: If you have problems with the scanner, first try to reset it to retain all memory. - Page 76 Welcome To Multi-System Trunking Initializ- ing Please Wait . appears on the display about 25 seconds. Note: Do not turn off the scanner until the initializa- tion is complete and Welcome To Multi-Sys- tem Trunking appears again.
-
Page 77: Care And Maintenance
20-522.fm Page 77 Friday, September 17, 1999 12:46 PM CARE AND MAINTENANCE Your RadioShack PRO-92 500-Channel Portable Trunk- ing Scanner is an example of superior design and crafts- manship. The following suggestions will help you care for your scanner so you can enjoy it for years. -
Page 78: Specifications
20-522.fm Page 78 Friday, September 17, 1999 12:46 PM SPECIFICATIONS Frequency Coverage: Ham ... 29–30 MHz (in 5 kHz steps) VHF Lo ... 30–50 MHz (in 5 kHz steps) Ham ... 50–54 MHz (in 5 kHz steps) Aircraft ... 108–136.9875 MHz (in 12.5 kHz steps) Government ... - Page 79 20-522.fm Page 79 Friday, September 17, 1999 12:46 PM Search Rate ... Up to 50 Steps per second Delay Time ... 2 seconds Intermediate Frequencies (IF): 1st ... 257.5 MHz 2nd ... 21.4 MHz 3rd ... 455 kHz Priority Sampling ... 2 seconds Operating Temperature ...
- Page 80 20-522.fm Page 80 Friday, September 17, 1999 12:46 PM Limited One-Year Warranty This product is warranted by RadioShack against manufacturing defects in material and workmanship under normal use for one (1) year from the date of purchase from RadioShack company-owned stores and authorized Ra- dioShack franchisees and dealers.