Bushnell ImageView 111026 Instruction Manual
Hide thumbs
Also See for ImageView 111026:
- Instruction manual (17 pages) ,
- Brochure & specs (4 pages) ,
- Instruction manual (102 pages)
Table of Contents
Advertisement
Available languages
Available languages
Quick Links
Advertisement
Table of Contents

Related Manuals for Bushnell ImageView 111026


Summary of Contents for Bushnell ImageView 111026
- Page 1 Instruction Manual Model #: 111026 Version 3.0 Lit. #: 98-0828/04-12...
-
Page 3: Table Of Contents
TABLE OF CONTENTS PAGE ENGLISH 4-17 FRANÇAIS 18-31 ESPAÑOL 32-45 DEUTSCH 46-59 ITALIANO 60-73... -
Page 4: English
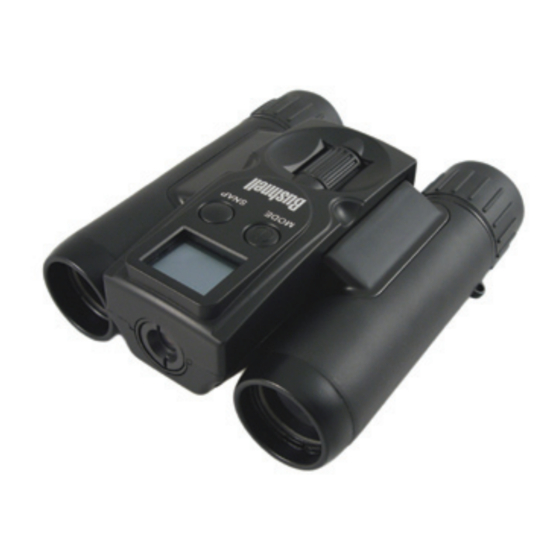
ENGLISH Congratulations on your purchase of the Bushnell ImageView ® binocular! The Bushnell ImageView binocular takes the technology of digital photography and combines it with a high-quality compact binocular. This allows you to observe sporting events, wildlife, scenic vistas or anything you would normally use a binocular for, and then save the image in a built-in attached digital camera. -
Page 5: Camera And Binocular Parts Guide
Camera and Binocular Parts Guide Binocular Focus SNAP Button Power/ MODE Camera Button Lens Port Battery Compartment SD Card Slot... - Page 6 Setup and Basic Operation CAMERA PARTS 1. the camera is powered by two AAA alkaline, lithium, or NiMh batteries (not included). insert batteries into the compartment, with the springs in contact with the negative (flat) end of each battery. A power meter on the top right of the display indicates battery condition.
- Page 7 available operating modes listed in the chart below. Briefly pressing the MODE button will step through these operational modes in the listed order, and you will see the icon for each mode on the display. Use the SNAP button to perform the operation after selecting the icon.
-
Page 8: System Requirements
Using the Optional Operating Modes Mode Icon Description Delete Last 1 frame Select this mode and press SNAP to delete only the last photo or crossed out video you took. the counter will go down one number. Delete All 3 frames Select this mode and press SNAP twice to erase the entire memory crossed out contents (the counter resets to zero). - Page 9 Using the ImageView with Your Computer 1. the camera will be recognized as a USB mass storage device, which means no special drivers are required for all operating systems later than Windows 98 (Me, 2000, XP, Vista, and Windows 7.) Mac OS 9 and OSX are also compatible. 2.
- Page 10 Transferring Photos/Videos to Your Computer 1. Make sure the imageView is powered on first (if it is not, it may be recognized as a "web cam" by your computer). Connect the supplied cable to the imageView’s USB port, then directly to a main USB port on your computer-do not use front panel/ keyboard USB ports or unpowered “hubs”.
- Page 11 Transferring Photos/Videos to Your Computer 5. After the photos are transferred to your hard drive, you can disconnect the camera. Some Windows operating systems may produce a screen warning that you have disconnected a USB device without stopping or ejecting the “disk” first (your photo files will not be harmed).
-
Page 12: Using The Binocular
Using the Binocular the imageView's binocular optics are designed to provide many years of pleasurable viewing. this portion of the booklet will help you achieve optimum performance by explaining how you can adjust the binocular to your eyes, and how to care for this instrument. - Page 13 Using the Binocular Binocular instructions 2. Set the “diopter adjustment” to zero (Fig. 2). 3. Keep both eyes open at all times. 4. Using a lens cover or your hand, cover the objective (front) lens of the right side of the binocular. 5.
- Page 14 Storage, General Care and Cleaning Your Bushnell imageView will provide years of trouble-free service if it receives the normal care you would give any fine optical instrument. the imageView is not waterproof, and should not be exposed to any source of moisture. Water damage is not covered by the warranty.
- Page 15 NOTE: To reset the camera if you experience problems or if the display becomes unresponsive, remove the batteries for at least one minute, then re-install them. NOTE: Some ImageView model 111026 units (depending on date of manufacture and/or supplier parts availability) may include a small amount of internal memory capacity (8MB or less).
- Page 16 TWO-YEAR LIMITED WARRANTY Your Bushnell ® product is warranted to be free of defects in materials and workmanship for two years after the date of purchase. in the event of a defect under this warranty, we will, at our option, repair or replace the product, provided that you return the product postage prepaid.
- Page 17 FCC Note: this equipment has been tested and found to comply with the limits for a Class B digital device, pursuant to Part 15 of the FCC Rules. these limits are designed to provide reasonable protection against harmful interference in a residential installation. this equipment generates, uses and can radiate radio frequency energy and, if not installed and used in accordance with the instructions, may cause harmful interference to radio communications.
-
Page 18: Français
FRANÇAIS Merci d'avoir acheté les jumelles ImageView® de Bushnell ! Les jumelles ImageView de Bushnell s'emparent de la technologie de la photographie numérique pour l'intégrer à des jumelles compactes de grande qualité. Grâce à ces jumelles, vous pourrez observer des événements sportifs, la nature, des panoramas touristiques ou tout ce que vous observez habituellement avec des jumelles et même capturer l'image à... - Page 19 Guide pour l’appareil photo et les différentes parties des jumelles Mise au point des jumelles Bouton SNAP (Déclencheur) Bouton Power/MODE Objectif (Marche/MODE) Port Compartiment des piles Fente pour carte SD...
- Page 20 CAMERA PARTS Installation et fonctionnement standard L'appareil photo est alimenté par deux piles AAA alcalines, au lithium ou rechargeables (non incluses). insérez les piles dans le compartiment, en plaçant les ressorts en contact avec la borne négative (extrémité plate) de chaque pile. Un indicateur de charge dans la partie supérieure droite de l’écran indique le niveau des piles.
- Page 21 le bouton SNAP et de commencer à prendre des photos. Cependant, si vous souhaitez réaliser un clip vidéo, effacer une ou plusieurs photos ou explorer d'autres options, nous vous recommandons de consulter les modes de fonctionnement disponibles répertoriés dans le tableau ci-dessous. En appuyant légèrement sur le bouton MODE, vous accèderez à...
- Page 22 Utilisation des modes de fonctionnement optionnels Mode Icône Description Effacer la 1 image Sélectionnez ce mode et appuyez sur SNAP pour effacer la dernière dernière barrée photo ou vidéo prise. Le compteur descendra d'un chiffre. (image ou vidéo) tout effacer 3 images Sélectionnez ce mode et appuyez sur SNAP à...
- Page 23 Utilisation de l'ImageView avec votre ordinateur L'appareil photo sera reconnu comme un périphérique USB de stockage de masse. Vous n'aurez donc pas besoin de pilotes particuliers pour tous les systèmes d'exploitation ultérieurs à Windows 98 (Me, 2000, XP, Vista et Windows 7). Mac OS 9 et OSX sont également compatibles.
- Page 24 Transfert de photos/vidéos vers votre ordinateur Assurez-vous d'abord que l'imageView est allumé (si ce n'est pas le cas, votre ordinateur le reconnaîtra peut-être comme une « webcam »). Branchez le câble fourni sur le port USB de l’imageView, puis directement sur un port USB principal de votre ordinateur - n’utilisez pas les ports USB du panneau frontal / du clavier ou des «...
- Page 25 Transfert de photos/vidéos vers votre ordinateur photo. Certains systèmes d'exploitation Windows peuvent afficher un avertissement à l'écran indiquant que vous avez débranché un périphérique USB sans avoir préalablement arrêté ou éjecté le « disque » (vos fichiers photos ne seront pas endommagés). (Sur les ordinateurs Mac, et ce lorsque l'appareil photo est branché, glissez-déposez le «...
-
Page 26: Utilisation Des Jumelles
Utilisation des jumelles Les optiques des jumelles imageView sont conçues pour vous permettre de nombreuses années d'observation intense. Cette section du livret vous aidera à obtenir une performance optimale en vous expliquant comment ajuster les jumelles à vos yeux et entretenir cet instrument. Lisez ces instructions attentivement avant d'utiliser vos jumelles. - Page 27 Utilisation des jumelles Binocular instructions 3. Gardez les deux yeux ouverts pendant la durée du réglage. 4. Couvrez, à l'aide d'un cache de lentille ou votre main, la lentille (avant) de l’objectif du côté droit des jumelles. 5. En utilisant la molette de mise au point centrale, faites la mise au point sur un objet lointain ayant de nombreux détails (par exemple un mur de briques, les branches d'un arbre, etc.) jusqu'à...
- Page 28 Stockage, entretien général et nettoyage Vos jumelles imageView de Bushnell resteront parfaitement fonctionnelles pendant des années si vous les entretenez aussi bien que n'importe quel autre appareil optique. L'imageView ne résiste pas à l'eau et ne doit pas être exposé à l'humidité. Les dégâts provoqués par l'eau ne sont pas couverts par la garantie.
- Page 29 Remarque : Pour réinitialiser l'appareil photo en cas de problème ou si l'écran reste figé, retirez les piles pendant au minimum une minute, puis insérez-les de nouveau. Remarque : Certaines unités 111026 du modèle ImageView (selon la date de fabrication et/ou la disponibilité des pièces du fournisseur) peuvent inclure une faible capacité...
- Page 30 GARANTIE LIMITEE DE DEUX ANS Votre produit Bushnell ® est garanti contre les éventuels vices de matière ou de fabrication pendant deux ans à compter de la date d’achat. En cas de défaut durant la période de garantie, nous nous réservons la possibilité de réparer, ou d’ é changer le produit, à condition que vous retourniez le produit en port payé.
- Page 31 Traitement des déchets d’équipements électriques et électroniques (En vigueur dans l’Union européenne et autres pays européens ayant des systèmes de collecte des déchets séparés) Cet équipement contient des composants électriques et/ou électroniques et par conséquent ne doit pas être éliminé en fin de vie avec les autres déchets ménagers.
-
Page 32: Español
ESPAÑOL ¡Enhorabuena por su compra de los gemelos Bushnell ImageView®! Los gemelos Bushnell ImageView utilizan la tecnología de la fotografía digital y la combinan con unos gemelos compactos de alta calidad. Esto le permite observar eventos deportivos, vida salvaje, vistas panorámicas y cualquier cosa para la que normalmente utilizaría unos gemelos,... - Page 33 Guía de los componentes de la cámara y los gemelos Enfoque de los gemelos Botón SNAP (DISPARO) Botón Power/MODE (Encendido/MODO) Objetivo de la cámara Puerto Compartimiento de las pilas Ranura para tarjetas SD...
- Page 34 CAMERA PARTS Configuración y funcionamiento básico La cámara funciona con dos pilas AAA alcalinas, de litio o de NiMh (no incluidas). introduzca las pilas en el compartimento, con los muelles en contacto con el extremo negativo (plano) de cada pila. Un medidor de corriente situado en la parte superior derecha de la pantalla indica el estado de las pilas.
- Page 35 modos de funcionamiento disponibles, que se recogen en el gráfico siguiente. Si pulsa brevemente el botón MODE (MODO), pasará por estos modos de funcionamiento en el orden indicado y verá el icono de cada modo en la pantalla. Utilice el botón SNAP (DiSPARO) para llevar a cabo la operación una vez que haya seleccionado el icono.
- Page 36 Uso de los modos de funcionamiento opcionales Modo Icono Descripción Eliminar 1 fotograma Seleccione este modo y pulse SNAP (DiSPARO) para eliminar solo último tachado la última fotografía o vídeo que tomó. El contador disminuirá en uno. Eliminar 3 foto- Seleccione este modo y pulse SNAP (DiSPARO) dos veces para todo gramas...
- Page 37 Uso de la ImageView con el ordenador El ordenador reconocerá la cámara como un dispositivo USB de almacenamiento masivo, lo que significa que no se necesitan controladores especiales para ningún sistema operativo posterior a Windows 98 (Me, 2000, XP, Vista y Windows 7.) Mac OS 9 y OSX también son compatibles.
- Page 38 Transferencia de fotos/vídeos al ordenador Asegúrese primero de que la imageView está encendida (si no fuera así, el ordenador puede reconocerla como una "cámara web"). Conecte el cable incluido al puerto USB de la imageView y a un puerto USB principal del ordenador, no utilice puertos USB de panel delantero/teclado ni concentradores ("hubs") sin alimentación eléctrica.
- Page 39 Transferencia de fotos/vídeos al ordenador operativos de Windows pueden mostrar una pantalla que le advierte de que ha desconectado el dispositivo USB sin detener o expulsar primero el "disco" (los archivos de fotos no resultarán dañados). (En ordenadores Mac, arrastre el "disco" que apareció en el escritorio al conectar la cámara hasta la Papelera para "expulsarlo"...
- Page 40 Uso de los gemelos Los materiales ópticos de los gemelos imageView están diseñados para ofrecer muchos años de visualización placentera. Esta parte del libreto le ayudará a alcanzar un rendimiento óptico explicándole cómo ajustar los gemelos a sus ojos y cómo cuidar este instrumento. Lea atentamente las instrucciones antes de usar los gemelos.
- Page 41 Uso de los gemelos Binocular instructions 4. Utilice una tapa de objetivo o la mano para tapar la lente del objetivo (delantero) derecho de los gemelos. 5. Con ayuda de la rueda de enfoque central, enfoque algún objeto distante al detalle (por ejemplo, un muro de ladrillos, una rama de árbol, etc.) hasta que aparezca lo más nítido posible por el lado izquierdo de los gemelos.
- Page 42 Almacenamiento, mantenimiento general y limpieza Los gemelos Bushnell imageView le proporcionarán años de servicio de calidad si reciben el cuidado normal que se le debe dar a cualquier instrumento óptico de calidad. La imageView no es resistente al agua, por lo que no se debe exponer a ninguna fuente de humedad. Los daños ocasionados por el agua están excluidos de la garantía.
- Page 43 NOTA: Algunas unidades del modelo 111026 de ImageView (dependiendo de la fecha de fabricación o la disponibilidad de piezas por parte del proveedor) pueden incluir una pequeña cantidad de capacidad de memoria interna (8 MB o menos).
- Page 44 GARANTÍA LIMITADA DE DOS AñOS Su producto Bushnell ® tiene una garantía que le cubre los defectos de los materiales y la calidad durante un año después de la fecha de la compra. En caso de un defecto bajo la garantía, nosotros, según nuestra elección, repararemos o reemplazaremos el producto, dando por sentado que usted devuelve el franqueo de producto a pagar por adelantado.
- Page 45 Eliminación de equipos eléctricos y electrónicos (Aplicable en la UE y otros países europeos con sistemas de recogida separada) Este equipo contiene elementos eléctricos o electrónicos y por tanto no debe eliminarse con los residuos domésticos normales. En cambio, debe eliminarse en los correspondientes puntos de recogida para reciclaje previstos por las comunidades. Para usted resultará...
-
Page 46: Deutsch
DEUTSCH Herzlichen Glückwunsch zum Kauf des Bushnell ImageView®-Fernglases! Das Bushnell ImageView-Fernglas nutzt die Technologie der digitalen Fotografie und kombiniert diese mit einem qualitativ hochwertigen, kompakten Fernglas. Dies ermöglicht Ihnen das Beobachten von Sportveranstaltungen, Wildtieren, Landschaftsausblicken oder allen anderen Dingen, für die Sie normalerweise ein Fernglas verwenden würden. - Page 47 Teileführer für Kameras und Ferngläser Fernglasfokus SNAP-Taste (KLICK-Taste) Power-/MODE-Taste (Einschalt-/Modus-Taste) Kameraobjektiv USB- Anschluss Batteriefach SD-Kartenschlitz...
- Page 48 CAMERA PARTS Einrichtung und grundlegende Bedienung Die Kamera wird mit zwei Alkali-, Lithium- oder NiMh-Batterien vom typ AAA betrieben (nicht im Lieferumfang enthalten). Legen Sie die Batterien in das Batteriefach ein, sodass die Federn das negative (flache) Ende der einzelnen Batterien berühren. Ein Leistungsmesser oben rechts auf dem Display zeigt den Batteriezustand an.
- Page 49 der aufgeführten Reihenfolge durchlaufen. Dabei wird das Symbol für die einzelnen Modi auf dem Display angezeigt. Nachdem Sie ein Symbol ausgewählt haben, führen Sie mithilfe der SNAP-taste (Schnappschuss) den entsprechenden Vorgang aus. Wenn Sie nicht innerhalb von 5 Sekunden die SNAP-taste (Schnappschuss) drücken, wechselt die Kamera in den Normalbetrieb und zur normalen Anzeige zurück.
- Page 50 Optionale Betriebsmodi verwenden Modus Symbol Beschreibung Letzte Datei 1 durch- Wählen Sie diesen Modus aus und drücken Sie die SNAP-taste löschen gestrich- (Schnappschuss), um nur die zuletzt aufgenommene Foto- oder enes Bild Videodatei zu löschen. Der Zähler wechselt daraufhin um eine Zahl zurück.
- Page 51 ImageView mit Ihrem Computer verwenden Die Kamera wird als USB-Massenspeichergerät erkannt. Demnach sind bei allen Betriebssystemen nach Windows 98 (Me, 2000, XP, Vista und Windows 7) keine speziellen treiber erforderlich. Mac OS 9 und OSX sind ebenfalls kompatibel. Wenn das Betriebssystem ihres Computers oben aufgeführt und mit USB-Massenspeichern kompatibel ist, wird nach dem Anschließen des USB-Kabels vom imageView in Windows Explorer das Symbol für einen neuen Datenträger (unter „Arbeitsplatz“) als neuer „Wechseldatenträger“...
- Page 52 Fotos/Videos auf Ihren Computer übertragen Stellen Sie zunächst sicher, dass imageView eingeschaltet ist (ist dies nicht der Fall, wird das Gerät von ihrem Computer möglicherweise als „Webcam“ erkannt). Schließen Sie das mitgelieferte Kabel an den USB-Anschluss des imageView und dann direkt an den USB- Hauptanschluss ihres Computers an –...
- Page 53 Fotos/Videos auf Ihren Computer übertragen einen neuen Ordner („Fußball“ etc.). Klicken Sie dann auf „OK“, um Kopien der gewünschten Fotodateien zu übertragen. Nachdem die Fotos auf ihre Festplatte übertragen wurden, können Sie die Kamera trennen. in einigen Windows-Betriebssystemen wird auf dem Bildschirm möglicherweise eine Warnung ausgegeben, dass Sie ein USB-Gerät getrennt haben, ohne den „Datenträger“...
- Page 54 Fernglas verwenden Die Fernglasoptik des imageView ist so konzipiert, dass Sie viele Jahre lang Spaß daran haben. Dieser teil des Handbuchs hilft ihnen dabei, eine optimale Leistung zu erzielen. Es wird beschrieben, wie Sie das Fernglas an ihre Augen anpassen und wie Sie das instrument pflegen. Lesen Sie die Anweisungen vor dem Gebrauch des Fernglases sorgfältig durch.
- Page 55 Fernglas verwenden Binocular instructions 3. Halten Sie stets beide Augen geöffnet. 4. Decken Sie die Objektivlinse (Vorderlinse) der rechten Fernglasseite mit einem Linsendeckel oder ihrer Hand ab. 5. Fokussieren Sie ein entferntes Objekt mit feinen Details (z. B. eine Backsteinmauer, Äste usw.) mithilfe des mittleren Fokussierrades, bis das Objekt durch die linke Seite des Fernglases eine optimale Schärfe erreicht.
- Page 56 Aufbewahrung, allgemeine Pflege und Reinigung ihr Bushnell imageView wird viele Jahre einwandfrei funktionieren, wenn es die für ein optisches Präzisionsgerät angemessene Pflege erhält. Das imageView-Fernglas ist nicht wasserdicht und es sollte keiner Feuchtigkeit ausgesetzt werden. Beschädigungen durch Wasser sind nicht durch die Garantie abgedeckt.
- Page 57 Display nicht mehr reagiert, entfernen Sie die Batterien für mindestens eine Minute und setzen Sie sie dann wieder ein. HINWEIS: Einige Geräte des ImageView-Modells 111026 (abhängig vom Produktionsdatum und/oder von der Verfügbarkeit der Teile bei Lieferanten) sind möglicherweise mit einem kleinen internen Speicher ausgestattet (mit einer maximalen Kapazität von 8...
- Page 58 BESCHRÄNKTE ZWEI-JAHRES GARANTIE Wir garantieren für zwei Jahre ab Erwerbsdatum, dass Ihr Bushnell ® -Produkt frei von Material- und Verarbeitungsfehlern ist. Bei allen Schäden unter dieser Garantie behalten wir uns nach eigenem Ermessen vor, das Produkt entweder zu reparieren oder zu ersetzen, vorausgesetzt, dass Sie das Produkt frei Haus an uns senden.
- Page 59 Entsorgung von elektrischen und elektronischen Geräten (Gültig in der EU und anderen europäischen Ländern mit getrennten Sammelsystemen) Dieses Gerät enthält elektrische und/oder elektronische Bauteile und darf deshalb nicht im normalen Hausmüll entsorgt werden. Stattdessen sollte es an den entsprechenden Sammelstellen für Recycling der jeweiligen Gemeinden abgegeben werden. Ihnen entstehen hierdurch keine Kosten.
-
Page 60: Italiano
ITALIANO Congratulazioni per aver acquistato il binocolo Bushnell ImageView®! Il binocolo Bushnell ImageView sfrutta la tecnologia della fotografia digitale, fondendola con le caratteristiche tipiche di un binocolo compatto di alta qualità. In tal modo, è possibile seguire eventi sportivi, osservare la vita selvatica, ammirare panorami pittoreschi o qualsiasi altro soggetto per i quali è... - Page 61 Guida alle parti della fotocamera e del binocolo Messa a fuoco del binocolo Tasto SNAP (scatto) Tasto Power/MODE (alimentazione/modalità) Obiettivo della fotocamera Porta Vano batterie Slot per scheda SD...
- Page 62 CAMERA PARTS Impostazioni e operazioni di base La fotocamera viene alimentata con due batterie AAA (non incluse) alcaline, al litio o NiMh. inserire le batterie nel vano, con le molle a contatto con l'estremità negativa (piatta) di ciascuna batteria. il misuratore della potenza in alto a destra del display indica le condizioni di carica delle batterie.
- Page 63 elencato e verrà altresì visualizzata l'icona per ciascuna modalità sul display. Utilizzare il tasto SNAP (scatto) per eseguire le operazioni una volta selezionata l'icona. Laddove non si prema SNAP (scatto) entro 5 secondi, la fotocamera ritorna al funzionamento e alla visualizzazione regolare. Modalità...
- Page 64 Utilizzo delle modalità operative opzionali Modalità Icona Descrizione Elimina Elimin- Selezionare questa modalità e premere SNAP (scatto) due volte tutto azione di 3 per eliminare l'intero contenuto della memoria (il contatore viene fotogrammi riazzerato). Utilizzare questa funzione dopo aver scaricato i file, per ripulire la memoria in modo da poter realizzare altre foto.
- Page 65 Utilizzo di ImageView con il computer La fotocamera verrà riconosciuta come dispositivo USB di archiviazione di massa e, pertanto, non sono necessari driver speciali per tutti i sistemi operativi successivi a Windows 98 (Me, 2000, XP, Vista, Windows 7). Sono altresì compatibili Mac OS 9 e OSX. Per chi disponesse di un computer il cui sistema operativo rientra tra quelli sopra elencati, ovvero compatibile con un dispositivo USB di archiviazione di massa, l'icona con il nuovo disco compare in Windows Explorer (in "Computer") sotto forma di nuovo...
- Page 66 Trasferimento foto/video sul computer Verificare in primis che imageView sia correttamente alimentato (in caso contrario, esso potrebbe essere riconosciuto come webcam dal computer). Collegare il cavo in dotazione alla porta USB di imageView, quindi direttamente alla porta USB principale del computer; non usare le porte USB sul pannello frontale o sulla tastiera, né...
- Page 67 Trasferimento foto/video sul computer lo scollegamento del dispositivo USB senza aver arrestato o espulso prima il "disco" (i file fotografici non verranno comunque danneggiati). (Nei computer Mac, trascinare nel cestino il "disco" visualizzato sul desktop quando è stata collegata la fotocamera, per "espellerlo" prima di scollegare).
- Page 68 Messa a fuoco/Regolazione diottrica Ogni persona ha una capacità visiva diversa. il binocolo Bushnell è dotato di anelli per la regolazione diottrica che permettono di regolare la convergenza del sistema ottico secondo la propria capacità visiva. Per la regolazione diottrica e per mettere a fuoco il binocolo imageView: 1.
- Page 69 Uso del binocolo Binocular instructions 3. tenere sempre gli occhi aperti. 4. Coprire con un coperchio o una mano l'obiettivo (lente frontale) del barilotto destro. 5. Usando la manopola centrale di messa a fuoco, mettere a fuoco un oggetto distante con dettagli minuti (per esempio un muro di mattoni, rami di un albero ecc.) fino a che tali dettagli non risultino il più...
- Page 70 Conservazione, cura generale, pulizia Bushnell imageView durerà per anni senza problemi se si presta la normale cura usata per tutti gli strumenti ottici. imageView non è impermeabile e non deve essere pertanto esposto ad alcuna fonte di umidità. La garanzia non prevede pertanto la copertura per danni da contatto con l'acqua.
- Page 71 NOTA: Alcuni modelli di ImageView, ad esempio le unità 111026, (in base alla data di produzione e/o alla disponibilità delle componenti da parte del produttore) possono includere una piccola capacità di memoria interna (8MB o meno). Essa è destinata solo per l'esecuzione di prove, in quanto qualsiasi fotografia memorizzata in questa memoria interna (volatile) verrà...
- Page 72 GARANTIA LIMITADA DE DOIS ANOS Seu produto Bushnell ® possui garantia contra defeitos nos materiais e mão-de-obra por dois anos após a data de compra. No caso de defeitos dentro do período de garantia, a empresa se reserva o direito de consertar ou substituir o produto, desde que o envio seja feito por meio de postagem pré-paga.
- Page 73 Eliminar Equipamento Eléctrico e Electrónico (Aplicável na CE e outros países europeus com sistemas separados de recolha) Este equipamento contém peças eléctricas e/ou electrónicas e não devem ser eliminadas como detrito doméstico regular. Em vez disso, deve ser eliminada nos pontos de recolha respectivos para reciclagem fornecida pelas comunidades. Para você, isto é grátis. Se o equipamento contiver baterias intercambiáveis (recarregável), devem ser removidas antes e, se necessário, em vez de ser eliminada de acordo com regulamentos relevantes (veja também os comentários respectivos nestas instruções de unidade).
- Page 74 For further questions or additional information please contact: Bushnell Outdoor Products 9200 Cody, Overland Park, Kansas 66214 (800) 423-3537 • www.bushnell.com ©2012 Bushnell Outdoor Products...